

A cookie banner in Framer can look correct and still fail at its most important job: blocking non-essential tracking scripts before the visitor gives consent.
Many Framer users add a banner, connect Google Analytics, or install Google Tag Manager — but never verify whether GA4, Meta Pixel, HubSpot, or other third-party tools are still loading before consent. The banner looks fine, but scripts fire anyway.
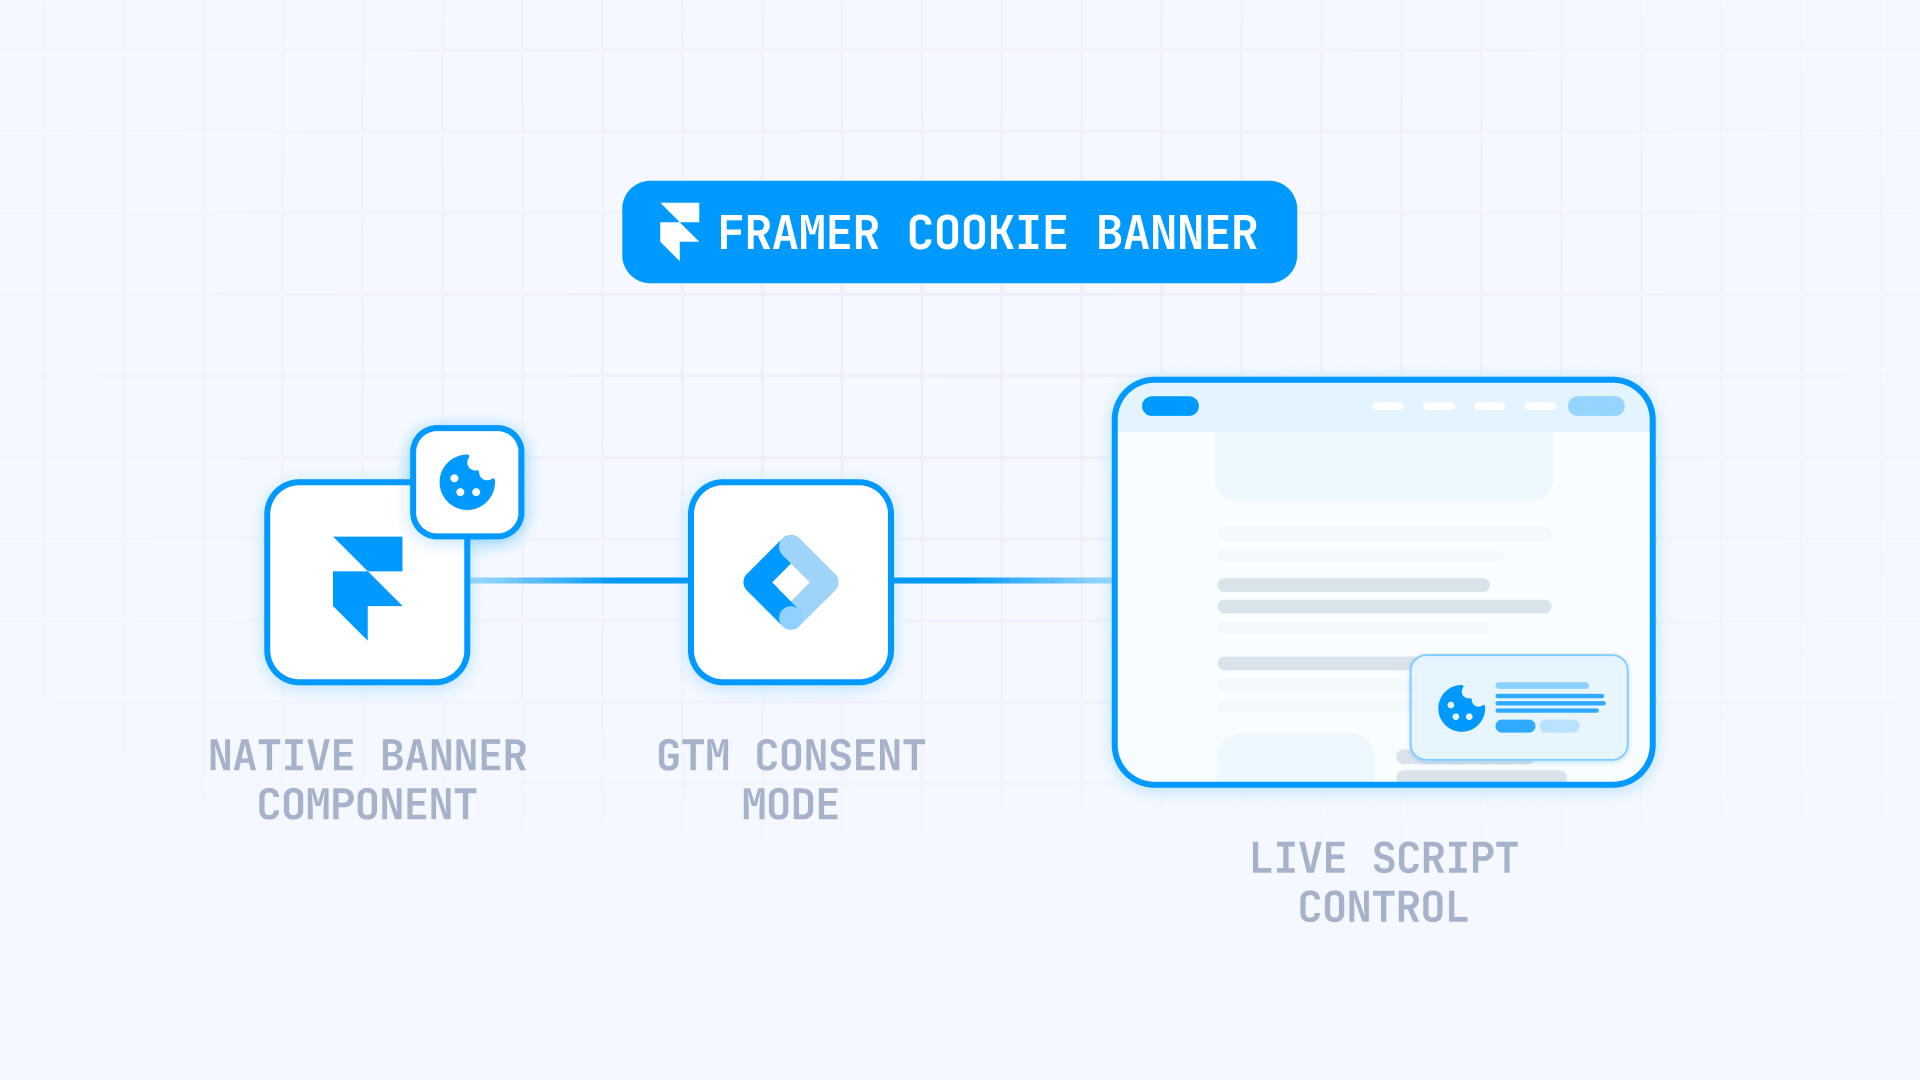
This guide covers when you actually need a cookie banner on a Framer site, how to set up the native Framer Cookie Banner with GTM, when native is enough and when it is not, and how to test that everything works correctly.
Why cookie consent matters for Framer sites
A cookie banner is only useful if it controls what loads before and after consent. The visual layer (the banner) and the functional layer (script blocking) need to work together.
- Legal compliance. Regulations like GDPR and the ePrivacy Directive require consent before loading non-essential tracking scripts on visitors in the EU and UK.
- Visitor trust. A transparent cookie banner with clear accept and reject options shows visitors you respect their privacy choices.
- Controlled script loading. Cookie consent is not just about showing a banner — it determines which scripts fire before and after consent, which is the part that often breaks.
- Avoiding compliance risk. Non-compliance can result in fines, especially for sites with EU or UK traffic.
- Accurate analytics. When consent is properly configured, you collect data only from visitors who opted in, which leads to cleaner, more reliable analytics data.
When you need a cookie banner on your Framer site
Not every Framer site needs a cookie banner. If you only use Framer's built-in analytics and no third-party tracking, you probably do not need one.
You usually need cookie consent when your Framer site loads non-essential scripts that process visitor data before they actively consent. Common tools that may require consent:
- Google Analytics 4
- Google Tag Manager (when loading tracking tags)
- Meta Pixel
- TikTok Pixel
- LinkedIn Insight Tag
- HubSpot
- Hotjar
- YouTube embeds
- Chat widgets (Intercom, Crisp, Tidio)
- Advertising conversion tags (Google Ads, Bing Ads)
- Newsletter embeds (Mailchimp, ConvertKit)
If you are unsure, check what scripts your Framer site actually loads. Open Chrome DevTools, go to the Network tab, and filter by third-party domains. That will tell you more than guessing. For guides on installing specific tracking tools that may require consent, see our tutorials on implementing TikTok Pixel in Framer, setting up LinkedIn Insight Tag conversion tracking on Framer, How to implement Reddit Pixel in Framer for ad campaigns and How to implement Pinterest Pixel in Framer for ad campaigns.
Framer's native Cookie Banner: step-by-step tutorial
Framer includes a native Cookie Banner Component that works with Google Tag Manager and Google Consent Mode. This is the simplest option for most Framer sites.
What must be true before you start
The cookie banner only controls scripts that GTM manages. If any of these conditions are not met, the banner will look correct but scripts will still fire before consent.
- All tracking scripts must go through GTM. No GA4, Meta Pixel, TikTok Pixel, or other tracking scripts pasted directly into Framer's custom code (Project Settings → Custom Code or page-level custom code). Any script outside GTM loads independently of the banner.
- GTM must be installed on your Framer site. If you have not set it up yet, see our guide to installing Google Tag Manager in Framer.
- GA4 must be configured as a tag inside GTM — not installed using Framer's native GA4 integration and GTM at the same time. Pick one method. For consent setups, GTM is the right choice. For a full walkthrough, see our guide to installing Google Analytics in Framer.
- No duplicate scripts. If you previously installed GA4 directly in Framer, remove that code before setting up the consent workflow. Running GA4 both directly and through GTM means the direct copy bypasses consent.
- Third-party embeds need separate handling. YouTube videos, HubSpot forms, chat widgets, and scheduling tools load their own scripts outside GTM. The banner does not control them unless you wrap them in a consent-dependent loader.
Steps in Framer
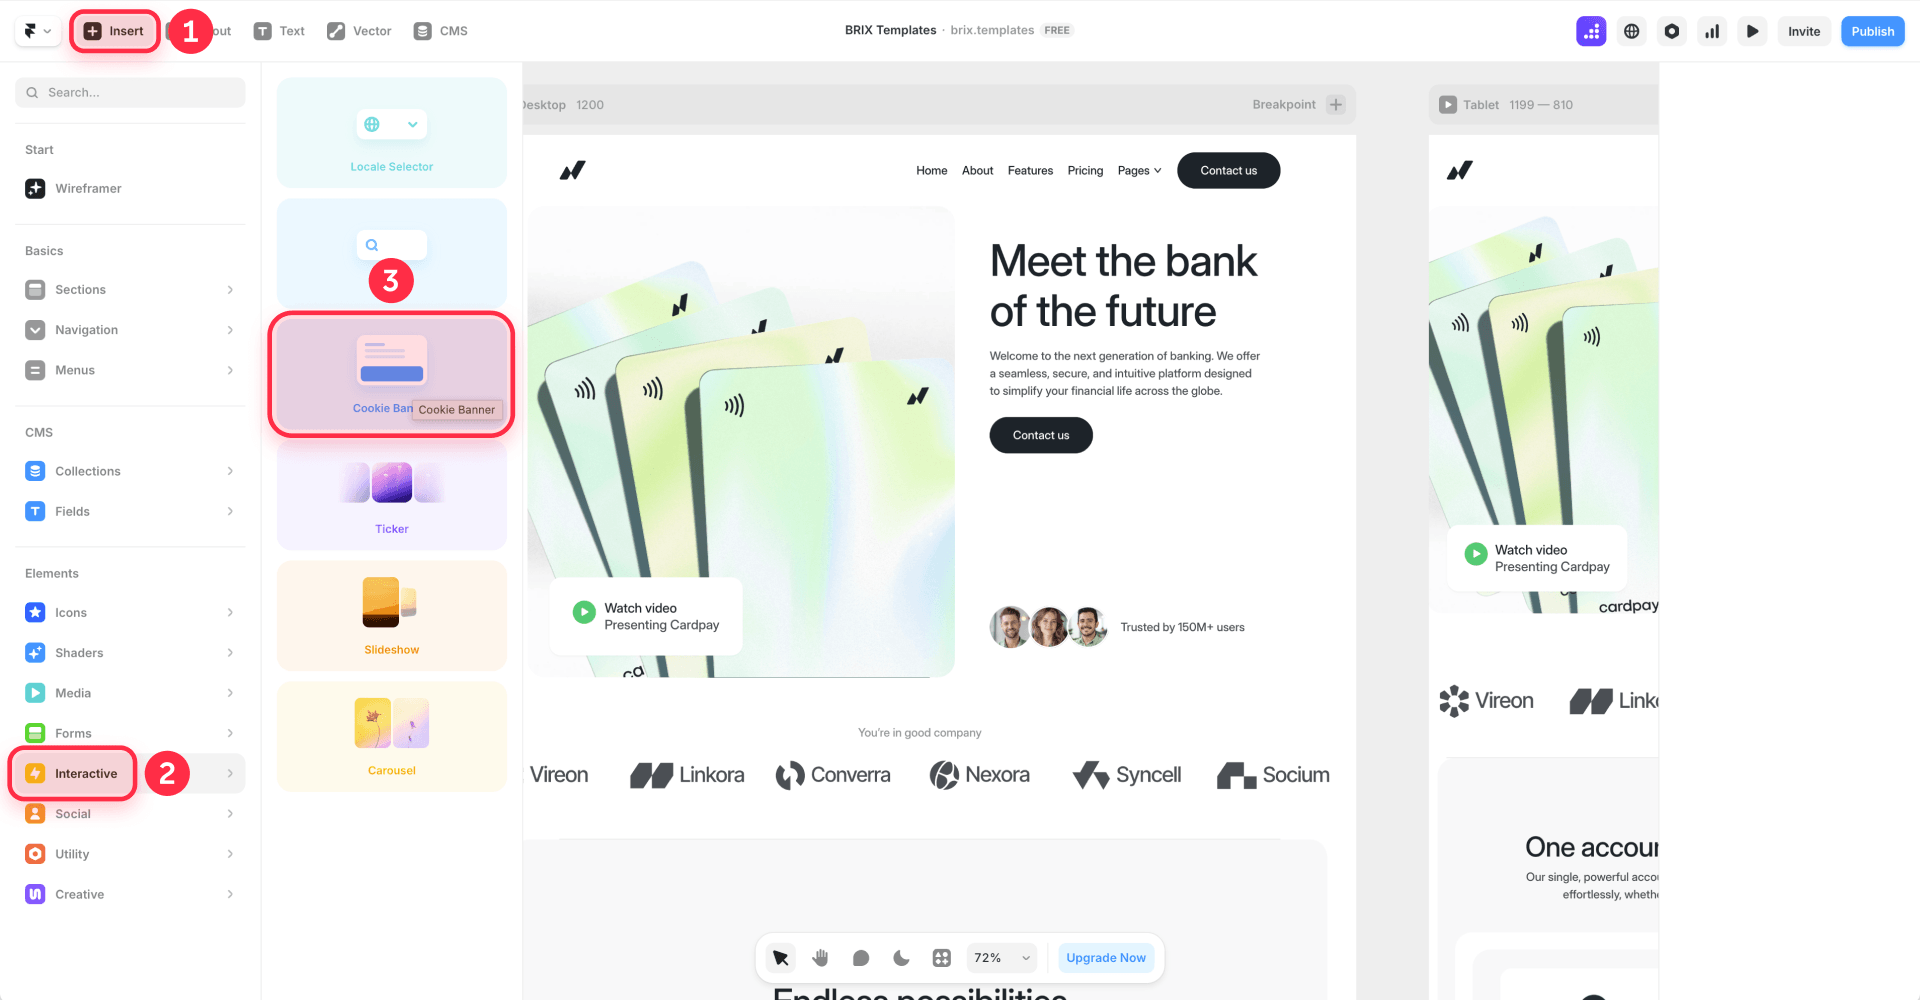
- Open your Framer project in the editor.
- Insert the Cookie Banner Component from Framer's component library.
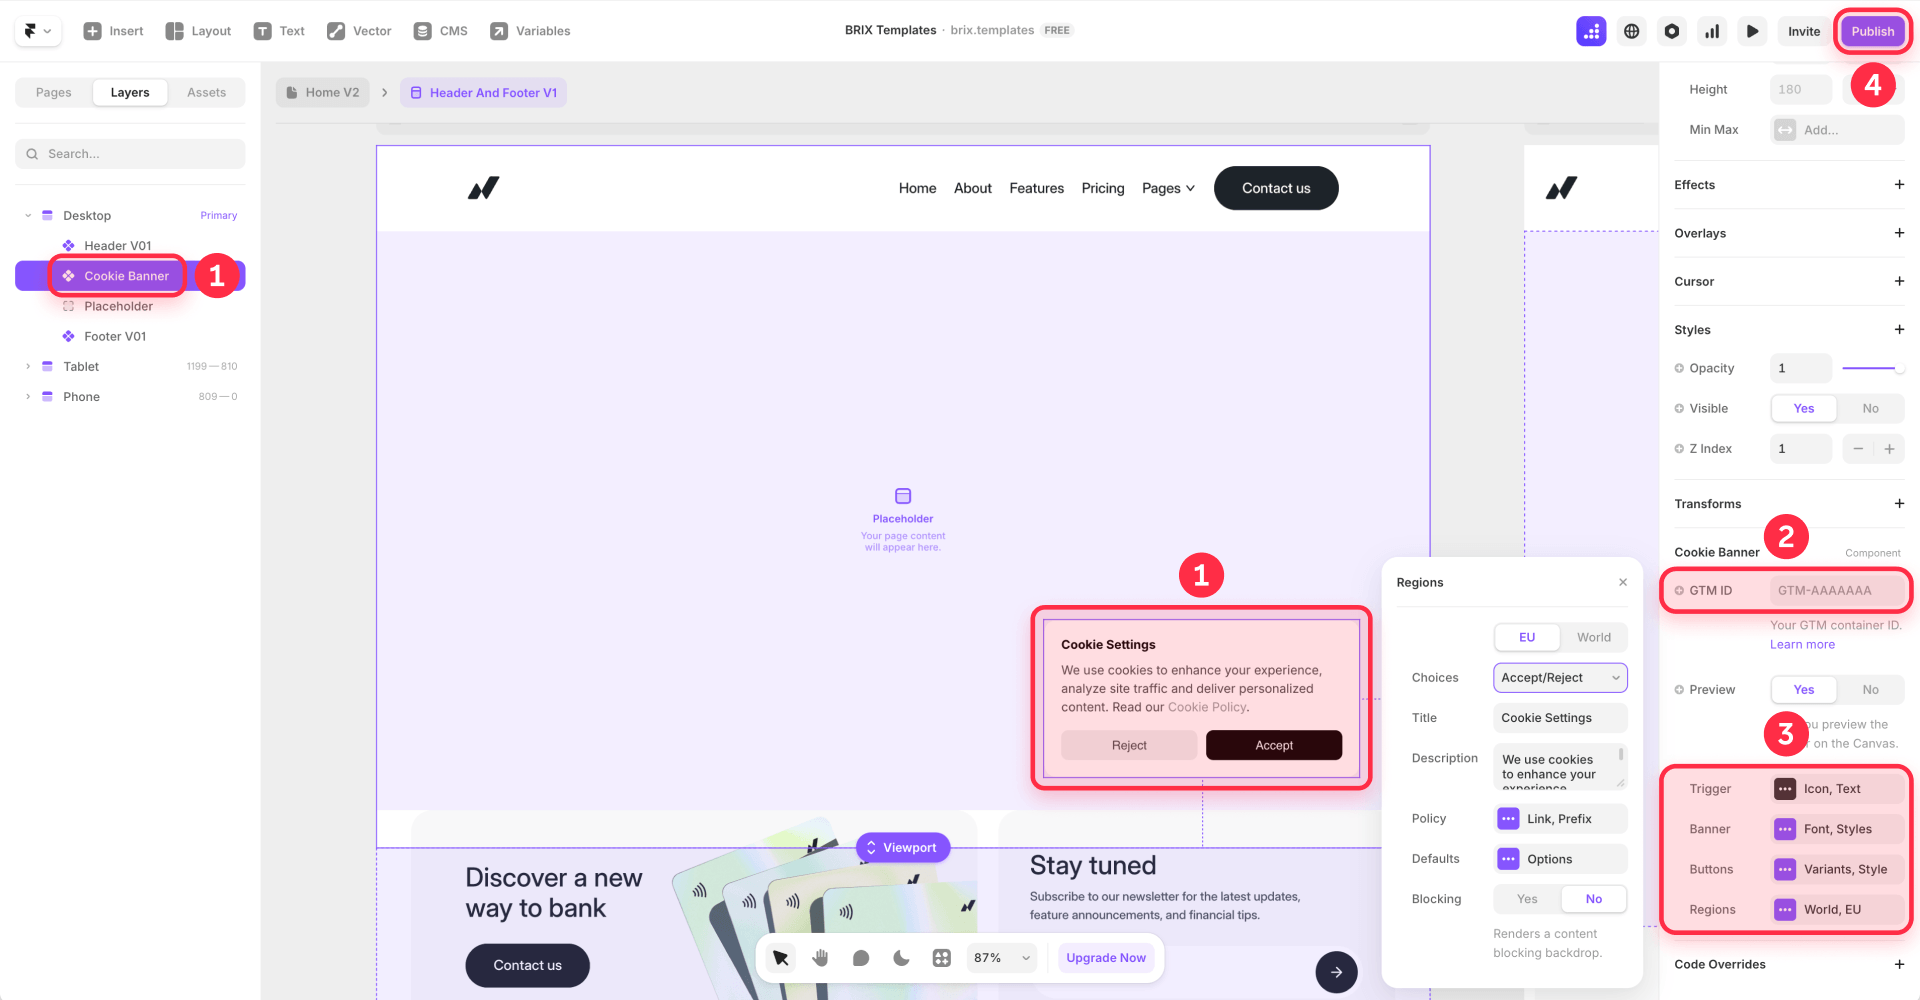
- Connect the banner to your GTM container using your GTM Container ID (GTM-XXXXXXX).
- Style the banner to match your site — make sure both "Accept" and "Reject" are equally visible and easy to click.
- Add a persistent link or button somewhere on your site so visitors can reopen cookie preferences later.
- Remove any direct tracking scripts from Project Settings → Custom Code and from page-level custom code. These scripts bypass GTM consent controls.
- Publish your Framer site.
Steps in GTM
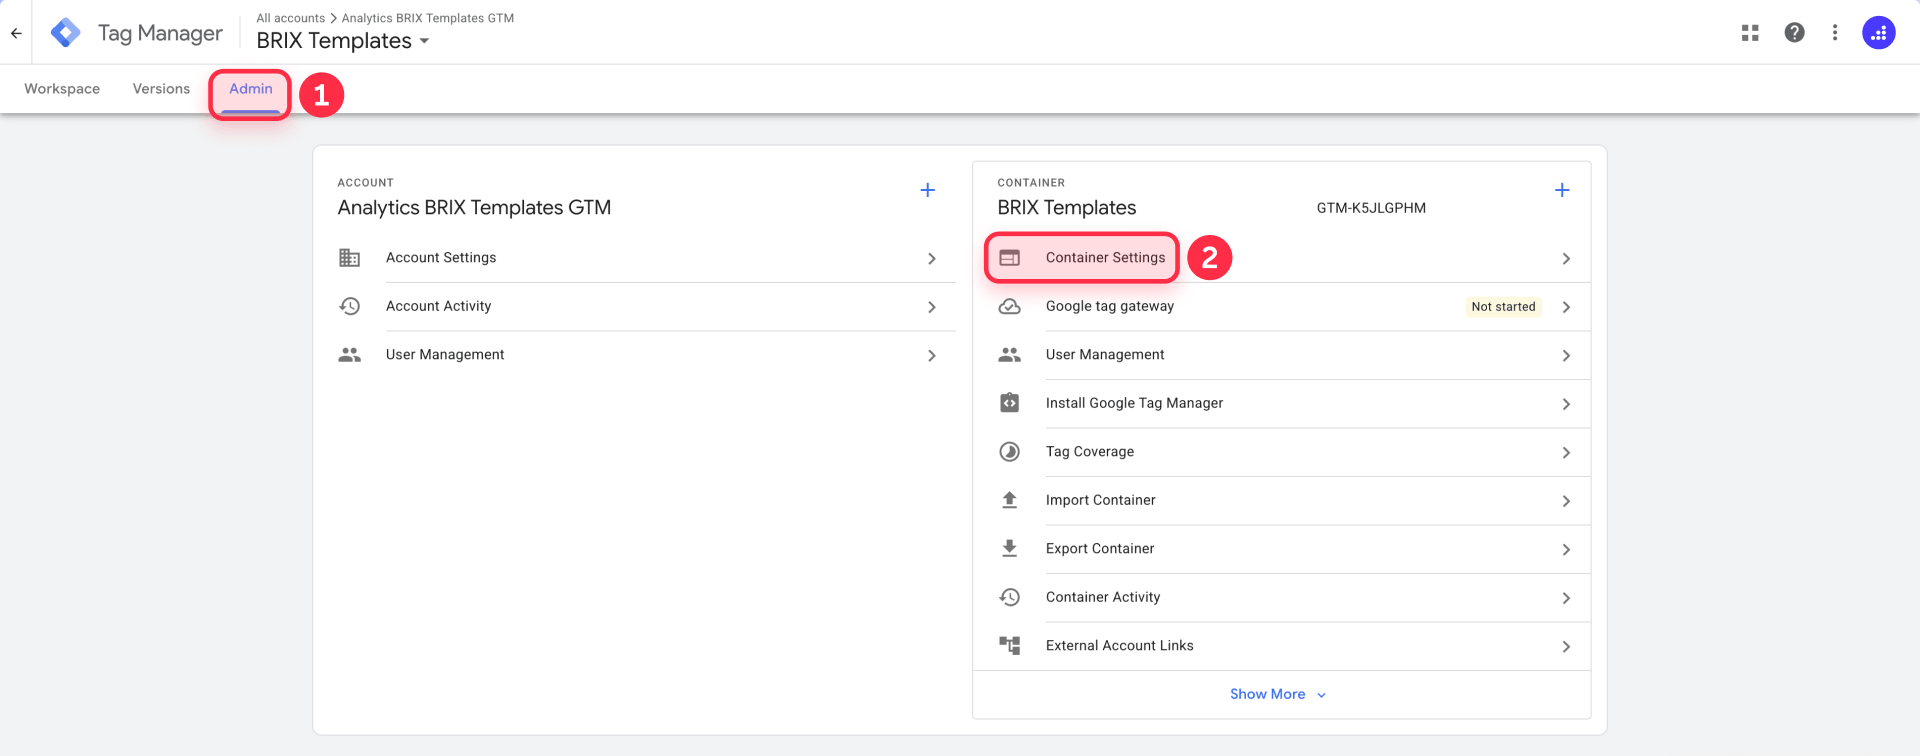
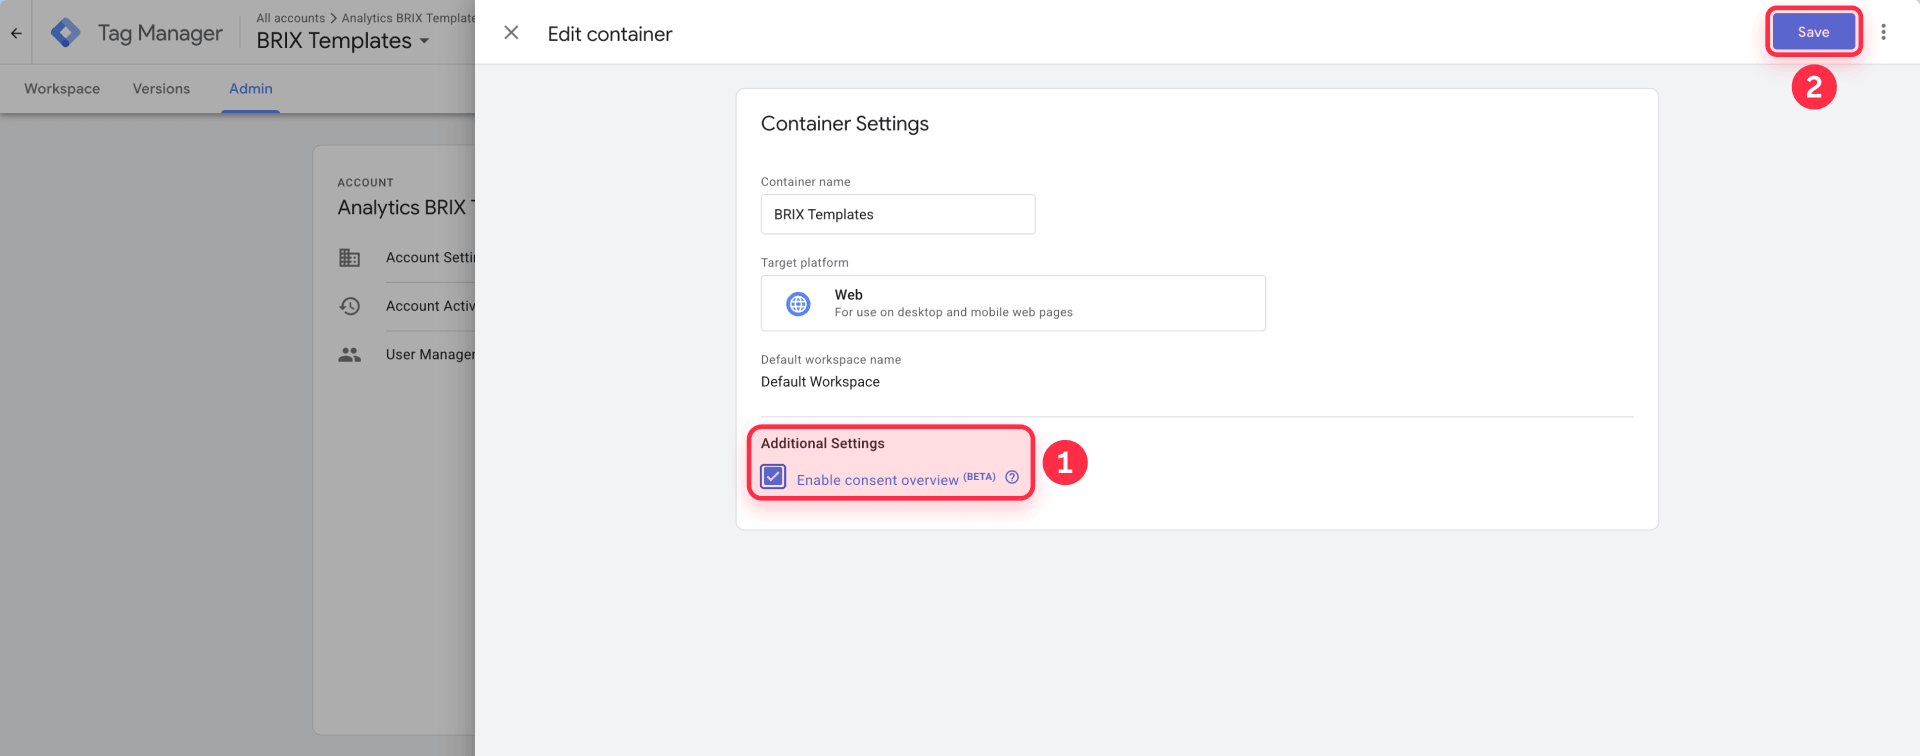
- In Google Tag Manager, go to Admin → Container Settings → Additional Settings and enable Consent Overview. This does not enable Consent Mode by itself; it only lets you review consent settings across your tags.
- Make sure your Framer Cookie Banner is connected to the correct GTM container. Framer's Cookie Banner is designed to work with Google Tag Manager and Google Consent Mode, so it can send consent signals when visitors accept, reject, or customize their preferences.
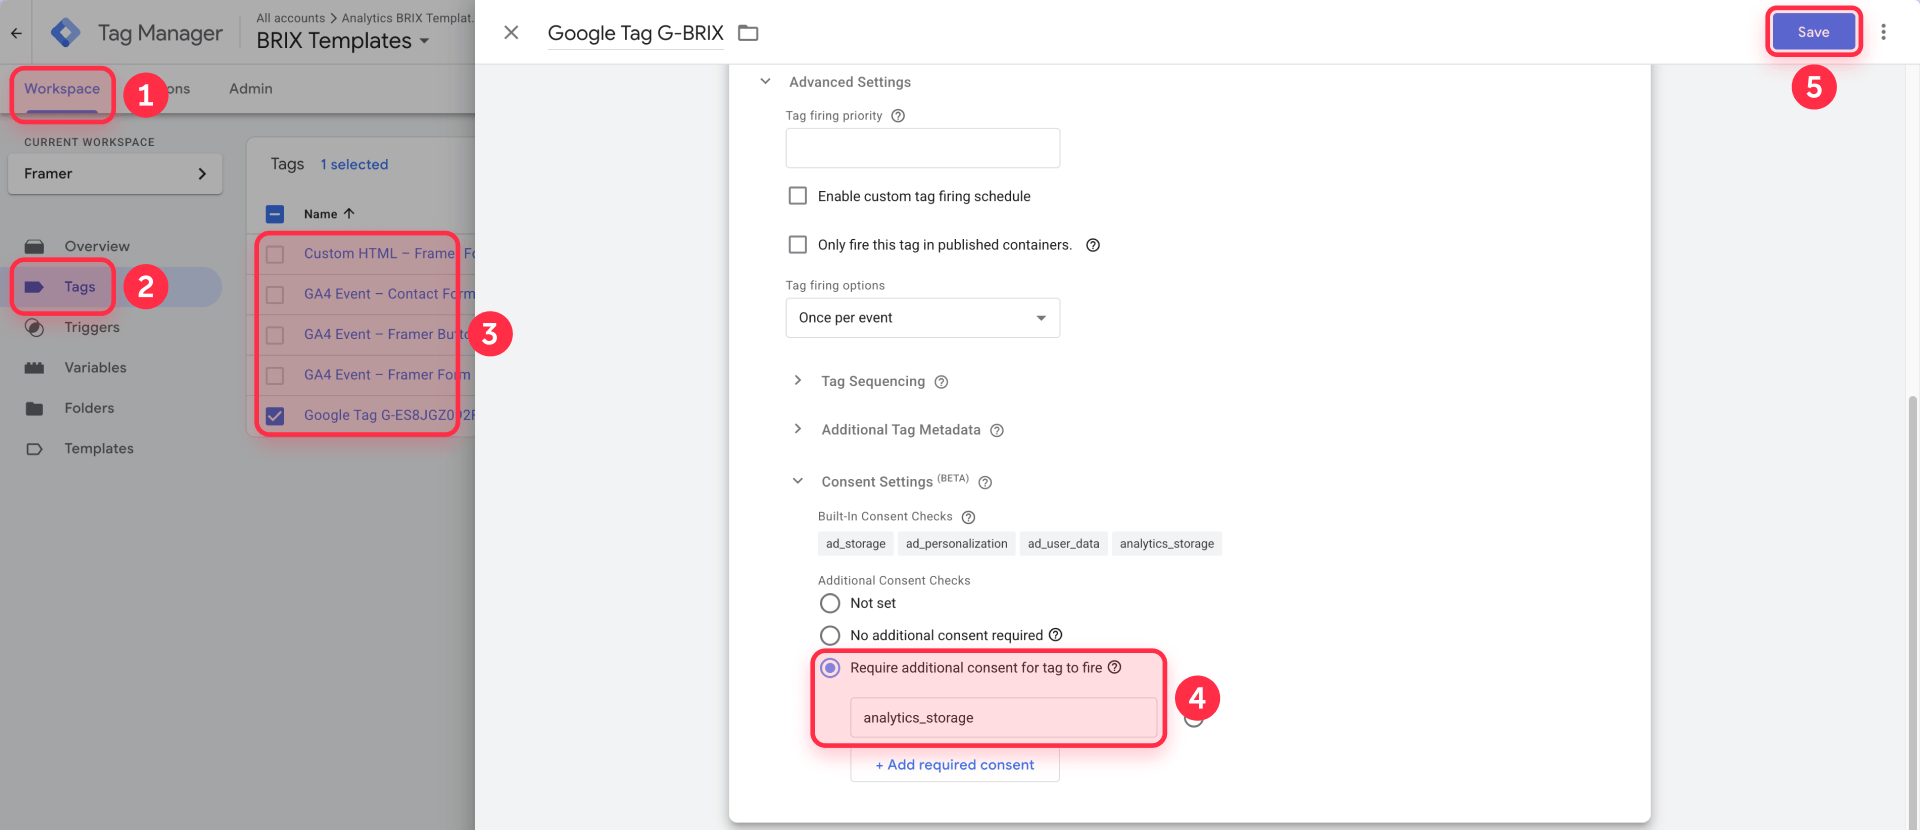
- In GTM, open your Google Tag or GA4 tags and check Advanced Settings → Consent Settings. Google tags already include built-in consent checks for consent types like analytics_storage, ad_storage, ad_user_data, and ad_personalization.
- For Google Tags and GA4 tags, do not add extra "Require additional consent for tag to fire" checks unless you are intentionally building a stricter advanced setup and have tested that the tag still fires correctly after consent. In most Framer Cookie Banner setups, leave Google tags as Not set or No additional consent required, and let the built-in consent checks handle Consent Mode behavior.
- For non-Google marketing tags like Meta Pixel, TikTok Pixel, LinkedIn Insight Tag, or custom advertising scripts, go to Advanced Settings → Consent Settings → Require additional consent for tag to fire. Require advertising-related consent types such as ad_storage, ad_user_data, and ad_personalization.
- For non-Google analytics or behavior-tracking tools like Hotjar or similar tools, require analytics_storage or the relevant consent category.
- Use GTM Preview Mode and Google Tag Assistant to test the implementation before publishing. Test at least four states: before consent, after Reject all, after analytics-only consent, and after Accept all.
- Once the consent states and tag behavior are working correctly, submit and publish your GTM container.
When the native banner is enough (and when it is not)
Native is enough when:
- You use GTM as your central script manager
- Your setup is relatively simple (GA4 plus a few marketing tags)
- You want a Framer-native design workflow
- You do not need automated cookie scanning or consent records
Consider a third-party CMP when:
- You need automated cookie scanning to detect what your site loads
- You need structured consent categories with audit trails
- Your site is compliance-sensitive and requires consent records
- You manage a multilingual site with different consent requirements per region
Other cookie consent options for Framer
If Framer's native banner is not enough, here are the main alternatives.
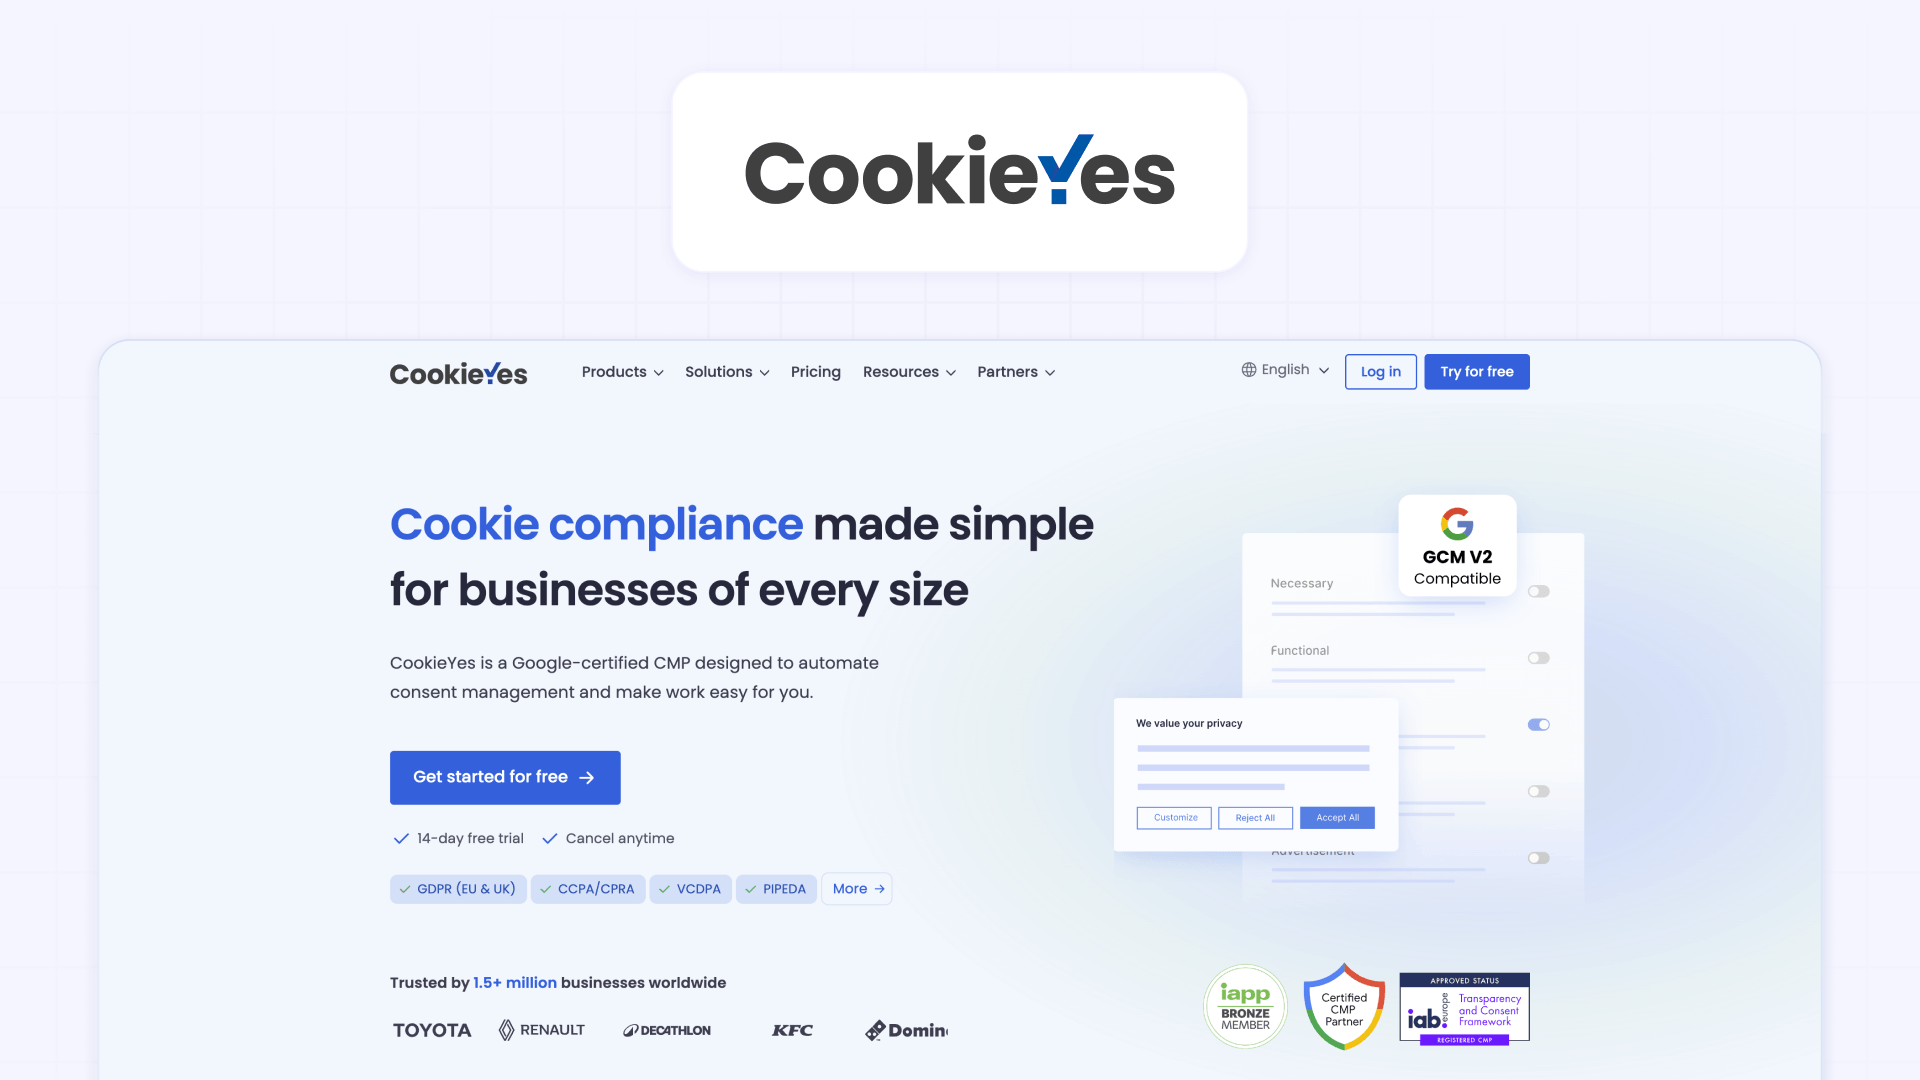
CookieYes — A popular cookie consent platform with a Framer installation guide. Good for small to medium sites that want scanning, categories, and consent records. The free plan has limits on page views and scans.
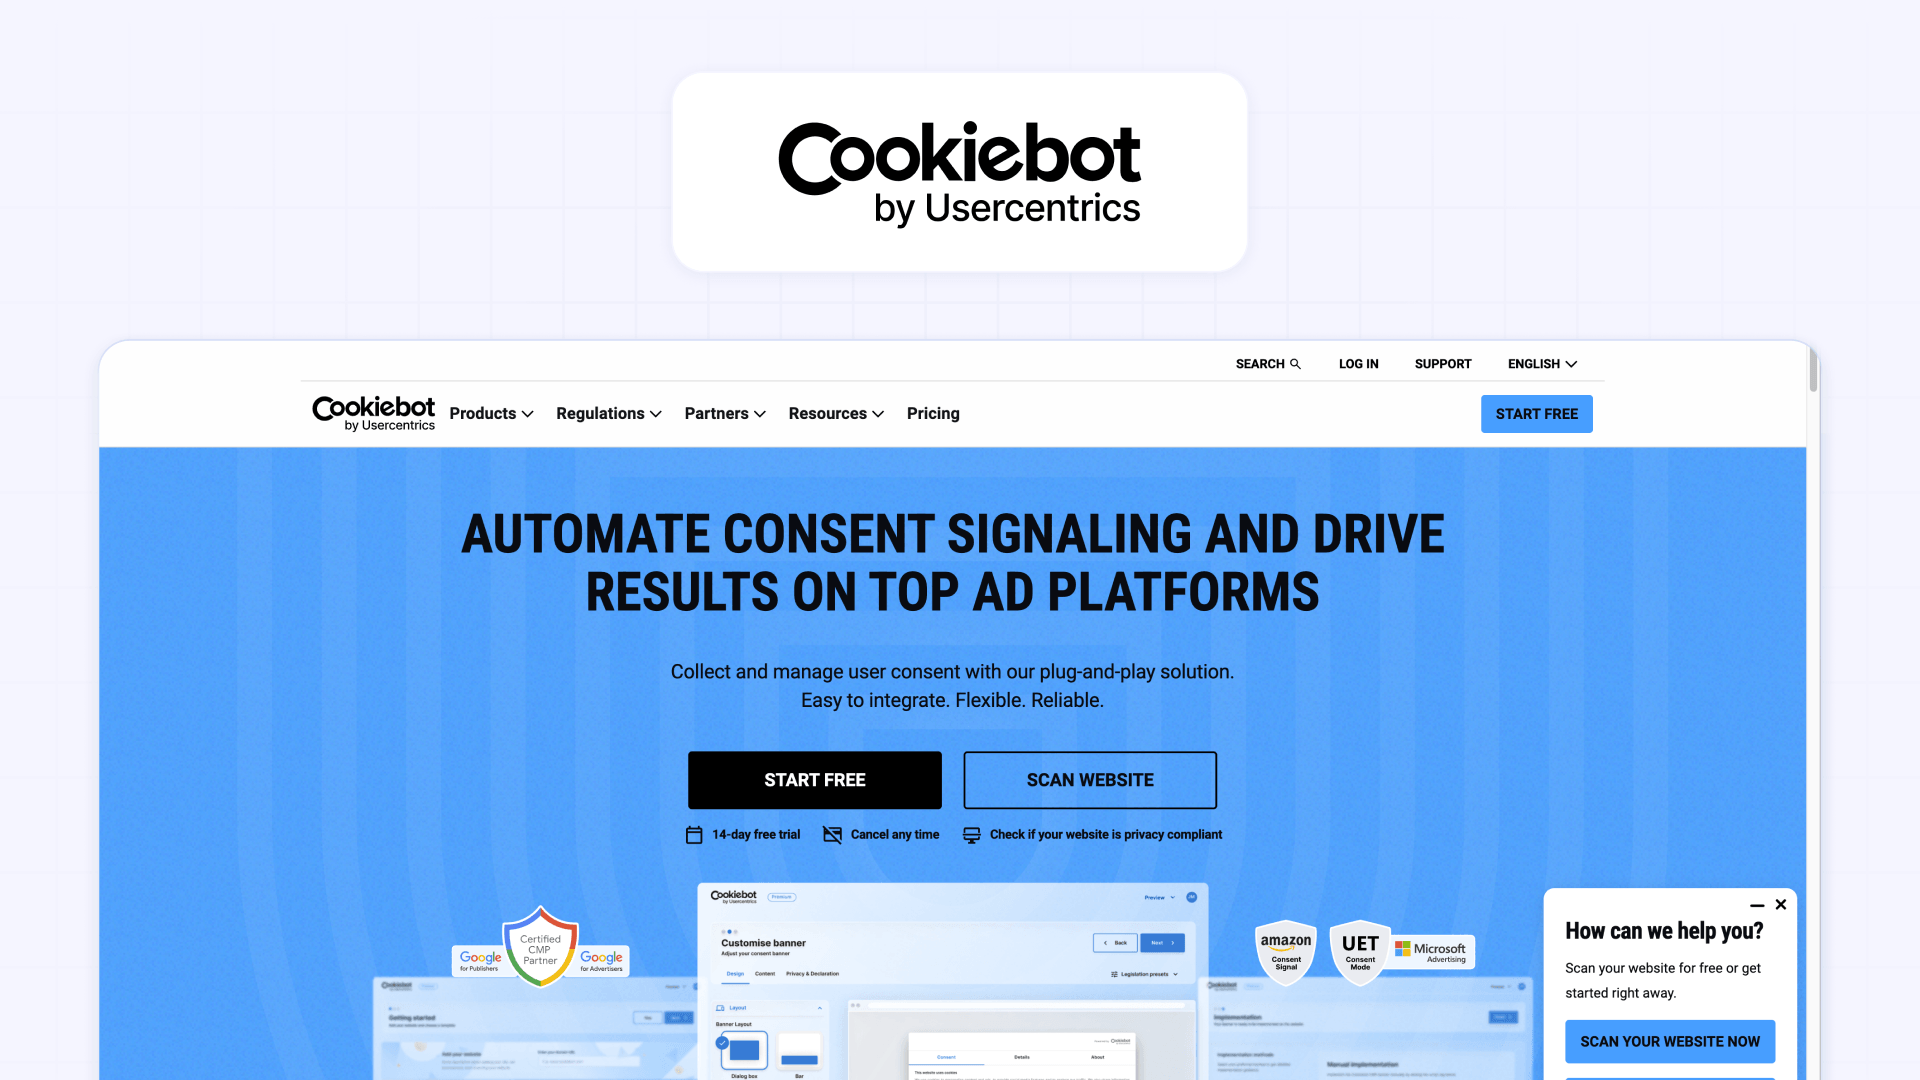
Cookiebot — A more established CMP with automated cookie scanning and support for Google Consent Mode. Better for compliance-heavy sites, but the free plan is limited and setup can feel technical.
Custom cookie banner — Full control and maximum flexibility, but you must handle consent storage, categories, script blocking, preferences, and testing yourself. Not recommended unless you are comfortable with JavaScript and consent architecture.
If your consent requirements are this complex and you are not sure how to implement them, get in touch with BRIX Templates and we can handle the full setup for you.
How to test your cookie consent setup
Testing is the most important step. A banner that looks correct can still fail at blocking scripts.
Test before consent: Open your site in an incognito window. Do not click the banner. Open Chrome DevTools and check the Network tab and Application → Cookies. Confirm that GA4, pixels, and marketing scripts are not firing.
Test reject all: Click "Reject all" or "Necessary only." Reload the page and verify that analytics and marketing tags still do not fire.
Test accept all: Accept all cookies and confirm that analytics and marketing tags fire as expected.
Test returning visitor: Accept or reject consent, close the browser, and reopen the site. Confirm the preference is remembered and the banner does not show again.
Test CMS pages: Check blog posts and CMS detail pages to confirm consent behavior is consistent across all page types.
Troubleshooting common cookie consent issues in Framer
- GA4 still tracks after "Reject all." GA4 was likely installed directly in Framer custom code instead of through GTM. When GA4 loads from a direct script embed, GTM consent controls cannot reach it. Remove the direct GA4 code and install GA4 only through GTM.
- GA4 does not fire even after accepting cookies. GTM consent requirements may be set too strictly, or consent updates from the banner are not reaching GTM correctly. Check your consent initialization trigger and verify the banner sends the correct consent events to the GTM container.
- Marketing pixels fire before consent. Pixels like Meta Pixel or TikTok Pixel are probably pasted directly into Framer custom code instead of being managed through GTM. Move them into GTM tags with the appropriate consent checks. For step-by-step help configuring ad pixels through GTM on your Framer site, see our guide to setting up Google Ads conversion tracking on Framer sites.
- The banner does not appear on CMS pages. The Cookie Banner Component may not be included in the CMS page template. Make sure the banner is placed in a component or layout that renders on every page type — not just the homepage.
- Third-party embeds load without consent. YouTube videos, HubSpot forms, and chat widgets can load their own scripts and cookies independently of your banner. Show a placeholder instead of the embed, and load the real content only after the visitor accepts the relevant consent category.
Frequently asked questions about cookie consent in Framer
Do I need a cookie banner if I only use Framer Analytics?
Not necessarily. Framer Analytics is designed differently from cookie-based analytics tools and does not rely on third-party tracking cookies. But if you add GA4, marketing pixels, or third-party embeds on top of Framer Analytics, you may still need consent for those additional tools regardless of whether you also use Framer's built-in analytics.
Does Framer's cookie banner automatically block Google Analytics?
Not by itself. The banner needs to be connected to GTM, and GTM needs to enforce consent on the GA4 tag. If GA4 is installed directly in Framer custom code, the banner and GTM cannot control it — GA4 needs to be loaded through GTM for consent to work.
Why is GA4 still tracking visitors after I click "Reject all"?
The most common cause is GA4 installed directly in Framer's custom code instead of through GTM. A direct GA4 script loads independently of any consent banner. Other causes include GTM tags not configured with consent checks, or consent defaults loading after the tags already fired.
What is the difference between GA4 and GTM for cookie consent?
GA4 is an analytics tool that tracks visitor behavior. GTM is a tag manager that loads and controls scripts — including GA4, Meta Pixel, and many others. For cookie consent, GTM acts as the control center: you configure which tags require consent, and GTM blocks or allows them based on the visitor's choice. They use different IDs — GA4 uses a Measurement ID (G-XXXXXXXXXX) and GTM uses a Container ID (TM-XXXXXXX).
Can I use CookieYes or Cookiebot with Framer?
Yes. Both can be installed in Framer using custom code. CookieYes works well for small to medium sites that want scanning and consent categories. Cookiebot is better for compliance-heavy sites that need structured consent records. Installing either tool alone does not automatically block every script — you still need to categorize and configure your scripts correctly.
Do YouTube embeds need cookie consent on a Framer site?
They can, depending on how they are embedded. YouTube embeds can load third-party cookies and tracking requests. For privacy-sensitive setups, show a placeholder instead of loading the video immediately, and only embed the YouTube player after the visitor accepts the relevant consent category.
How do I know if my cookie consent setup is actually working?
Test it in an incognito browser window with Chrome DevTools open. Check the Network tab and Application → Cookies before clicking the banner, after rejecting all, and after accepting all. You can also use GTM Preview Mode and Google Tag Assistant to verify that tags fire only when they should. If scripts fire before consent, something in your setup needs fixing.
Conclusion
A cookie banner in Framer is not enough by itself. The real goal is making sure non-essential scripts do not load before the visitor gives consent — and the hardest part is usually understanding what your site loads, how GTM and GA4 are connected, and whether third-party embeds bypass your banner.
For most Framer sites, the best approach is to audit your scripts, centralize tracking in GTM, use Framer's native Cookie Banner with proper consent defaults, and test every consent state before publishing. For broader site privacy protection beyond cookie consent, see our guide to blocking bots and crawlers from your Framer site.
If you need help setting up cookie consent with GTM, configuring consent-aware tracking, or auditing which scripts your Framer site loads, the BRIX Templates Framer agency team can handle the full setup for you.










Join readers commenting on this post!