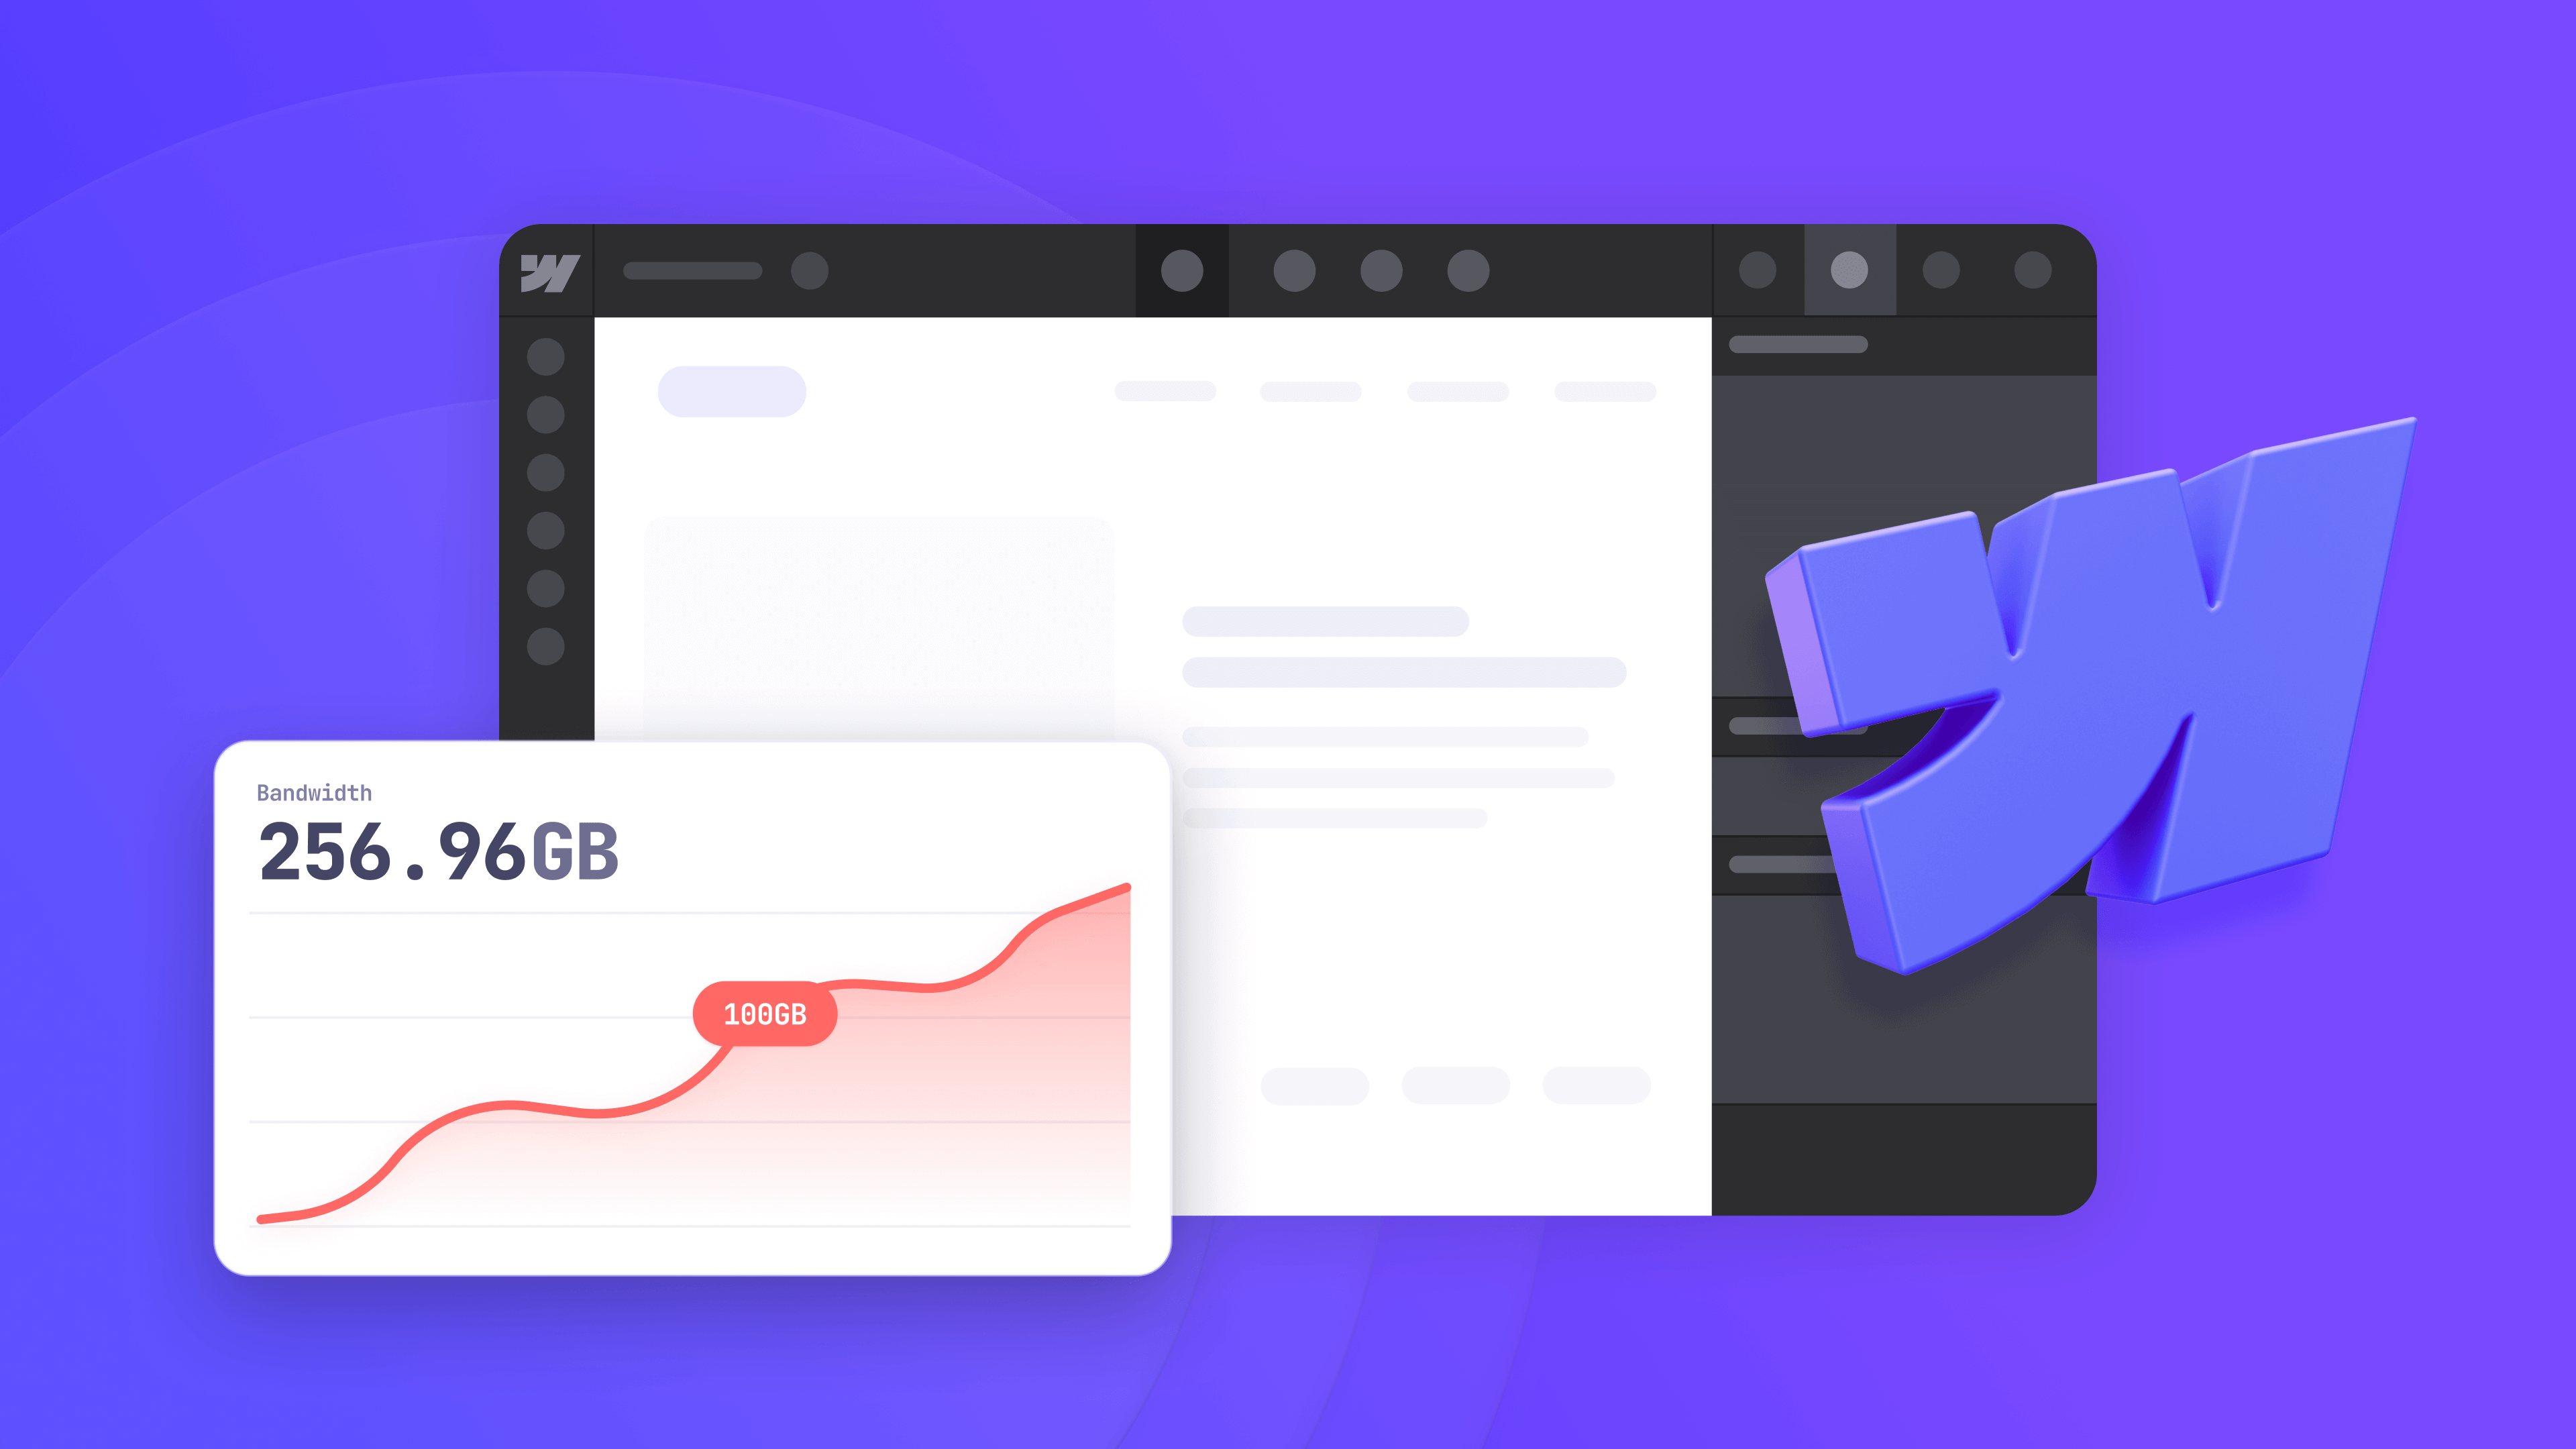
If you've received an unexpected Webflow bandwidth overage notification or noticed your site approaching its limits, you're not alone. Webflow's recent pricing changes have made bandwidth optimization more crucial than ever.
This comprehensive guide walks you through practical strategies to reduce your Webflow bandwidth usage – from quick wins to advanced implementations – helping you avoid costly overages while maintaining site performance.
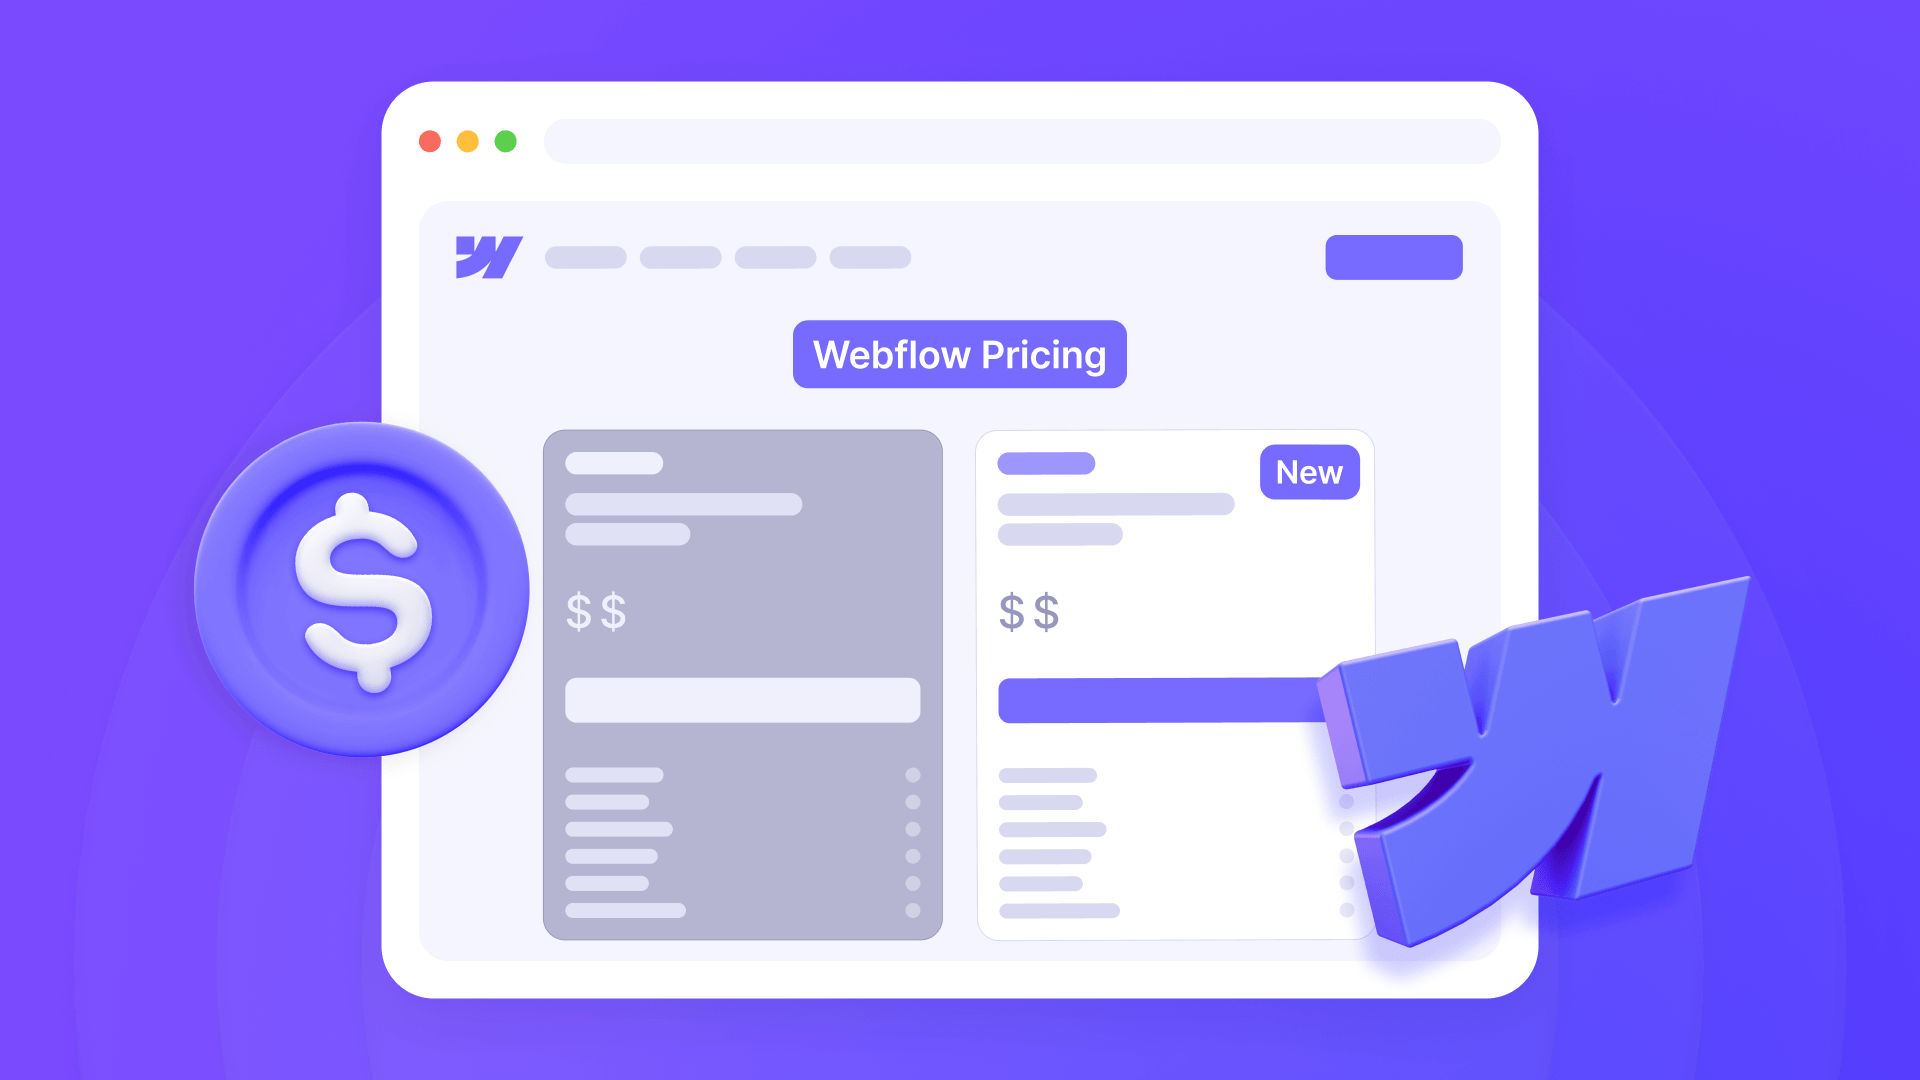
Why Webflow bandwidth optimization matters
Webflow's 2024-2025 pricing updates significantly reduced the bandwidth allowances across all site plans, and the May 2026 pricing changes further simplified the plan structure. The old CMS and Business plans have been consolidated into the new Premium plan, while the Basic plan retains its reduced allocation. Under the current structure, Basic includes 10 GB of bandwidth per month, and Premium includes 50 GB – far less than what many sites previously had under the legacy plans.
When you exceed your bandwidth allocation, Webflow's surge protection spares you the first month, but a second consecutive overage triggers automatic plan upgrades or bandwidth add-on charges. Some users have reported unexpected bills when bumped to a higher plan or forced into bandwidth add-ons due to overages.
This direct impact on your hosting costs makes bandwidth optimization a financial necessity, not just a performance consideration. For a complete breakdown of the new plan structure, see our guide to Webflow's May 2026 pricing changes and the pricing calculator, or our complete Webflow pricing guide for help choosing the right plan.
Overview of Webflow bandwidth optimization approaches
This guide will take you through a progression of bandwidth-saving strategies:
First, we'll explore quick wins – simple optimizations that can immediately reduce your usage without complex implementations. Then we'll move to intermediate solutions like offloading media to external services and handling excessive bot traffic. Finally, we'll cover advanced tactics for high-traffic sites, including Cloudflare Workers setups and multi-project architectures.
By implementing these strategies, you'll not only avoid bandwidth overages but also improve your site's performance and user experience.
Whether you need a minor tune-up or a complete bandwidth overhaul, this guide provides practical solutions tailored to your specific situation.
Understanding Webflow bandwidth limits
Recent Webflow bandwidth changes and pricing implications
Webflow's bandwidth allowances have gone through significant changes. In mid-2024, bandwidth was dramatically reduced across all plans. Then, with the May 2026 pricing update, Webflow simplified its site plan structure by merging the CMS and Business plans into a single Premium plan.
For the standard paid Site plans most relevant to this guide, the current structure is:
- Basic plan: 10 GB bandwidth per month
- Premium plan: 50 GB bandwidth per month
The Premium plan replaces the previous CMS and Business plans. Sites that were previously on CMS (50 GB) or Business (100 GB) plans are transitioning to Premium under the new structure. While Premium's 50 GB base is higher than Basic, it's lower than what Business plan users previously had, making bandwidth management just as important as ever.
While Webflow offers "surge protection" that forgives your first month over the limit, a second consecutive overage will trigger automatic plan upgrades or bandwidth add-ons.
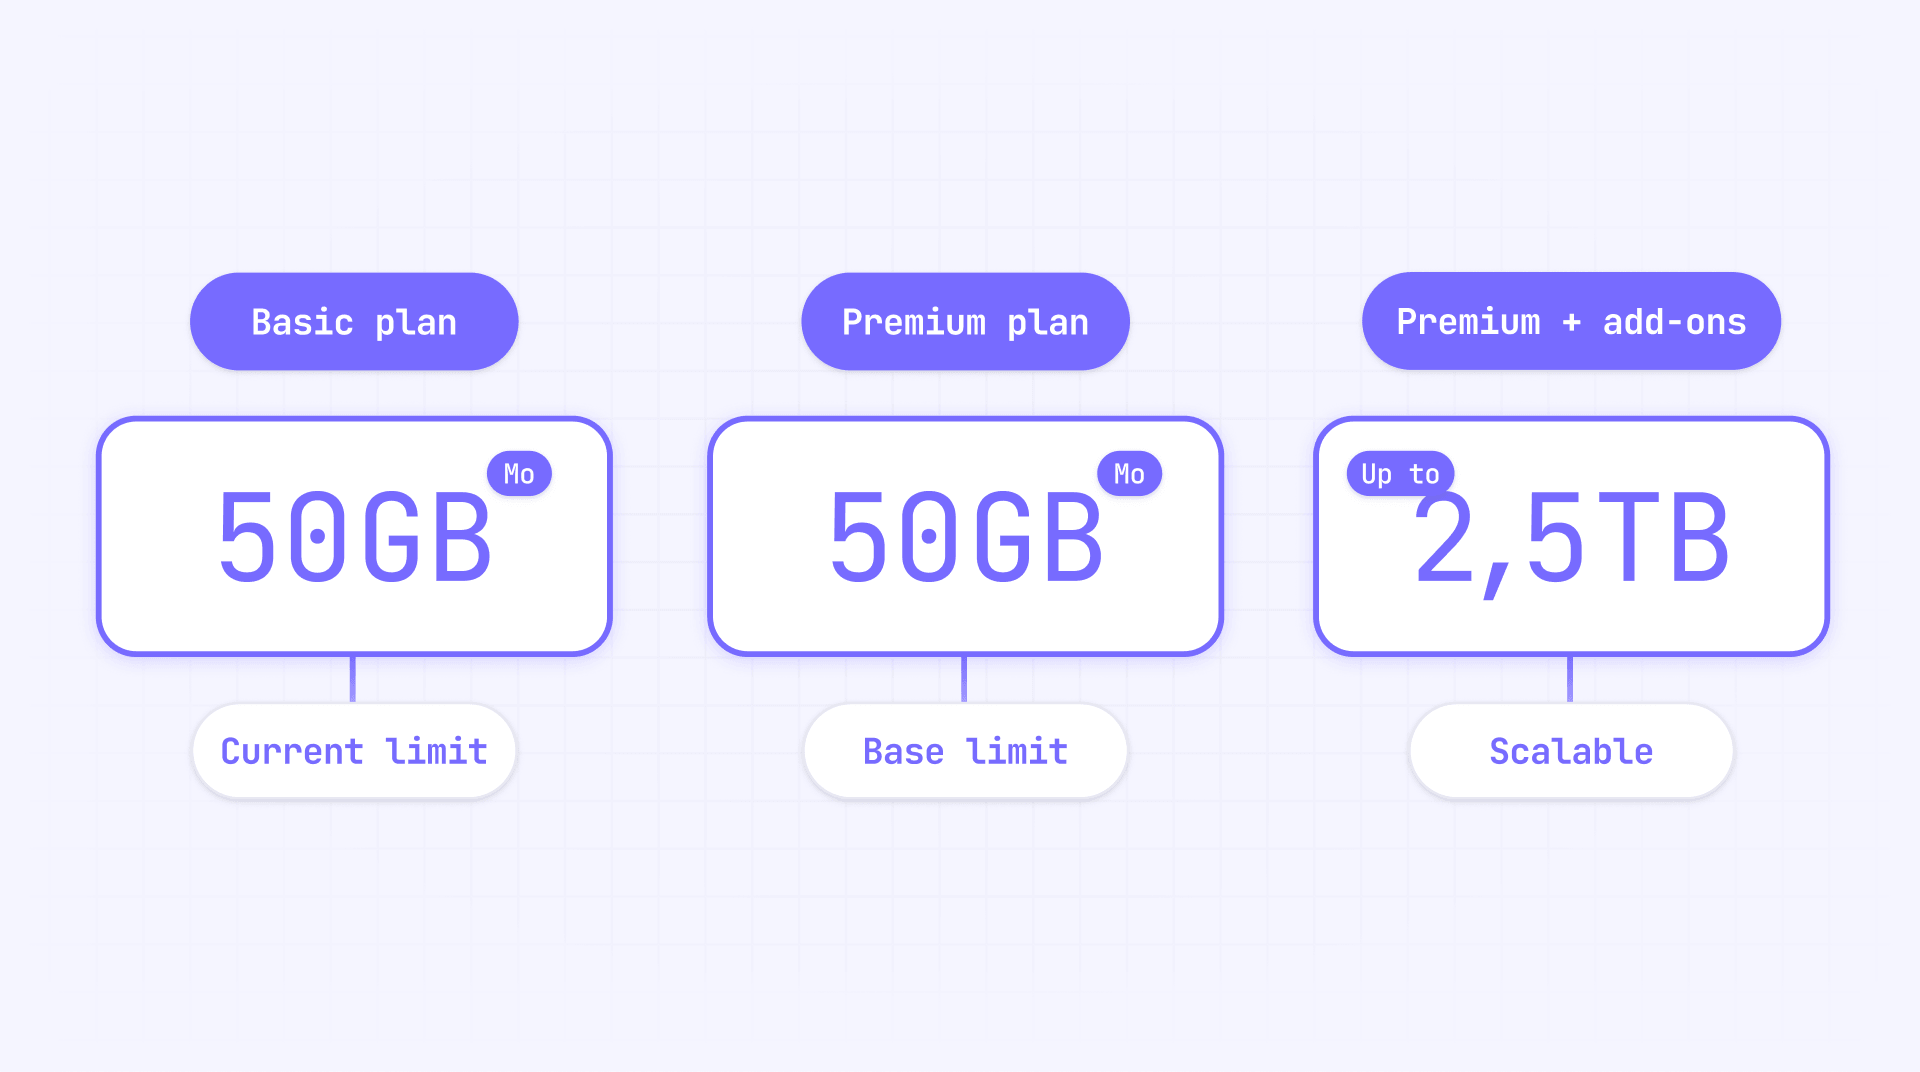
For Premium plans, bandwidth can be scaled beyond the base 50 GB using add-ons, up to 2.5 TB total:
- 50 GB: Base Premium plan (included)
- 100 GB total: +50 GB add-on
- 150 GB total: +100 GB add-on
- 200 GB total: +150 GB add-on
- 300 GB total: +250 GB add-on
- 400 GB total: +350 GB add-on
- 500 GB total: +450 GB add-on
- 750 GB total: +700 GB add-on
- 1 TB total: +950 GB add-on
- 1.5 TB total: +1.45 TB add-on
- 2 TB total: +1.95 TB add-on
- 2.5 TB total: +2.45 TB add-on
Add-on pricing varies depending on monthly vs. annual billing. For exact pricing at each tier, check our Webflow May 2026 pricing changes article with calculator or our general Webflow pricing guide.
Sites on the Basic plan are automatically upgraded if they exceed limits repeatedly, which can result in unexpected charges.
These changes have forced many Webflow users to pay closer attention to their bandwidth consumption and implement optimization strategies to stay within their plan limits.
How Webflow measures bandwidth usage
Bandwidth is the total data transferred from your site to visitors' browsers. This includes everything downloaded when someone visits your site: HTML, CSS, JavaScript, images, videos, and any other files.
For example:
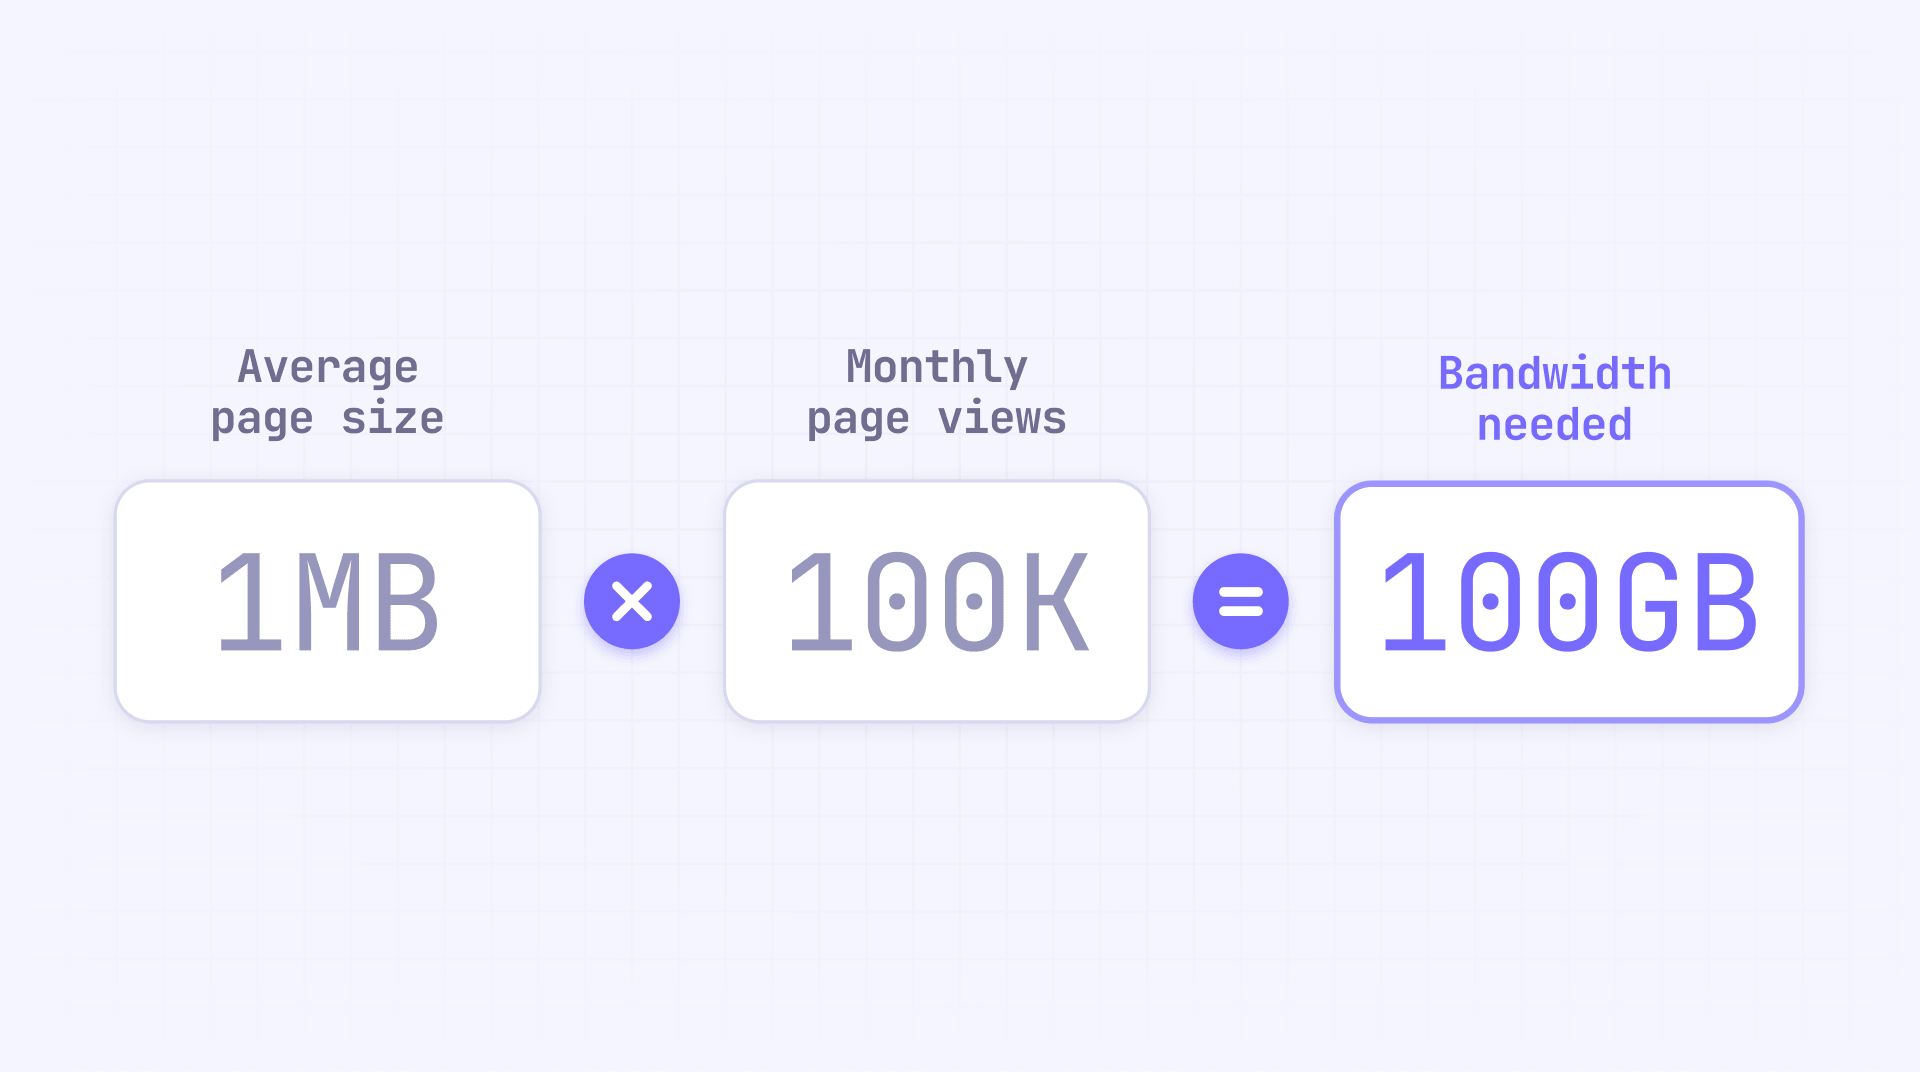
- Average page size: 1 MB
- Expected monthly views: 100,000
- Calculation: 1 MB × 100,000 = 100,000 MB (approximately 100 GB)
Importantly, Webflow counts all traffic towards your bandwidth – including both human visitors and bots – and all HTTP status codes (even 404 errors and redirects). This means that bot traffic, which can sometimes account for a significant percentage of visits, impacts your bandwidth just as much as legitimate users.
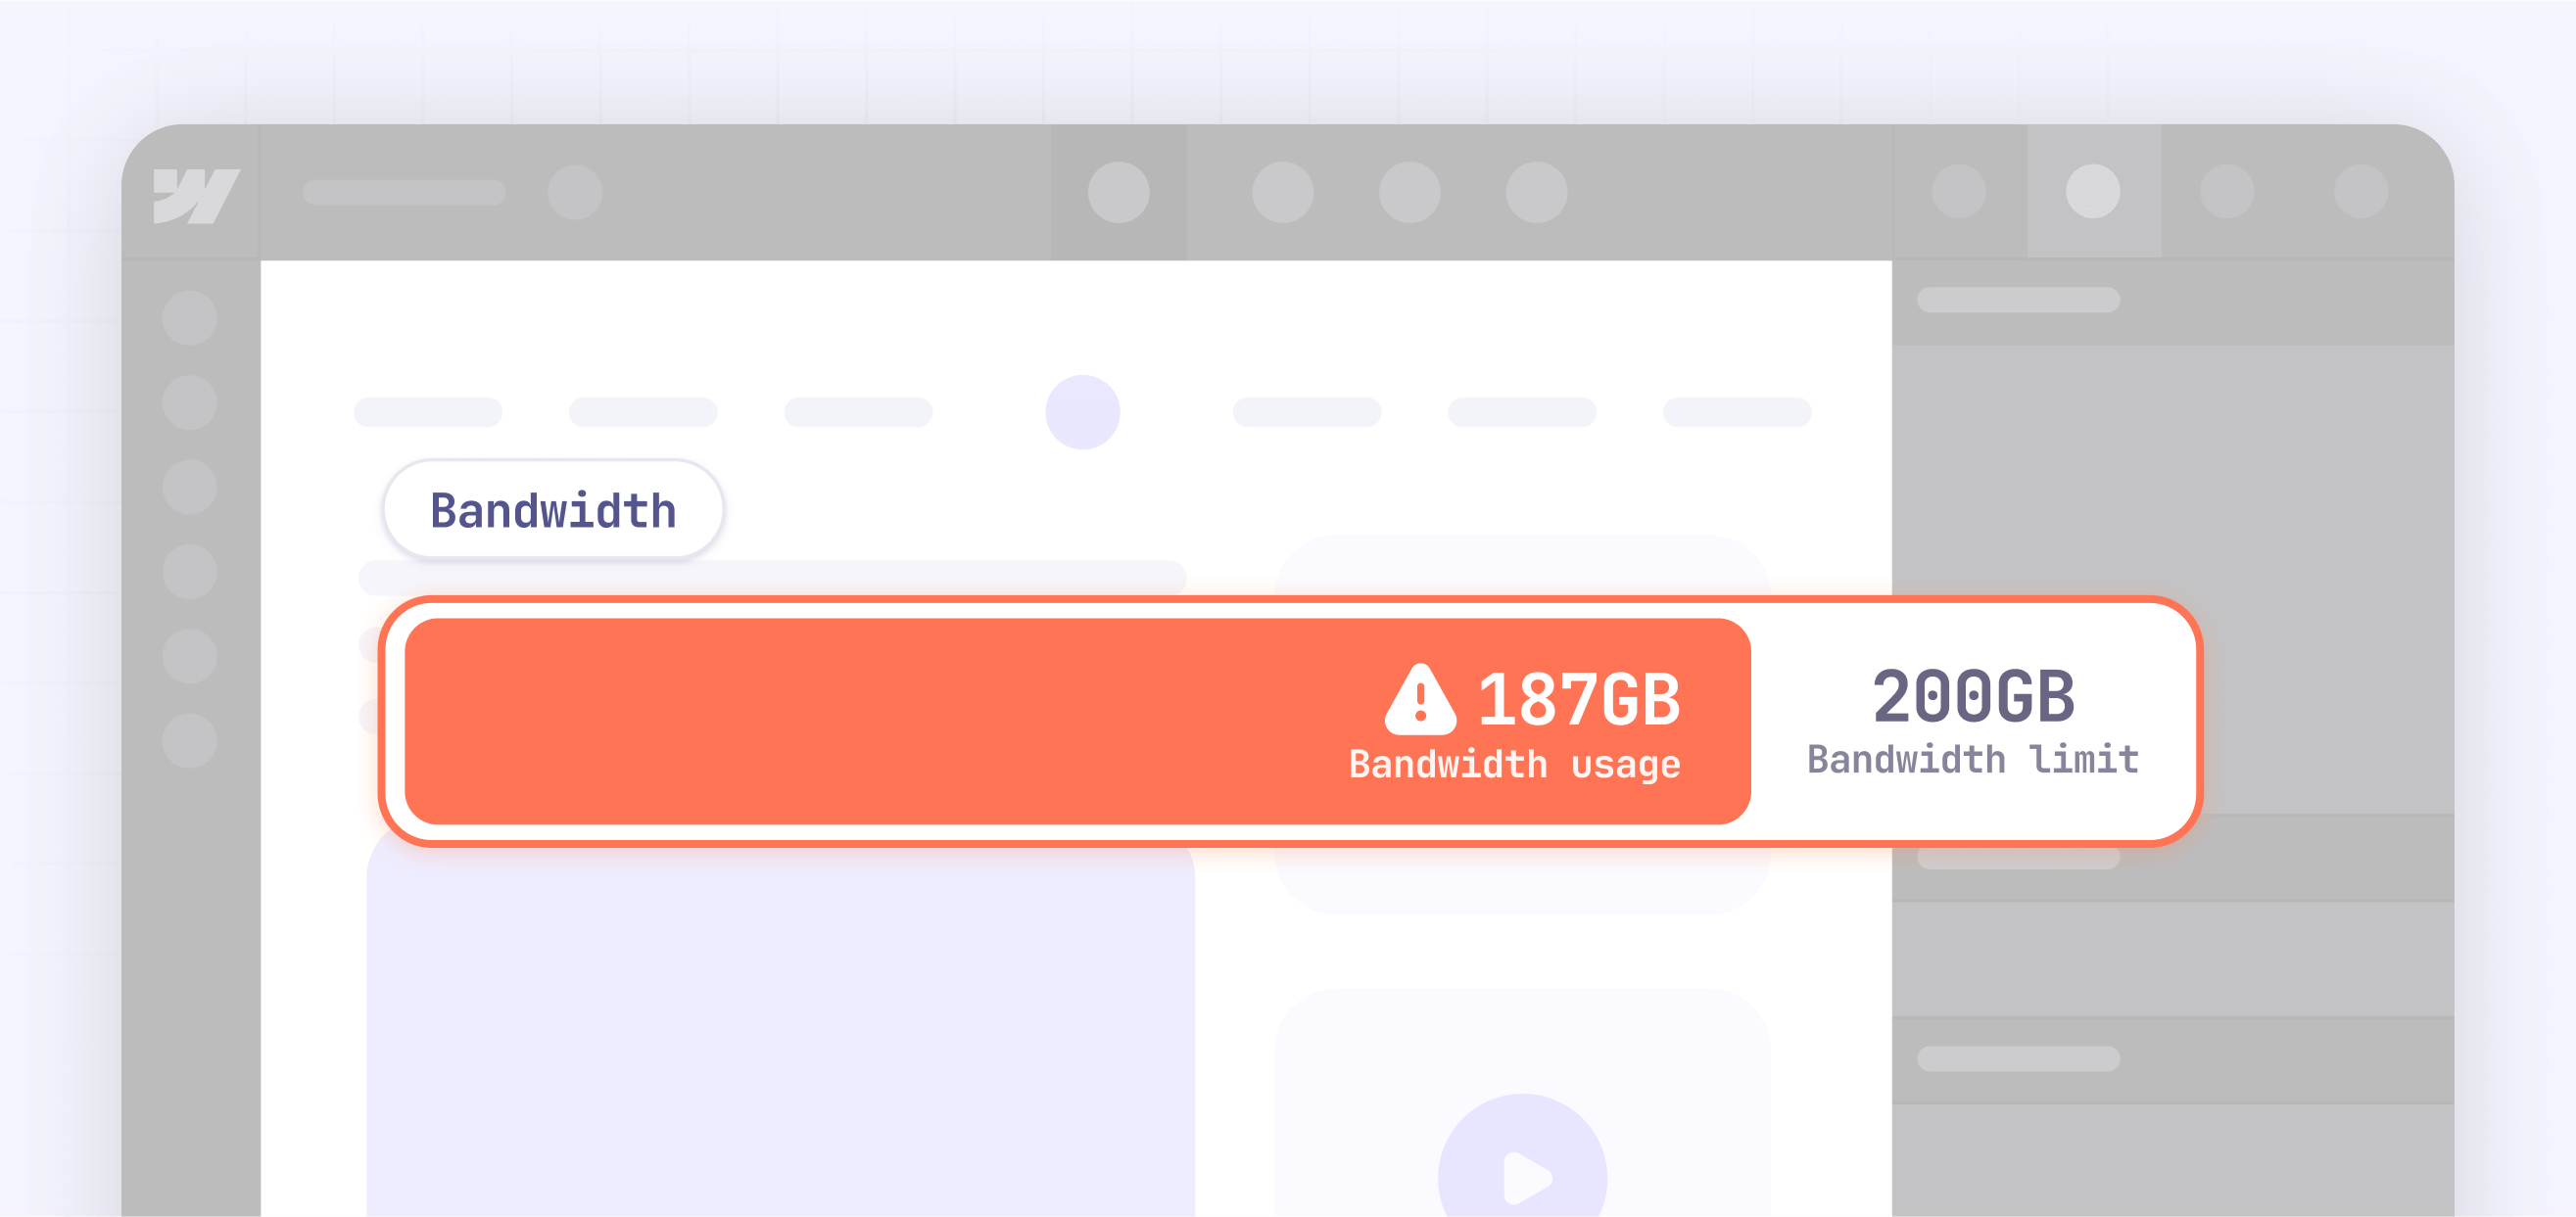
To monitor your usage, check Webflow's Site Usage dashboard in your Project Settings. This shows your current and historical bandwidth consumption, plus a breakdown of which pages and assets are using the most data. The dashboard lets you:
- View bandwidth trends over time
- Identify the top bandwidth-consuming pages
- See which specific assets (images, videos, etc.) are using the most bandwidth
- Download a CSV of usage data for further analysis
This information is crucial for diagnosing bandwidth issues and targeting your optimization efforts effectively. For a step-by-step approach to tracking your usage, see our companion guide to monitoring and estimating your Webflow bandwidth.

Common Webflow bandwidth culprits
The biggest bandwidth consumers on most Webflow sites are typically:
- Unoptimized images: Large, high-resolution images that aren't properly sized or compressed can easily consume megabytes per view. For example, a 4000px-wide image displayed in a 400px container wastes substantial bandwidth.
- Background videos: A 20 MB background video that autoplays for every visitor adds up quickly – just 500 views consumes 10 GB of bandwidth.
- PDFs and downloadable files: If you host case studies, white papers, or other downloadable resources directly on Webflow, each download counts toward your bandwidth.
- Bot traffic: Crawlers, scrapers, and other automated visitors can significantly impact bandwidth usage. Some users have reported unexpected spikes of hundreds of gigabytes in a single day due to aggressive bot activity, with no corresponding increase in human visitors.
- Inefficient code and unused assets: Unminified code, unnecessary JavaScript libraries, or unused fonts also contribute to bandwidth usage, though usually to a lesser extent than media files.
By identifying which of these factors is most significant for your site, you can focus your optimization efforts where they'll have the greatest impact.
Quick wins for Webflow bandwidth reduction
Start with these straightforward optimizations that can significantly reduce bandwidth without complex implementation:
Webflow image optimization for bandwidth reduction
Images are often the biggest bandwidth consumers on a website. Here's how to optimize them:
- Resize images to appropriate dimensions: Never use a 4000px image when it will only display at 800px. Before uploading to Webflow, resize images to the maximum dimensions needed (typically 2x the displayed size for retina screens).
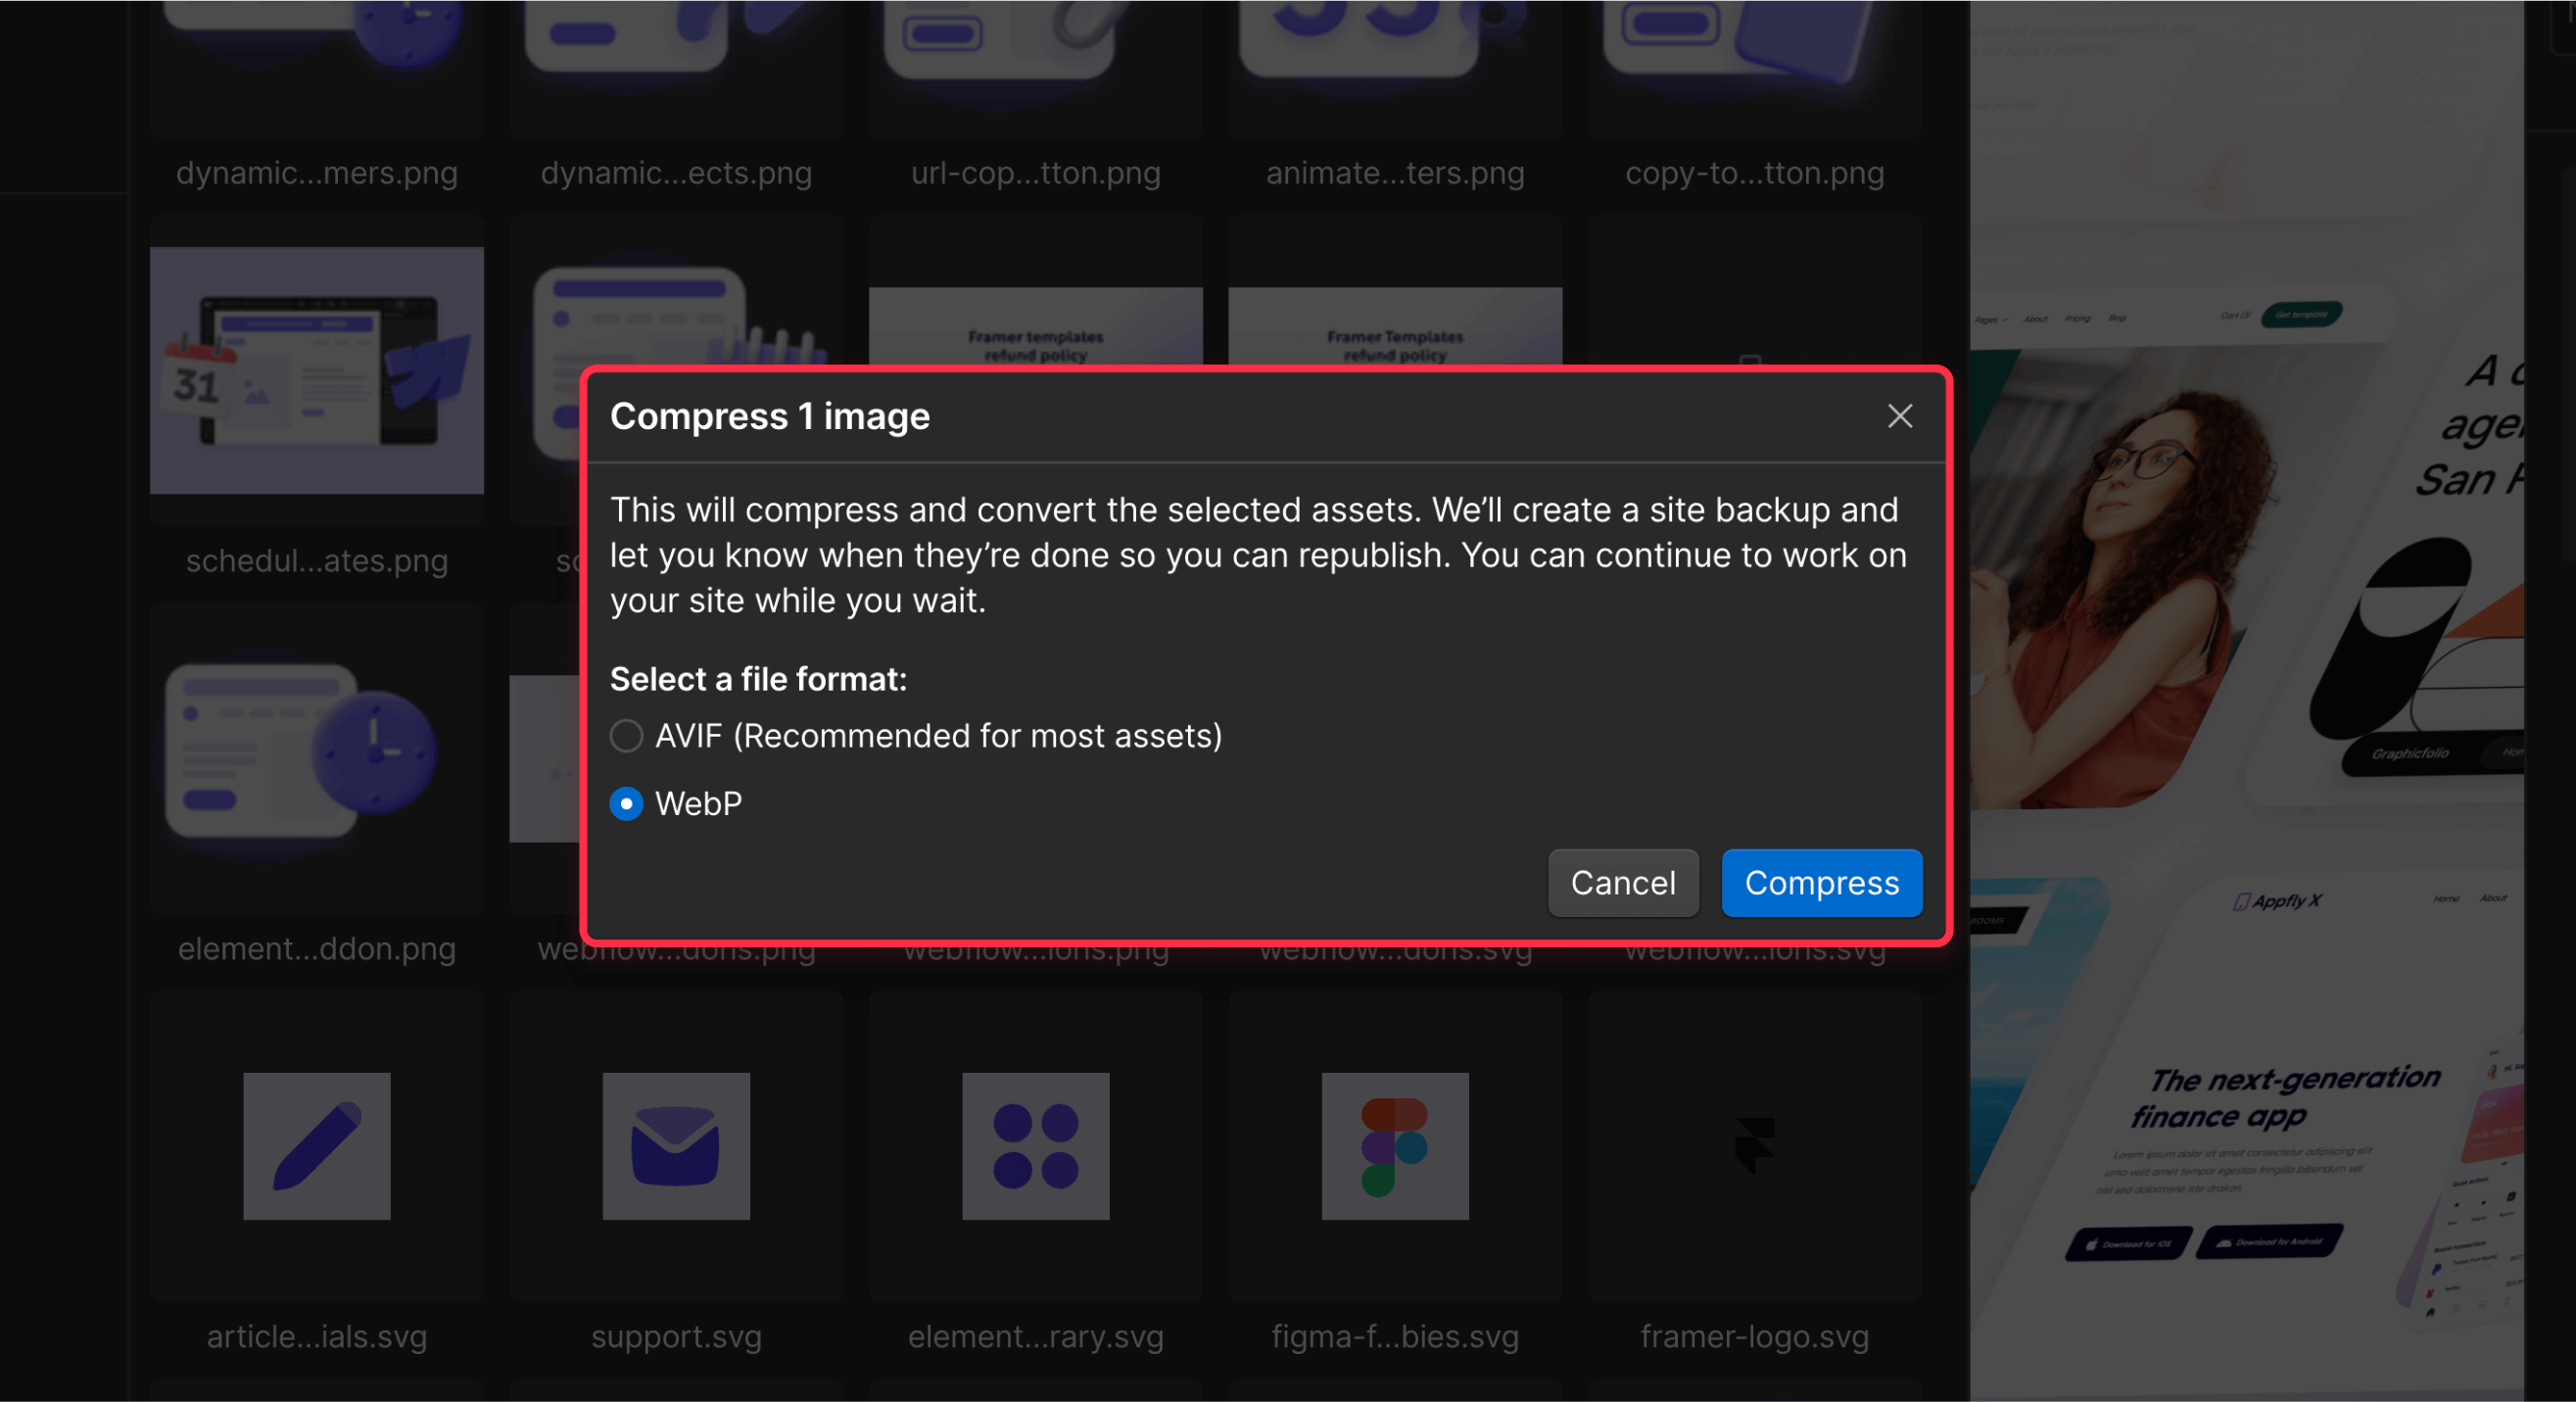
- Convert to AVIF or WebP format in Webflow: Webflow's built-in image conversion tool now supports both AVIF and WebP conversion. AVIF typically reduces file sizes by 50% or more compared to PNG/JPEG, while WebP reduces sizes by about 30% or more – both without visible quality loss. Access this by:
- Going to Assets → Select images → click "Compress"
- In Collections panel, choose "Compress Assets" for CMS images
- Use SVG for logos and icons in Webflow: Vector graphics are typically much smaller than PNGs for logos, icons, and simple illustrations. Replace bitmap graphics with SVGs wherever possible.
- Manually compress Webflow images: For maximum control, use tools like TinyPNG to compress images before uploading to Webflow. This often yields better results than relying solely on Webflow's compression.
Image optimization alone can reduce bandwidth by 30-50% with no visible quality loss. For example, a site using 80 GB monthly might drop to 40-50 GB just by implementing proper image optimization.
Implementing lazy loading in Webflow to reduce bandwidth
Lazy loading prevents images from loading until they're about to enter the viewport, which means:
- If a user never scrolls to a particular section, those images are never downloaded, saving significant bandwidth
- Initial page load is faster since fewer resources are requested upfront (making your website faster!)
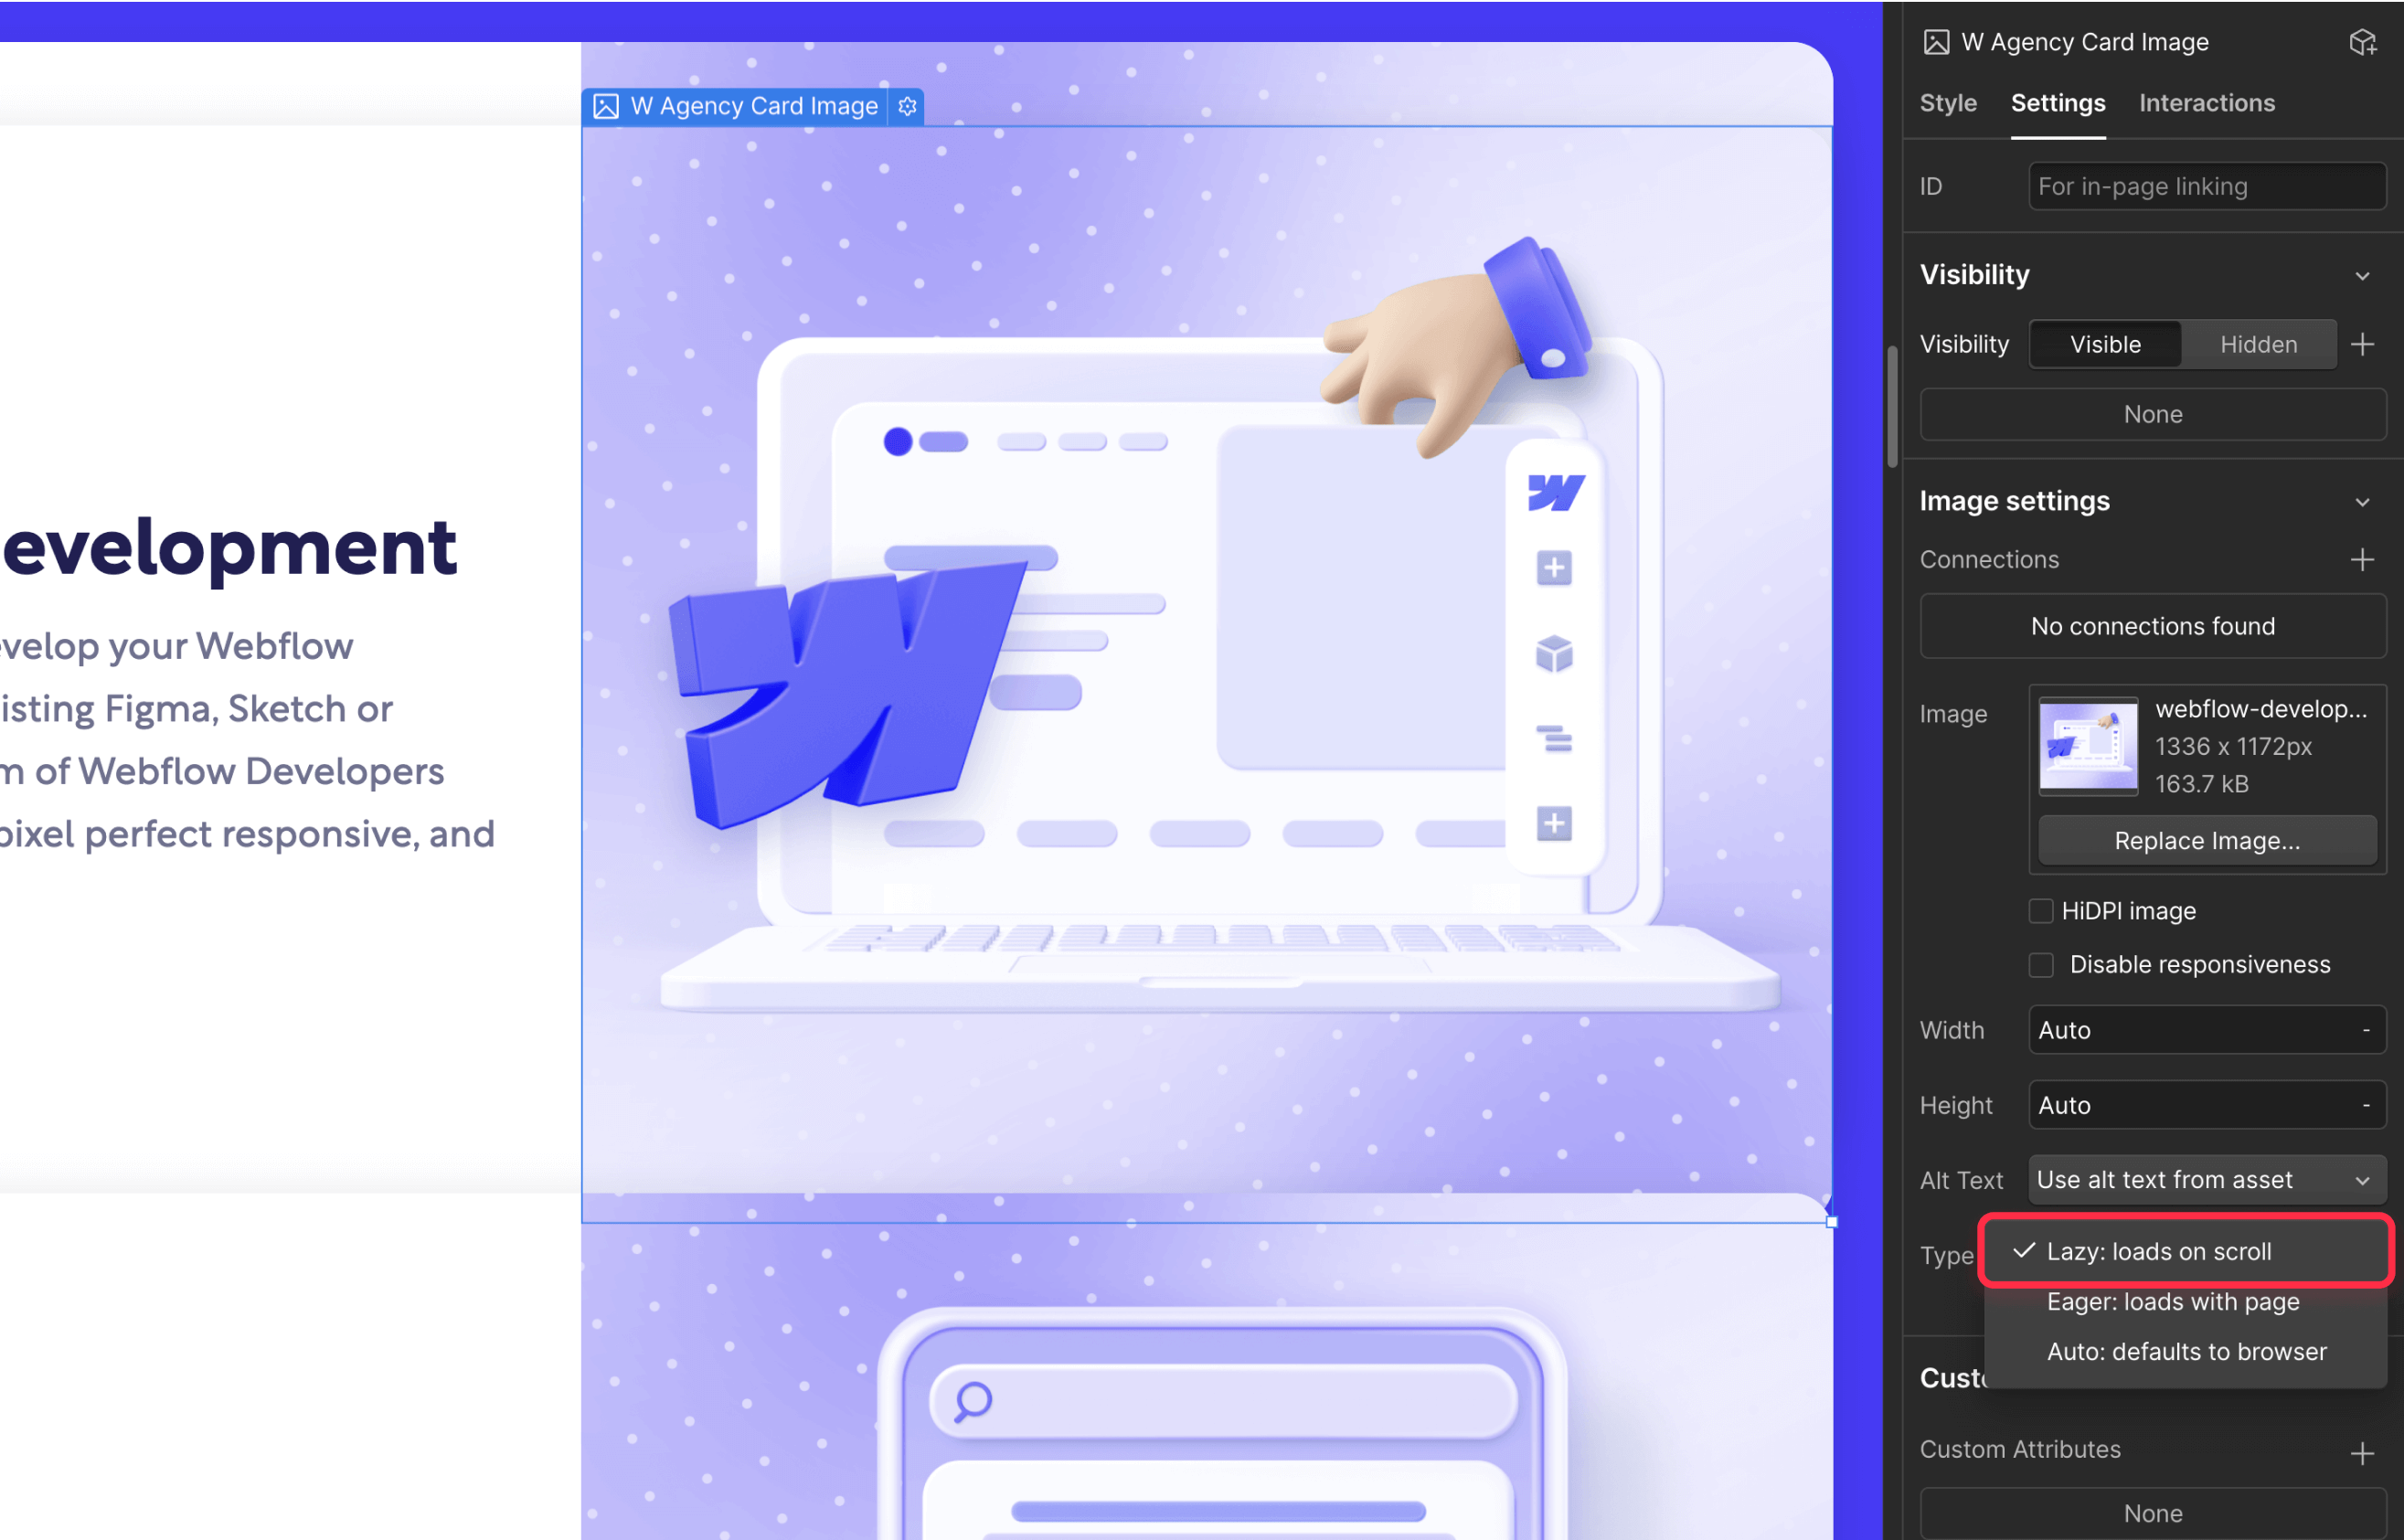
Webflow automatically applies native lazy loading to inline images that aren't in the initial viewport. However, background images and images in rich text fields don't lazy-load by default. To maximize lazy loading benefits:
- Use the Image Element in Webflow instead of background images where possible
- Verify that "Lazy Load" is enabled for images in the Webflow Designer (it's on by default for most images)
- For image galleries or sliders, consider custom solutions that load images on demand rather than all at once
Effective lazy loading can significantly reduce bandwidth for pages with many images, especially if users typically don't scroll through the entire content.
Minify and remove unused Webflow code
While media files are the biggest bandwidth consumers, don't overlook the savings from optimizing your HTML, CSS, and JavaScript:
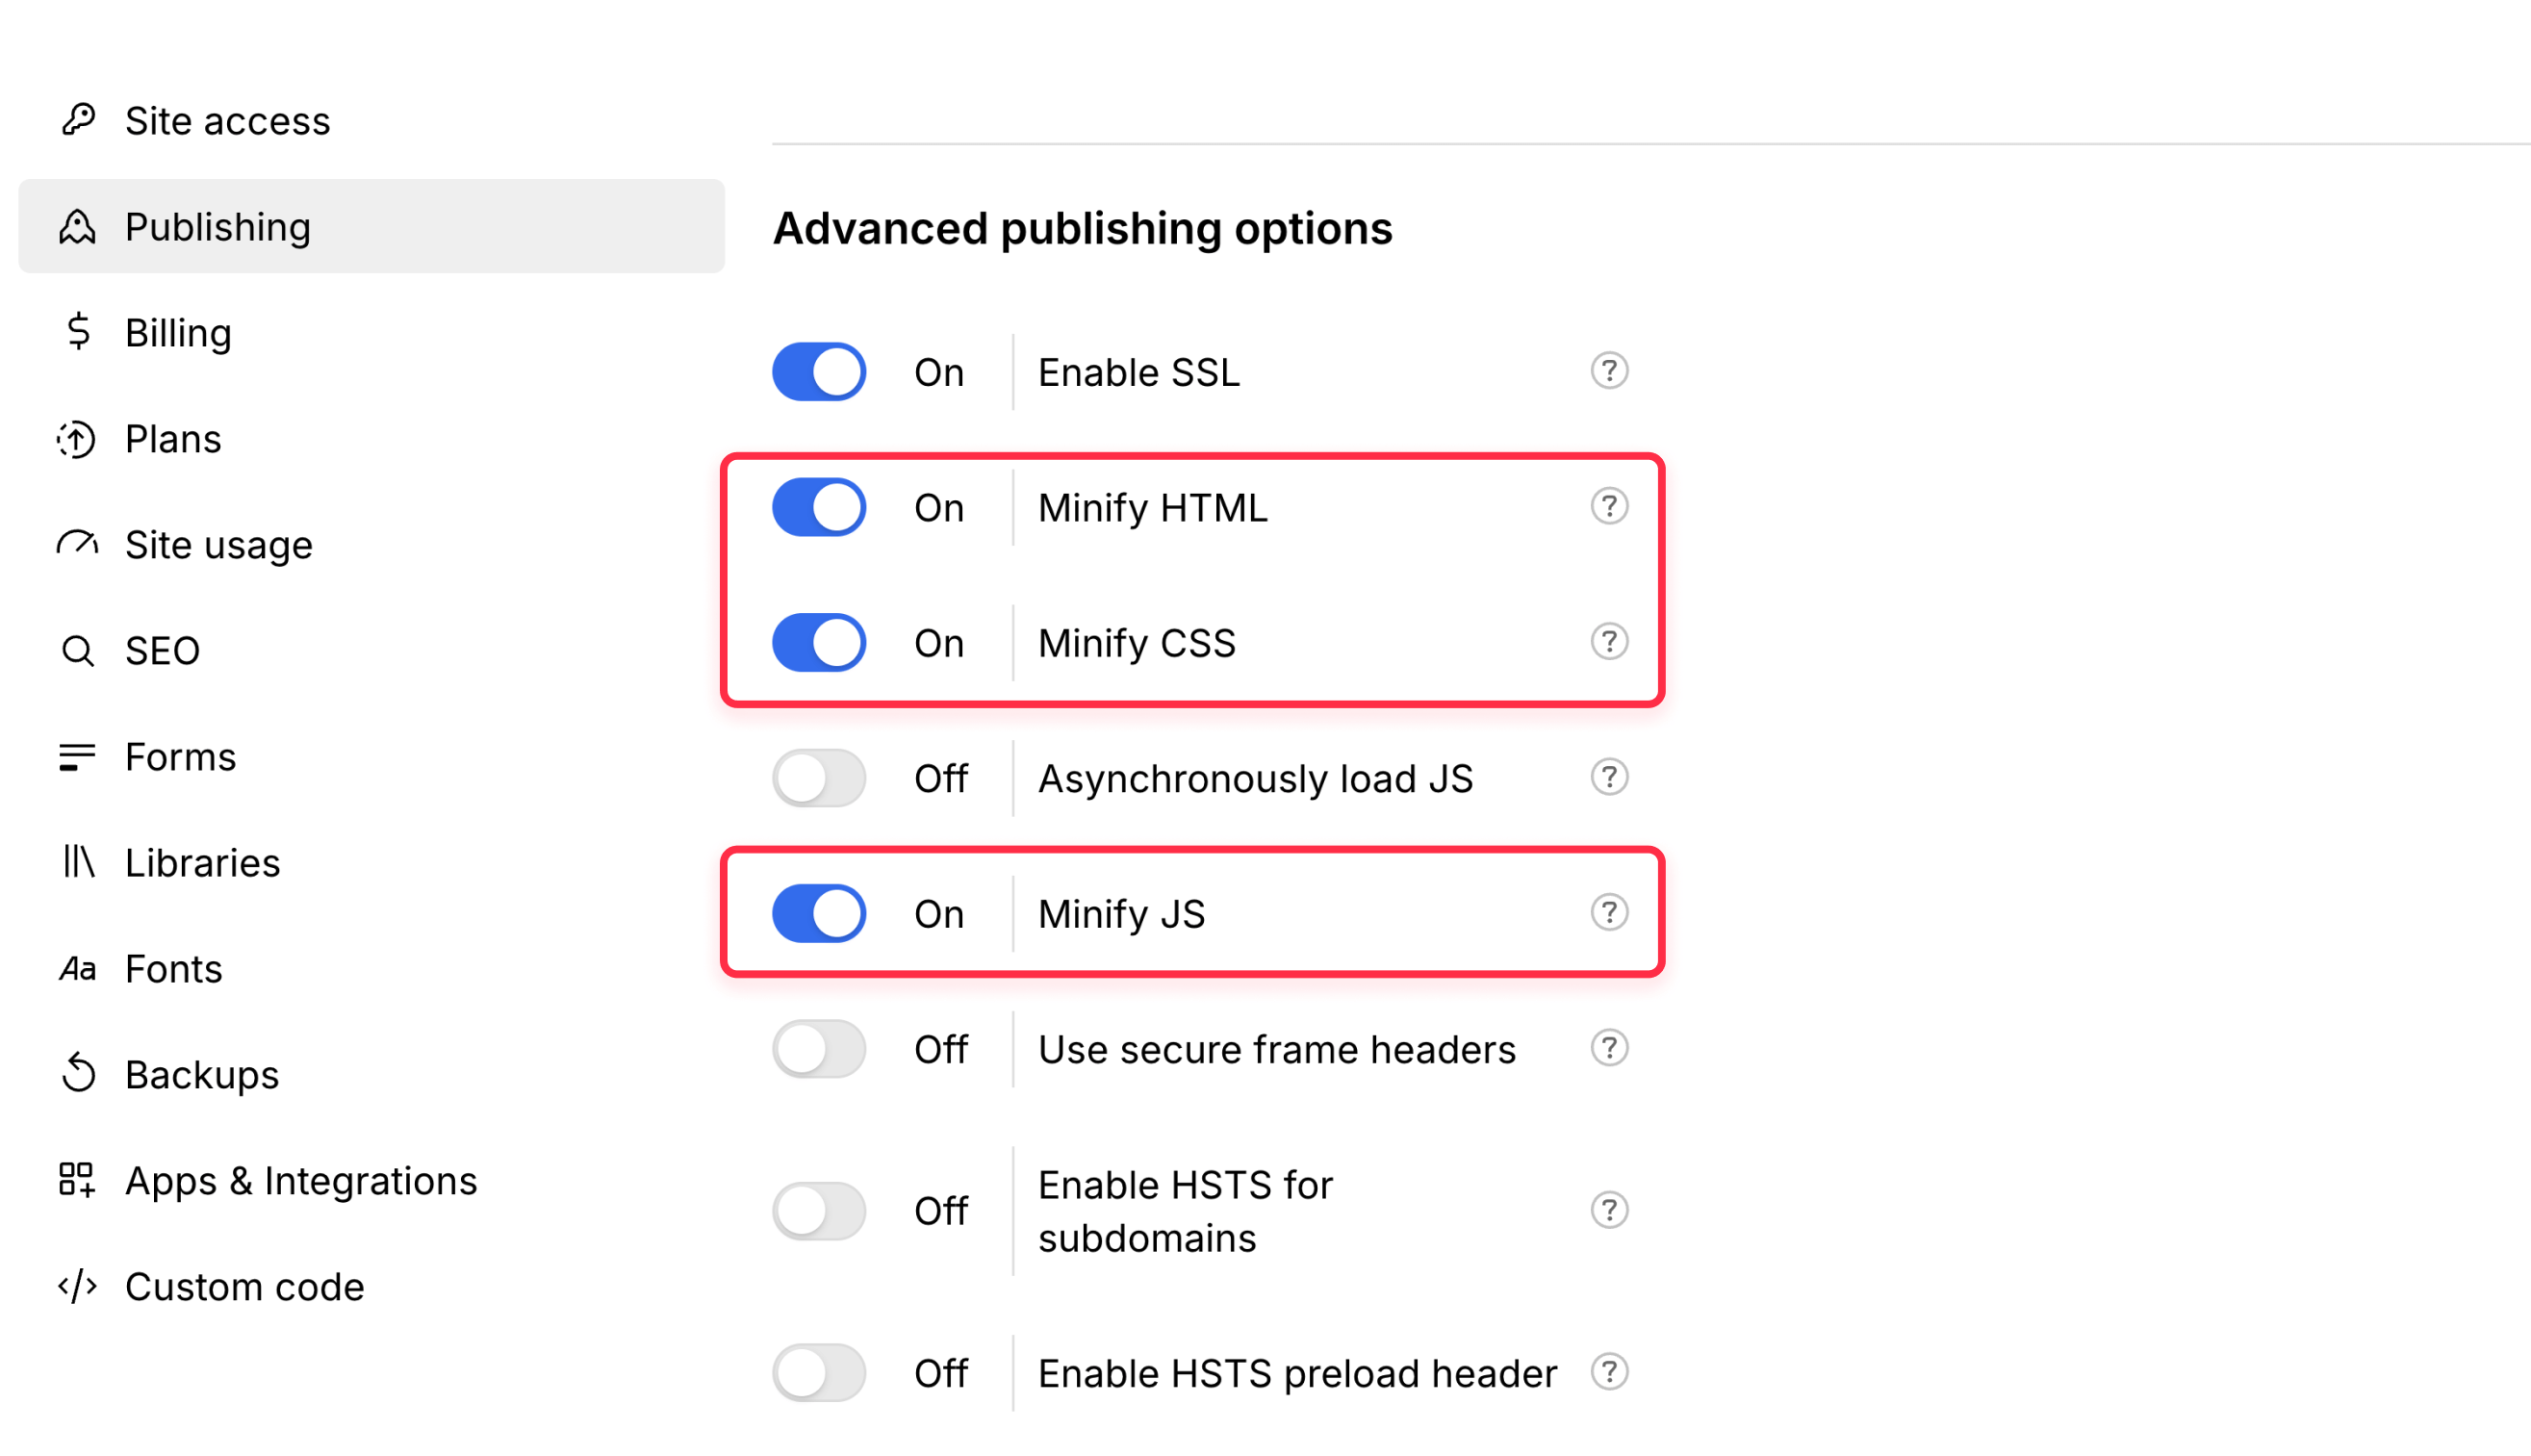
- Enable Webflow code minification: In Project Settings → Hosting, ensure that "Minify HTML", "Minify CSS", and "Minify JS" are enabled. This removes whitespace and comments, often reducing file sizes by about 10%.
- Clean up unused Webflow styles: Webflow's Designer has options to remove unused classes. Go to the Style Manager panel, click the three dots, and select "Clean up unused styles". Just be careful not to remove components from your design system that you might need later.
- Remove unnecessary Webflow interactions: If you created animations or interactions and later removed the elements they applied to, clean them up in the Interactions panel to avoid loading unused JavaScript.
- Audit third-party scripts in Webflow: Review any custom code or embeds you've added. Remove scripts for features you no longer use, and consider deferring non-critical scripts to improve page load performance. Note that third-party scripts served from external domains generally don't count toward your Webflow bandwidth, but they can still affect page speed and user experience.
- Delete unused fonts from Webflow: Font files can be surprisingly large. If you experimented with multiple font families but only use some of them in your final design, remove the unused fonts from your project. You can manage fonts in Webflow by going to Project Settings → Fonts, where you'll see all the font families loaded in your project.
These optimizations might seem small individually, but collectively, they contribute to a leaner, more efficient site that uses less bandwidth per visitor.
Intermediate Webflow bandwidth optimization solutions
If basic optimizations aren't enough to keep you under your bandwidth limit, consider these more substantial solutions:
Offloading videos and large files from Webflow
Videos can quickly consume enormous amounts of bandwidth. Instead of hosting them directly on Webflow:
- Use external video platforms with Webflow: Replace Webflow-hosted videos with embedded players from YouTube, Vimeo, or specialized services. These platforms are optimized for video delivery and the bandwidth used doesn't count against your Webflow limit.
- Replace Webflow background videos: For background videos, consider:
- Using VidzFlow, a specialized video hosting service for Webflow
- Creating a lighter animation using Lottie or CSS instead
- Using a static image with a play button that opens a video in a modal
- Host large downloads externally: Move PDFs, audio files, or other large downloads to external storage like:
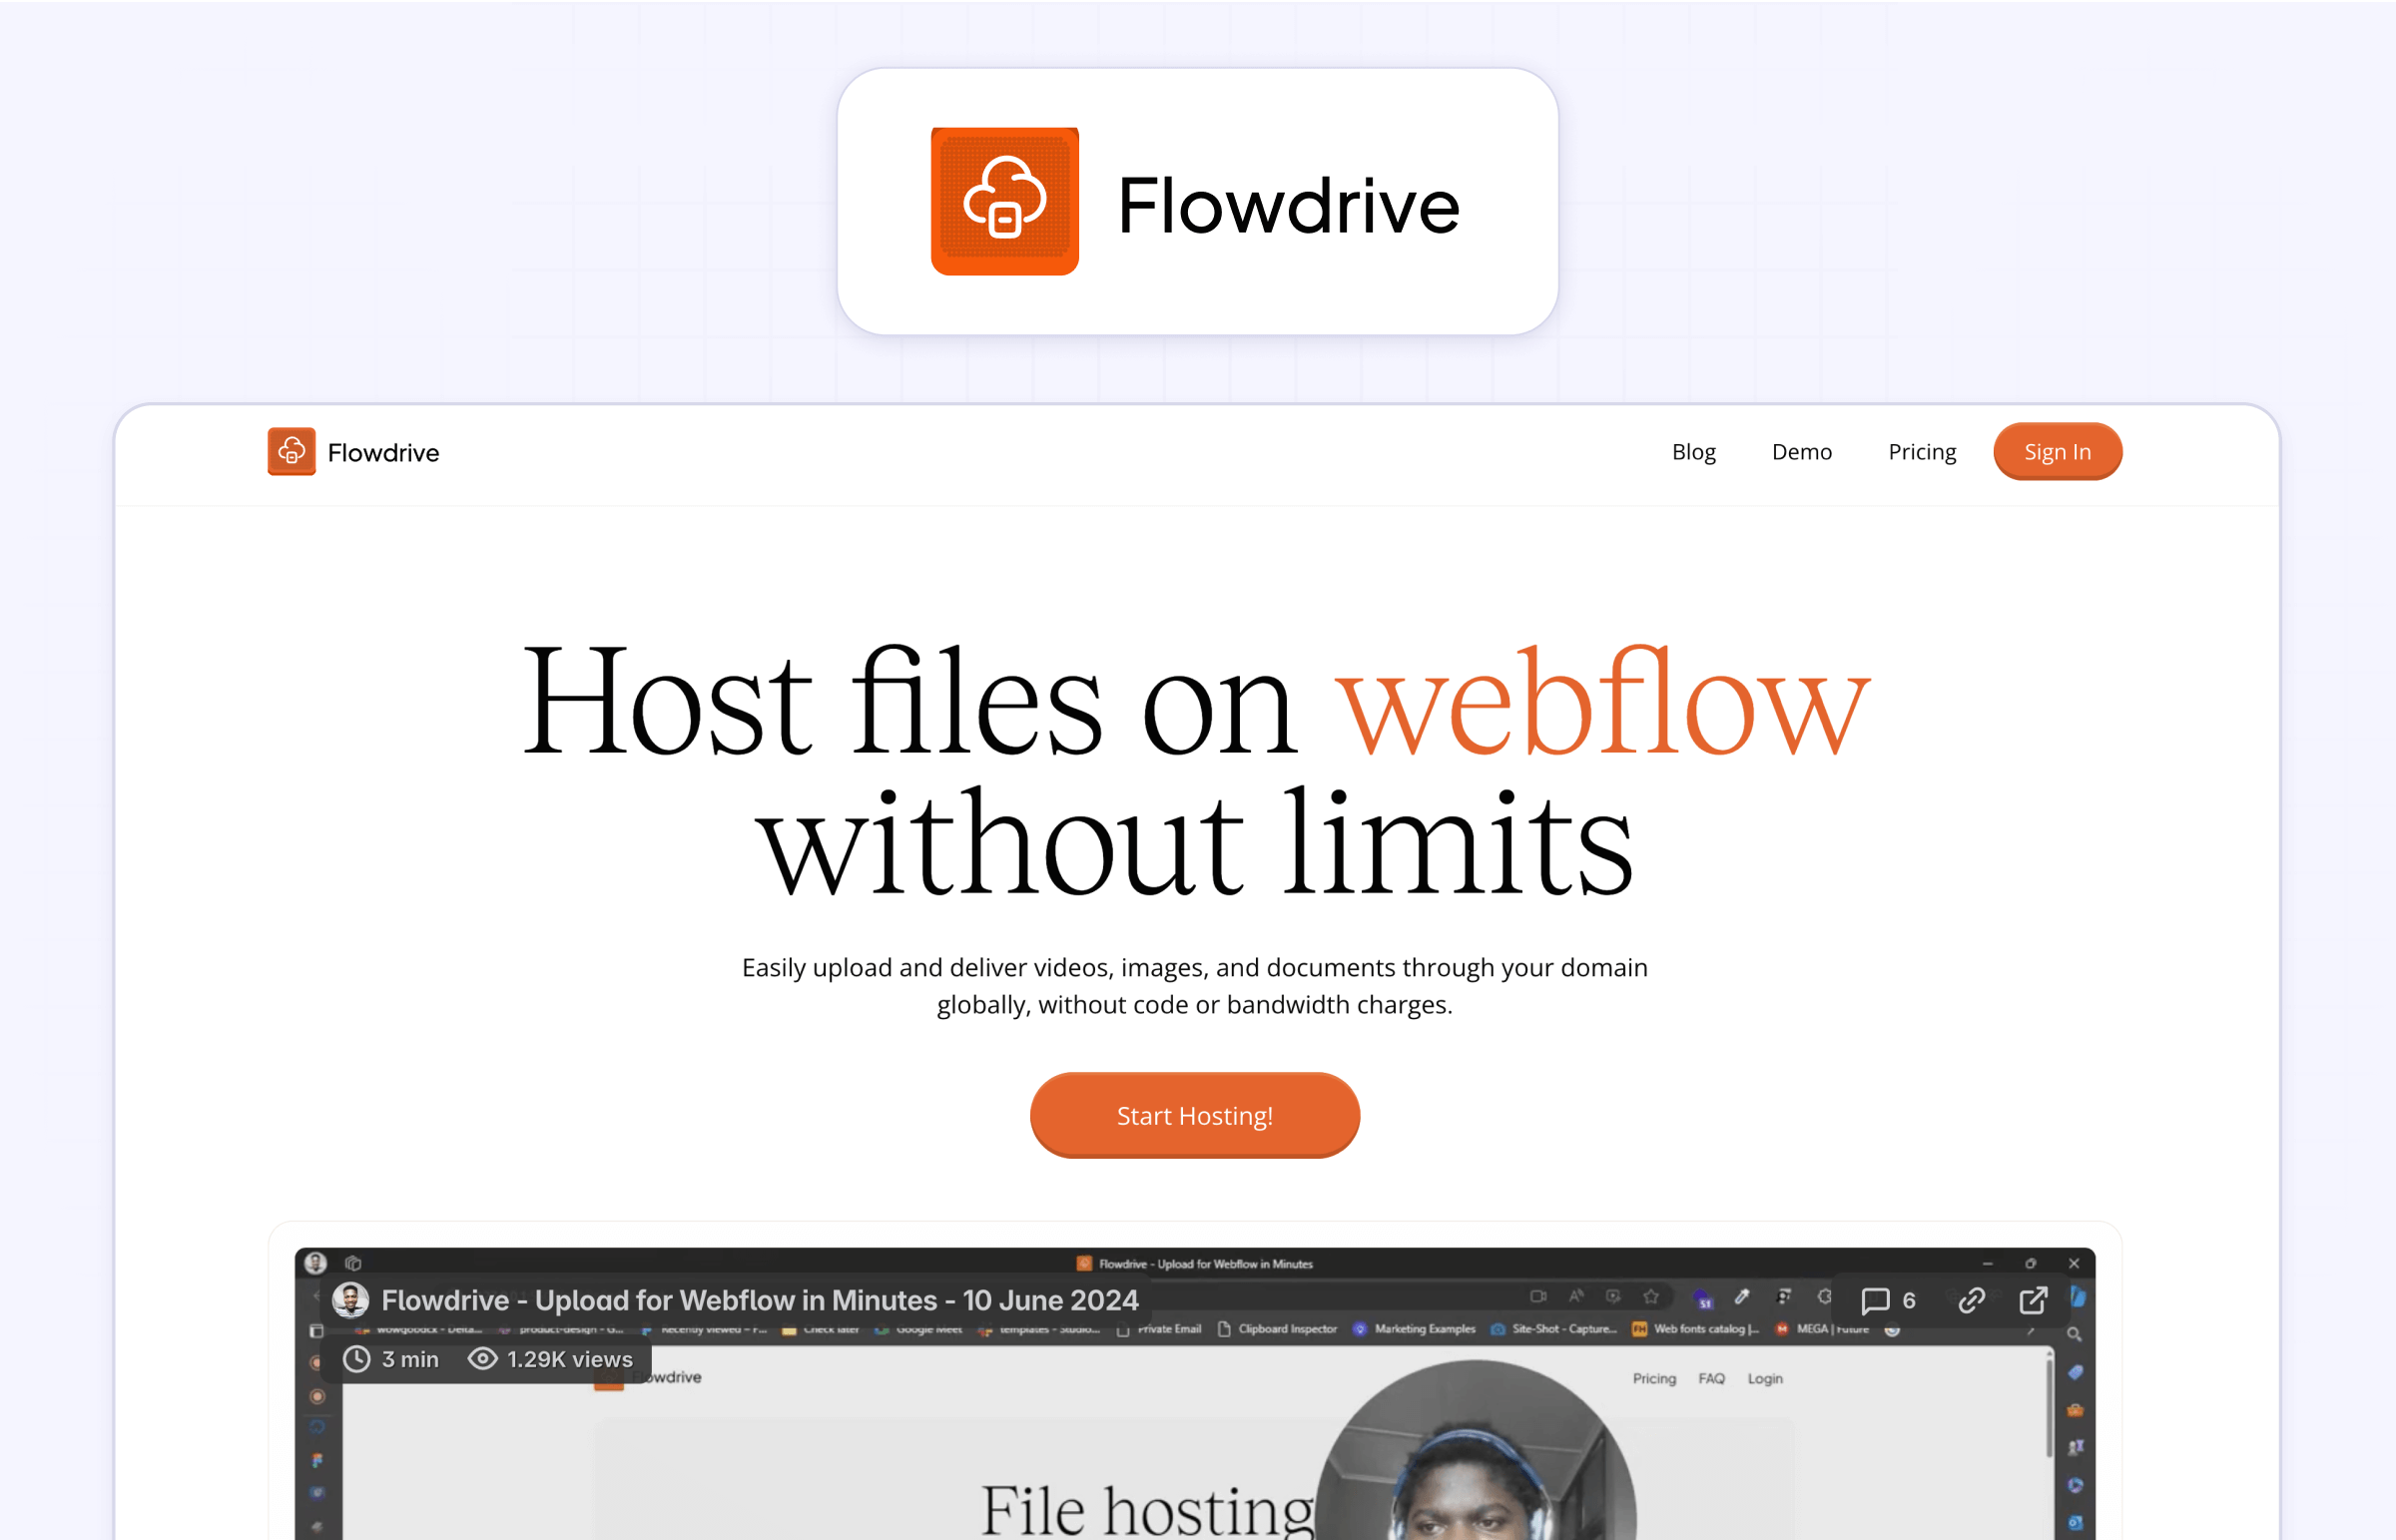
- FlowDrive, a purpose-built solution for Webflow that supports large file hosting, custom domains, and request-based pricing with no bandwidth caps
- Google Drive, which can be used to create download links in Webflow for any file type
- Amazon S3 or Google Cloud Storage
By moving these bandwidth-heavy assets off Webflow, you can dramatically reduce your usage. For example, a site with a 15 MB background video that gets 10,000 visits might save 150 GB of bandwidth by using an external video host instead.
Using FlowDrive for Webflow asset offloading
FlowDrive is a specialized tool designed specifically for offloading Webflow assets to external storage while maintaining seamless integration:
- What it does: FlowDrive moves your images, PDFs, videos, and other files from Webflow's servers to FlowDrive's storage (backed by Cloudflare R2 or S3), and automatically updates the links in your Webflow project.
- Implementation: Install FlowDrive from the Webflow Marketplace, select which assets to transfer, and use its one-click replace feature to update all asset links in your Webflow site.
- Bandwidth impact: Assets served through FlowDrive don't count toward your Webflow bandwidth, and as images take the most bandwidth usage, this can easily reduce your bandwidth usage by 20% - 50%.
- Pricing: FlowDrive offers a free tier and paid request-based plans, making it more cost-effective than scaling Webflow bandwidth for many asset-heavy sites. Since pricing is based on request volume rather than transferred bandwidth, FlowDrive can be easier to predict than bandwidth-based hosting for media-heavy Webflow sites.
FlowDrive is particularly useful for sites with lots of media that don't want to deal with manual CDN setups. It preserves the look and functionality of your site while significantly reducing Webflow bandwidth usage.
Using VidzFlow for Webflow video optimization
VidzFlow is a specialized video hosting service designed specifically for Webflow that helps eliminate video-related bandwidth usage:
- What it does: VidzFlow provides professional, distraction-free video hosting with a customizable player that integrates seamlessly with Webflow. Videos are served from VidzFlow's global CDN rather than counting against your Webflow bandwidth.
- Implementation: VidzFlow offers an official Webflow app that adds a VidzFlow interface directly inside Webflow Designer. You can upload videos (up to 1GB compared to Webflow's 30MB limit) and place them anywhere on your page without leaving Webflow.
- Bandwidth impact: Videos served through VidzFlow have zero impact on your Webflow bandwidth quota. For sites with multiple videos or background videos, this can save dozens or even hundreds of gigabytes monthly.
- Pricing: VidzFlow offers a free plan (up to 10 videos, 100MB per video) and paid plans are available for higher limits, branding removal, better quality options, and longer duration limits.
VidzFlow is particularly valuable for video-rich websites like portfolios, product showcases, and course platforms. Also, on top of the bandwidth reduction, users report videos starting up to 10× faster than standard embedded players, with significantly less buffering during playback.

Dealing with high bot traffic on Webflow sites
Sometimes bandwidth spikes aren't due to legitimate users, but to bots or AI scrapers:
Identify the problem: If you notice unusual spikes in your bandwidth usage without corresponding increases in user traffic, bot activity may be the culprit. Unfortunately, Webflow's dashboard doesn't distinguish between human and bot traffic.
Basic Webflow bot protections:
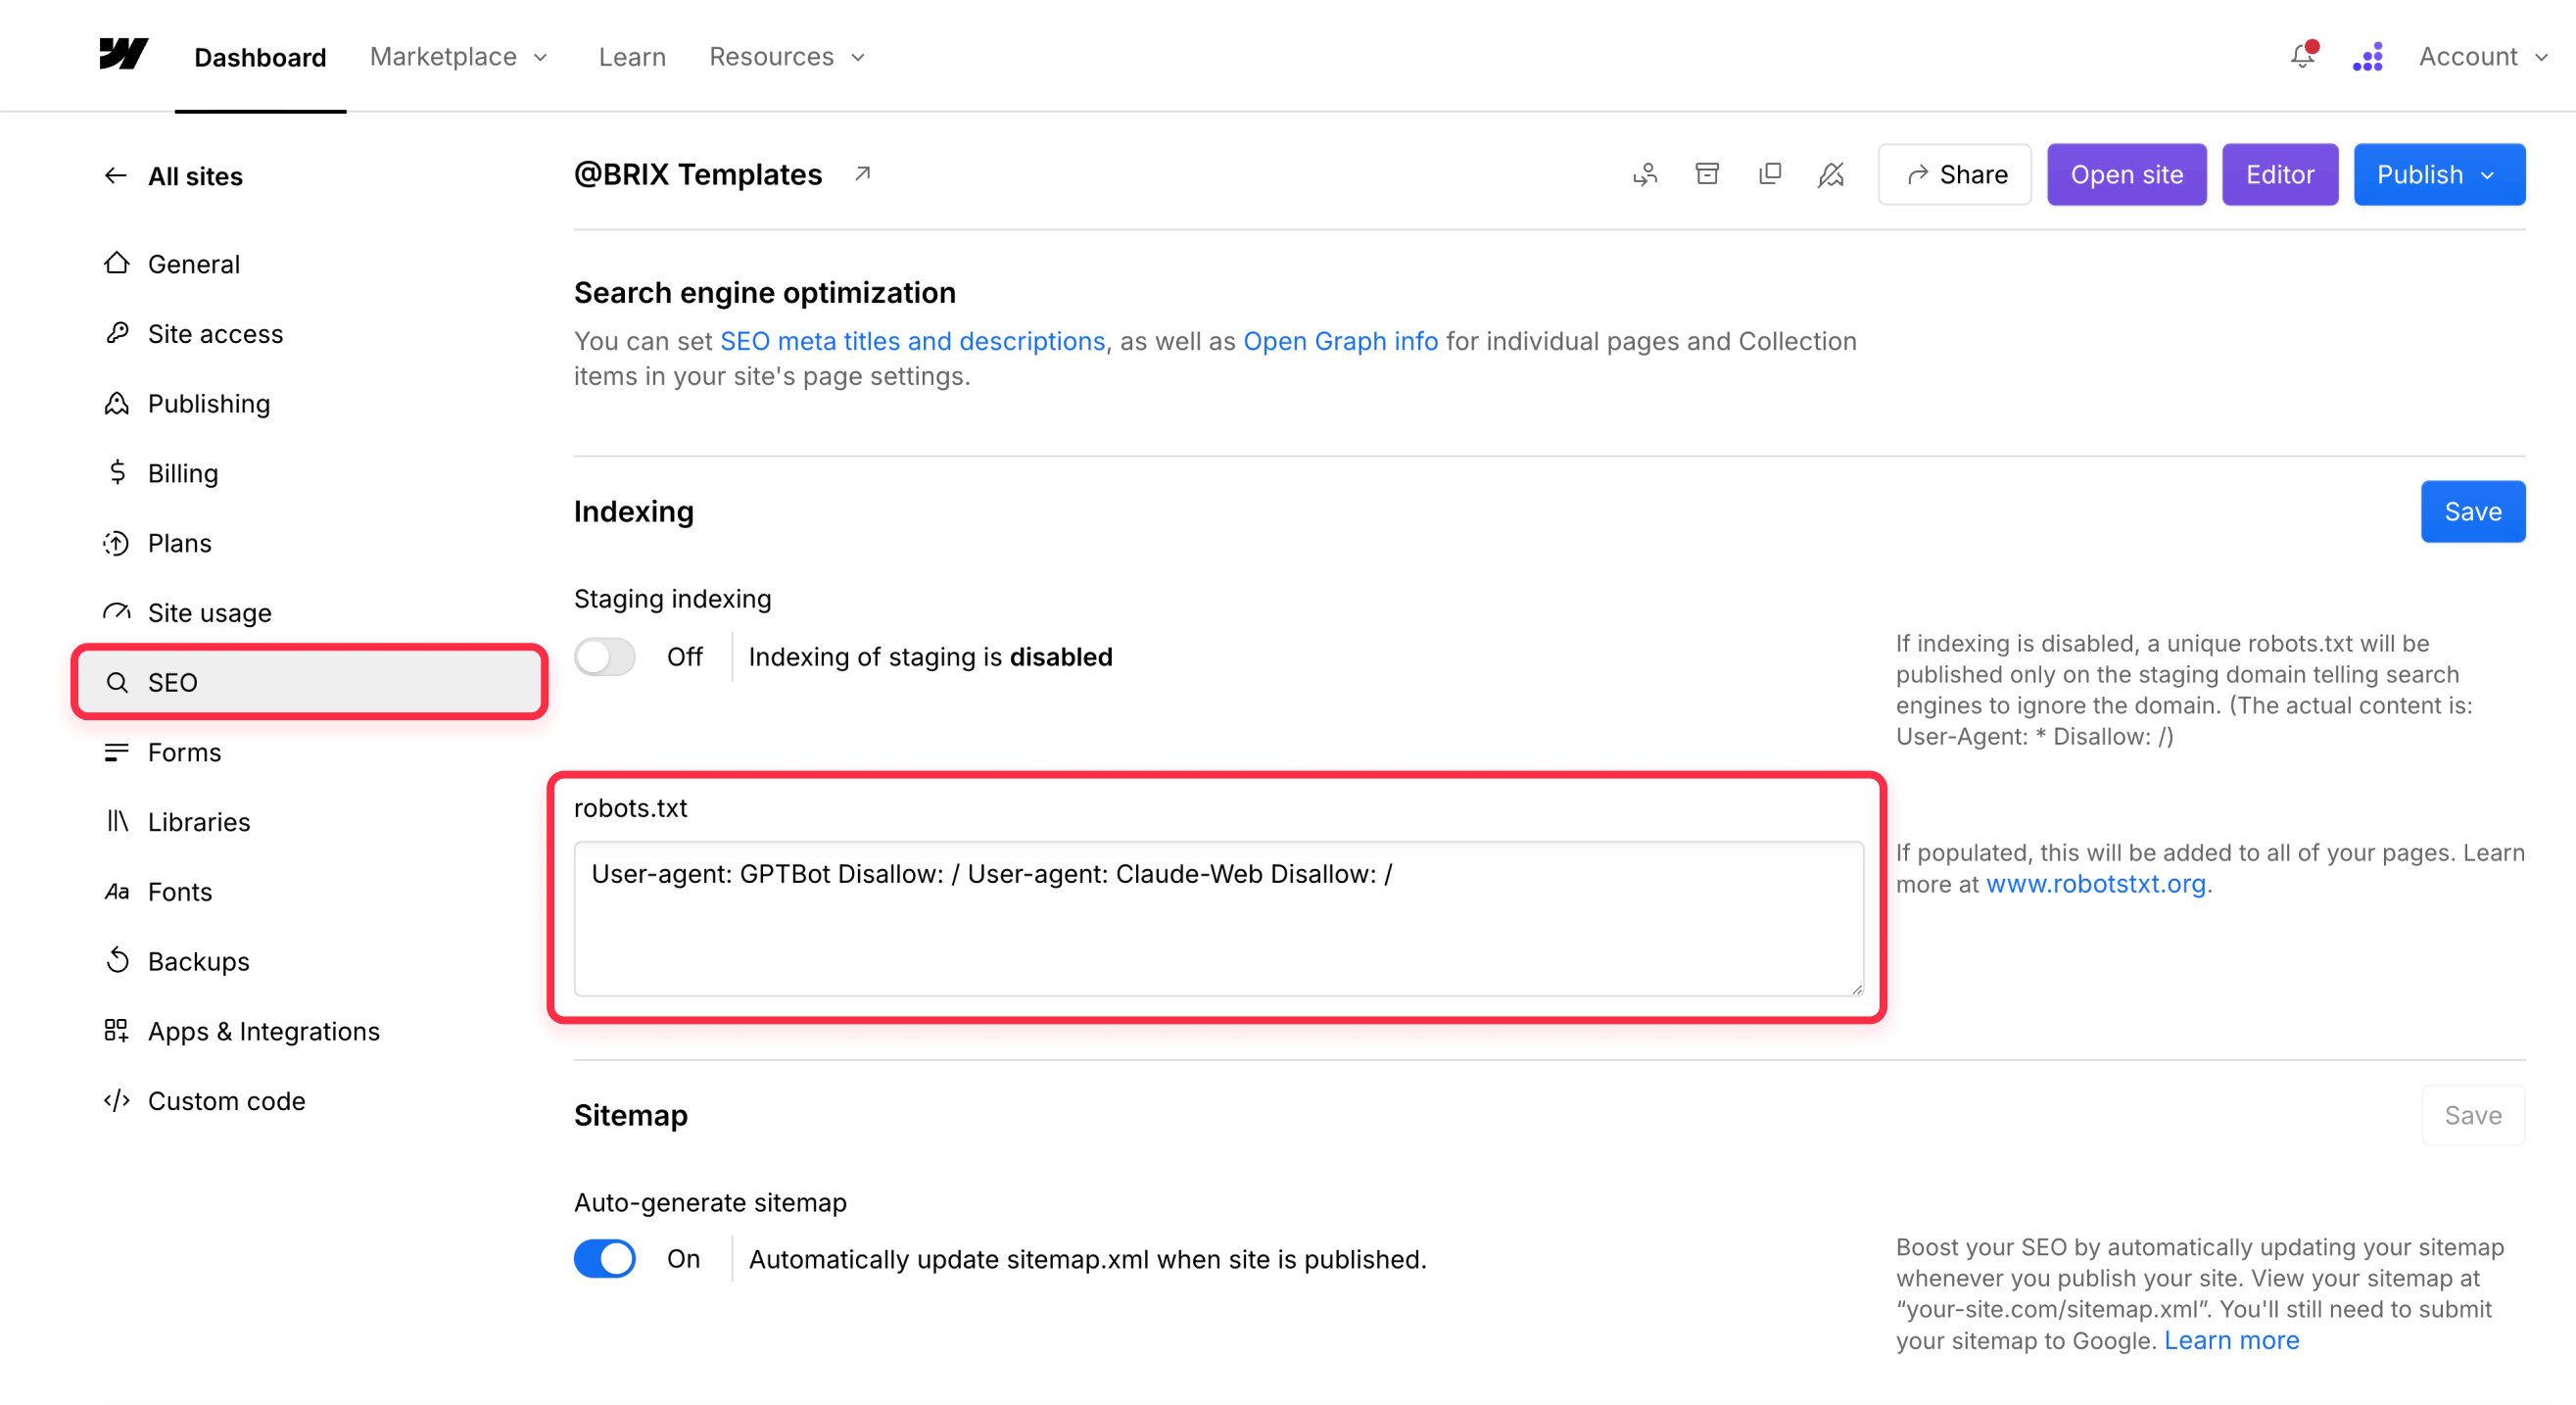
Use robots.txt to disallow crawling of resource-heavy sections, for example:
User-agent: * Disallow: /downloads/ Disallow: /high-res-images/ Crawl-delay: 10
Add HTTP headers like X-Robots-Tag: noindex, nofollow to specific heavy resources you don't want indexed
Advanced Webflow bot management:
- Use Cloudflare's free Bot Fight Mode to challenge suspicious traffic
- Create firewall rules to block specific user agents or IP ranges with unusual patterns
- For Cloudflare Pro users, enable more advanced bot protection features
Handling AI crawlers on Webflow:
Modern AI crawlers can be particularly bandwidth-intensive. Some users have reported single AI crawlers causing hundreds of gigabytes of traffic in a day. Consider adding explicit statements in your robots.txt about AI training permissions, such as:
User-agent: GPTBot Disallow: / User-agent: Claude-Web Disallow: /
Effectively managing bot traffic can significantly reduce bandwidth usage — for a comprehensive walkthrough, read our detailed guide to blocking unwanted bots on your Webflow site. One non-profit site reduced their monthly bandwidth by 40% simply by implementing Cloudflare with bot protection, even as legitimate traffic continued to grow.
Need expert help with your Webflow bandwidth optimization?
If you're finding that these solutions are becoming technically challenging or time-consuming to implement, don't worry. Our team at BRIX Templates specializes in optimizing Webflow sites for performance and bandwidth efficiency.
We can help you implement the right combination of strategies for your specific site needs, whether that's setting up FlowDrive integration, configuring Cloudflare properly, or implementing custom solutions tailored to your unique requirements.
Contact us for a consultation on how we can help you reduce your Webflow bandwidth usage while maintaining your site's performance and user experience.
Advanced Webflow bandwidth optimization tactics
For high-traffic websites or those with special requirements, these advanced techniques can provide maximum bandwidth efficiency:
Cloudflare Workers and reverse proxy approaches for Webflow
One of the most powerful ways to reduce Webflow bandwidth is to implement a reverse proxy using Cloudflare Workers:
- Cloudflare Orange-to-Orange (O2O) setup for Webflow:
- Webflow sites created after April 21, 2025 are already on Webflow's newer Cloudflare-based hosting, which simplifies the setup
- For older sites, you may need to update your DNS records before using O2O – check with Webflow Support if unsure
- The preferred configuration is Cloudflare Orange-to-Orange (O2O), which allows Cloudflare to sit in front of Webflow's own Cloudflare infrastructure without SSL conflicts
- Add your domain to Cloudflare and enable the proxy (orange cloud)
- Advanced Cloudflare Workers implementation for Webflow:
- Create a Cloudflare Worker script that intercepts requests to your Webflow site
- Rewrite asset URLs to serve from your domain instead of Webflow's CDN
- Cache HTML pages and assets at Cloudflare's edge, drastically reducing requests to Webflow
- Benefits: A well-implemented Cloudflare proxy can in some cases reduce Webflow bandwidth usage by 50-90%, as most content is served from Cloudflare's cache instead of repeatedly pulling from Webflow's servers. If you haven't yet connected your domain to Cloudflare, start with our guide to connecting your domain to Webflow through Cloudflare.
- Considerations: This approach requires careful configuration to ensure Webflow's Editor, forms, and other dynamic features continue to function properly. You'll need to set up special rules to bypass caching for editor sessions and form submissions.
Exporting your Webflow site (not recommended)
As a last resort, you can export your Webflow site's code and host it elsewhere:
- What you get: Webflow provides the HTML, CSS, JS, and static assets of your site, which you can host on platforms like Netlify, Vercel, or AWS with typically higher or cheaper bandwidth allowances. For more details on what's included and lost when exporting, see our complete guide to Webflow code export.
- What you lose: Exported sites lose all dynamic features:
- CMS content and collection pages
- Form handling
- Site search
- Editor access for content updates
- Use cases: This approach may be viable for static marketing sites or landing pages that don't change frequently and don't rely heavily on Webflow's CMS or Editor.
- Alternatives: Before exporting, consider integrating a headless CMS with your Webflow site, where content editors still use Webflow's interface but the front-end is served elsewhere.
While exporting gives you complete control over hosting, the loss of Webflow's content management and easy updates makes this a less attractive option for most sites. It's generally better to optimize within Webflow's ecosystem using the strategies outlined above.
Conclusion and final recommendations
Key takeaways about Webflow bandwidth optimization
Optimizing your Webflow site's bandwidth usage is increasingly important given the reduced limits and the new Premium plan structure. The most effective approaches include:
- Start with the basics — optimize images, implement lazy loading, and clean up unused code. These simple steps can often reduce bandwidth by 30-50%.
- For media-heavy sites, offload large files to external services. Videos, large images, and downloadable files are typically the biggest bandwidth consumers.
- Consider dedicated tools like FlowDrive or VidzFlow that integrate seamlessly with Webflow while moving bandwidth-intensive assets off Webflow's servers.
- For high-traffic sites, implement caching or asset serving through Cloudflare to decrease a big majority of your bandwidth usage.
- Don't forget about bot traffic, which can sometimes account for significant unexpected bandwidth usage. Implementing bot protection measures can yield substantial savings.
By implementing these strategies, you can maintain your site's performance and user experience while staying within your Webflow bandwidth limits and avoiding unexpected overage charges.
The level of optimization you need depends on your situation:
- For sites slightly over limit: Focus on quick wins like image optimization and lazy loading
- For media-heavy sites: Implement video offloading and consider tools like FlowDrive or Vidzflow
- For high-traffic sites: Explore advanced caching or asset-serving strategies with Cloudflare
- For sites with unexplained spikes: Investigate and mitigate bot traffic
Remember that bandwidth optimization isn't just about avoiding extra costs—it also improves your site's performance, leading to better user experience and potentially improved SEO.
If you need expert assistance implementing these strategies or developing a custom bandwidth optimization solution for your Webflow site, our agency can help with tailored recommendations and implementation support.
Frequently asked questions about Webflow bandwidth optimization
What is bandwidth usage in Webflow?
Bandwidth usage in Webflow refers to the total amount of data transferred from your website to visitors' browsers when they access your site. This includes all HTML, CSS, JavaScript, images, videos, and downloadable files that are served each time someone views a page. Webflow measures bandwidth on a monthly basis. For the standard paid Site plans covered in this guide, Basic includes 10 GB, while Premium includes 50 GB by default and can scale with bandwidth add-ons.
How does Webflow calculate bandwidth usage?
Webflow calculates bandwidth usage by measuring the total bytes transferred from their servers to users' browsers when they visit your site. This calculation includes every asset served—HTML, CSS, JavaScript files, images, videos, fonts, and downloadable resources.
Importantly, Webflow counts both human and bot traffic, including search engine crawlers and AI scrapers. Even 404 errors and redirects contribute to your bandwidth total. For example, if your homepage is 1.5 MB in size and receives 1,000 visits, that's 1.5 GB of bandwidth used just for that page.
What happens if I exceed my Webflow bandwidth limit?
For Basic plans, your site may be upgraded to a higher tier. For Premium plans, Webflow can add bandwidth extensions to scale your allowance up to 2.5 TB. These changes happen automatically and will affect your next billing cycle. To avoid surprises, set up regular monitoring of your bandwidth usage through Webflow's Site Usage dashboard. For a full breakdown of plan costs and bandwidth add-ons, see our Webflow pricing guide.
How much does Webflow bandwidth overage cost?
For exact add-on pricing at each bandwidth tier, refer to our Webflow May 2026 pricing changes article, which includes a pricing calculator, or our complete Webflow pricing guide.
How do I check my current Webflow bandwidth usage?
To check your current Webflow bandwidth usage, log into your Webflow account and navigate to your project. Click on "Project Settings" in the left sidebar, then select the "Site Usage" tab. Within this section, you'll find a detailed breakdown of of your bandwidth consumption by page and asset.


Join readers commenting on this post!