
If you're considering moving your Webflow site to another hosting provider, or need to deliver HTML files to a client, you've probably wondered: "Can I export my Webflow website?"
The short answer is yes—but there are significant limitations you need to understand first.
Why exporting Webflow code isn't usually recommended
Webflow's greatest strength is its all-in-one platform that seamlessly integrates visual design, content management, hosting, form handling, and user interactions. This is why many consider Webflow a good platform choice in 2025 despite some limitations. This integrated ecosystem makes website building and management remarkably efficient.
When you export your Webflow site, you're effectively breaking this ecosystem apart. You'll maintain your design and visual elements, but lose all the dynamic features that make Webflow so powerful. This means you'll need to reconstruct each dynamic feature separately, often requiring multiple third-party services, custom code, or significant technical knowledge.
Most designers and agencies find that the convenience, reliability, and integrated workflows of Webflow hosting far outweigh any potential cost savings from self-hosting an exported site. However, there are valid reasons why you might need to export—from compliance requirements to client handoffs—which is why understanding the process is valuable.
Overview of Webflow code export options ahead
In this guide, we'll examine exactly what happens when you export a Webflow site—what you keep, what you lose, and why it matters. We'll explore practical methods for exporting your Webflow site effectively, including both official and community-created tools.
We'll then dive into replacing each missing Webflow feature: content management, forms, search functionality, ecommerce, and membership systems. Finally, we'll provide implementation tips to help you decide whether exporting makes sense for your particular situation.
Whether you're considering export for a specific project or just exploring your options, this guide will give you a clear understanding of what's involved and help you make an informed decision.
The reality of exporting Webflow code directly
What you actually get in a Webflow code export
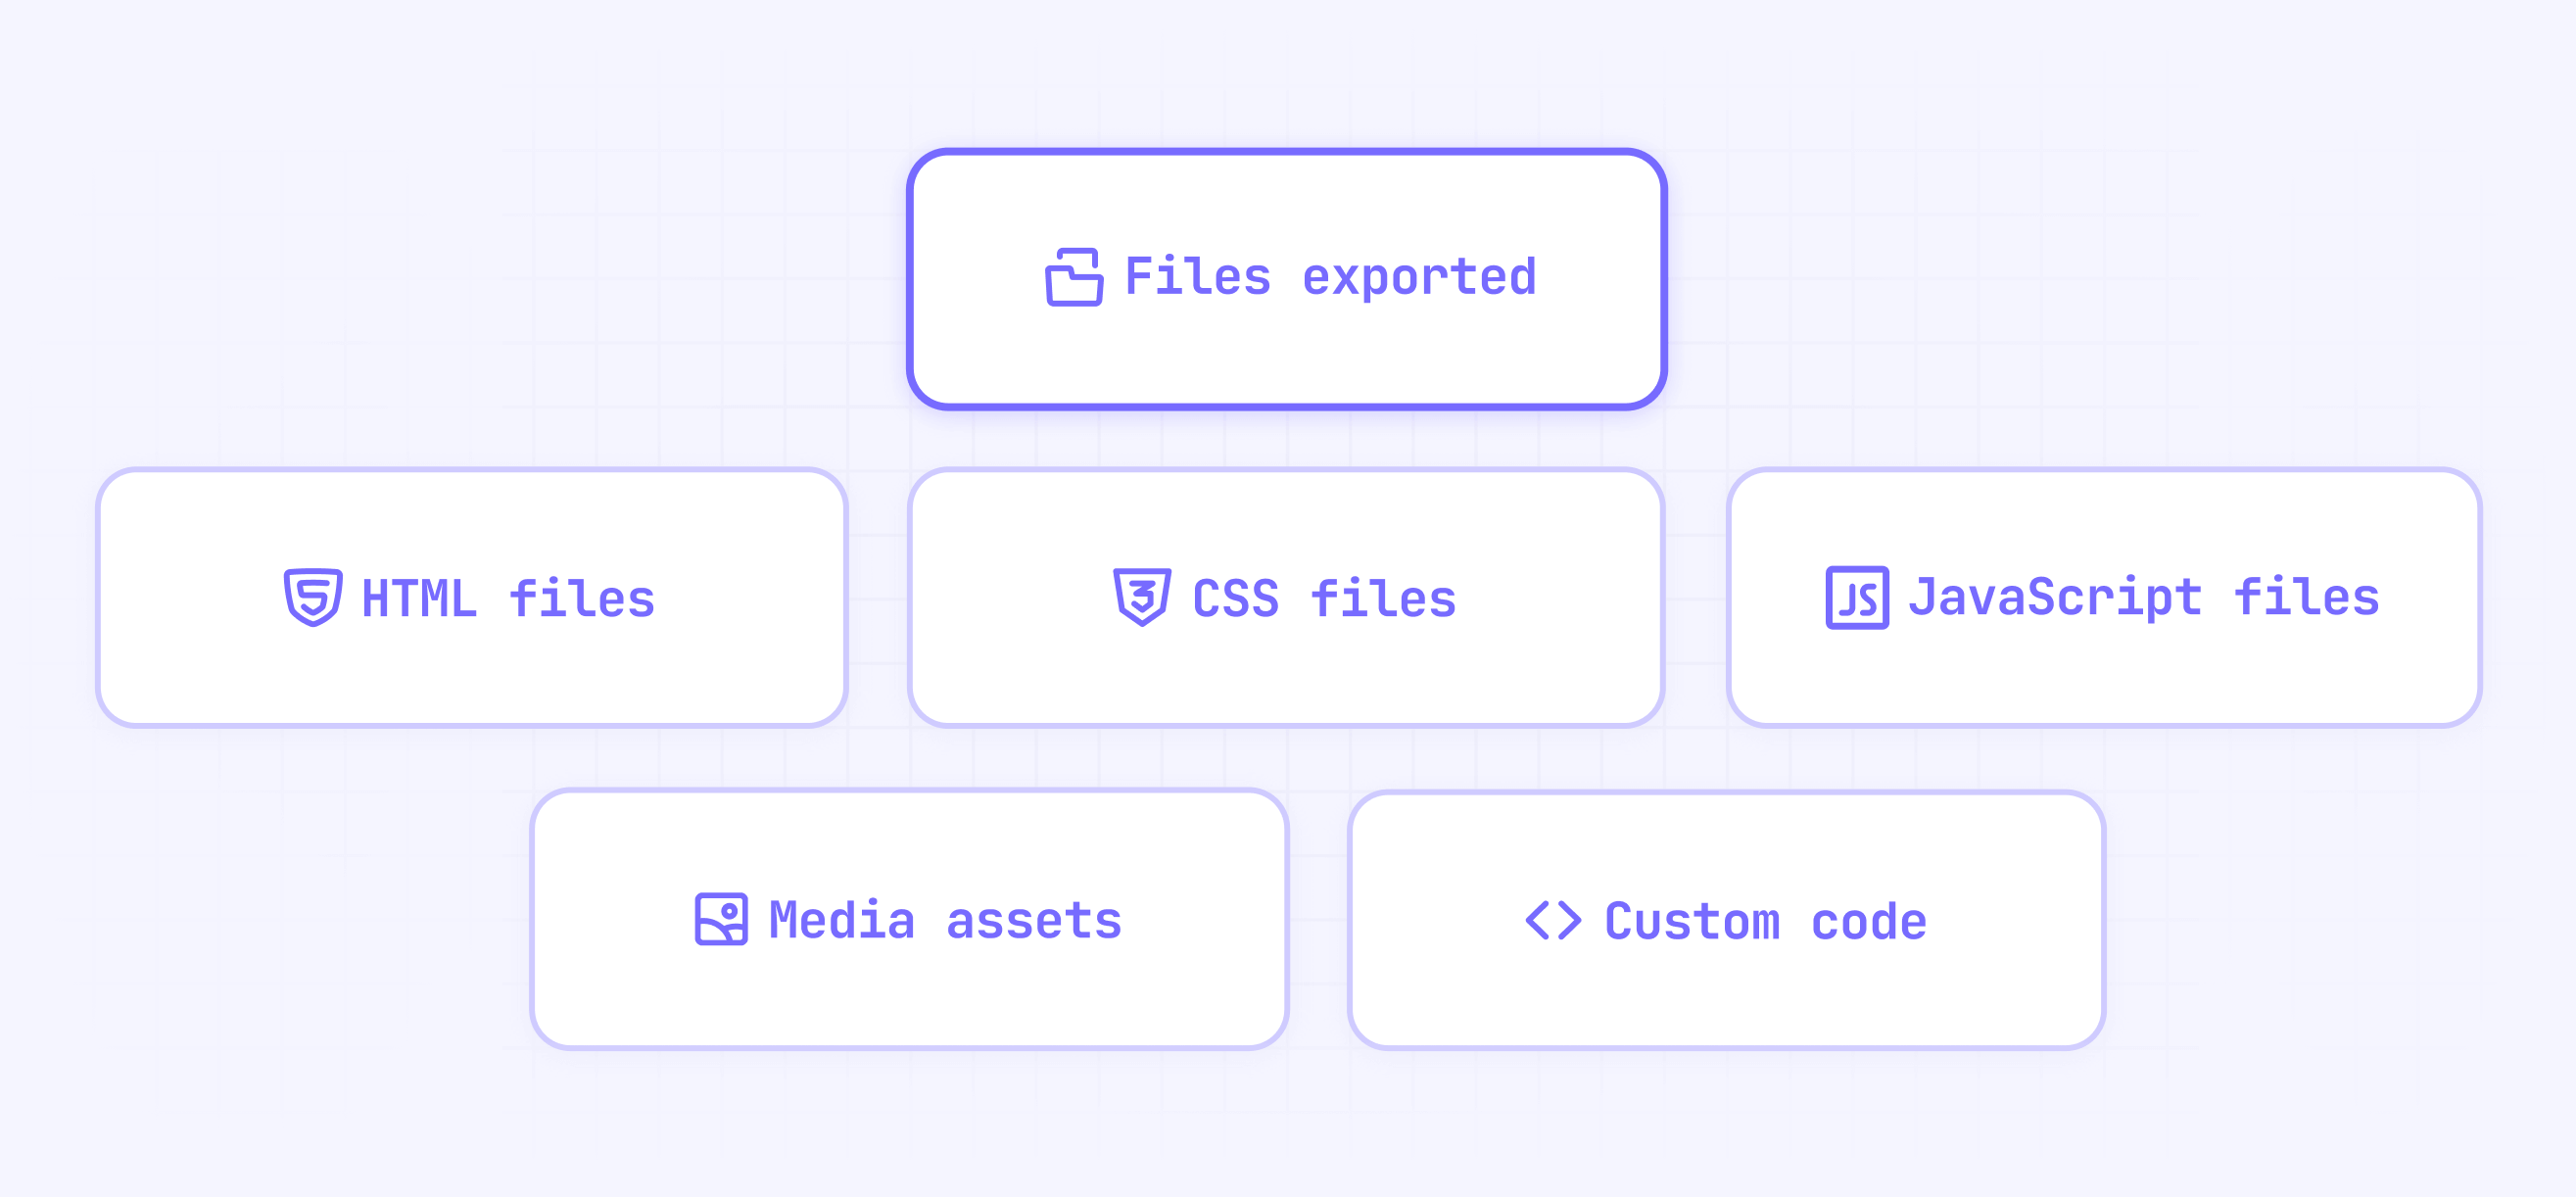
When you export your Webflow site, you'll receive a neatly organized ZIP file containing:
- All your HTML files with their structure and content intact
- CSS files (including both Webflow's core styling and your custom styles)
- JavaScript files (including Webflow's interaction engine)
- Image assets and other media
- Custom code snippets you've embedded (unless they reference CMS data)
Your site's visual design will remain identical—including responsive layouts, animations, and interactive elements. This is because Webflow's interactions are client-side (running in the user's browser), so they continue to function as long as the webflow.js file is included.
For example, if you've created complex animations, hover states, or scroll-based effects, these will all work perfectly on your exported site. The same applies to navigation menus, accordions, tabs, and other interactive UI components that Webflow provides.
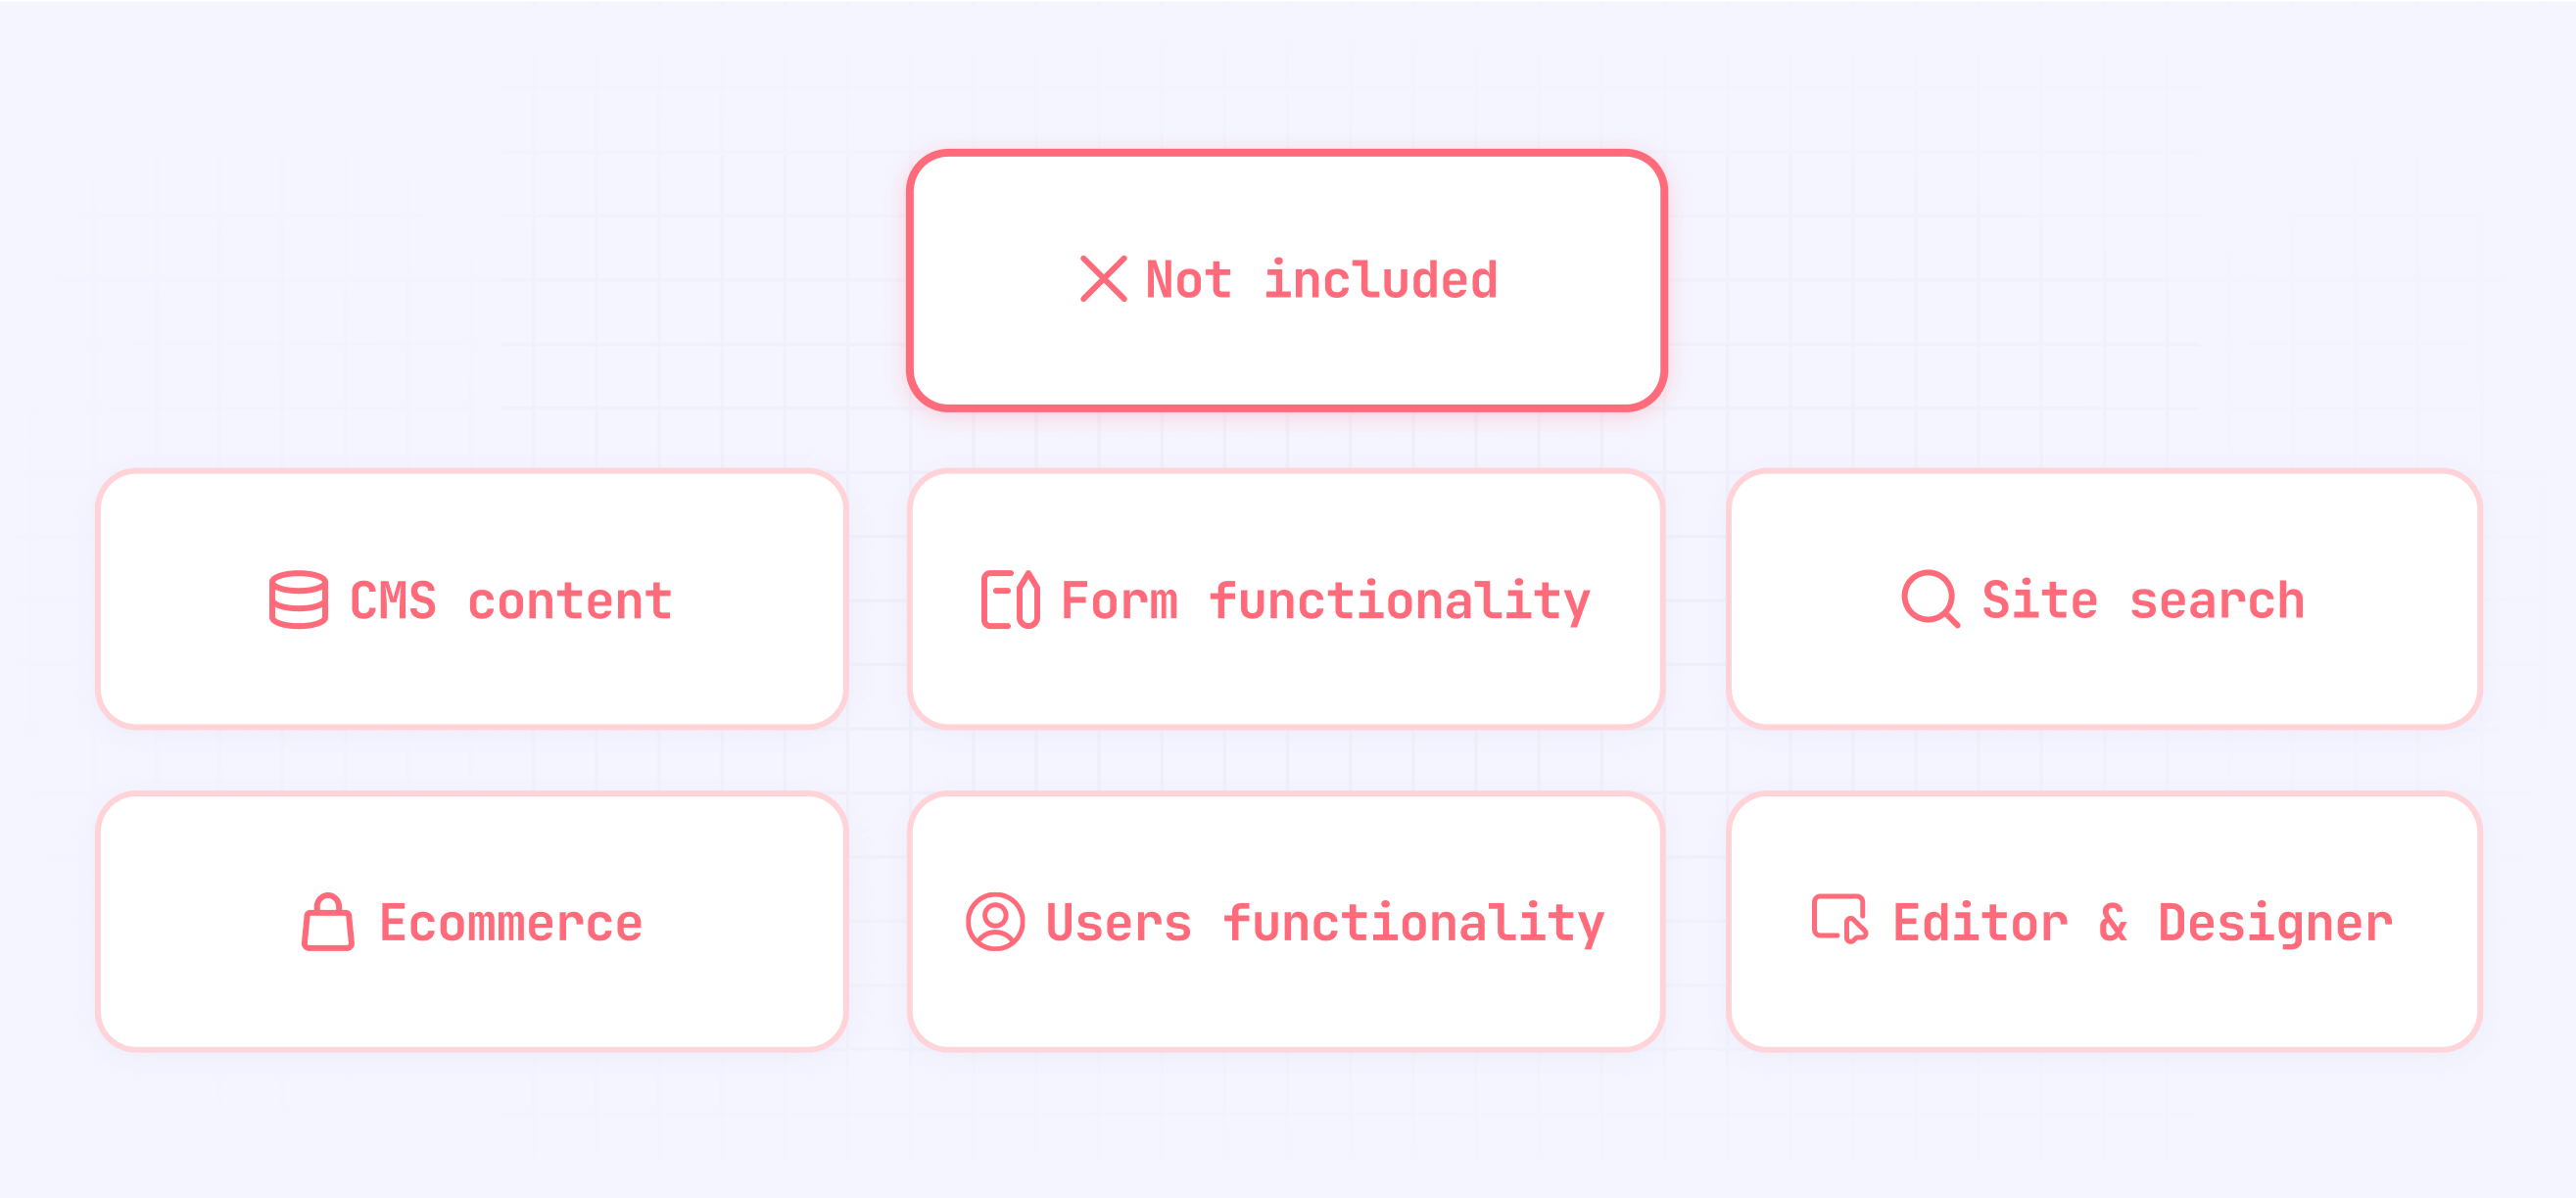
What you don't get in a Webflow export (and why it matters)
Despite preserving your design, the export process strips away all server-side and dynamic functionality:
- CMS content: Collection lists will appear empty, and collection template pages won't generate individual item pages. The HTML structure exists, but no dynamic content appears.
- Form submissions: Forms will display properly but won't actually send data anywhere, as they rely on Webflow's backend processing.
- Site search: Search functionality breaks completely since it depends on Webflow's content indexing.
- Ecommerce: Product lists, shopping carts, and checkout processes simply won't function.
- Membership/user accounts: Login forms won't work, and previously protected pages become publicly accessible.
- Editor and Designer access: You lose the ability to update content through Webflow's Editor interface or make design changes in the Designer.
These limitations aren't minor inconveniences—they represent core functionality that you'll need to rebuild from scratch if they're essential to your site. For instance, if your site relies heavily on CMS-driven content (like a blog or portfolio), you'll face the significant challenge of implementing a new content management system and migrating all your data.
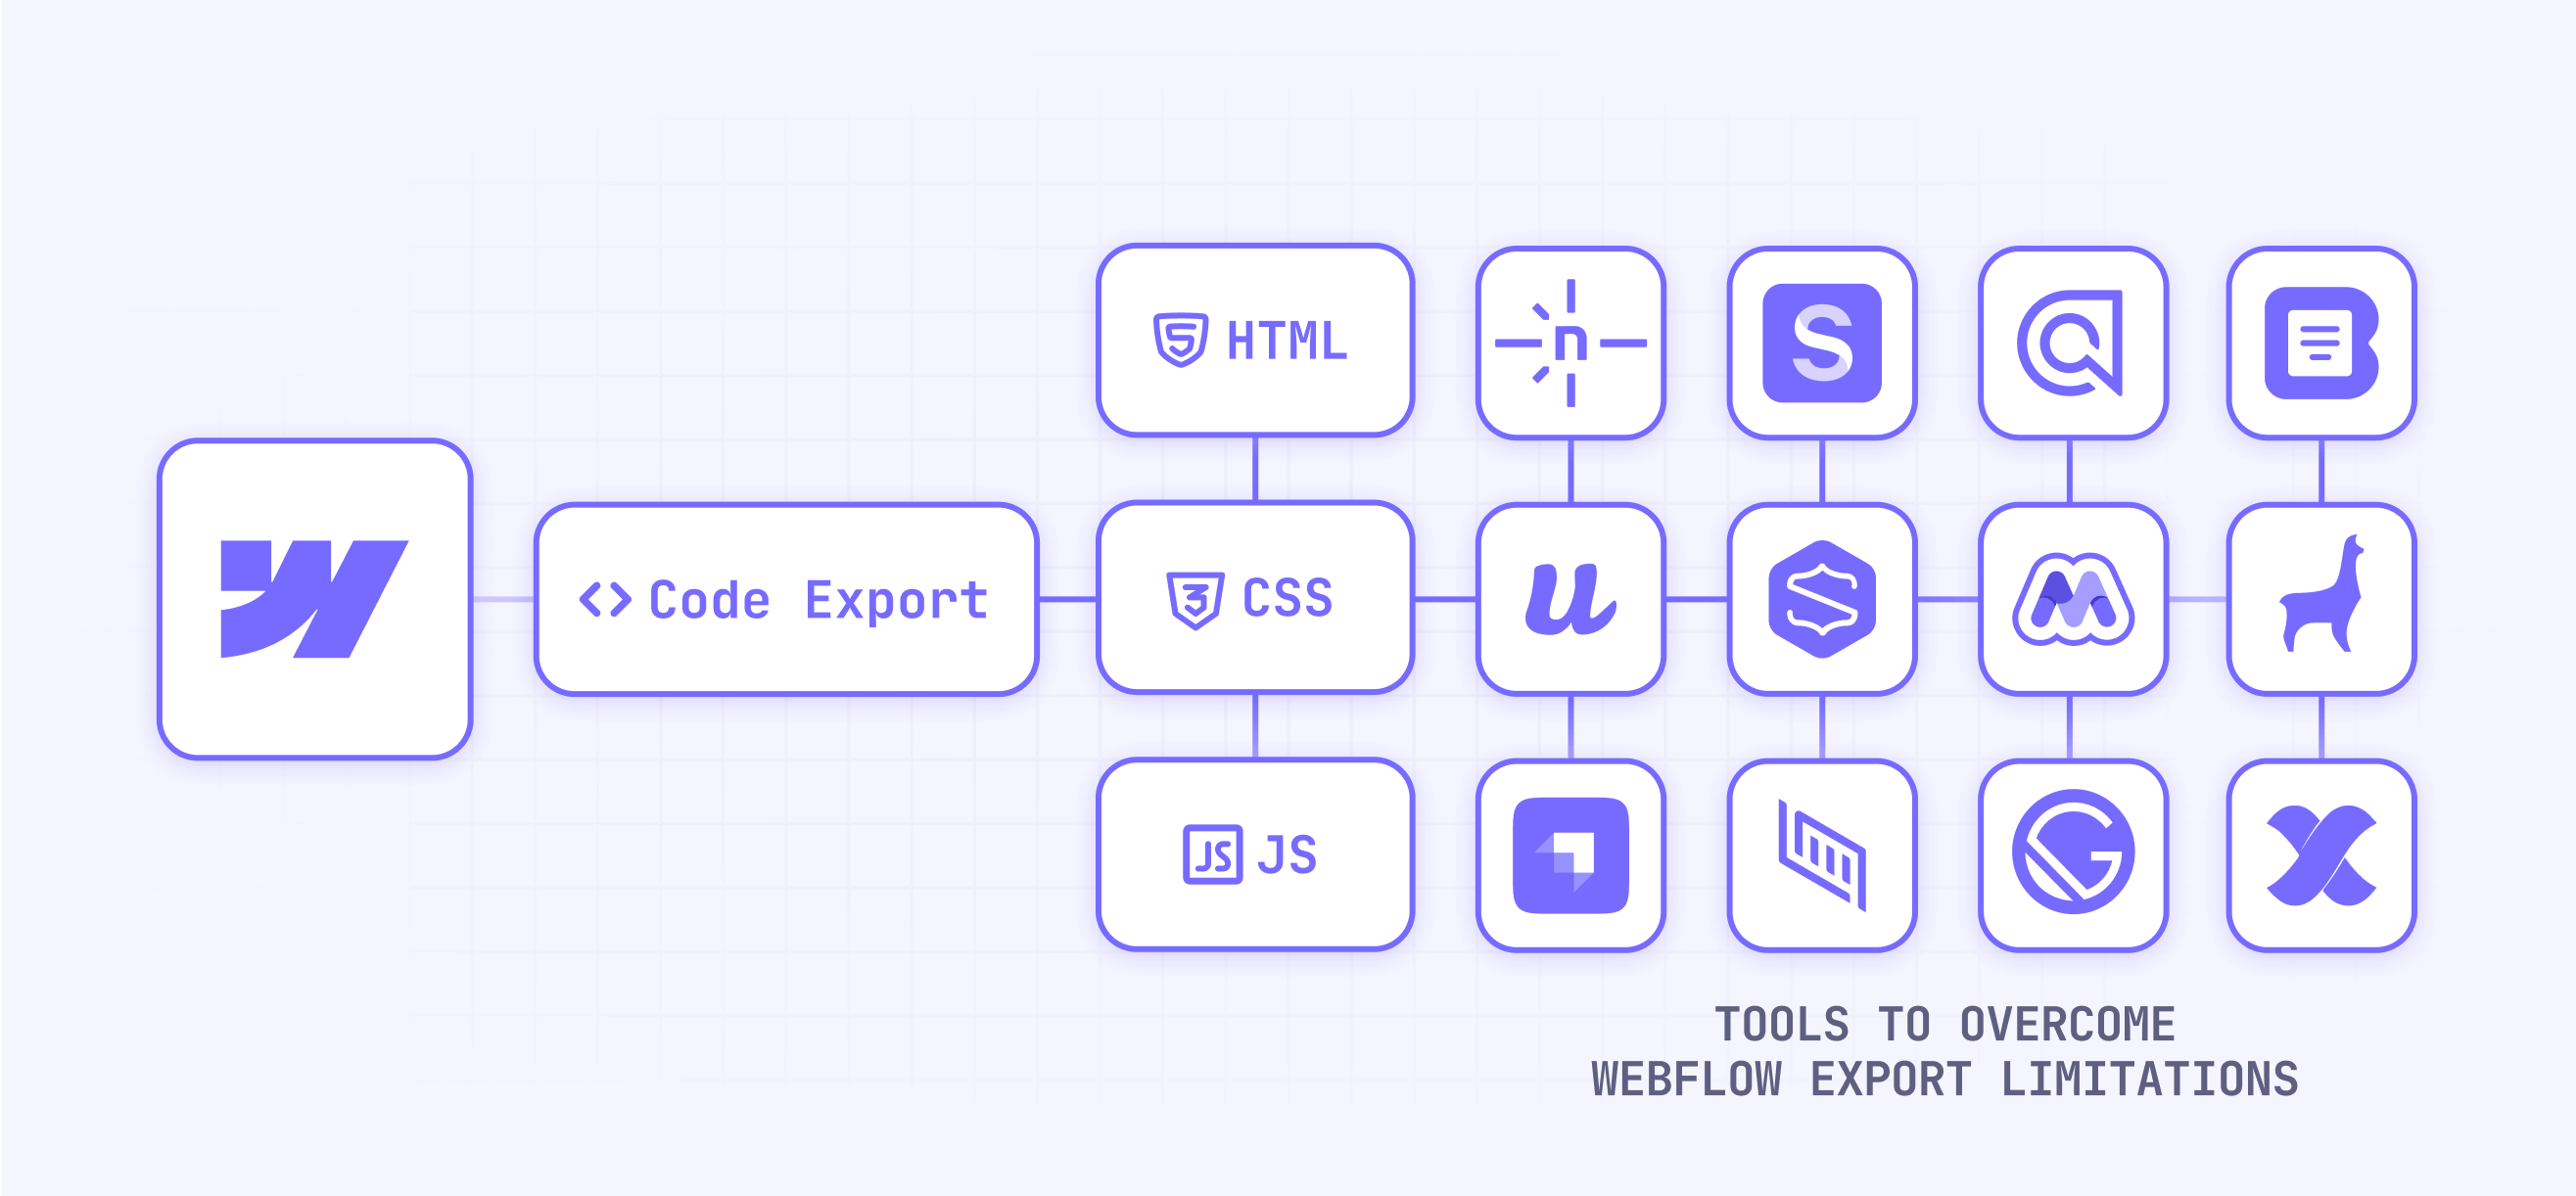
Different approaches to export Webflow sites
Official Webflow code export method
The standard way to export your site is directly through Webflow:
- Go to the Webflow Designer
- Select the top left hamburger menu and click on Export code option
- Download the ZIP file containing your site files
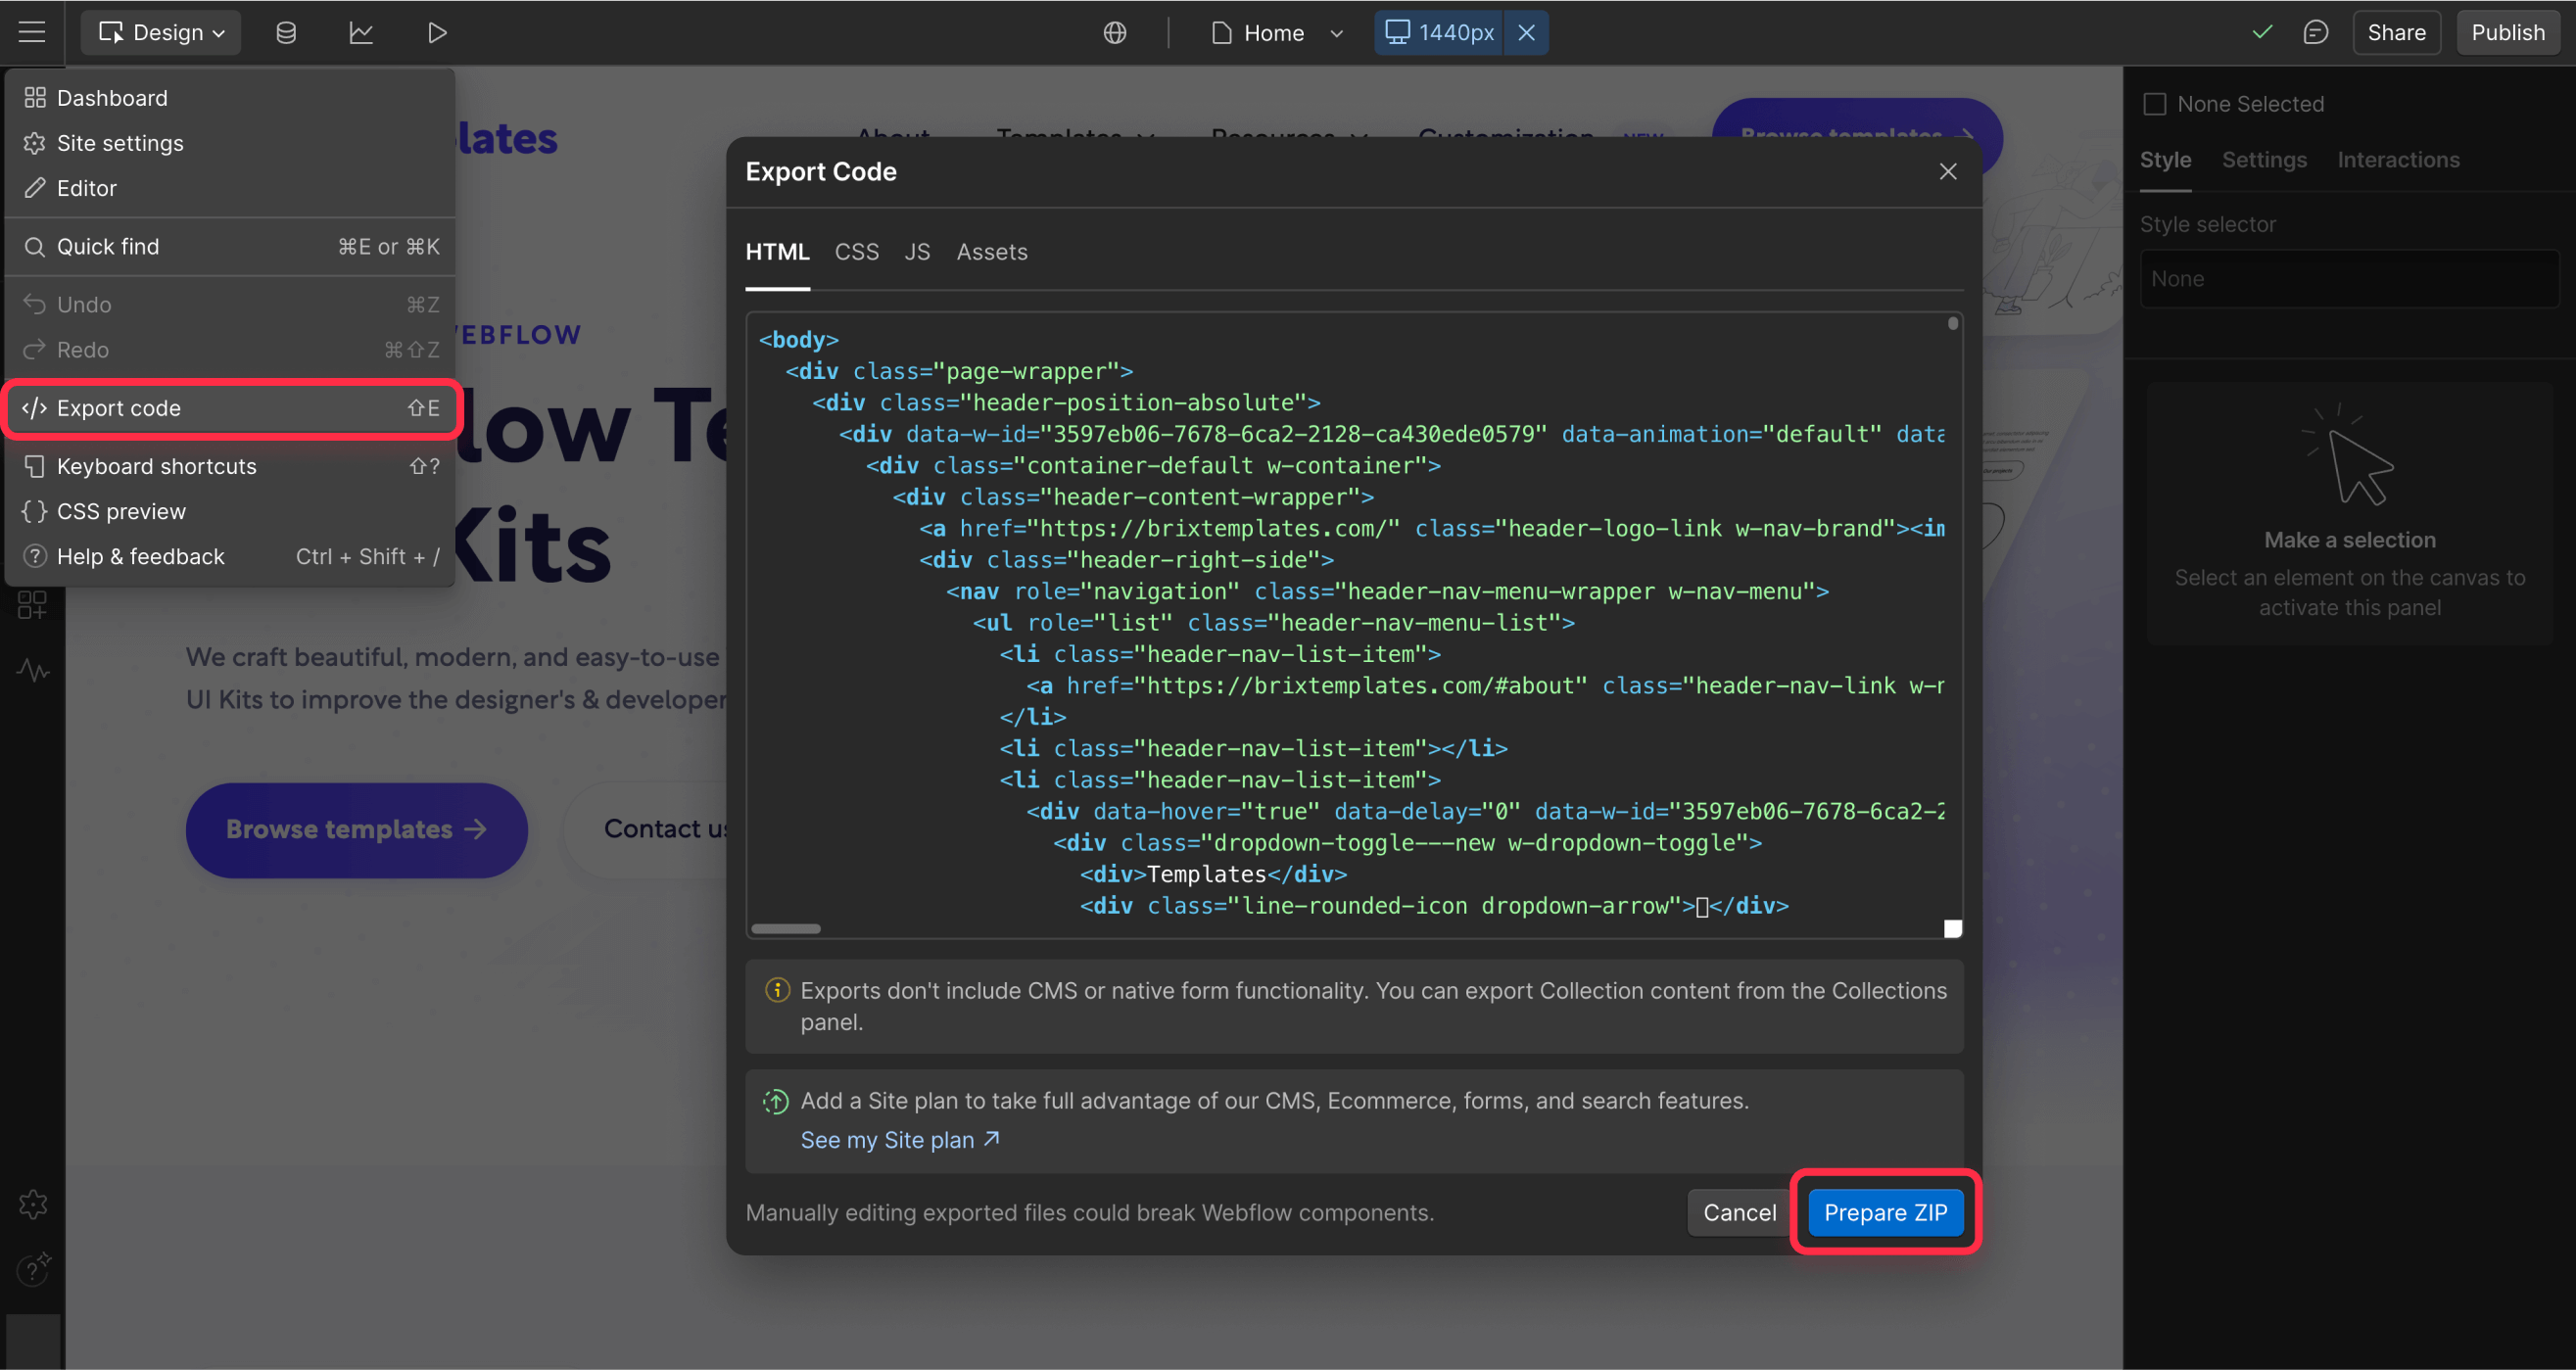
This method gives you clean, well-organized code that's ready to be hosted anywhere. However, as mentioned earlier, you only get the static elements of your site—no CMS content, form handling, or other dynamic features.
Using Wget and web scraping tools for Webflow exports
A popular community approach for preserving CMS content involves using web scraping tools:
Wget (for Mac/Linux), HTTrack (for Windows), or SiteSucker (for Mac) can crawl your published Webflow site and save every page as static HTML, including those generated from your CMS collections. This creates a complete snapshot of your site as it currently exists.
The process typically involves:
- Installing the scraping tool on your computer
- Running a command that specifies your Webflow site URL
- Waiting while the tool visits and downloads each page
- Uploading the resulting files to your hosting provider
The advantage is that you capture all current content, including CMS-generated pages that the official export omits. However, these remain static snapshots—you can't update them without repeating the scraping process.
Converting Webflow exports with Udesly
Udesly offers a more sophisticated solution for maintaining dynamic content after export. This paid service converts your Webflow export into various formats:
- WordPress theme: Maps Webflow collections to WordPress custom post types
- Shopify theme: Converts Webflow designs to Shopify-compatible templates
- Jamstack project: Transforms your site into an Eleventy static site with Netlify CMS
The conversion process preserves your design while enabling ongoing content management through the target platform. However, you'll need to re-export and re-convert whenever you make design changes in Webflow, which can create workflow challenges for sites that change frequently.
Using ExFlow for whole-project Webflow exports
ExFlow is a community-built tool specifically designed to help with the CMS limitation of Webflow exports. Unlike the official export, ExFlow attempts to capture all your CMS-generated pages as static HTML files.
The service works by:
- Taking your Webflow site URL (i.e. yourdomain.com)
- Crawling through all pages, including CMS template pages
- Generating a ZIP file with complete static pages
ExFlow offers both free and paid tiers (starting at $5.99/month for Standard and $15.99/month for Professional), with the paid options providing additional features like Git integration, custom scripts, and automatic site hosting. This can be a good middle-ground solution if you need a simple way to export CMS content without setting up scraping tools yourself.
Developer-centric approaches to Webflow exports
For teams with development resources, more advanced options exist:
- Static site generators (like Eleventy, Gatsby, or Next.js) can pull content from Webflow's CMS API to build a static or server-rendered site
- Custom integration scripts can sync Webflow CMS data to external databases or content platforms
- Headless Webflow approaches use Webflow purely for content management while building the front-end separately
These approaches require significant technical knowledge but offer the most flexibility. For instance, a development team might keep content editors working in the familiar Webflow CMS while deploying the site through a custom CI/CD pipeline to specialized hosting.
Important: Webflow Terms of Service considerations
Before diving into ways to replace Webflow's features, it's important to understand that some approaches may conflict with Webflow's Terms of Service or recommended best practices. Specifically:
- Scraping content from a Webflow site (even if it's your own) could potentially violate Webflow's terms depending on how it's done
- Using proxies or intermediaries like CryoLayer might fall into a gray area regarding Webflow's hosting policies
- Some methods may circumvent Webflow's intended business model, which is designed around their hosting platform
While many developers and agencies use these techniques without issue, you should proceed with caution and ideally consult with Webflow support or review their current Terms of Service before implementing any solution that seems to work around Webflow's intended workflows.
Additionally, remember that implementing these alternative solutions often creates technical debt and maintenance challenges that may outweigh the benefits of exporting in the first place.
Replacing Webflow's missing features
Alternative CMS options for exported Webflow sites
When you export your Webflow site, you'll need a new way to manage dynamic content. Here are your main options:
Headless CMS platforms:
- Contentful: A robust enterprise-grade headless CMS with a generous free tier
- Sanity: Developer-friendly CMS with customizable editing interfaces
- Strapi: Open-source headless CMS you can self-host

Static site CMS options:
- Netlify: Open-source CMS that works with static site generators
- TinaCMS (formerly Forestry): Git-based CMS for managing markdown content
- WordPress: Using Udesly to convert your Webflow site to a WordPress theme
The implementation process typically involves:
- Exporting your CMS content from Webflow (via CSV export)
- Setting up your chosen CMS platform
- Importing or recreating your content structure and data
- Modifying your exported HTML to pull content from the new source
Remember that any CMS replacement will require a different content editing workflow than what you had in Webflow—usually with less visual editing capability and a steeper learning curve for non-technical editors.
External form handling solutions for Webflow exports
Form functionality can be restored using third-party services that specialize in form handling:
Popular form solutions:
- Formspree: Simple form endpoint service with notification emails
- Basin: Form backend with spam filtering and file uploads
- Netlify Forms: Integrated form handling if hosting on Netlify
Implementation typically requires:
- Locating your form in the exported HTML
- Changing the form's action attribute to point to your chosen service
- Potentially removing or modifying Webflow's form JavaScript to prevent conflicts
- Testing submission flow and confirmation messages
For example, if using Netlify Forms, you would add the attribute data-netlify="true" to your form element and potentially add a success page URL. Formspree requires pointing your form action to a unique endpoint they provide.
The good news is that your form's visual design and field validation will typically remain intact—you're just changing where the data gets sent when someone submits the form.
Implementing search functionality in exported Webflow sites
Replacing Webflow's site search requires implementing a third-party search solution:
Algolia offers a powerful search API that can be integrated into static sites. The process involves:
- Creating an Algolia account
- Indexing your content (either via API or their crawler)
- Implementing their search UI library on your site
- Customizing the appearance to match your design

Google Programmable Search Engine provides a simpler alternative:
- Create a Google Programmable Search Engine configuration
- Restrict the search to your domain
- Embed the search box on your site
- Optionally customize the appearance

For smaller sites, client-side search libraries like Lunr.js or Fuse.js can index a JSON file of your content and search it directly in the browser—no external service required, but limited to smaller content sets.
Adding ecommerce to exported Webflow sites
If your Webflow site includes ecommerce functionality, you'll need to rebuild it using external services:
Foxy.io (formerly FoxyCart) is popular among Webflow exporters because it:
- Works with any static HTML site
- Handles the entire checkout process
- Manages product data, inventory, and orders
- Supports subscriptions and complex product options

Snipcart offers another well-regarded solution that:
- Adds to cart directly from your HTML
- Provides a customizable cart overlay
- Manages products, inventory, and shipping options
- Integrates with numerous payment gateways

Shopify Buy Button can be a good option if you're already familiar with Shopify. It embeds buyable products into any website while leveraging Shopify's robust backend.
Implementation typically involves adding the service's JavaScript to your site and marking up product elements with specific data attributes that tell the cart system what's being purchased.

Membership and login solutions for Webflow exports
For sites requiring user accounts or gated content, these services can replace Webflow's membership functionality:
Memberstack is designed specifically with Webflow in mind and:
- Handles user registration and login
- Controls access to content based on membership level
- Processes payments for paid memberships
- Shows/hides elements based on login state
Outseta provides a more comprehensive solution that includes:
- User authentication
- CRM functionality
- Email marketing tools
- Support ticketing
Both services work by adding JavaScript to your site that controls content visibility based on user login state. Implementation involves:
- Adding the service's script to your site
- Adding specific data attributes to elements that should be shown/hidden based on login state
- Setting up membership plans and access rules
- Testing the login flow and content restrictions
Note that these front-end solutions don't provide the same level of security as server-side authentication—determined users could potentially find hidden content in your HTML. For truly sensitive information, you'd need a more robust server-side solution.
Conclusion & final recommendations
Exporting your Webflow site gives you complete control over your hosting environment, but at the cost of significant functionality. You'll keep your design, layout, and client-side interactions, but lose all dynamic features that rely on Webflow's servers.
Replacing these features requires implementing various third-party services or custom solutions. While entirely possible, this process introduces complexity, ongoing maintenance requirements, and potentially higher costs spread across multiple platforms.
Who should (and shouldn't) export their Webflow site
Exporting makes sense if you:
- Have specific compliance or regulatory requirements that mandate self-hosting
- Need full control over server environment for security or performance reasons
- Have development resources available to maintain the exported site and its integrations
- Only need a static snapshot of a site (e.g., for archival purposes)
- Are building a custom application where Webflow serves primarily as a design tool
Staying on Webflow hosting is better if you:
- Regularly update content through the Webflow Editor
- Rely heavily on the CMS for dynamic content
- Need integrated forms, search, or membership features
- Want a maintenance-free hosting solution
- Don't have technical resources to implement and maintain alternatives
- Value the time savings of an integrated platform over potential cost savings
For most users—especially those leveraging Webflow's Designer, Webflow Editor, and he dynamic features of Webflow CMS—the convenience and integrated workflow of Webflow hosting far outweighs the potential benefits of exporting. The time and resources required to rebuild and maintain these features elsewhere often exceed any cost savings from alternative hosting.
If you need help evaluating whether exporting is right for your project, or assistance implementing a smooth transition to self-hosting, our agency can provide expert guidance tailored to your specific requirements.
Frequently asked questions about Webflow code export
What Webflow features don't work after exporting code?
After exporting code from Webflow, several key dynamic features stop functioning because they rely on Webflow's servers. The CMS functionality breaks completely—collection lists appear empty, and no collection item pages are generated. Forms won't submit data anywhere, as they require Webflow's backend processing.
Site search functionality stops working since it depends on Webflow's content indexing. Any ecommerce components (product listings, carts, checkout) become non-functional shells.
The Webflow Editor interface becomes inaccessible, meaning content can't be updated through Webflow's visual interface. Password-protected pages lose their protection. 301 redirects configured in Webflow no longer function. Automatically generated sitemaps and RSS feeds are not included.
In essence, anything requiring server-side processing or database access is lost, leaving you with just the static front-end of your site. For each missing feature, you'll need to implement an alternative solution if it's essential to your site.
How do I add a CMS to exported Webflow code?
Adding a CMS to exported Webflow code requires implementing an alternative content management system since Webflow's native CMS functionality doesn't export. The most straightforward approach is using a static site generator with a headless CMS.
For a no-code solution, the Udesly Adapter can convert your Webflow export into a Jamstack site with Netlify CMS integration. After conversion, you'll have a fully functional static site where content editors can update material through Netlify CMS's admin interface.
For more flexibility, export your Webflow CMS content as CSV and implement a headless CMS like Contentful, Sanity, or Strapi. You'll need to modify your HTML templates to pull content from the headless CMS using their JavaScript SDKs or APIs.
Developer teams often create custom solutions using static site generators like Eleventy, Hugo, or Next.js, connecting them to headless CMSs for content editing while maintaining Webflow's design.
The process involves technical work but results in a site that preserves both Webflow's design flexibility and content management capabilities when self-hosted.
How do I restore form functionality in exported Webflow code?
To restore form functionality in exported Webflow code, you'll need to implement a third-party form handling service. First, identify the forms in your exported HTML and locate the <form> elements.
Choose a form service like Formspree, Basin, or Netlify Forms based on your needs and budget. For Formspree (which offers a simple solution), create an account and get your unique form endpoint. Edit each form's HTML to add this endpoint as the form's action attribute: <form action="https://formspree.io/f/yourformid" method="POST">.
For Netlify Forms (if hosting on Netlify), simply add the attribute data-netlify="true" to your form tag and ensure form names are unique. You may need to disable Webflow's form handling JavaScript by adding onsubmit="return true" to the form tag or removing relevant scripts.
Don’t forget to test your Webflow form submissions thoroughly after implementation. For advanced features like conditional logic or file uploads, services like Jotform might be more appropriate.
How to convert Webflow export to WordPress theme?
Converting a Webflow export to a WordPress theme is most efficiently done using the Udesly Adapter tool. This specialized service transforms your Webflow design into a fully functional WordPress theme while preserving your visual design and converting dynamic elements.
The process involves:
- Export your complete Webflow site as a ZIP file
- Sign up for Udesly (paid service) and upload your export
- Configure mapping between Webflow Collections and WordPress post types
- Download the converted WordPress theme
- Install the theme on your WordPress site
- Import your content using WordPress's import tools
The adapter handles the complex conversion of Webflow's class-based styling to WordPress theme structure and creates template files that maintain your responsive design. It even translates Webflow CMS fields to WordPress custom fields.
For developers comfortable with WordPress theme development, an alternative is to manually convert the export by creating WordPress template files (header.php, footer.php, single.php, etc.) and incorporating Webflow's HTML/CSS structure within them. This approach requires significant WordPress development knowledge but offers more customization control.
Do Webflow interactions work after code export?
Yes, Webflow interactions work perfectly after code export as long as you include all necessary files. The webflow.js file included in your export package contains all the code needed to execute animations and interactions created in Webflow's Designer. This includes scroll animations, hover effects, click triggers, and complex multi-state interactions.
Can I export only specific pages from Webflow?
Webflow doesn't provide a native option to export only specific pages. When you use the export feature, it generates a complete package containing all pages, styles, scripts, and assets in your project. This all-or-nothing approach ensures proper functioning of shared components and stylesheets.
However, you can achieve selective exporting through manual methods after the fact. After exporting the full site, you can delete unwanted HTML files and their associated assets, keeping only the pages you need. This approach requires careful handling to avoid breaking dependencies—ensure you retain all CSS, JavaScript, and images referenced by your kept pages.
For a more precise approach, some developers use tools like Wget with specific page filters to download only certain pages from the published site. This can be more accurate for preserving exactly what you need.
Can I edit exported Webflow code manually?
Yes, you can edit exported Webflow code manually, but there are important considerations to ensure successful modifications. The exported code is standard HTML, CSS, and JavaScript, making it fully editable in any code editor like VS Code, Sublime Text, or even simple text editors.
When editing, maintain the file structure to preserve dependencies. The CSS is organized into several files (normalize.css, webflow.css, and your project-specific CSS), so understand which file controls which aspects of your design before making changes.


Join readers commenting on this post!