

Release notes pile up in GitHub every time your team ships, but your Webflow changelog only reflects them once somebody copies each one across by hand. The page your customers actually read is almost always a step behind reality.
The cleaner approach is to treat GitHub Releases as the single source and let automation carry each release into a Webflow CMS collection for you. Webflow has no built-in GitHub sync, so you wire this up with Zapier or Make — or, for advanced teams, a custom API build. Here's the full setup, step by step.
Why sync GitHub Releases to a Webflow changelog
This works well for teams that already treat GitHub Releases as the record of what shipped. The main reasons to do it:
- Engineering stays the source of truth: developers keep shipping in GitHub, and the changelog follows — you never maintain a second, manual copy.
- Less manual copying: once the automation runs, a newly published release can land in Webflow without anyone pasting the notes by hand.
- Content built for design: every release becomes structured CMS fields, so you can compose a polished changelog instead of dumping text on a page.
- Release state you can badge: prerelease status arrives as a field, while drafts should be filtered out or published before they show up — so beta entries are easy to tag.
- Built for SaaS and dev-tool teams: a natural fit for SaaS changelogs, product-update pages, release-notes archives, and open-source projects where devs ship in GitHub and marketing runs the Webflow site.
How a GitHub-to-Webflow changelog sync works
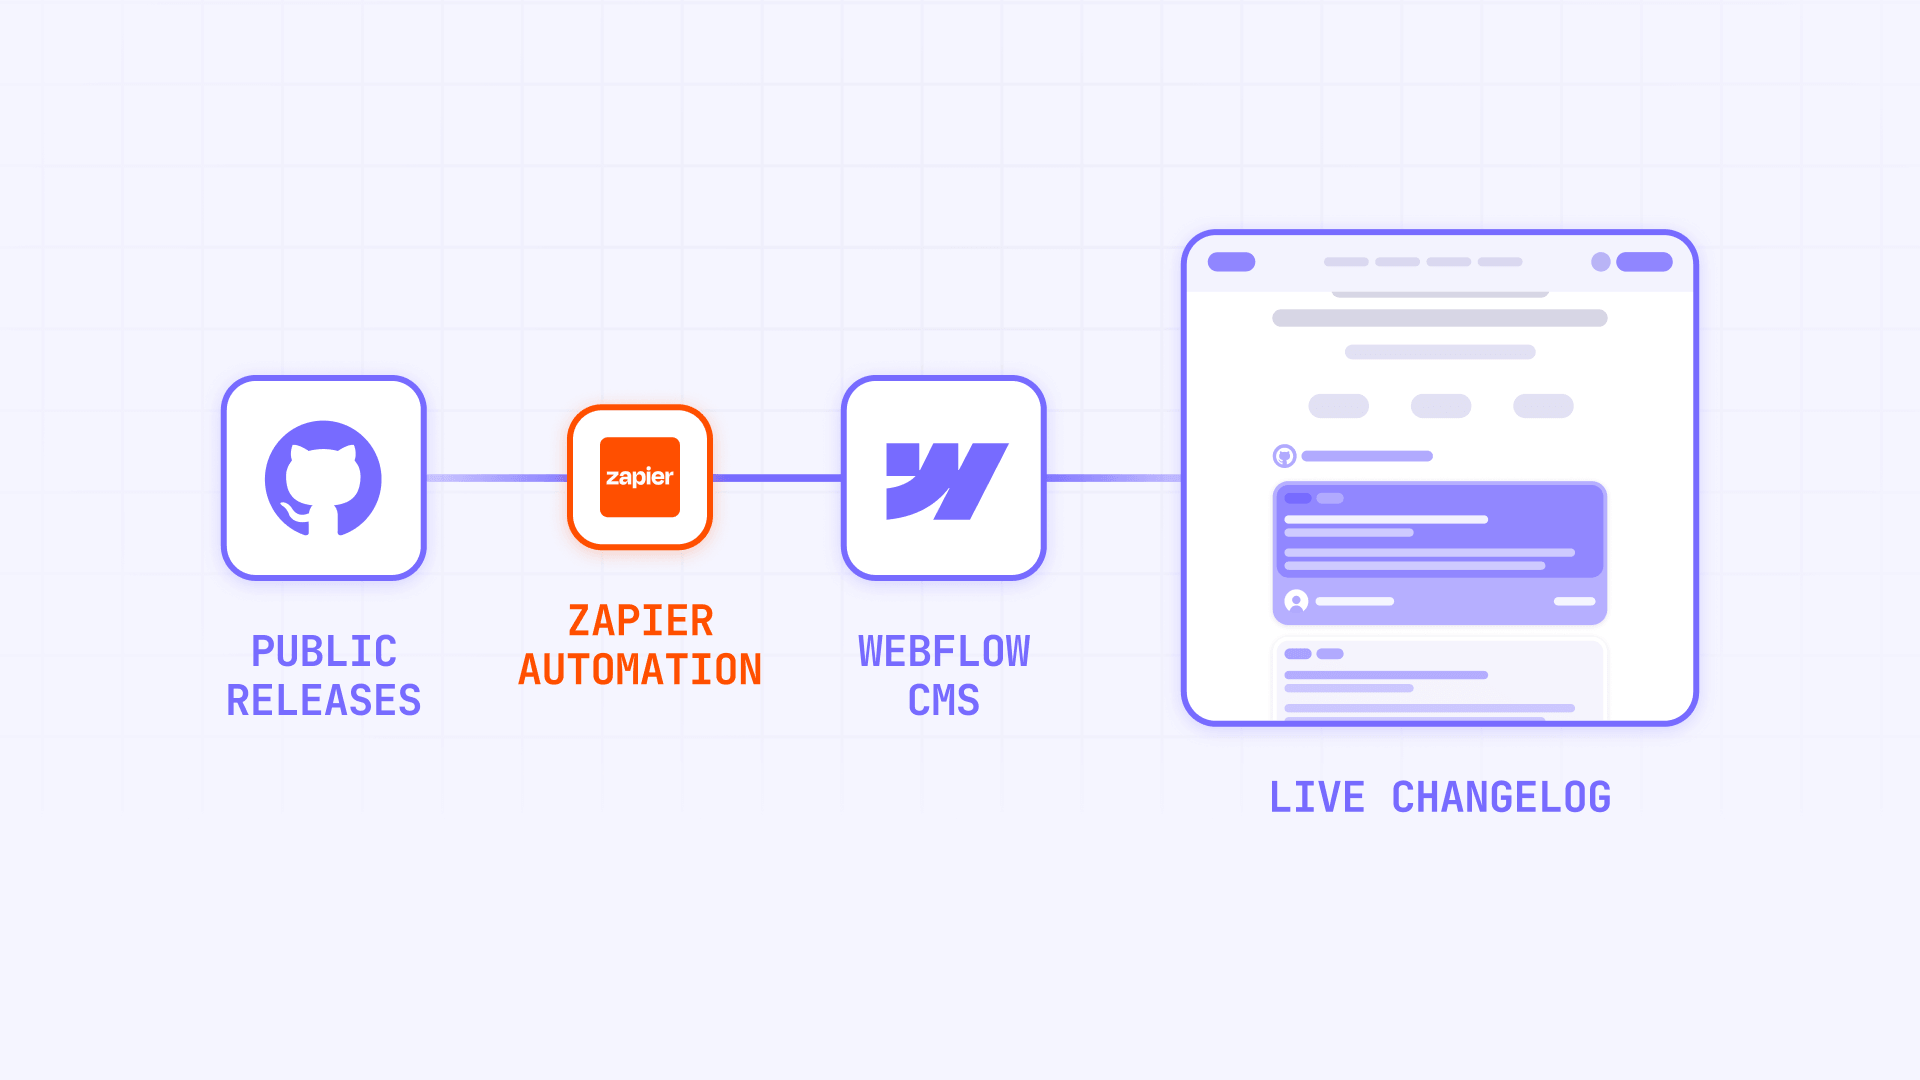
The setup is three pieces working together:
- GitHub Releases as the source of truth.
- Zapier or Make as the bridge that notices new releases and moves their data.
- Webflow CMS as the public changelog your readers see.
Two things follow from that shape: you set up a normal Webflow CMS collection first, and you handle duplicate prevention yourself (neither Webflow nor the automation tools do it for you). Teams that want full control can skip the bridge entirely and build a custom sync with the Webflow CMS API — covered near the end.
What GitHub release data you can send to Webflow
A GitHub Release exposes a clear set of fields you can carry into Webflow:
- Release title and Tag (the version, like v1.3.0).
- Release notes / body (the markdown content).
- Published date.
- GitHub release URL (the public release page).
- Prerelease and Draft status flags.
- Author name and Author avatar.
- Release ID (a stable, unique number) and Repository name.
Worth knowing: GitHub's Releases API only returns real, published releases — not plain Git tags — and drafts stay hidden until they're published or accessed with authentication. So a bare tag or an unpublished draft never reaches your automation.
How to prepare your GitHub Releases before syncing
The sync is only as clean as the releases you feed it. Your automation can move what GitHub publishes — anything that isn't a genuine, public release simply won't appear.
- Publish real GitHub Releases, not just tags. A tag only marks a commit; a release is the published object that carries the title and notes.
- Keep version tags readable. Clear tags like v1.3.0 turn into your changelog headings and URLs.
- Write notes people can scan. The body is what readers will actually read on the changelog.
- Publish the release. Leaving it as a draft means it isn't public, so it won't sync.
- Flag betas as prerelease. That status flows into Webflow and lets you badge them.
- Stay consistent with titles. Consistent naming keeps the changelog tidy and slugs predictable.
Tip: before switching the automation on, publish one test release and check that it shows up in the GitHub Releases API. If it's visible there, your automation has a reliable source to pull from.
How to set up the Webflow CMS collection
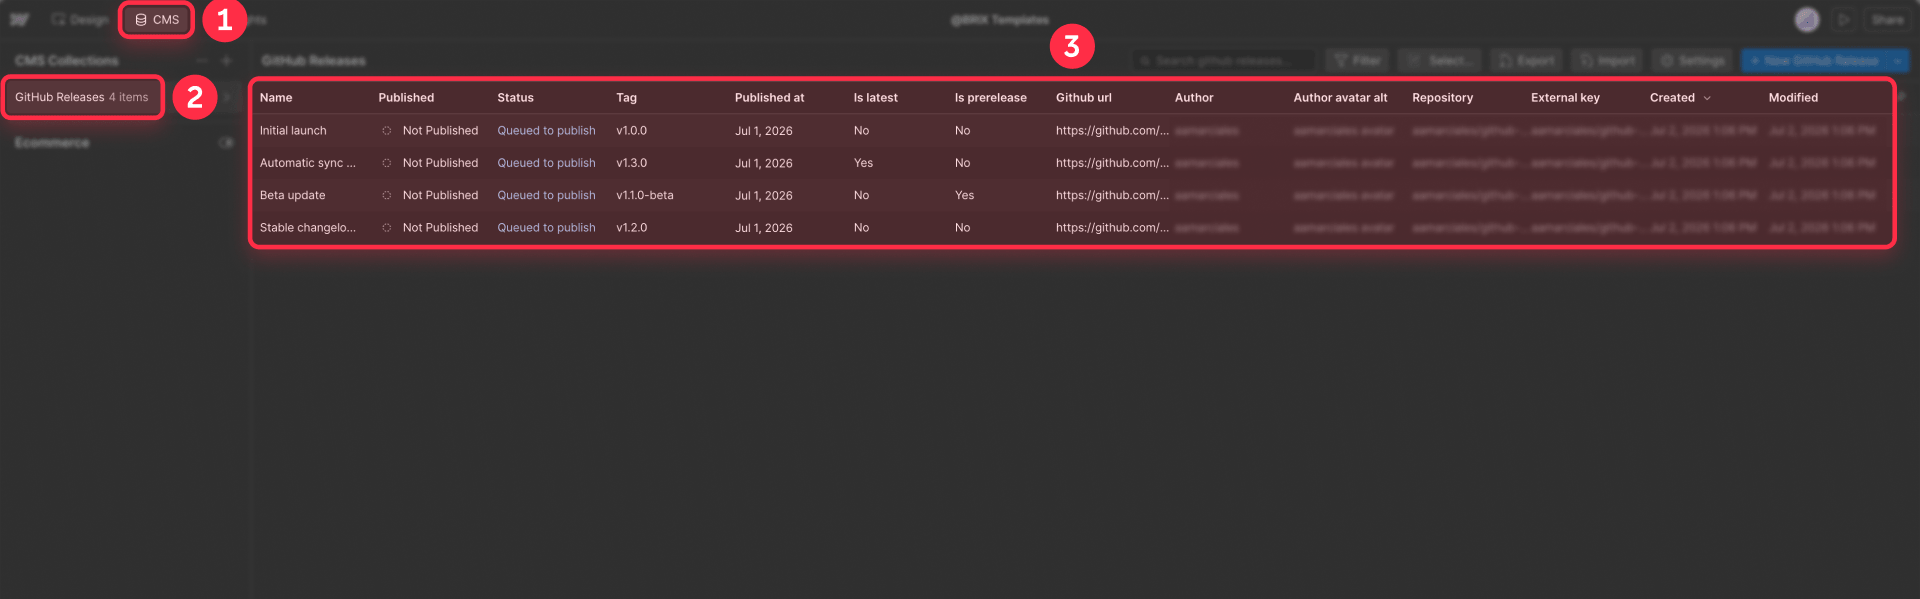
Webflow needs a normal CMS collection ready before anything syncs into it. Create one (a clear name is Changelog) and add these fields:
- Name / Title and Slug.
- Tag (plain text).
- Release Body (rich text or plain text, depending on how you want to handle GitHub Markdown).
- Published Date (date field).
- GitHub URL (link or plain text).
- Is Prerelease (boolean toggle).
- Author and Author Avatar (text and image).
- GitHub Release ID (number) and Repository (plain text).
If you use a rich-text field, test whether your Zapier or Make setup preserves headings, lists, links, and code blocks. Some teams may need to convert Markdown to HTML or clean the release body before sending it to Webflow.
Pick one field as your unique key — GitHub Release ID works best, or Repository \+ Tag as an alternative — and you'll use it in the next section to block duplicates. Make the slug deterministic, something like product-name-v1-3-0, so re-syncing a release never spins up a second item. Since every release becomes its own CMS item, an active changelog grows fast — and a busy collection can brush up against Webflow's limits. If yours gets large, our walkthrough on how to overcome Webflow's CMS item limit keeps things scalable.
How to sync GitHub Releases to Webflow with Zapier or Make
This is the heart of the workflow. Zapier and Make are the friendliest options when you want automation without building a backend — Webflow's Zapier integration is designed for automated CMS updates, and Make gives you visual workflows linking Webflow and GitHub.
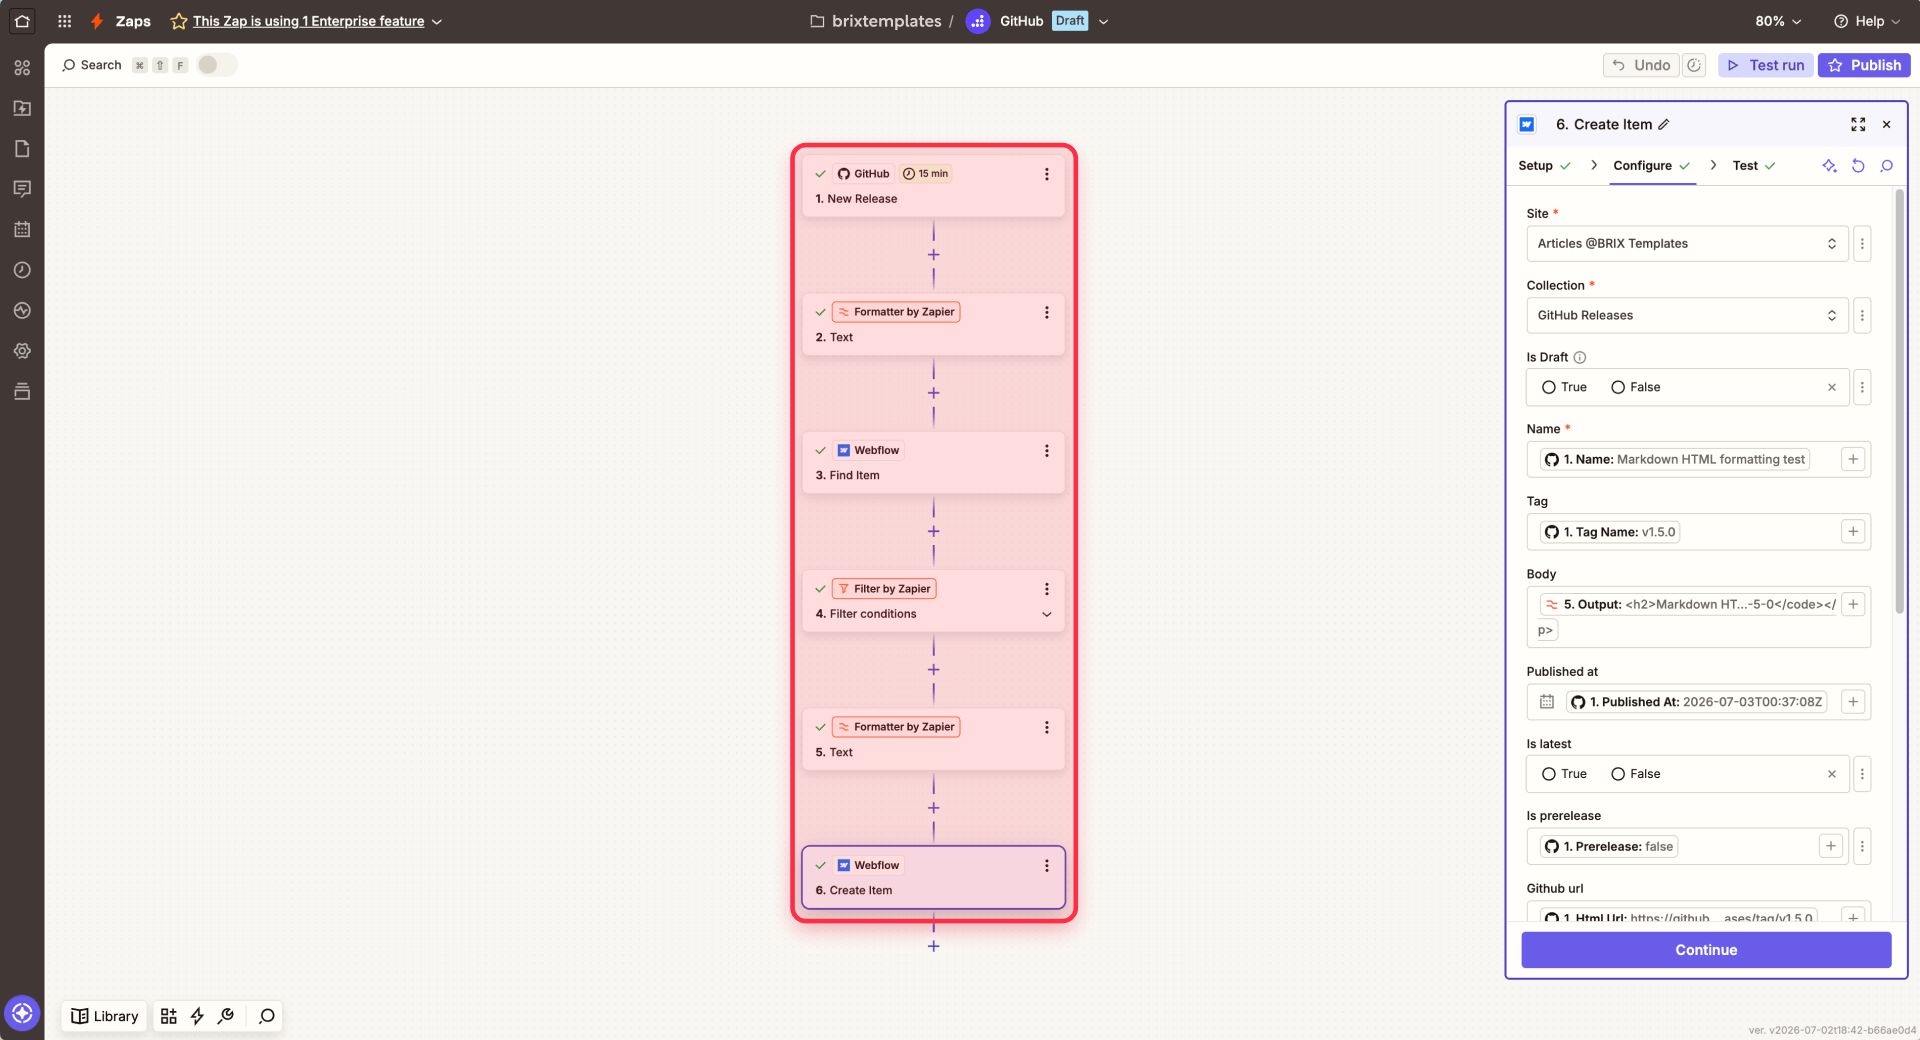
The shape of the flow is the same in either tool:
- Start a new Zap (Zapier) or Scenario (Make).
- Use GitHub as the trigger, watching for release activity or a newly published release, depending on the trigger available in your Zapier or Make account.
- Shape the release data so each GitHub field lines up with its Webflow field.
- Look up the Webflow CMS for a matching item by Release ID, slug, or Repository \+ Tag.
- Create a new CMS item if none exists. Update the existing one if it does.
- Publish right away or leave the item staged for review.
Then connect each GitHub field to the Webflow field it maps to:
- Release name → Name
- tag\_name → Tag
- body → Release Body
- published\_at → Published Date
- html\_url → GitHub URL
- prerelease → Is Prerelease
- author.login → Author
- author.avatar\_url → Author Avatar
- id → GitHub Release ID
- repository name → Repository
Tip: menu and field labels inside Zapier and Make shift over time, so verify the exact names in your version before you depend on a step.
How to avoid duplicate Webflow changelog entries
Webflow won't catch duplicates for you, so this part matters. If the automation creates a fresh CMS item on every run, you'll get repeats whenever a release fires more than once — edits, replays, and retries all count. The safeguard is a search-first routine:
- Search before you create. Query the Webflow CMS by GitHub Release ID, slug, or Repository \+ Tag.
- Found a match? Update it.
- No match? Create one.
- Make the slug deterministic — product-name-v1-3-0, for instance — so a given release always resolves to the same item.
Set that search-then-create-or-update logic up once and duplicates stop recurring.
How to publish or review new releases in Webflow
Every team lands on a publishing habit:
- Go live immediately when the release notes are safe to publish the moment they ship.
- Hold items in draft or staged when marketing, product, or legal need a look before the public sees them.
The exact publish behavior depends on the Zapier/Make action or API endpoint you use, so test whether the item lands staged, live, or requires a separate publish step.
For most teams, reviewing first is the safer habit — you keep the automation but keep a human in the loop. The advanced API path below can create, manage, and publish CMS items programmatically when you want end-to-end control.

How to design the changelog page in Webflow
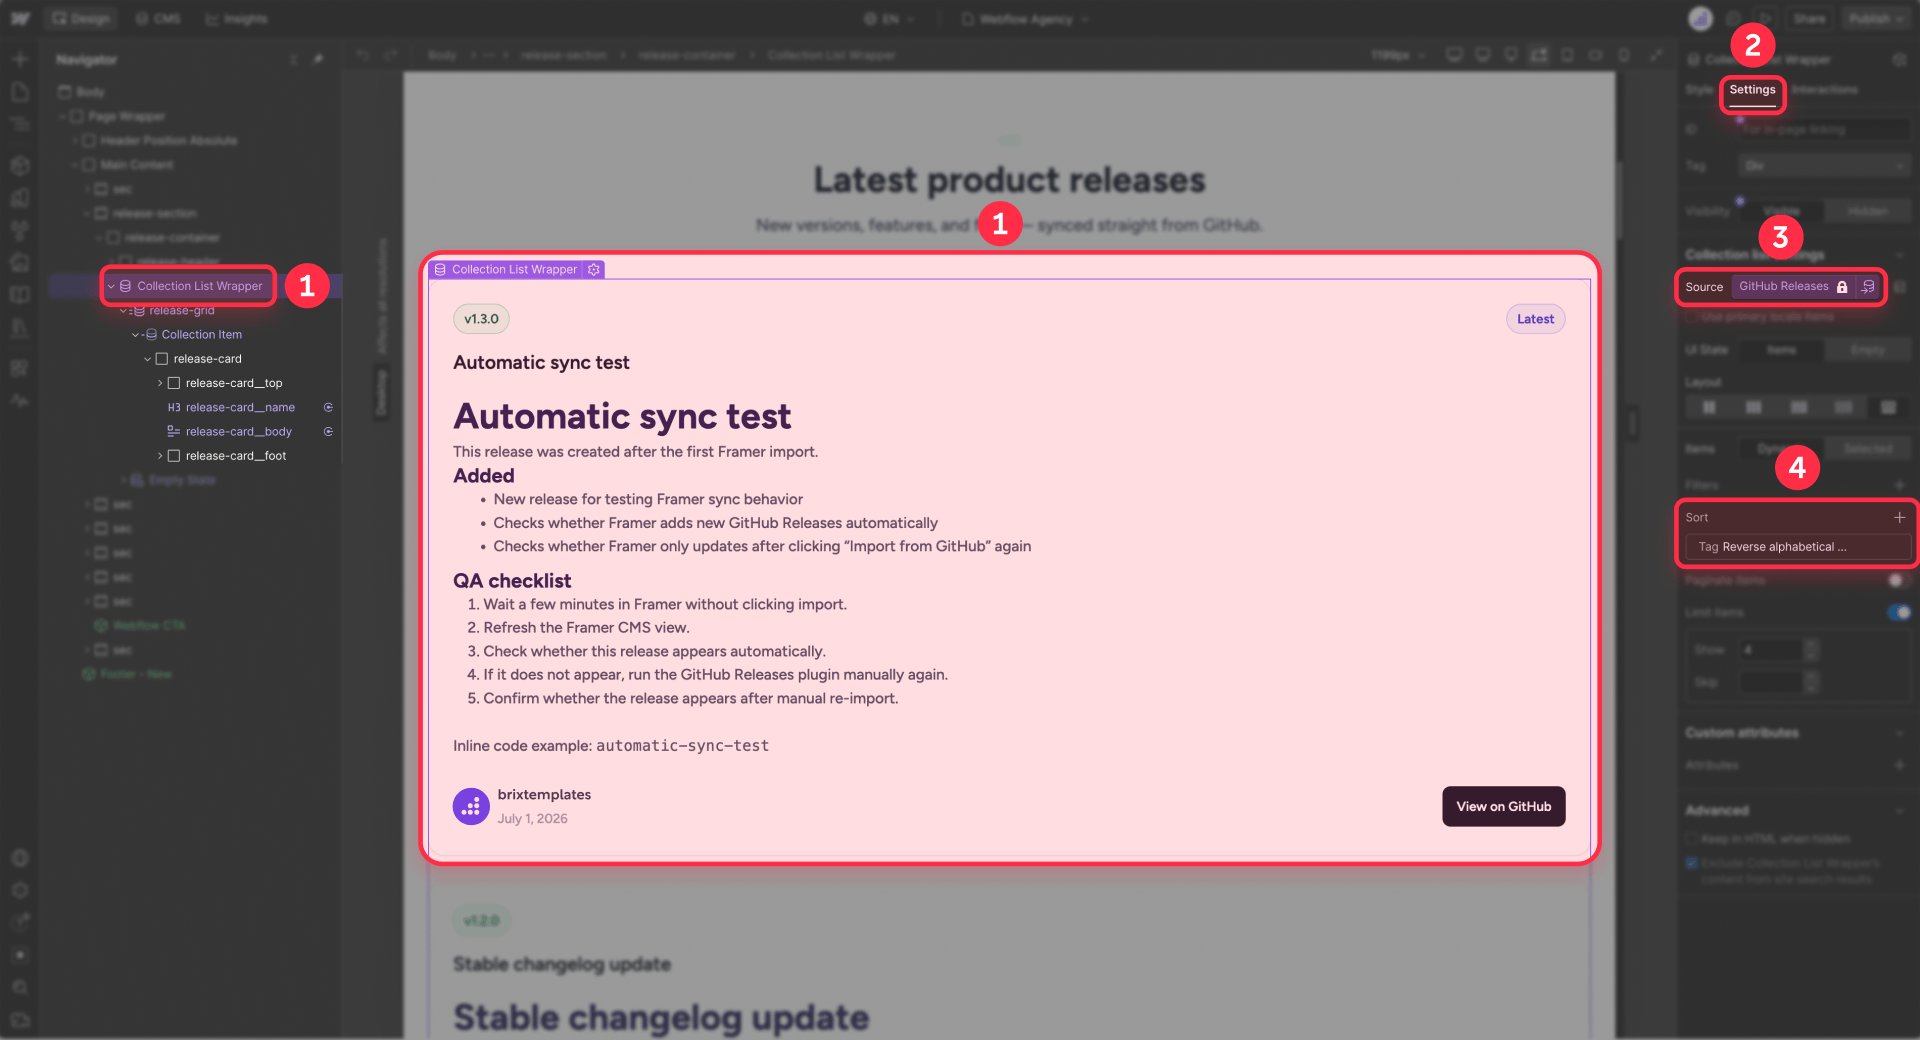
Once the collection has data, build the public-facing changelog:
- A Collection List for the archive, ordered by Published Date (newest first). Want subscribers notified of every release? You can syndicate that same collection as a feed — our walkthrough on creating an RSS feed from a Webflow CMS collection shows how.
- A Collection Template Page for single releases.
- Each entry surfaces the title, tag, date, release body, and a link back to GitHub.
- A Beta badge that only shows when Is Prerelease is true.
- Filters or tabs later on, once the archive is large enough to need them.
Because everything sits in CMS fields, you can style the page to match your brand rather than pasting in raw markdown. For per-release HTML or embeds, Webflow's embed element and per-collection-page structure handle that out of the box — and our guide to embedding unique HTML on each Webflow CMS page walks through the exact setup.
Advanced option: build a custom GitHub-to-Webflow sync with the API
When Zapier or Make aren't enough, the sturdy path is a custom build: GitHub release webhooks → a serverless function or small backend → the Webflow CMS API, with duplicate guards, markdown cleanup, staged-or-live publishing, and monitoring on top. GitHub fires a release webhook event, and Webflow's CMS API is built for programmatic content, so this holds up for production-scale teams. It's also where a seasoned Webflow partner delivers the most value.
Common issues to check before publishing
Most sync hiccups come down to a release that isn't real or public, or a missing duplicate check:
- Tags aren't releases. Publish a real GitHub Release — title and body included.
- Drafts may not come through. Drafts aren't public — publish them first.
- Private repos need authenticated access. Route them through Zapier, Make, GitHub OAuth, or a token kept in your backend — and never put GitHub tokens in client-side Webflow code.
- The tools can create duplicates if you skip the lookup step. Always search first.
- Markdown may need tidying before it reads well in Webflow. Test the body field.
- Slugs have to be unique. Stick with a deterministic pattern like product-name-v1-3-0.
- Date formats may need converting between GitHub and Webflow's date field.
- Webflow field names must line up with the collection you built.
- Auto-publishing can skip editorial review. Pick review-first if that review matters.
Frequently asked questions about syncing GitHub Releases to a Webflow changelog
Can Webflow pull in GitHub Releases on its own?
Not out of the box. The native piece is the Webflow CMS collection you design; the movement of data has to come from Zapier, Make, or a custom API workflow that watches GitHub and creates or updates items. Tip: reach for Zapier or Make first, and only move to the API when you outgrow them.
Can Zapier or Make build my Webflow changelog items?
Yes. Point the trigger at GitHub, map the release fields onto your Webflow collection, then create or update CMS items. The step that saves you from mess is the upfront search — look the item up by Release ID, slug, or Repository \+ Tag before writing, so you update instead of duplicating. Run it against one release first to confirm the mapping.
Should releases go live automatically in Webflow?
That's a team call. When the notes are safe to ship immediately, automation can publish items straight away. When marketing, product, or legal need eyes on them first, create the items as drafts and publish after sign-off. For most teams, review-first is the safer default — you keep the speed of automation without dropping editorial control.
Why didn't a release make it into Webflow?
Usually because it isn't a real, published GitHub Release. Bare tags don't count, and drafts stay hidden without authentication, so neither reaches the automation. Publish the release in GitHub, confirm it's listed in the Releases API, then re-run or wait for the next sync. Comparing the public release count against your Webflow item count is the quickest way to spot what's missing.
Does this work for private GitHub repositories?
Yes — but only with authenticated access, not as an open public flow. Connect private repos through Zapier, Make, GitHub OAuth, an access token, or a custom backend. The firm rule: never embed GitHub tokens in client-side Webflow code; keep them in the automation or server. At scale, a custom API build is the more secure route.
Will GitHub Markdown render properly in Webflow?
Often, yes — but verify it. Rendering depends on the Webflow field type (use a rich-text field for the body) and on whether your automation cleans or converts the markdown before it arrives. After a release syncs, skim the body — headings, lists, links, code blocks — before it goes live, and tweak the field or the automation if anything looks off.
How do I keep duplicate entries out of the Webflow changelog?
Run a search-first check: before creating anything, look the item up in Webflow by GitHub Release ID, slug, or Repository \+ Tag. Update if it's there, create if it isn't. Pair that with a deterministic slug like product-name-v1-3-0 so each release maps to one item. Build it once and duplicates stop coming back.
Conclusion
Connecting GitHub Releases to a Webflow changelog keeps your public notes current without the copy-paste tax: engineering ships in GitHub, Zapier or Make ferries each release into the Webflow CMS, and Webflow presents it through a collection you build once. The loop is straightforward — ship a real release, let the automation catch and format it, look before you create so nothing doubles up, then review or publish. The two details that matter most are keeping duplicates out and choosing between auto-publish and review-first.
The BRIX Templates team builds and maintains Webflow sites for product teams, marketers, and agencies — from CMS architecture to custom GitHub-to-Webflow automation. If you'd rather skip the trial and error on a release-notes workflow, our experienced Webflow development team can set it up for you.









Join readers commenting on this post!