
You pasted HTML into a Webflow Rich Text field, published your site, and instead of a working embed—you see raw code displayed as visible text. Or maybe you added an Embed element to your CMS template, and now every single blog post shows the exact same widget.
Both problems come from the same cause: Webflow restricts where and how custom code can run for security reasons. The good news? There are three options to add unique HTML to each CMS page, and this guide covers all of them.
Why unique HTML per Webflow CMS item matters
Having unique HTML per collection item unlocks practical capabilities that make Webflow CMS more powerful for real-world projects:
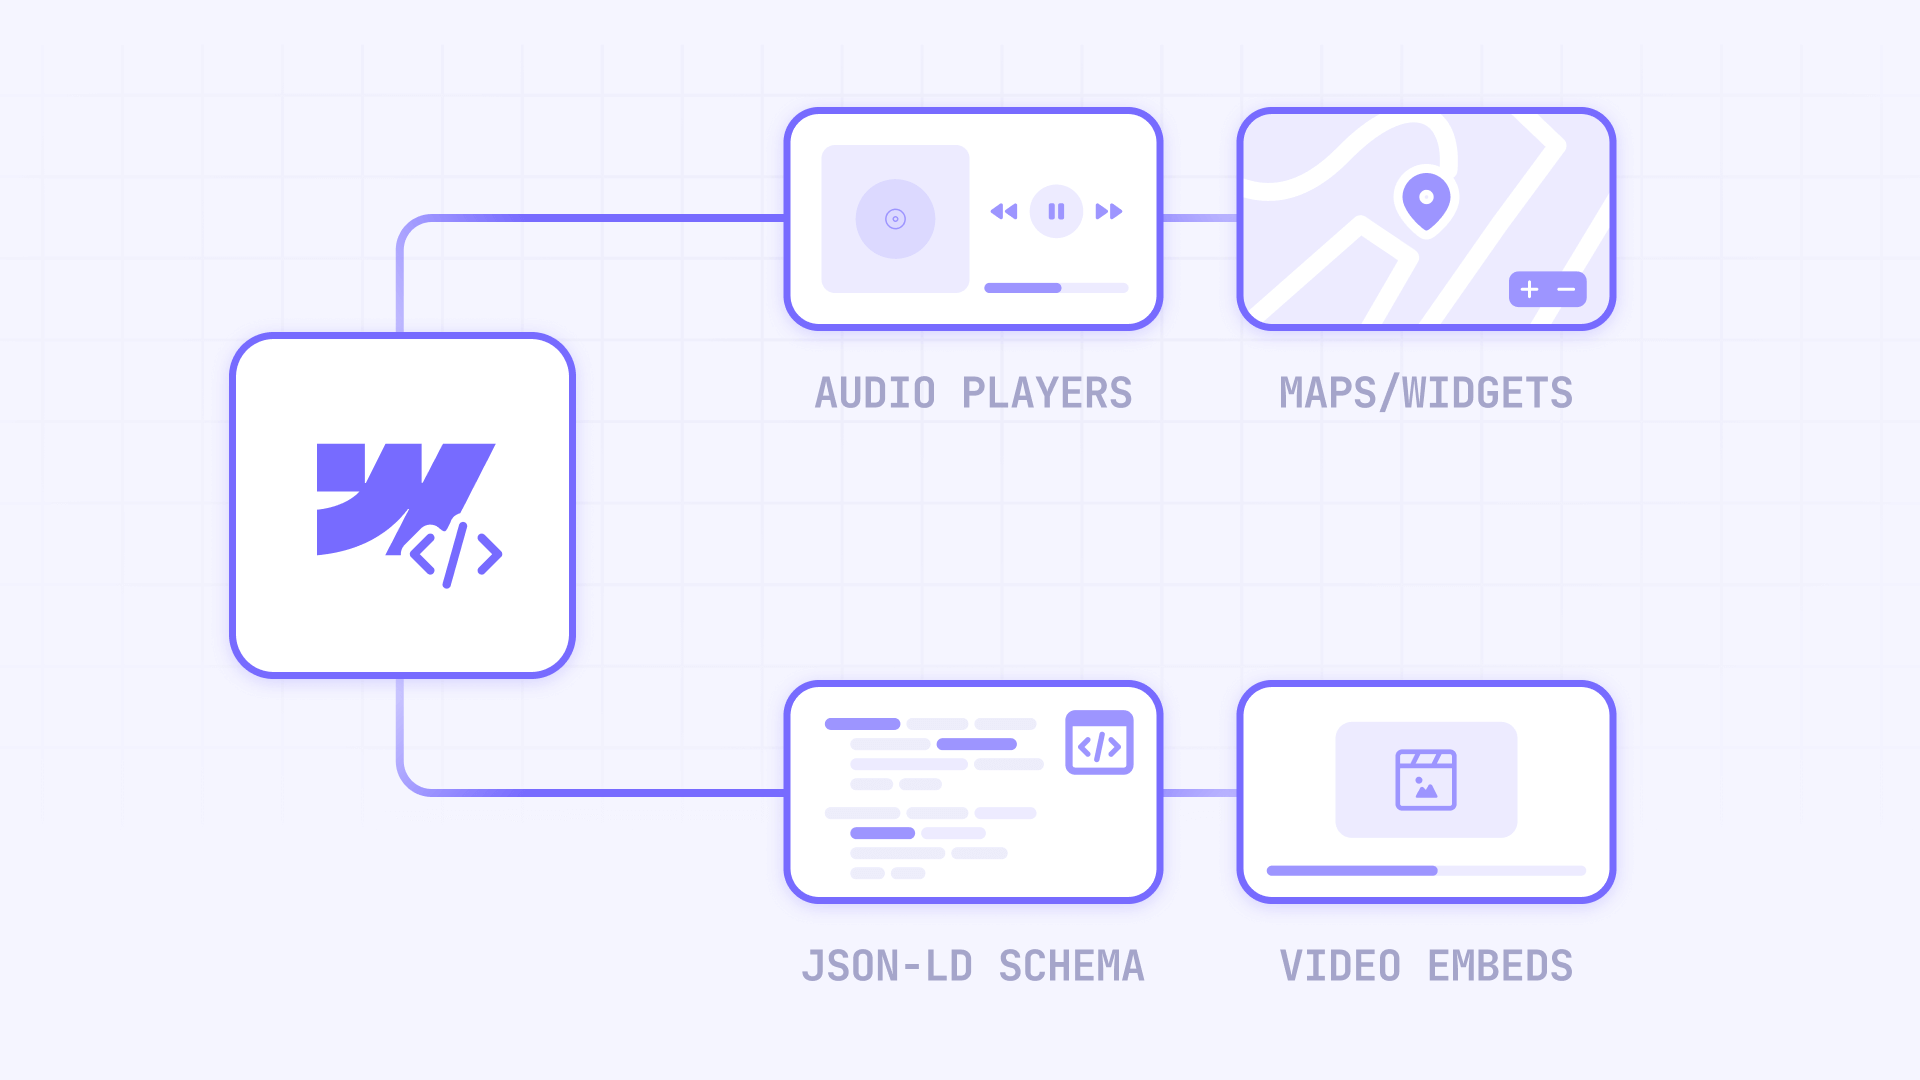
- Per-post audio players in Webflow: Add a unique Spotify or podcast player to each blog post so readers can listen instead of read. Store just the episode ID in your CMS, and the template handles the rest.
- Per-case-study embeds in Webflow: Show a different Figma prototype, Loom video, or interactive demo on each portfolio piece. One template pulls unique widget data from Collection fields—no separate static pages needed.
- Per-item SEO schema in Webflow: Output unique JSON-LD Article, Product, or FAQ schema in the head tag for each CMS item. This improves your rich result eligibility in Google without duplicating code across hundreds of pages.
- Per-property maps and booking widgets in Webflow: For real estate or location-based sites, inject different Google Maps iframes, Airbnb embeds, or booking widgets directly from CMS fields.
- Campaign-specific tracking in Webflow: Run different analytics snippets or conversion pixels on specific CMS pages—like success stories or landing pages—without manually editing every single page.
Understanding Webflow Collection Templates vs. Collection Lists
Before diving into options, you need to understand this key distinction:
A Collection Template page creates one unique page per item (like blog/my-article). This is where you implement unique HTML per page using dynamic embeds or page-level Custom Code.
A Collection List on a static page displays many items on one page (like a blog index). You can repeat widgets with per-item data here, but all items share the same page context.
If you want different HTML on each CMS page, you'll almost always work on the Collection Template page.
Option 1: Dynamic Embeds in Webflow for per-item HTML
This is the recommended default when your embed code structure stays the same across items and only a few values change—like a different audio file ID, iframe URL, or widget key.
Think of it as: Template HTML + CMS data = unique widget per item.
When to use Dynamic Embeds in Webflow
Use this option when:
- The widget's HTML structure is identical across all items
- Only 1-3 values change between items (IDs, URLs, keys)
- You want centralized control over the embed code
- Content editors should only manage simple data, not code
Setting up CMS fields for Webflow Dynamic Embeds
First, add the CMS fields you need to store variable data:
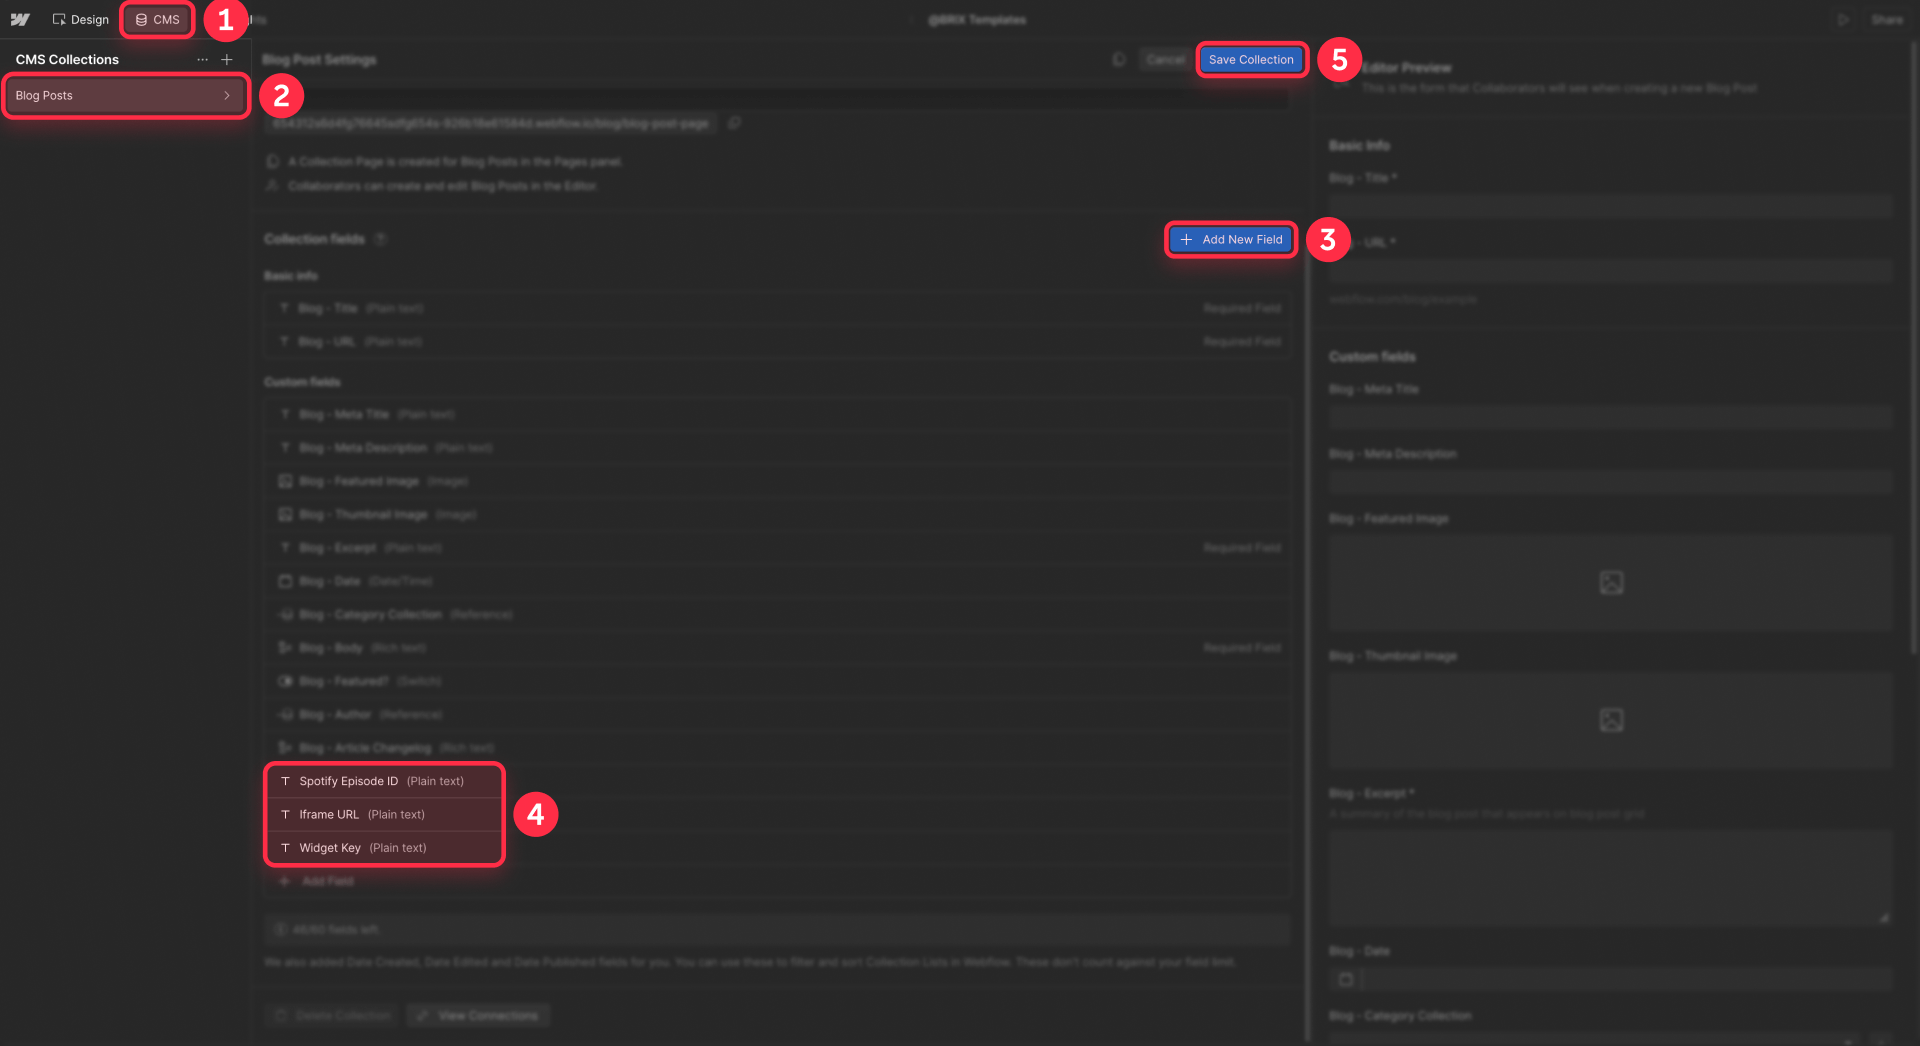
- Go to CMS → Collection Settings for your Collection (like Blog Posts)
- Click Add New Field
- Choose Plain Text for short values like IDs or URLs
- Name it descriptively: Spotify Episode ID, Iframe URL, Widget Key
- Save and close
Tip: Use Plain Text for single-line values and Link fields when you specifically need URL validation.
Creating the Dynamic Embed element in Webflow
Now create the embed that pulls CMS data:
- Open your Collection Template page in the Designer
- Drag an Embed element from the Add Panel to where you want the widget
- Paste your widget's base HTML code
- Place your cursor where the dynamic value should go
- Click Add Field (purple button) and select your CMS field
- The field appears as a purple pill inside your code
- Click Save & Close
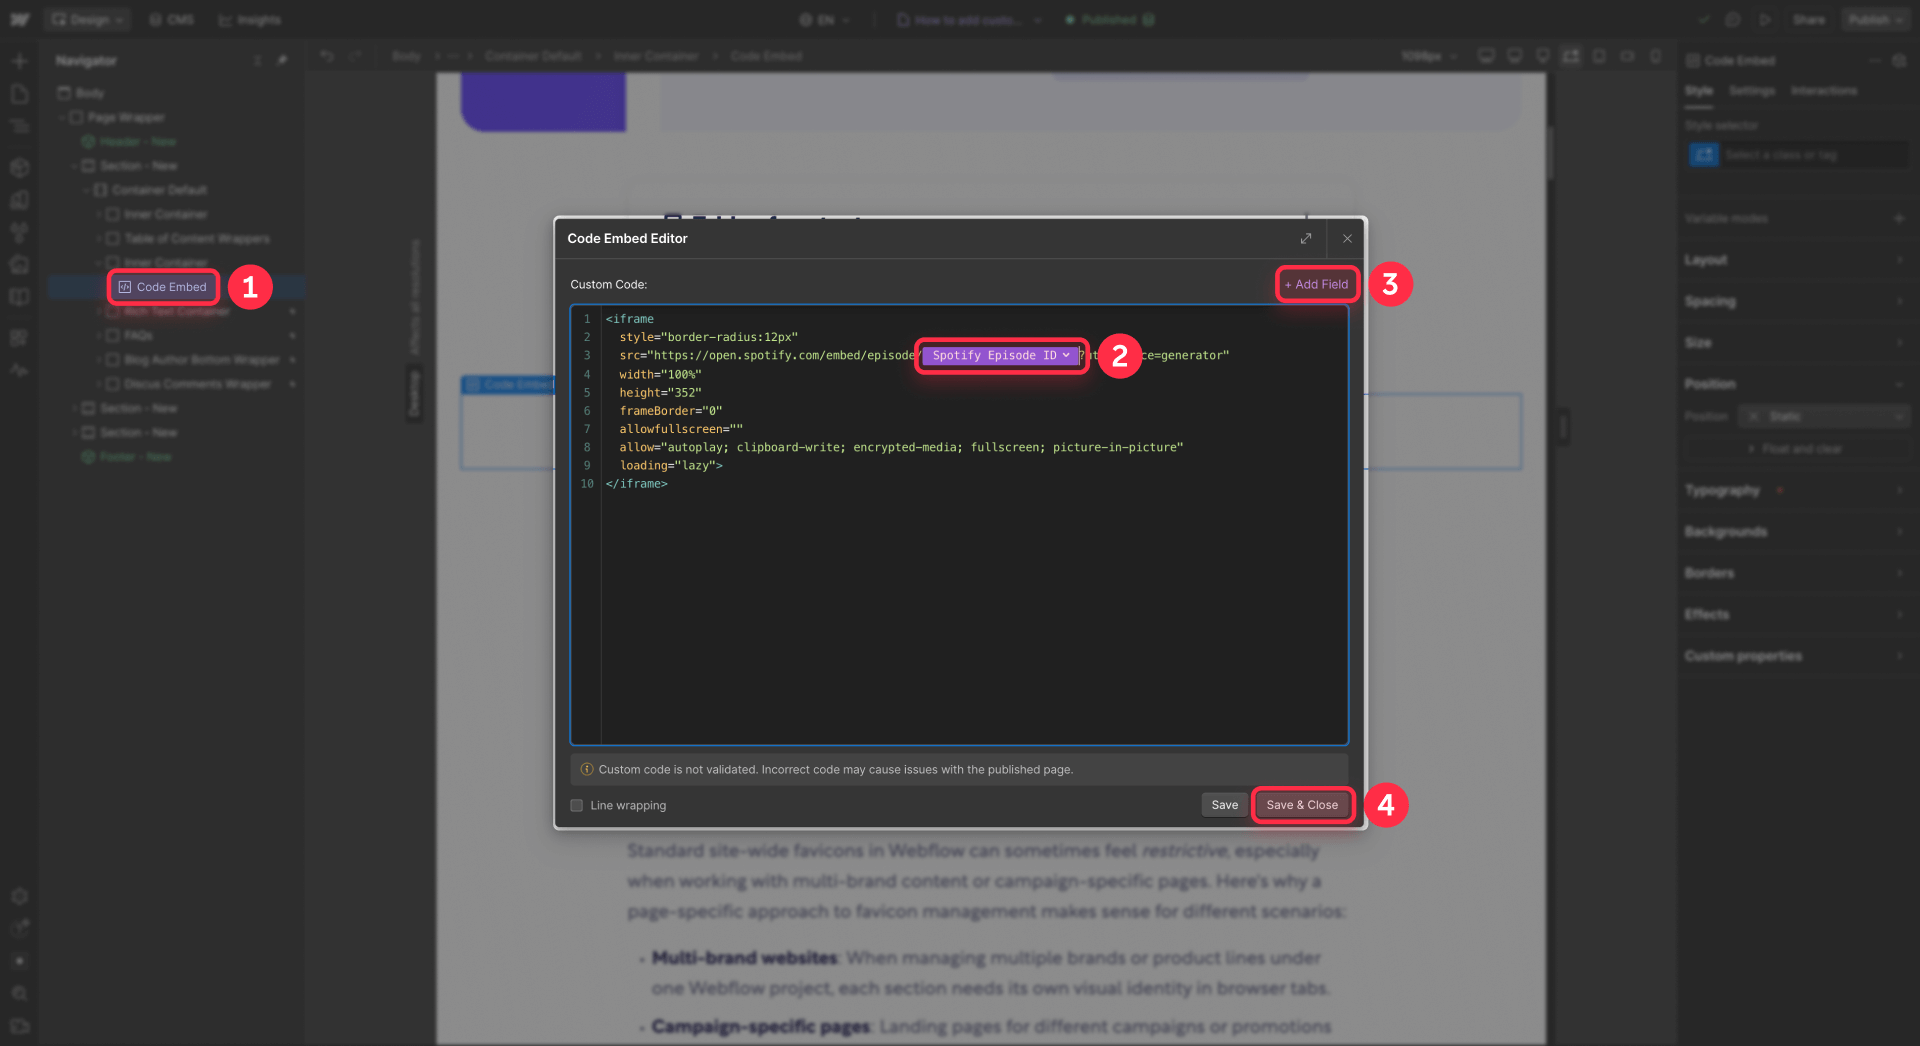
Here's an example for a Spotify podcast episode embed:
<iframe
  style="border-radius:12px"
  src="https://open.spotify.com/embed/episode/EPISODE_ID_FIELD?utm_source=generator"
  width="100%"
  height="352"
  frameBorder="0"
  allowfullscreen=""
  allow="autoplay; clipboard-write; encrypted-media; fullscreen; picture-in-picture"
  loading="lazy">
</iframe>
Replace EPISODE_ID_FIELD with your actual CMS field using the Add Field button. The episode ID is the string of characters after /episode/ in any Spotify episode URL.
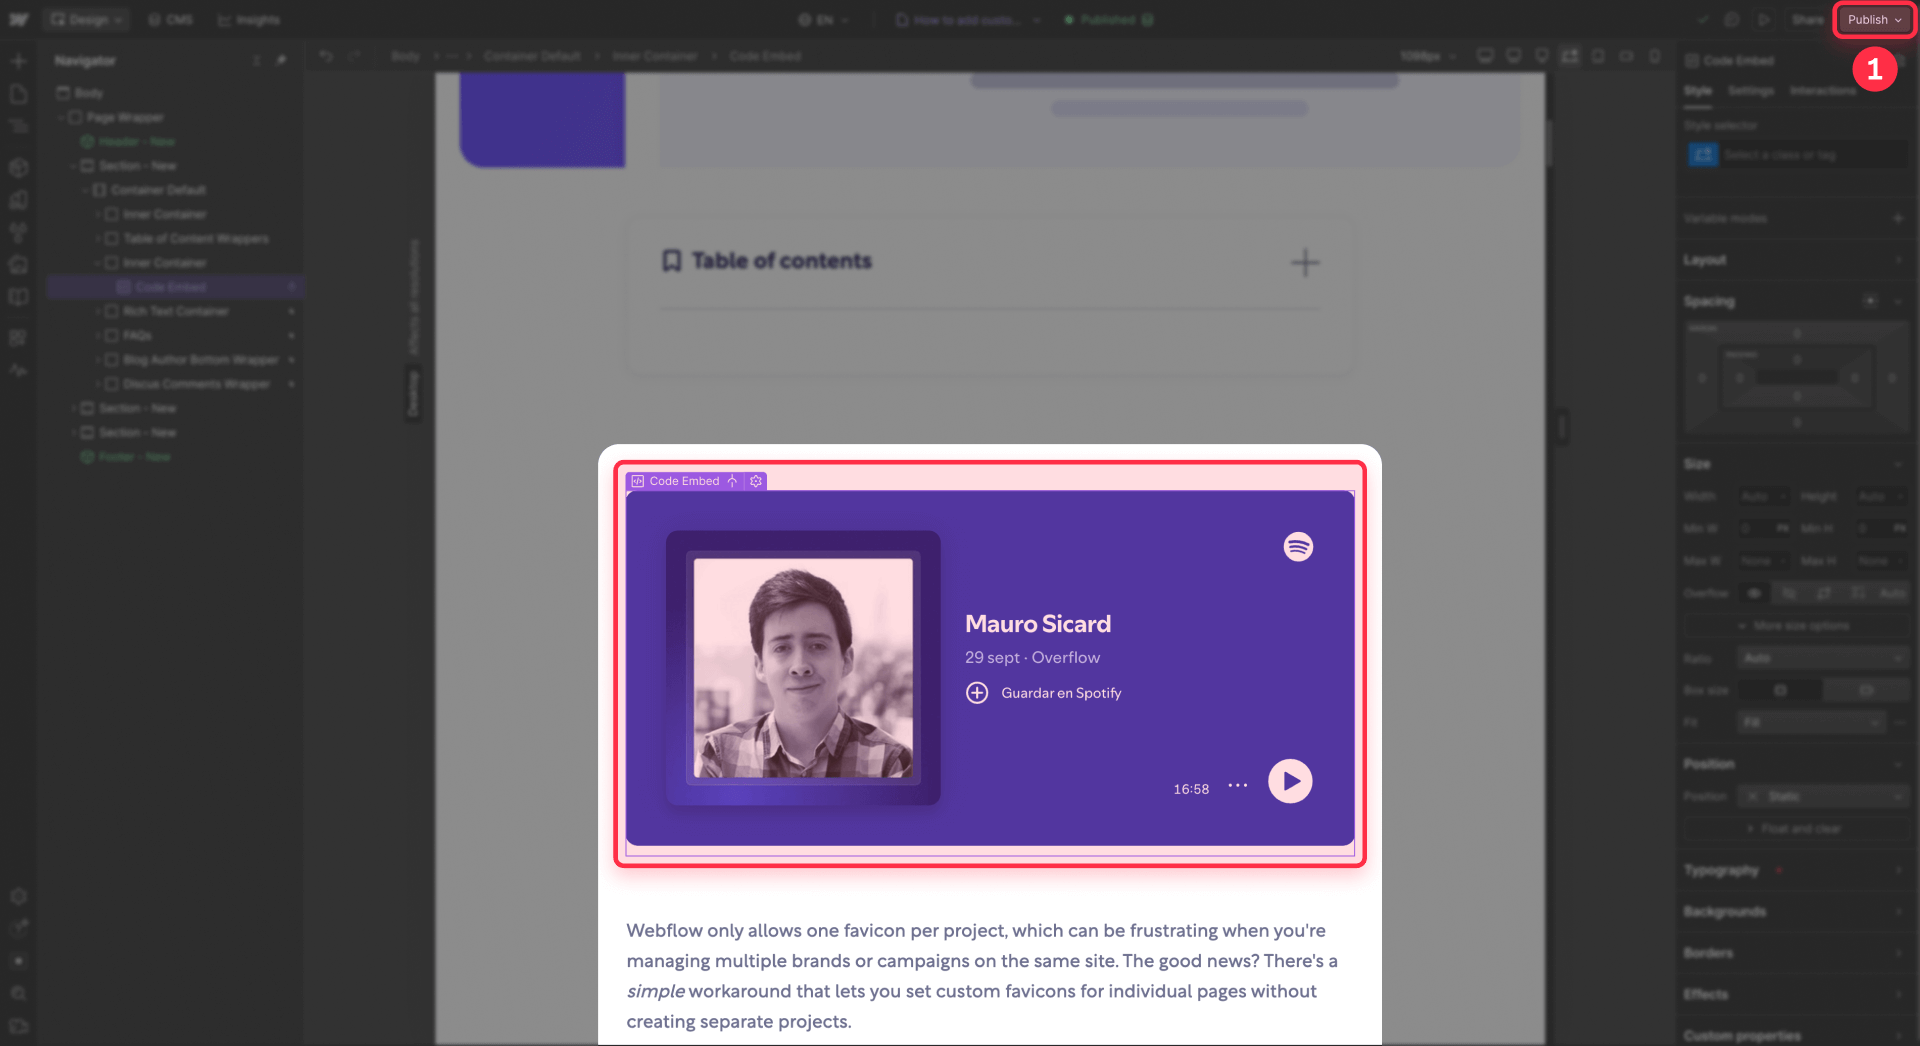
Testing your Webflow Dynamic Embed
The Designer canvas won't execute your code—this is normal. To test:
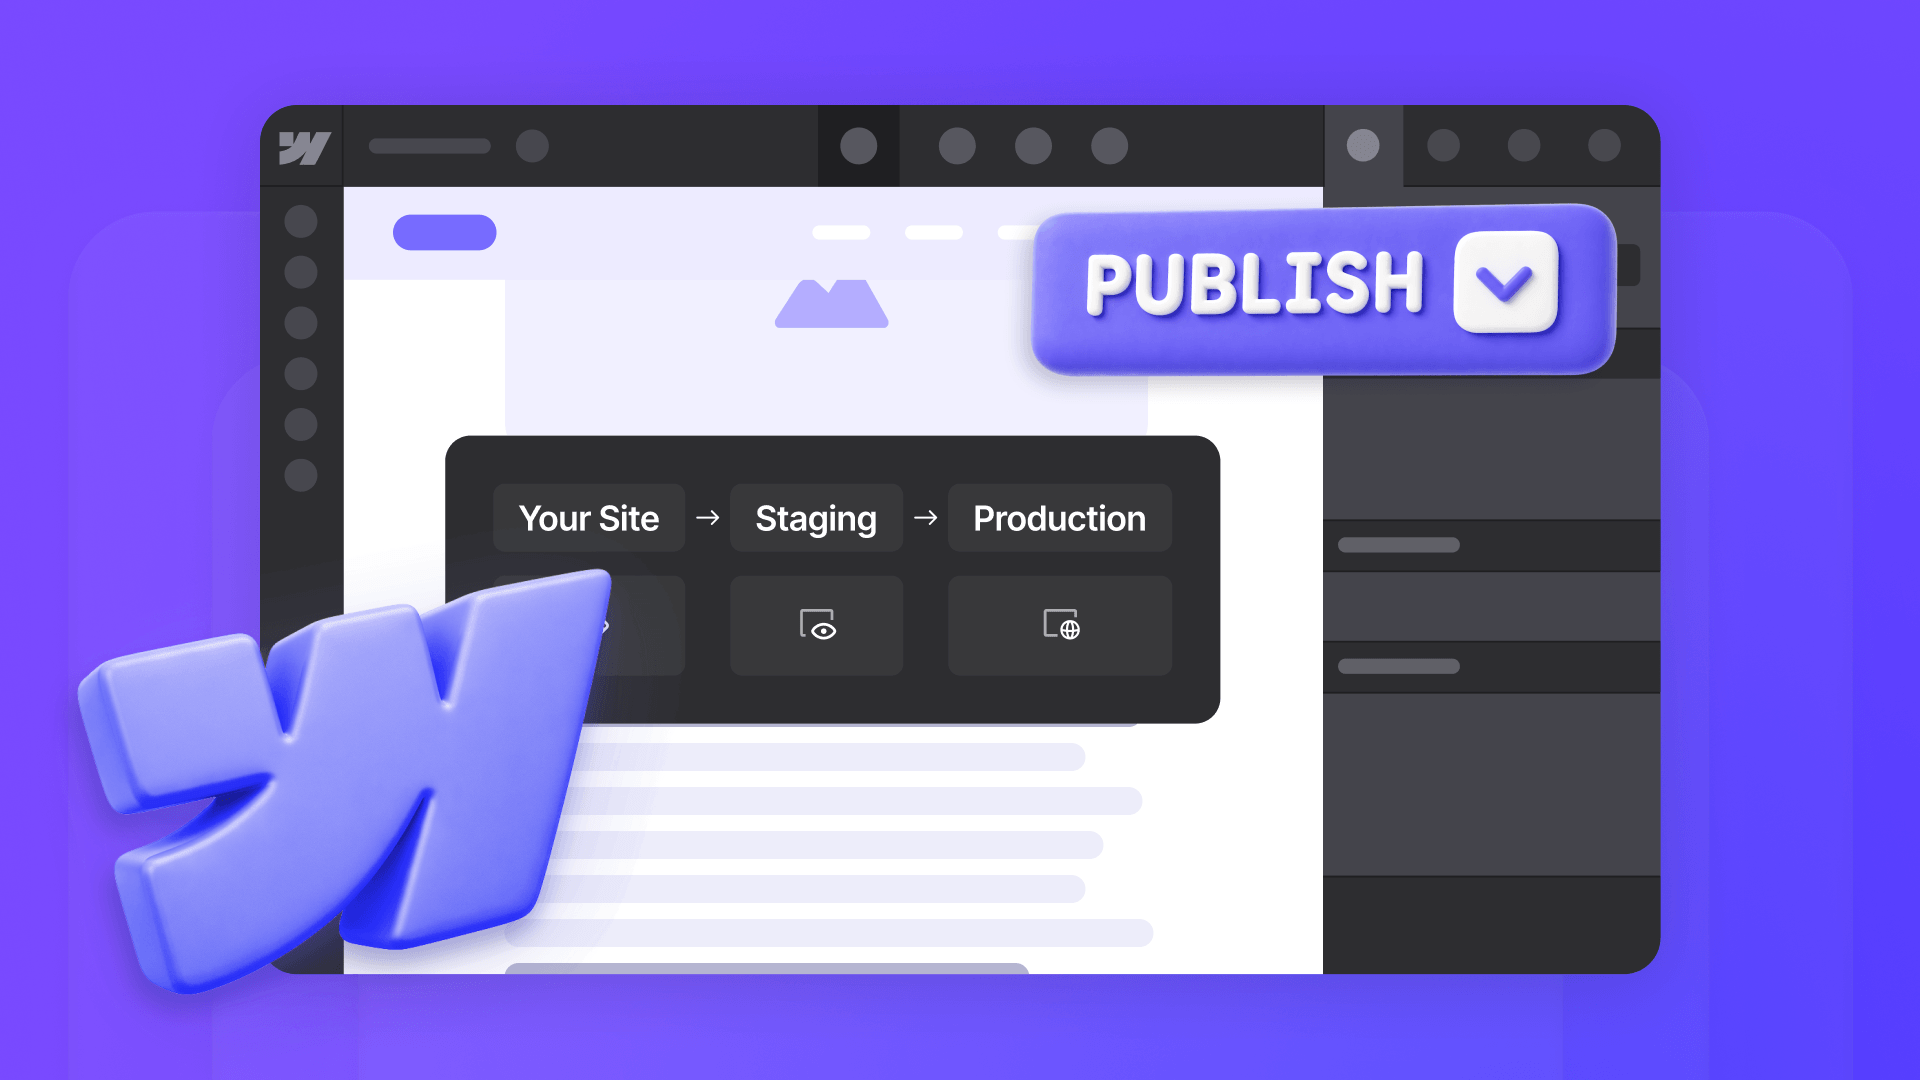
- Click Publish and publish to your staging or live domain
- Visit an actual CMS item page
- Verify the widget loads with that item's unique data
- Check a different CMS item to confirm values change correctly
Option 2: Page-Level Custom Code in Webflow for head and body scripts
Use this option when you need scripts in the head or body tags—like JSON-LD schema, canonical tags, or analytics that must load before the page content.
When to use Page-Level Custom Code in Webflow
This works best for:
- JSON-LD structured data (Article, Product, FAQ schema)
- Custom canonical URLs per item
- Scripts that must execute before page render
Adding dynamic head code to Webflow CMS Templates
- Open your Collection Template page
- Click the gear icon (Page Settings) in the top-left panel
- Scroll to Custom Code
- In the Inside Head Tag field, paste your code
- Place your cursor where CMS data should appear
- Click Add Field and select your CMS field
- Save and publish
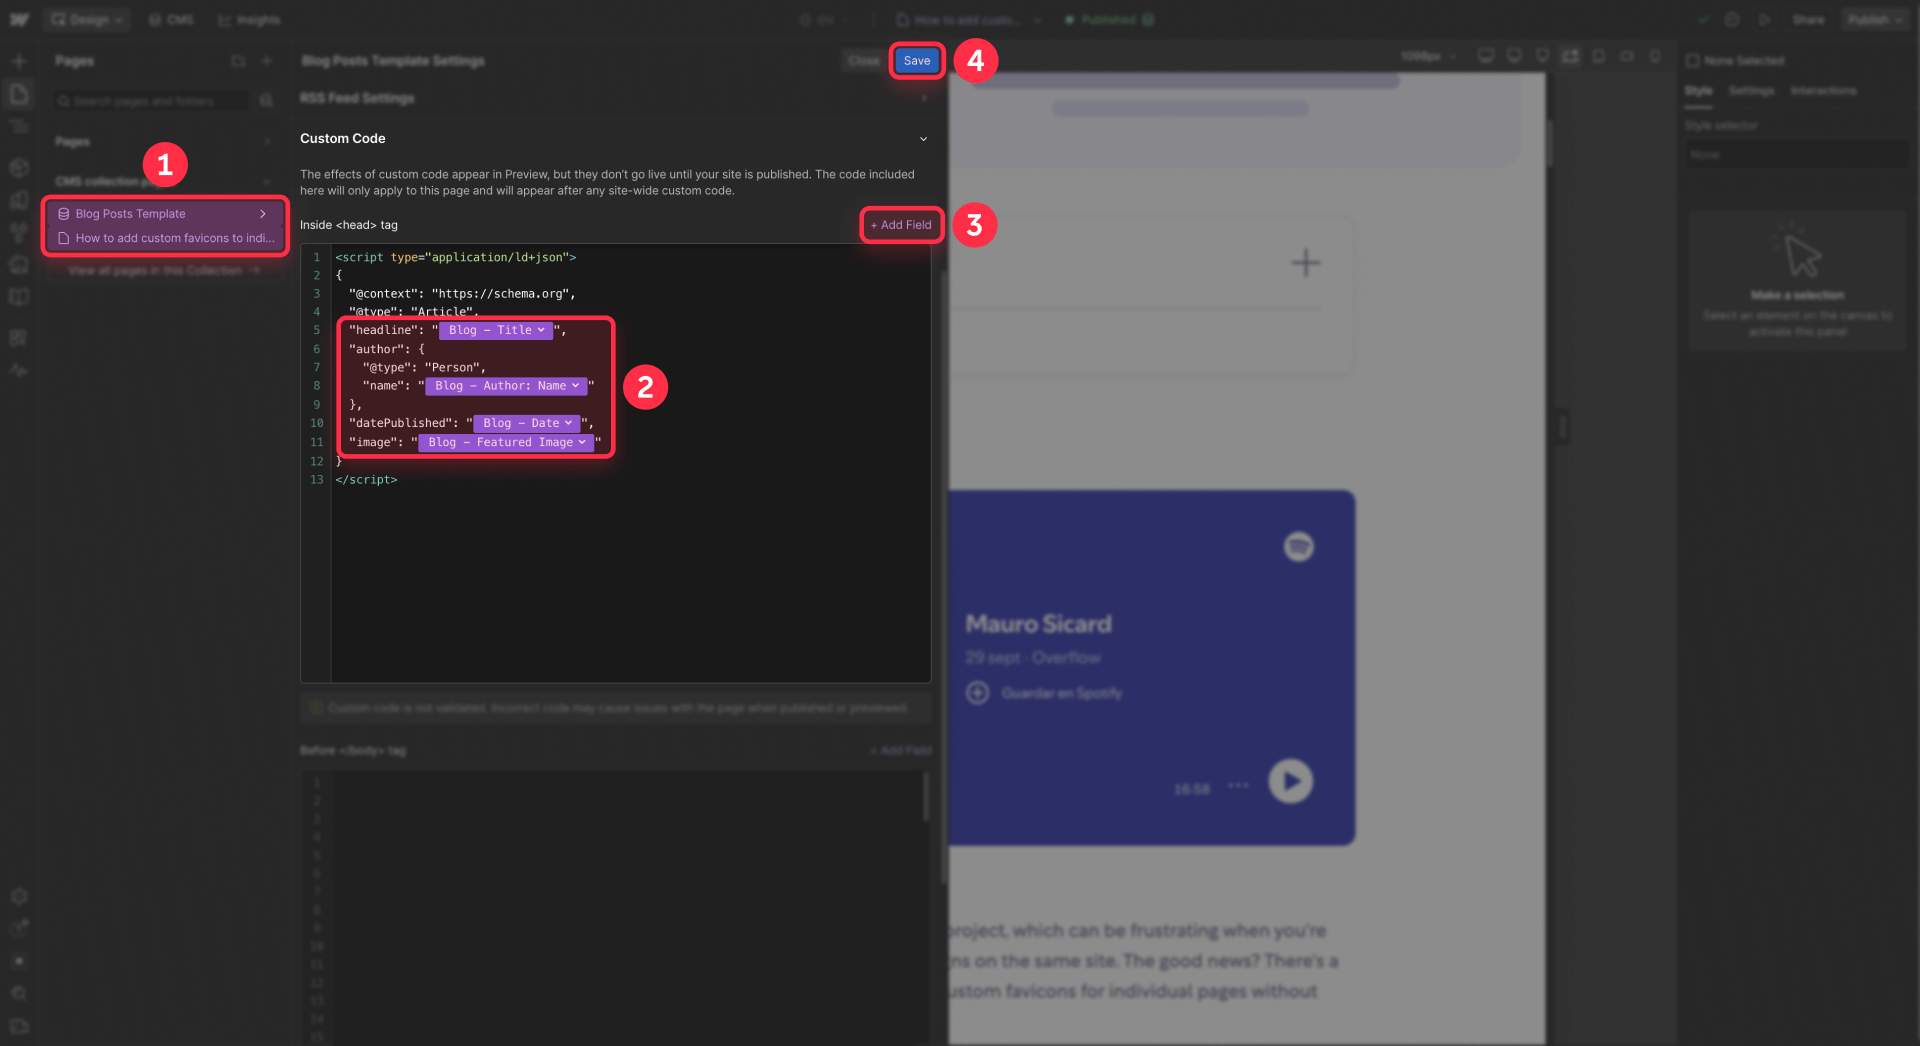
Here's an example JSON-LD Article schema:
<script type="application/ld+json">
{
  "@context": "https://schema.org",
  "@type": "Article",
  "headline": "TITLE_FIELD",
  "author": {
    "@type": "Person",
    "name": "AUTHOR_FIELD"
  },
  "datePublished": "DATE_FIELD",
  "image": "IMAGE_FIELD"
}
</script>
Replace each FIELD placeholder with your actual CMS fields using Add Field.
Important: Double quotes inside CMS text fields will break JSON structure because JSON uses double quotes for property names and values. If your content needs quotation marks, use single quotes (') instead of double quotes ("). For example, if an article title is The 'Best' Way to Learn, that will work—but The "Best" Way to Learn will break the JSON and cause schema errors.
Option 3: Rich Text Custom Code in Webflow for unique HTML per item
This is the most flexible option—each CMS item can have completely different HTML, including script tags and complex structures. Use it when every item needs genuinely unique code that can't follow a template.
When to use Rich Text Custom Code in Webflow
This works best for:
- One-off embeds that vary dramatically between items
- Complex JSON-LD with nested arrays or special characters
- Items where editors need full control over the embed code
- Situations where a single template structure can't cover all variations
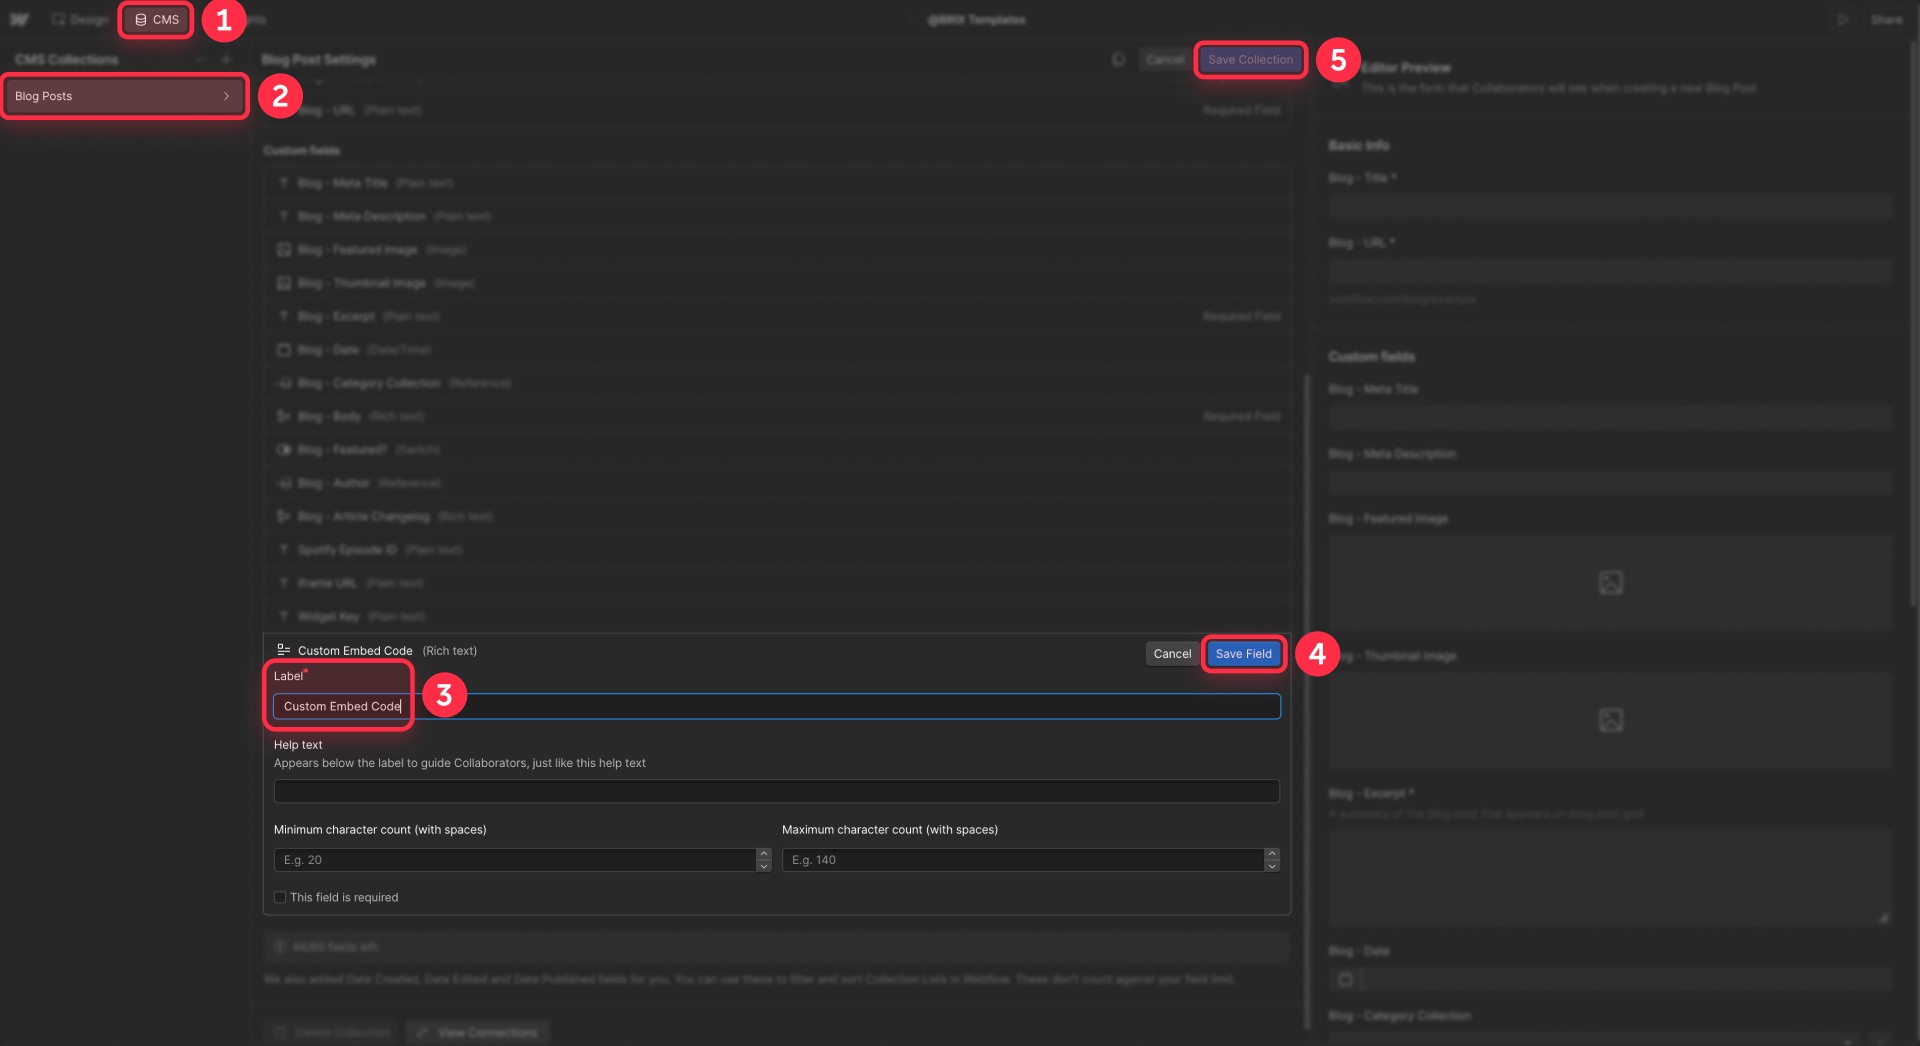
Setting up Rich Text fields for Webflow Custom Code
You have two approaches:
Create a dedicated field: Go to CMS → Collection Settings, add a new Rich Text field, and name it clearly: Custom Embed Code or Article Schema. This keeps embed code separate from your main content.
Use your existing Rich Text field: If you already have a Rich Text field for article content and only some items need custom embeds, you can add Custom Code blocks directly within that field. This is useful when embeds should appear inline with your content rather than in a fixed position.
Adding Custom Code to individual Webflow CMS items
- Open a CMS item in the Editor or CMS Panel
- Click into your Rich Text field
- Click the + button in the Rich Text toolbar
- Select Custom Code
- Paste your HTML, iframe, or script code
- Click Save
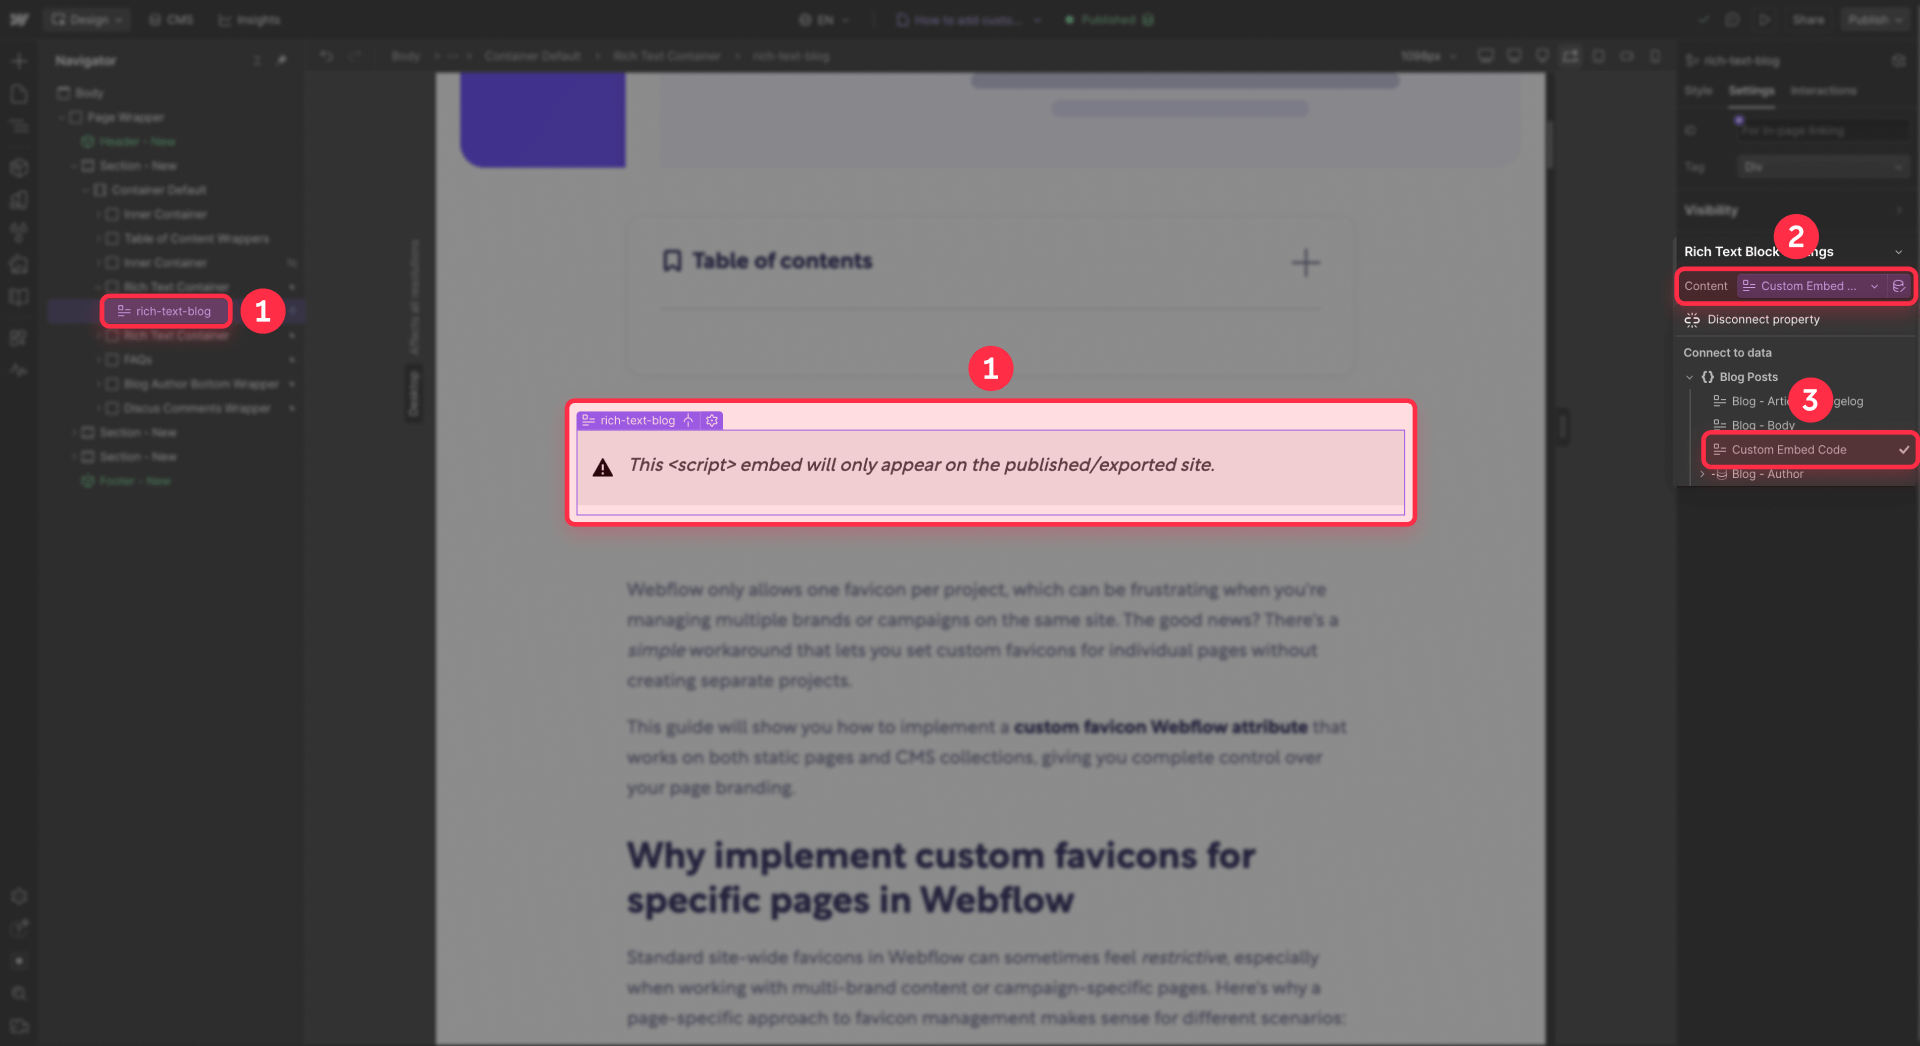
Binding the Rich Text field to your Webflow Template
- Open your Collection Template page
- Drag a Rich Text element where you want the code to appear
- Connect it to your Rich Text CMS field via the Settings Panel
- Publish and test
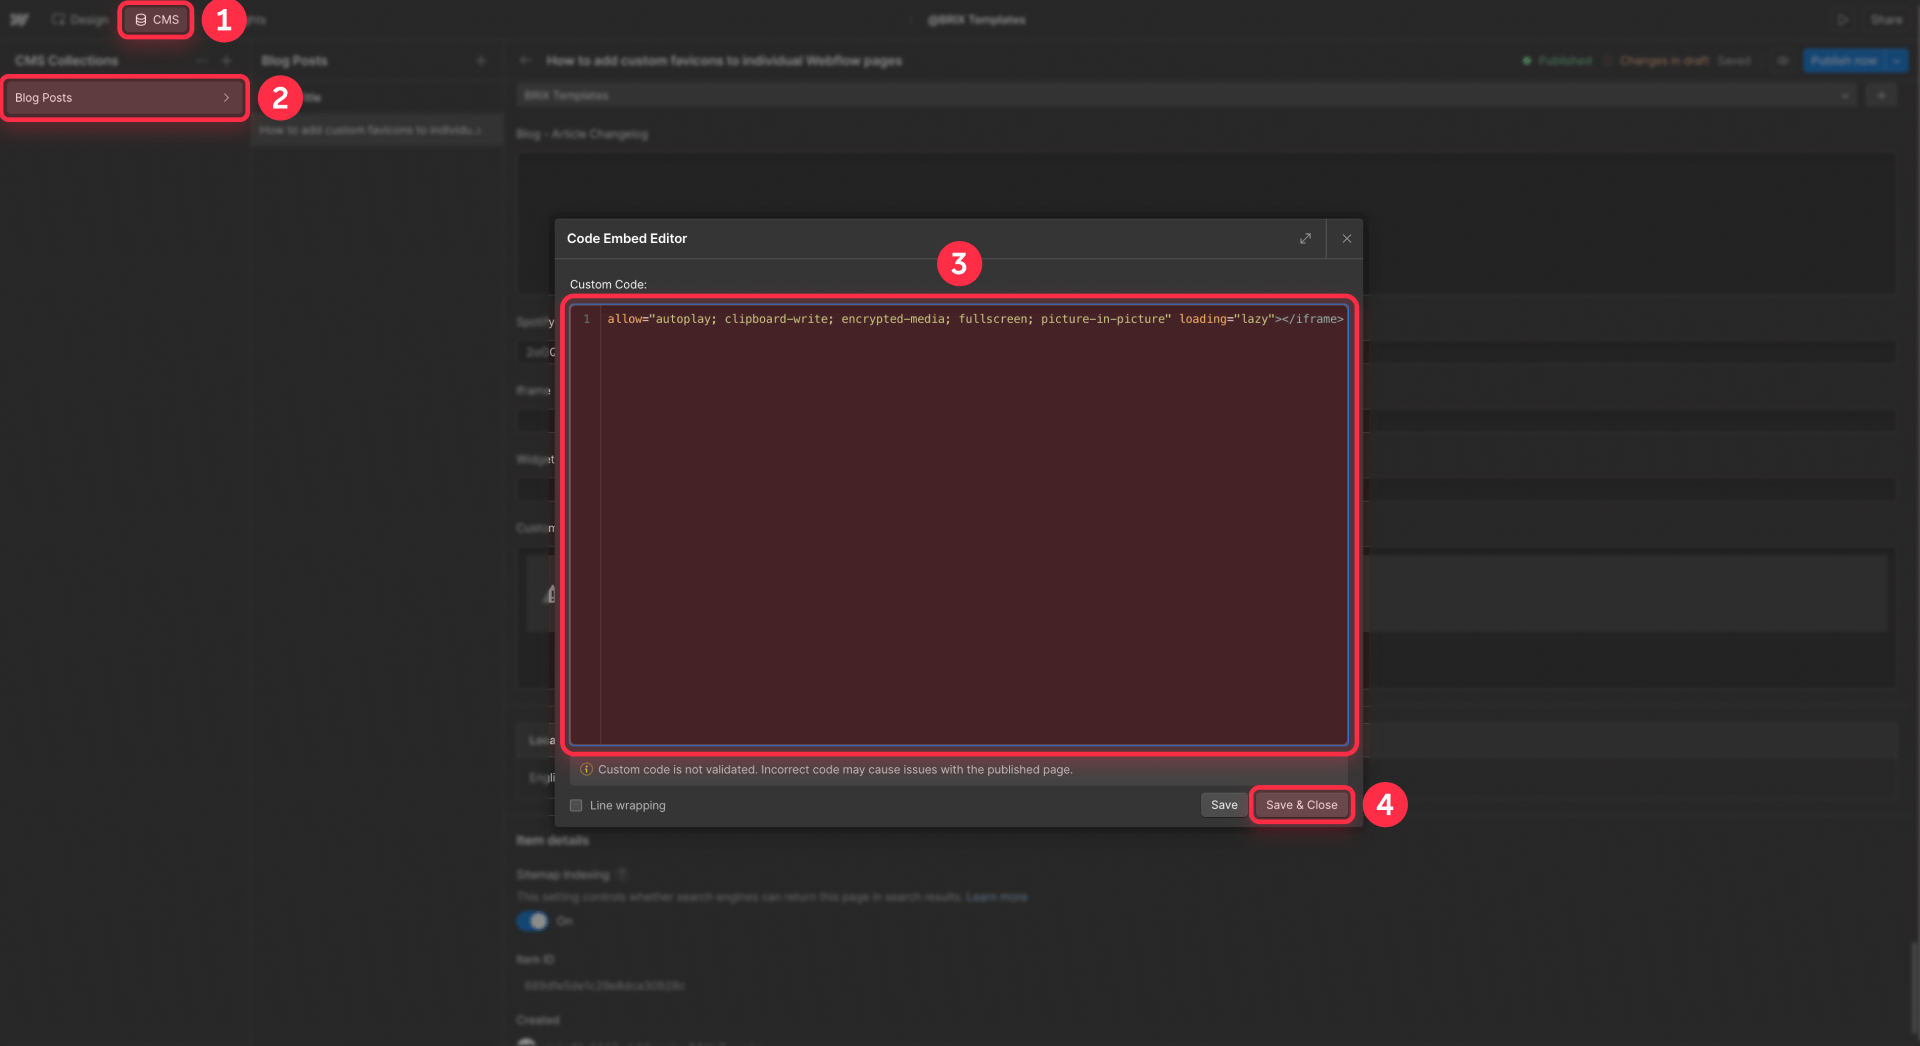
The Custom Code block inside each item's Rich Text will execute on the published site.
Choosing the right option for your Webflow project
Quick decision guide
- Same embed structure, different IDs/URLs → Option 1: Dynamic Embeds
- Need code in the
<head>(JSON-LD, canonical, verification tags) → Option 2: Page-Level Custom Code - Every CMS item needs completely different HTML → Option 3: Rich Text Custom Code
Rule of thumb: Start with Option 1 (Dynamic Embeds). It’s the cleanest and easiest to maintain. Only move to Options 2–3 when you hit a limitation that Option 1 can’t handle.
Troubleshooting Webflow CMS embeds
HTML appears as visible text instead of rendering: Your code is in a Plain Text field bound to a text element or injected incorrectly. Move it to an Embed element, Rich Text Custom Code block, or Page Settings Custom Code.
Embed works on one page but not others: Check that every CMS item has the required field filled in. Empty fields produce broken embeds.
Script doesn't run in the Designer: This is expected. Scripts only execute in preview mode and on the published site. Always test on your actual domain.
JSON-LD shows errors in testing tools: Double quotes in CMS text fields break JSON structure. Use single quotes instead, or switch to Rich Text Custom Code per item where you can control formatting directly.
Widget loads slowly or breaks the page: Heavy embeds (maps, video players) on pages with many Collection items can hurt performance. Consider lazy loading or limiting embeds to Template pages only.
Frequently asked questions about Webflow CMS HTML embeds
How do I embed unique HTML code on each Webflow CMS Collection page?
Use one of three options depending on your needs. For most cases, add an Embed element to your Collection Template, paste your widget's base HTML, and use Add Field to inject CMS data where values should change. This creates a Dynamic Embed that outputs unique HTML per item. For head-level scripts like JSON-LD, use Page Settings → Custom Code with CMS fields. When each item needs completely different HTML, use a Rich Text field with the Custom Code option per item.
Why does my HTML code appear as text instead of rendering in Webflow?
Webflow HTML-encodes content from Plain Text and Multi-line Text CMS fields for security reasons. When you bind these fields to text elements or inject them incorrectly, tags display as visible text instead of executing. To fix this, place your HTML in an Embed element, a Rich Text Custom Code block, or Page/Site Settings Custom Code—these are the only locations where Webflow allows code to execute.
Can I store full HTML in a Webflow CMS Plain Text field?
You can store it, but it won't render as HTML when output through standard field bindings. Webflow automatically encodes the content so tags appear as text. For executable HTML, use Rich Text Custom Code blocks per item or build your HTML structure in an Embed element and only inject simple data (IDs, URLs) from Plain Text fields.
What is the difference between Webflow Dynamic Embeds and Rich Text Custom Code?
Dynamic Embeds use a single Embed element on your template with CMS fields injected into a shared HTML structure—ideal when code is consistent and only values change. Rich Text Custom Code stores different HTML inside each CMS item's Rich Text field—ideal when every item needs genuinely unique code. Start with Dynamic Embeds for maintainability; use Rich Text Custom Code only when a template approach can't cover your variations.
How do I add per-post JSON-LD schema for Webflow CMS blog posts?
Open your Collection Template's Page Settings → Custom Code. In the Inside Head Tag field, paste your JSON-LD script and use Add Field to inject CMS values like title, author, date, and image. Avoid using double quotes within your CMS text content—use single quotes instead to prevent breaking the JSON structure.
Which Webflow option is best for embedding different iframes on each CMS page?
For most iframe embeds, use Option 1: Dynamic Embeds. Store the iframe URL in a CMS field, add an Embed element to your template with a standard iframe structure, and inject the URL field using Add Field. Each page renders the same iframe code with different sources. If you need iframes inside article content rather than fixed positions, use Rich Text Custom Code instead.
Why do my Webflow CMS scripts only work after publishing?
Webflow's Designer canvas never executes scripts—this is intentional for security and performance. Your code only runs in preview mode and on the published site. Always test embeds and Custom Code on your staging or live domain, not in the Designer.
What's the safest way to let content editors manage Webflow embeds?
Give editors simple CMS data fields (IDs, URLs, toggle switches) instead of full code access. Build the actual HTML structure in an Embed element on your Collection Template, and use Add Field to pull CMS values into the code. If editors truly need to paste custom code, provide a dedicated Rich Text CMS field with clear documentation and bind it to a Rich Text element on the template.
Conclusion
Embedding unique HTML on every Webflow CMS page becomes straightforward once you use the right option for your situation. Dynamic Embeds handle most repeatable widgets, Page-Level Custom Code covers head scripts like JSON-LD, and Rich Text Custom Code fills in gaps for one-off embeds.
Start with Option 1 (Dynamic Embeds) for most projects—it's the cleanest and easiest to maintain. Move to other options only when you hit a specific limitation that requires more flexibility.
If you need help architecting a scalable CMS structure or implementing complex embed patterns, our Webflow agency team can build it right the first time.


Join readers commenting on this post!