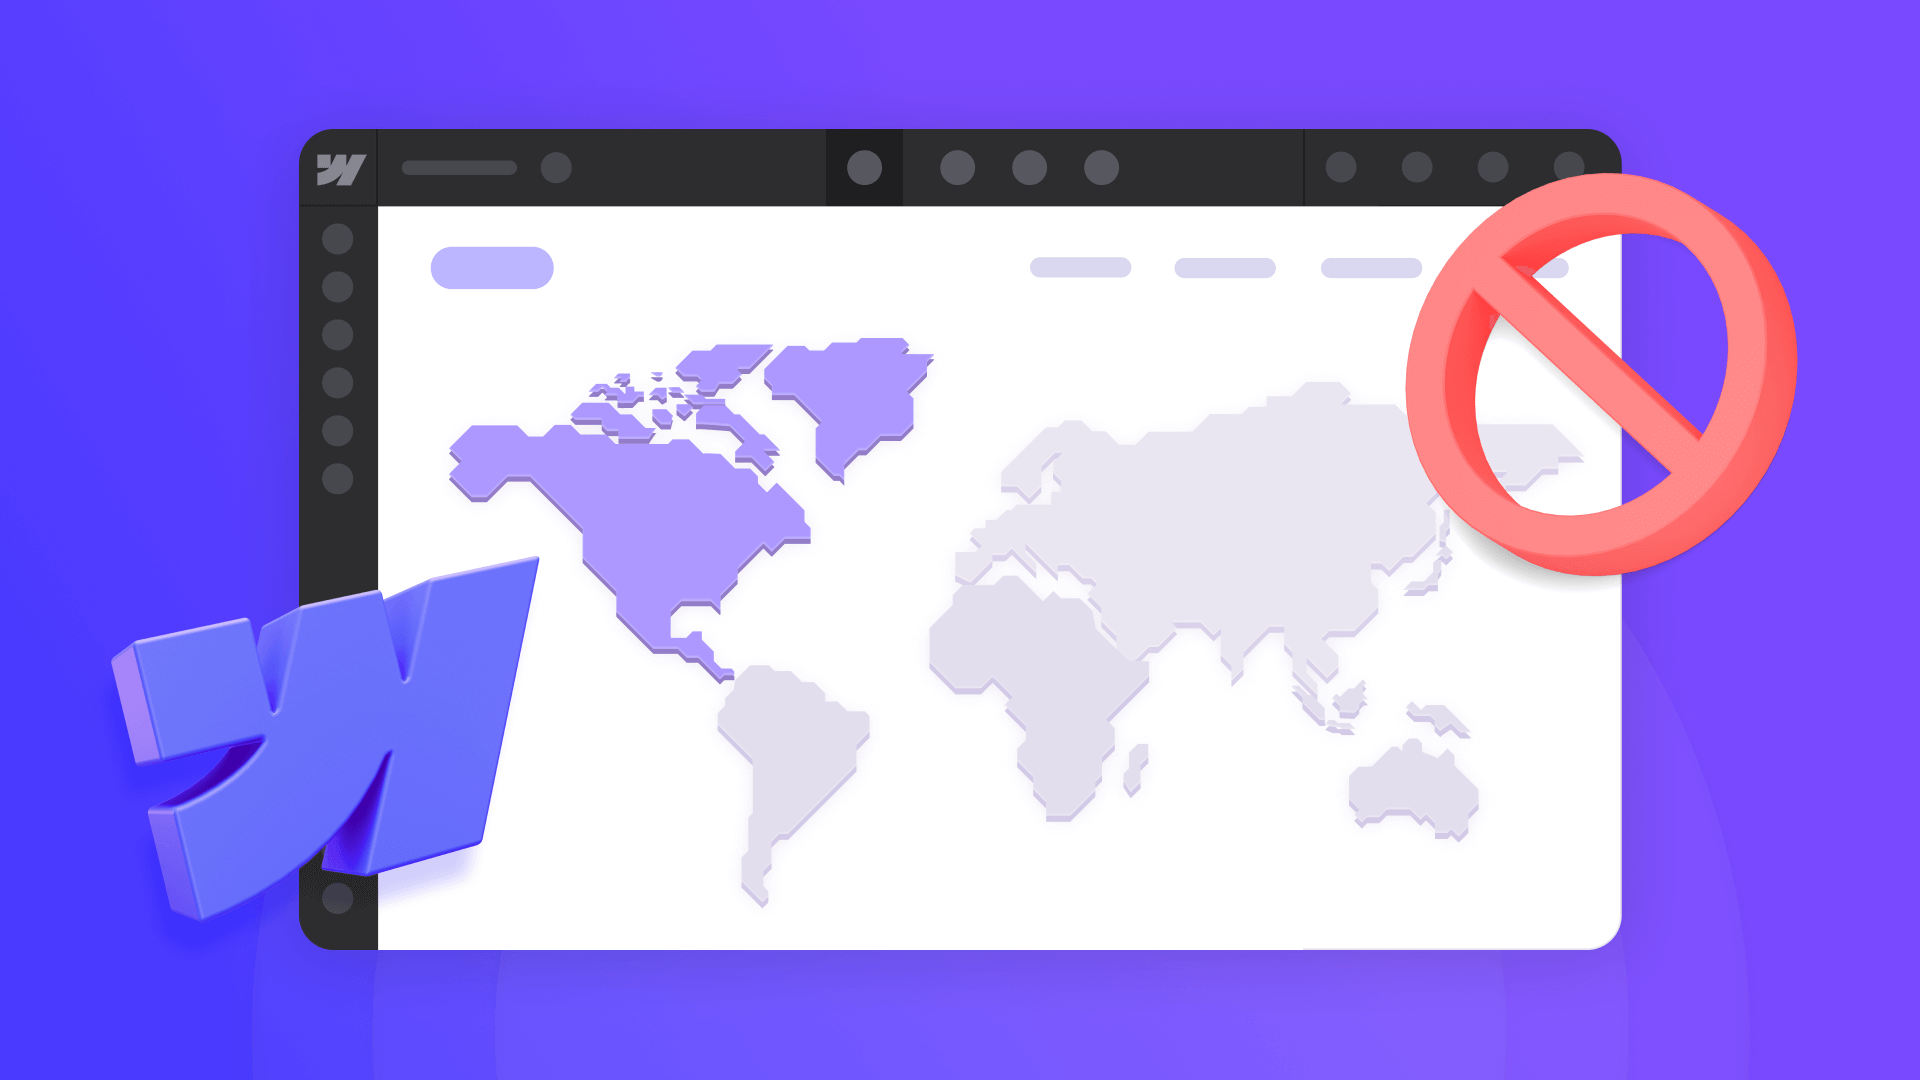
Not every website needs to be accessible worldwide. Some businesses operate in specific regions, face regulatory restrictions, or simply want more control over who can access their content. However, Webflow doesn’t include built-in geo-restriction tools, making it challenging to manage access based on location.
If you need a way to filter visitors by country or region, Cloudflare’s Web Application Firewall (WAF) provides a straightforward solution. This guide will walk you through how to set up geo-blocking step by step using Cloudflare WAF, so you can manage access as needed.
Why consider geo-blocking for your Webflow site
For some businesses, controlling access based on geography can be an important consideration. Whether it’s to reduce spam, meet legal requirements, or focus on a specific market, Geo-blocking provides a way to manage traffic more effectively.
Here are some of the most common reasons businesses choose to implement it:
- Spam and attack mitigation: If your Webflow site is bombarded with spam, bot traffic, or malicious attacks from a particular country, blocking that country can dramatically reduce the problem.
- Regulatory compliance and legal requirements: Your business or organization might be subject to regulations or legal restrictions that prevent you from serving content or transacting with users in certain countries. In some cases, failing to comply could result in penalties or legal consequences. Geo-blocking helps your Webflow site stay compliant and adhere to these requirements.
- Targeted marketing and content: You may want to focus your Webflow website and marketing efforts on specific geographic markets. Geo-blocking allows you to tailor your content and offers to your desired audience.
While there are other reasons—such as content licensing and legal obligations—these three are the most common and relevant for most users.
What you'll learn
Let’s go over what we’ll be doing in this guide. In this guide, you will learn to set up Geo‑blocking on your Webflow site using Cloudflare’s Web Application Firewall (WAF). Specifically, you’ll learn how to:
• Block visitors from specific countries
• Use Cloudflare’s firewall rules to allow or restrict access based on geographic location
• Implement more advanced filtering methods
Now that you have an overview, let's dive into setting up geo-blocking for your Webflow site
Setting up Cloudflare for your Webflow domain
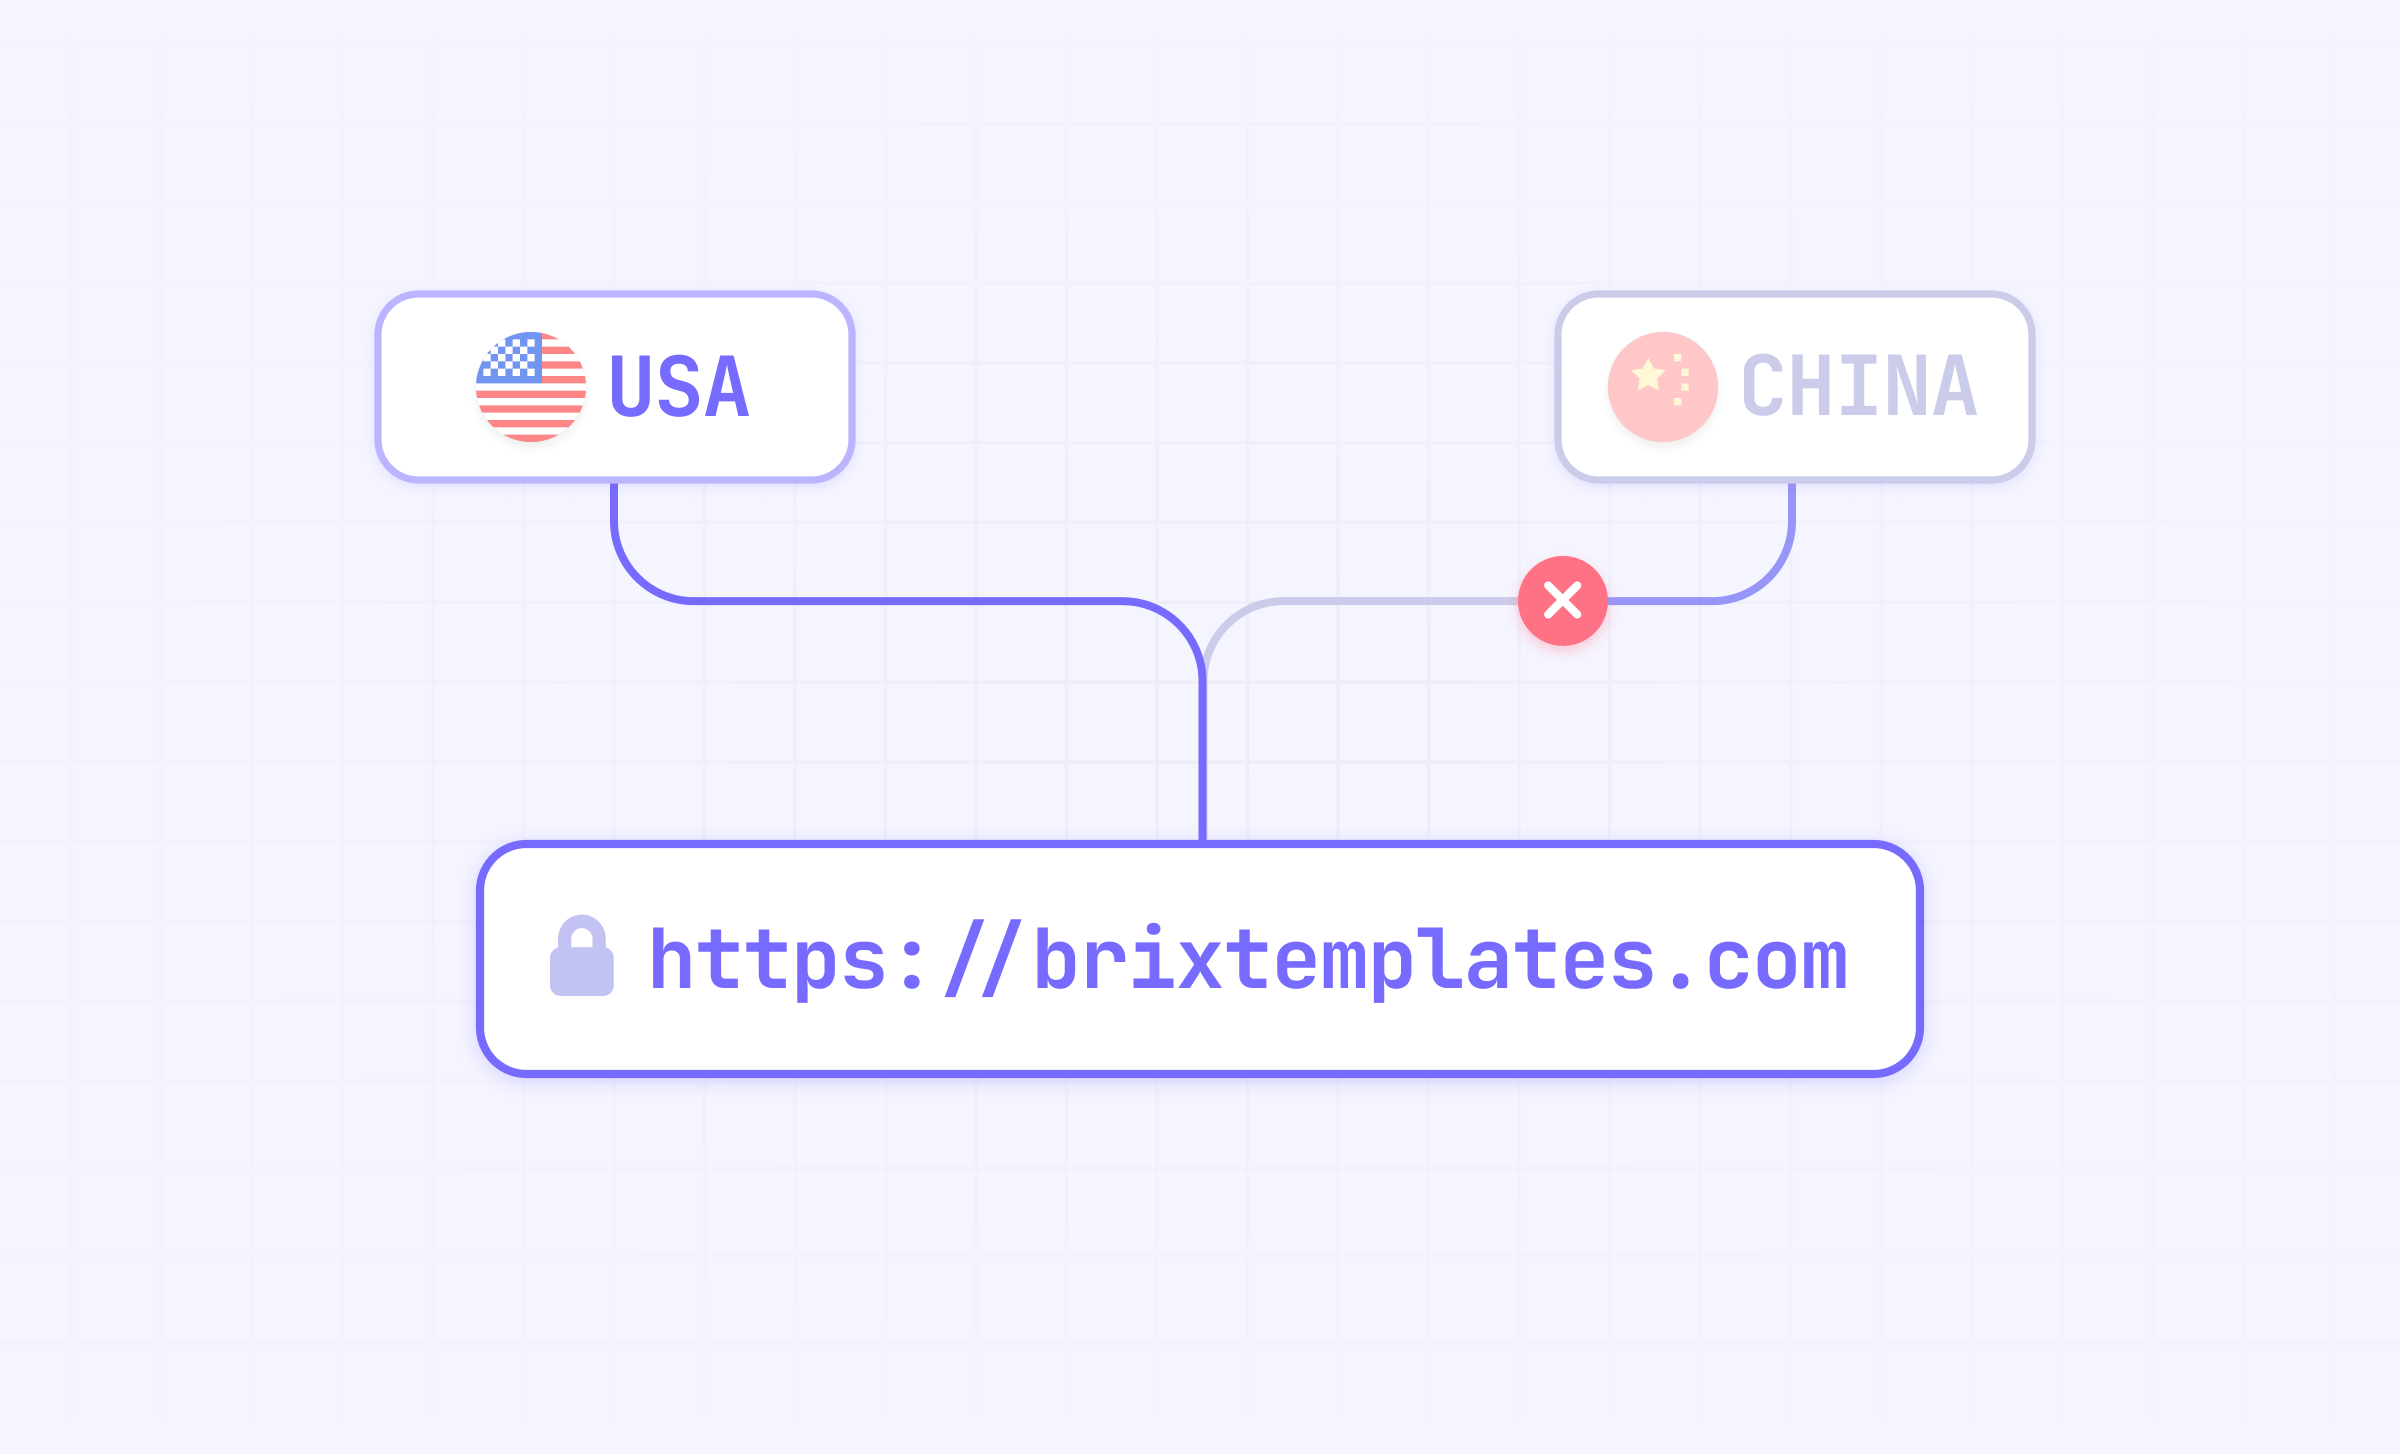
To use Cloudflare’s geo-blocking features, you must connect your Webflow site to Cloudflare by updating your domain’s DNS settings. This ensures Cloudflare acts as a protective layer between visitors and your Webflow site. This is done by updating your domain’s DNS records (at your domain registrar, like GoDaddy or Namecheap) to point to Cloudflare’s servers. Once connected, Cloudflare acts as an intermediary (via its proxy), filtering all traffic before it reaches your Webflow site.
We have a detailed, step-by-step guide on How to connect your custom domain to Webflow using Cloudflare. Rather than repeating the full process, here’s a quick overview of what needs to be done:
Quick setup overview
- Set up Cloudflare: Create a Cloudflare account and add your domain
- Update nameservers: Replace your domain registrar’s nameservers with Cloudflare’s
- Configure DNS: Add the required A and CNAME records for Webflow
- Enable SSL & Page Rules: Set SSL to Full (Strict) and add necessary rules
- Verify & test: Check that your site loads correctly and DNS changes have propagated
Now that Cloudflare is connected to your Webflow site, let’s take a closer look at how its Web Application Firewall (WAF) works to block visitors based on location. Understanding this process will help you configure geo-blocking rules effectively.
Understanding Cloudflare's WAF protecting your Webflow traffic
Before configuring geo-blocking, it’s important to understand how Cloudflare blocks visitors from specific countries on your Webflow site. This is done through the Web Application Firewall (WAF)—a security layer that acts like a virtual security guard for your website. It sits between your site and visitors, inspecting every request before it reaches Webflow.
Here's a breakdown:
- Request interception: Since you’re using Cloudflare’s DNS and proxy, all traffic to your Webflow site is first routed through Cloudflare’s servers. This means Cloudflare can intercept and process requests before they reach Webflow. If Cloudflare’s Web Application Firewall (WAF) is enabled, it can inspect, filter, and manage incoming requests based on defined rules. This interception is crucial to how the WAF works.
- IP geolocation: Cloudflare identifies a visitor’s approximate geographic location based on their IP address (a unique identifier assigned to their internet connection). It does this using IP Geolocation databases, which accurately map IP addresses to specific locations.
- Rule evaluation: Cloudflare’s WAF operates based on a set of rules that you define. It evaluates each incoming request against these rules. For geo-blocking, the rule typically follows this logic: “If the visitor’s country is X, then take action Y.”
- Action execution: When a request matches a WAF rule, Cloudflare takes the specified action. In the case of geo-blocking, this action is usually “Block”, preventing the visitor from accessing your Webflow site. However, other actions like “Challenge” (e.g., requiring CAPTCHA verification) are also available.
Now that you understand how Cloudflare’s WAF works to filter and block visitors based on location, it’s time to configure your own geo-blocking rules. In the next section, we’ll walk you through the step-by-step process of setting up country-based blocking in Cloudflare to protect and control access to your Webflow site.
Step-by-step blocking countries on your Webflow site with Cloudflare
Let's implement the geo-blocking rules. We'll use Cloudflare's WAF to create custom rules.
- Log in or create a Cloudflare account
- Select your domain from the Cloudflare dashboard
- Go to Security → WAF in the left sidebar
- Click "Create rule" to start
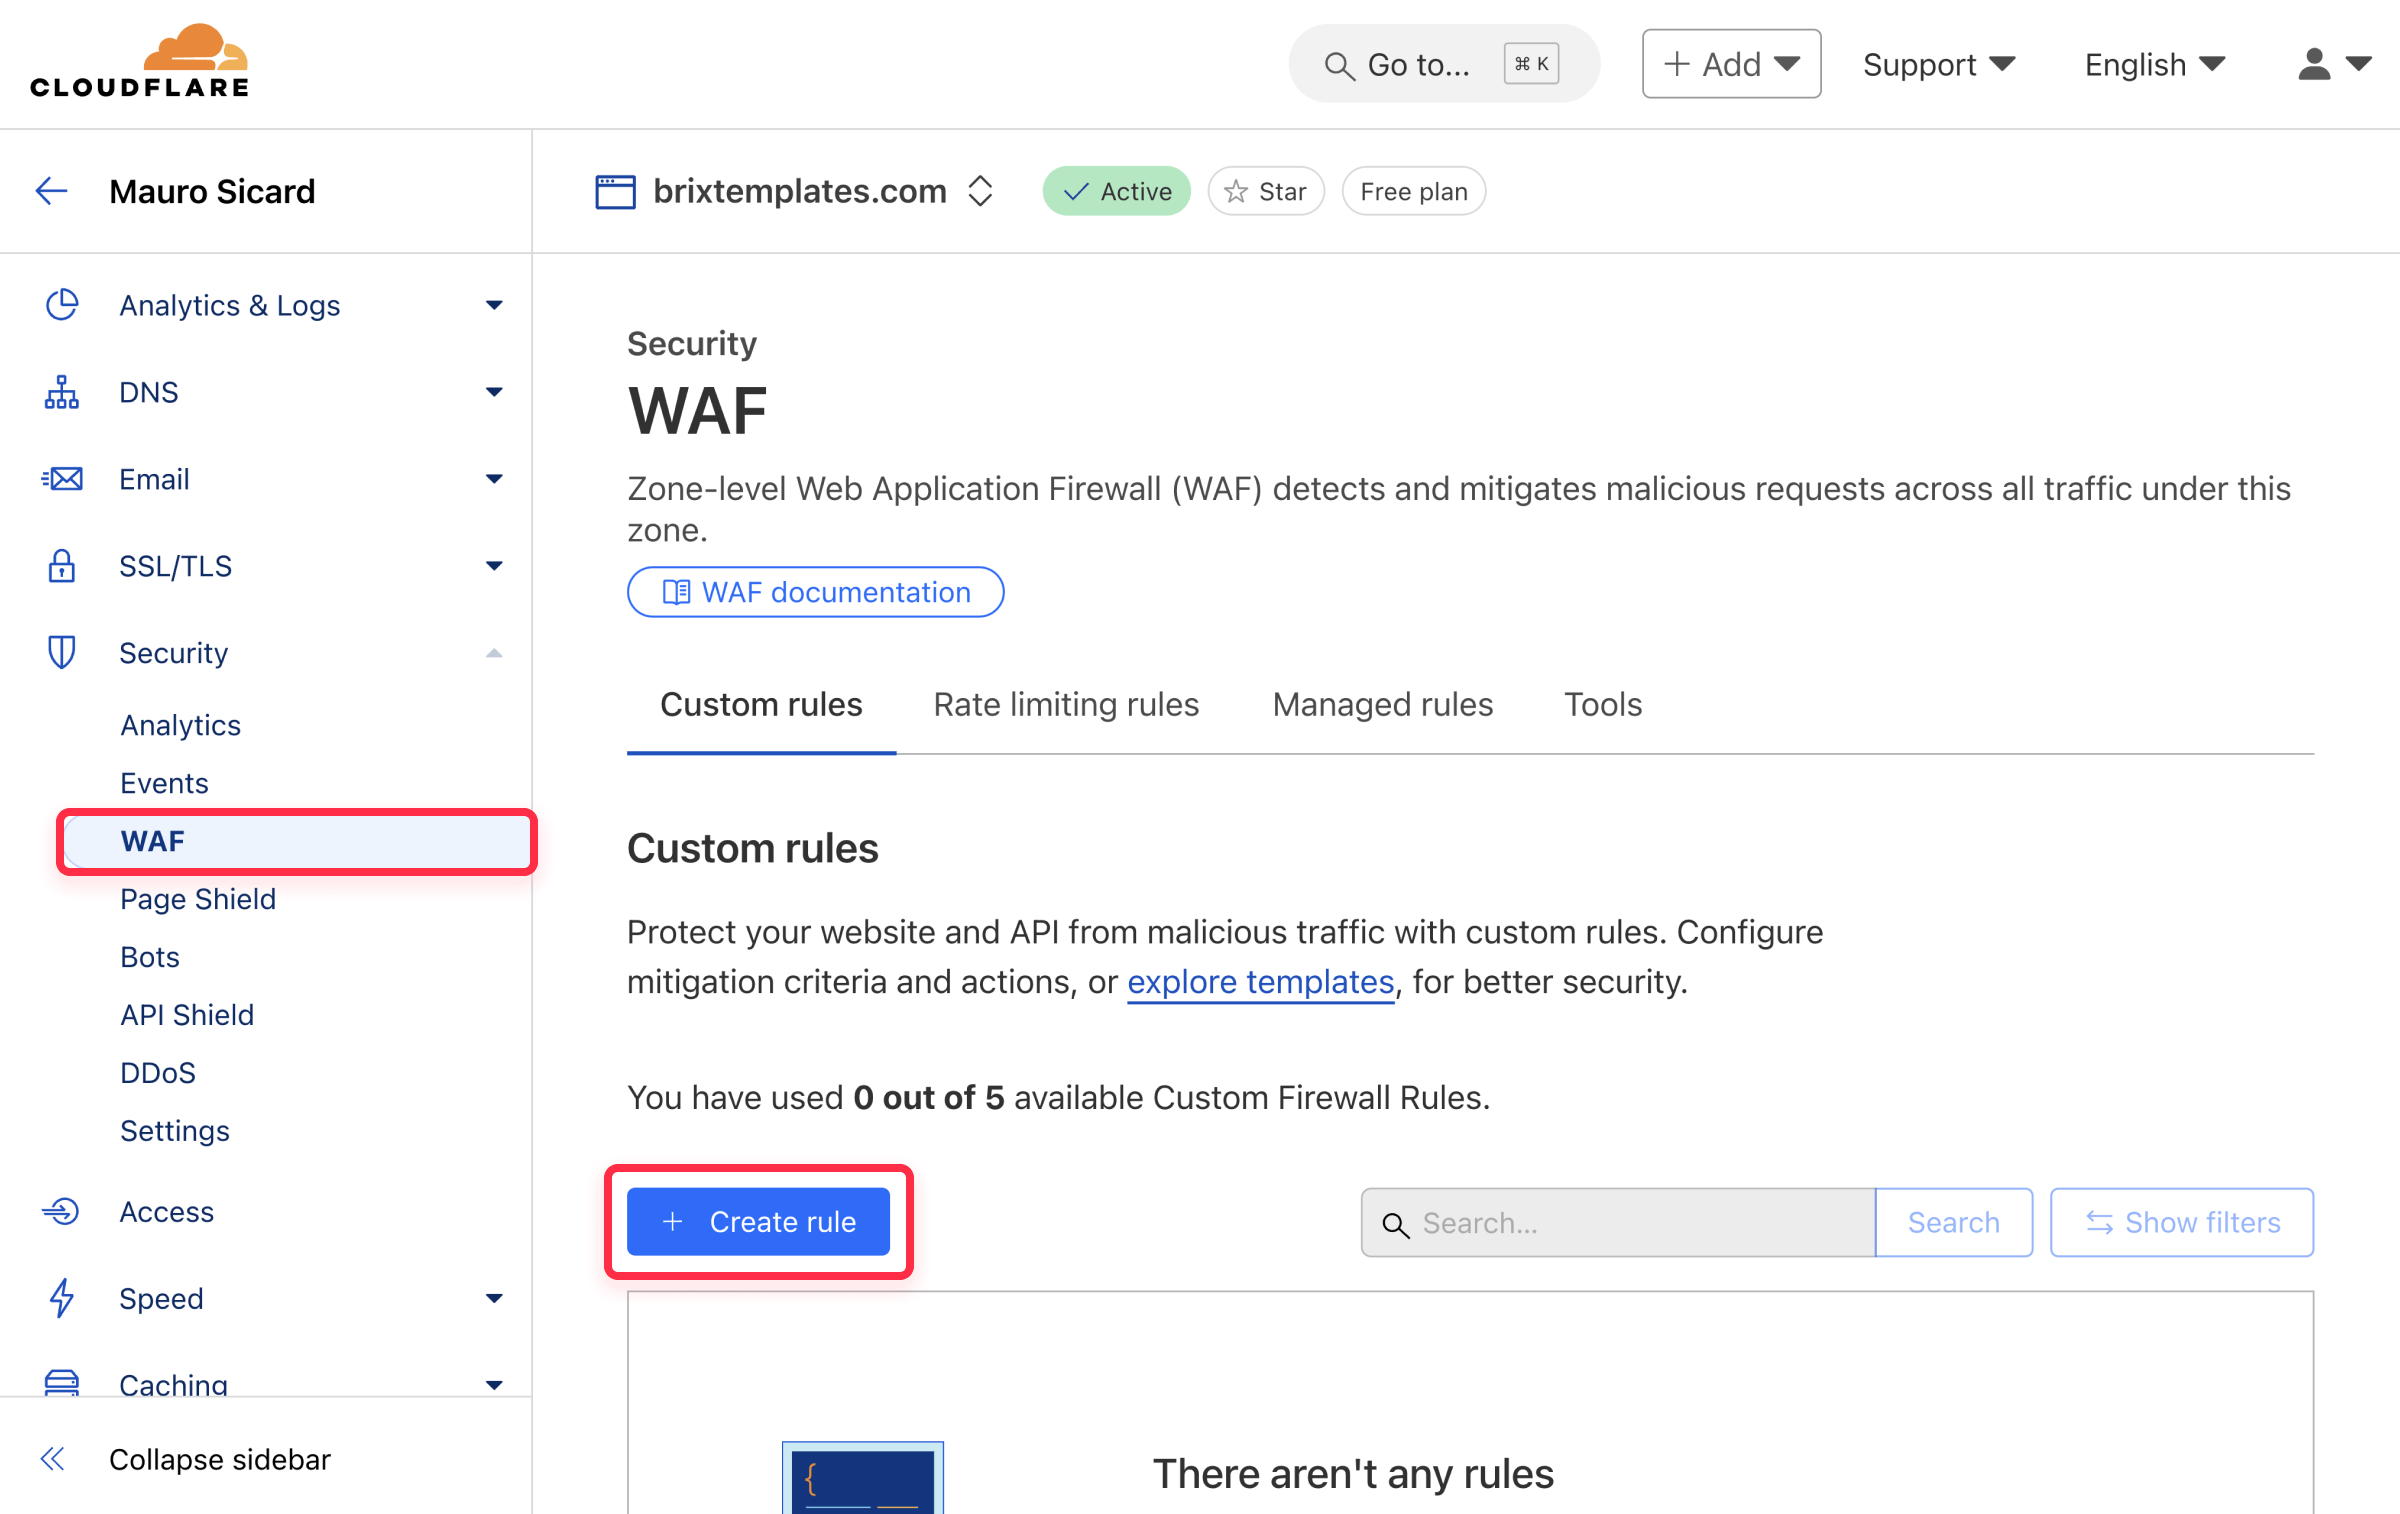
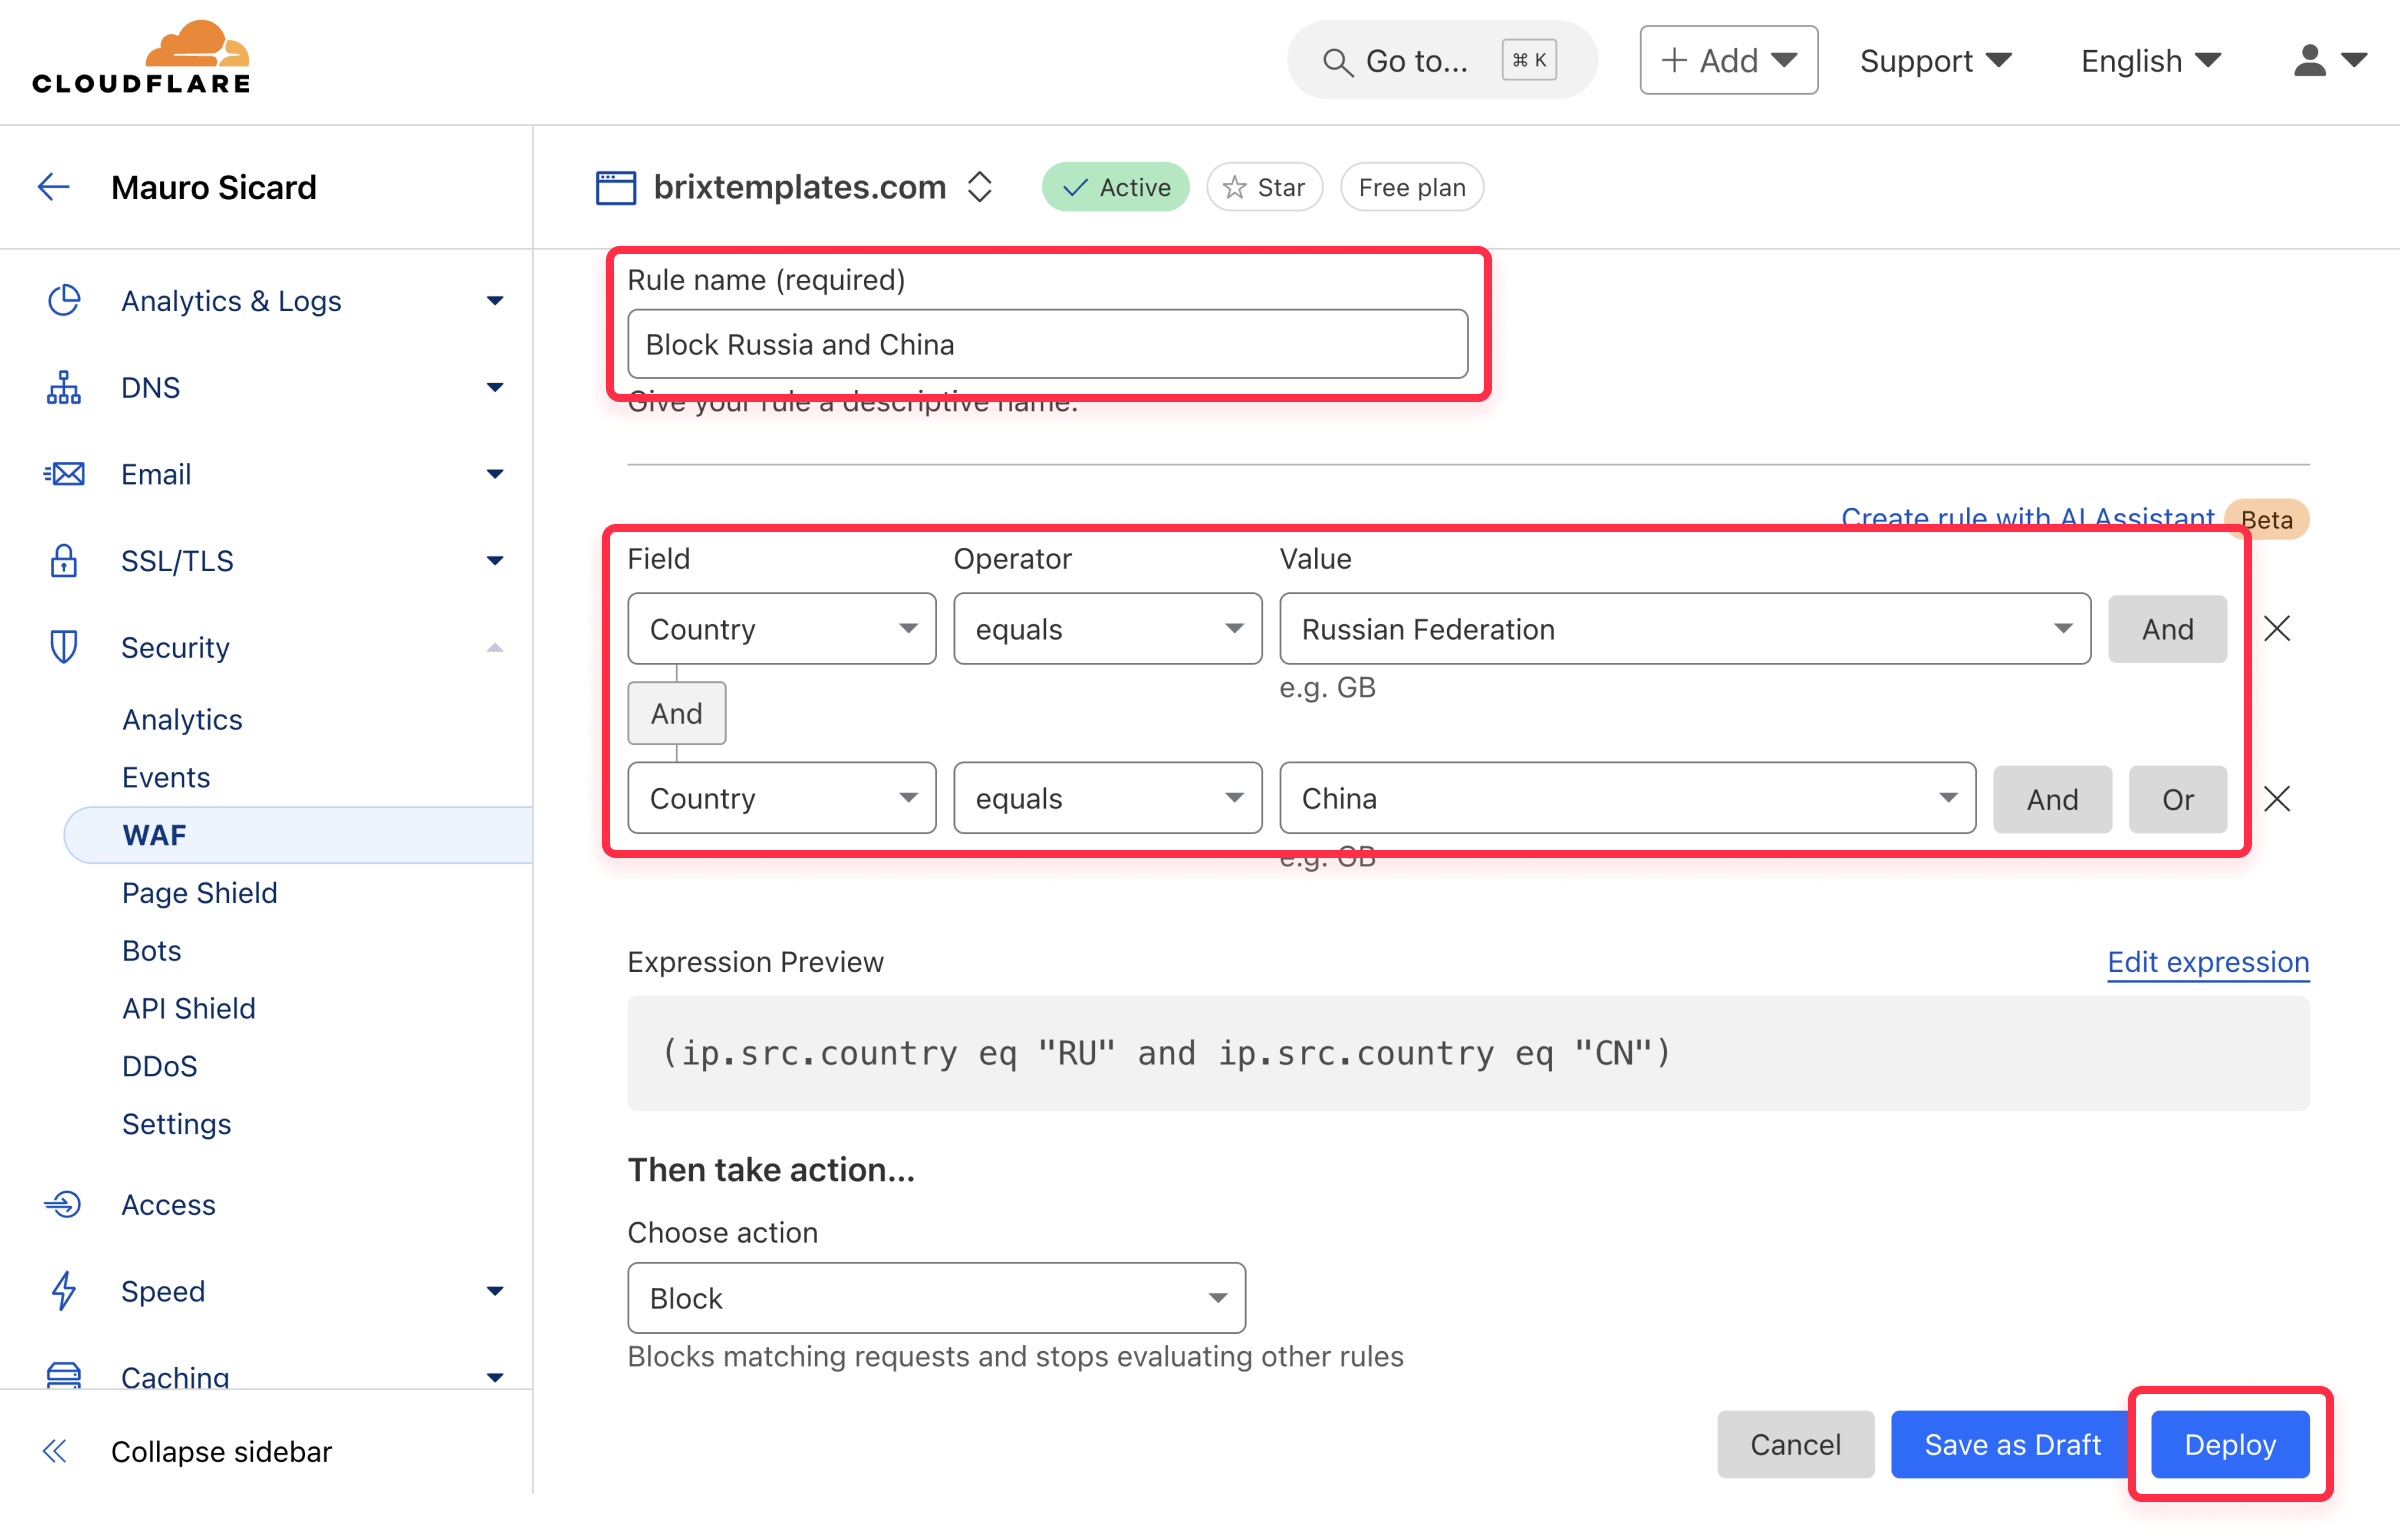
- Name your rule (e.g., “Block Russia and China”)
- Configure the rule for blocking:
- Field: Select "Country" from the dropdown
- Operator: Choose "equals."
- Value: Type the country name e.g., China, Russian Federation.
- Under “Then take action…”, select “Block”
- Click "Deploy"
Using custom expressions
Cloudflare’s Expression Editor allows you to create advanced firewall rules that go beyond the limitations of the standard rule builder. While the basic rule builder lets you block a single country per condition, custom expressions enable more complex filtering, such as:
- Blocking multiple countries within a single rule
- Combining geolocation rules with other conditions, such as blocking traffic from specific regions only if they attempt to access sensitive pages
- Filtering requests based on multiple factors, like IP reputation, user agents, request methods, or specific URL paths
These are just a few examples—custom expressions allow for even more advanced logic, giving you fine-grained control over how traffic is managed.
When using the Expression Editor, you’ll need to enter each country’s ISO 3166-1 Alpha-2 code (e.g., CN for China, RU for Russia). See the full country code list for reference.
How to use the expression editor
- In the “Create rule” screen, click “Edit expression.”
- Enter one of the following expressions depending on your needs:
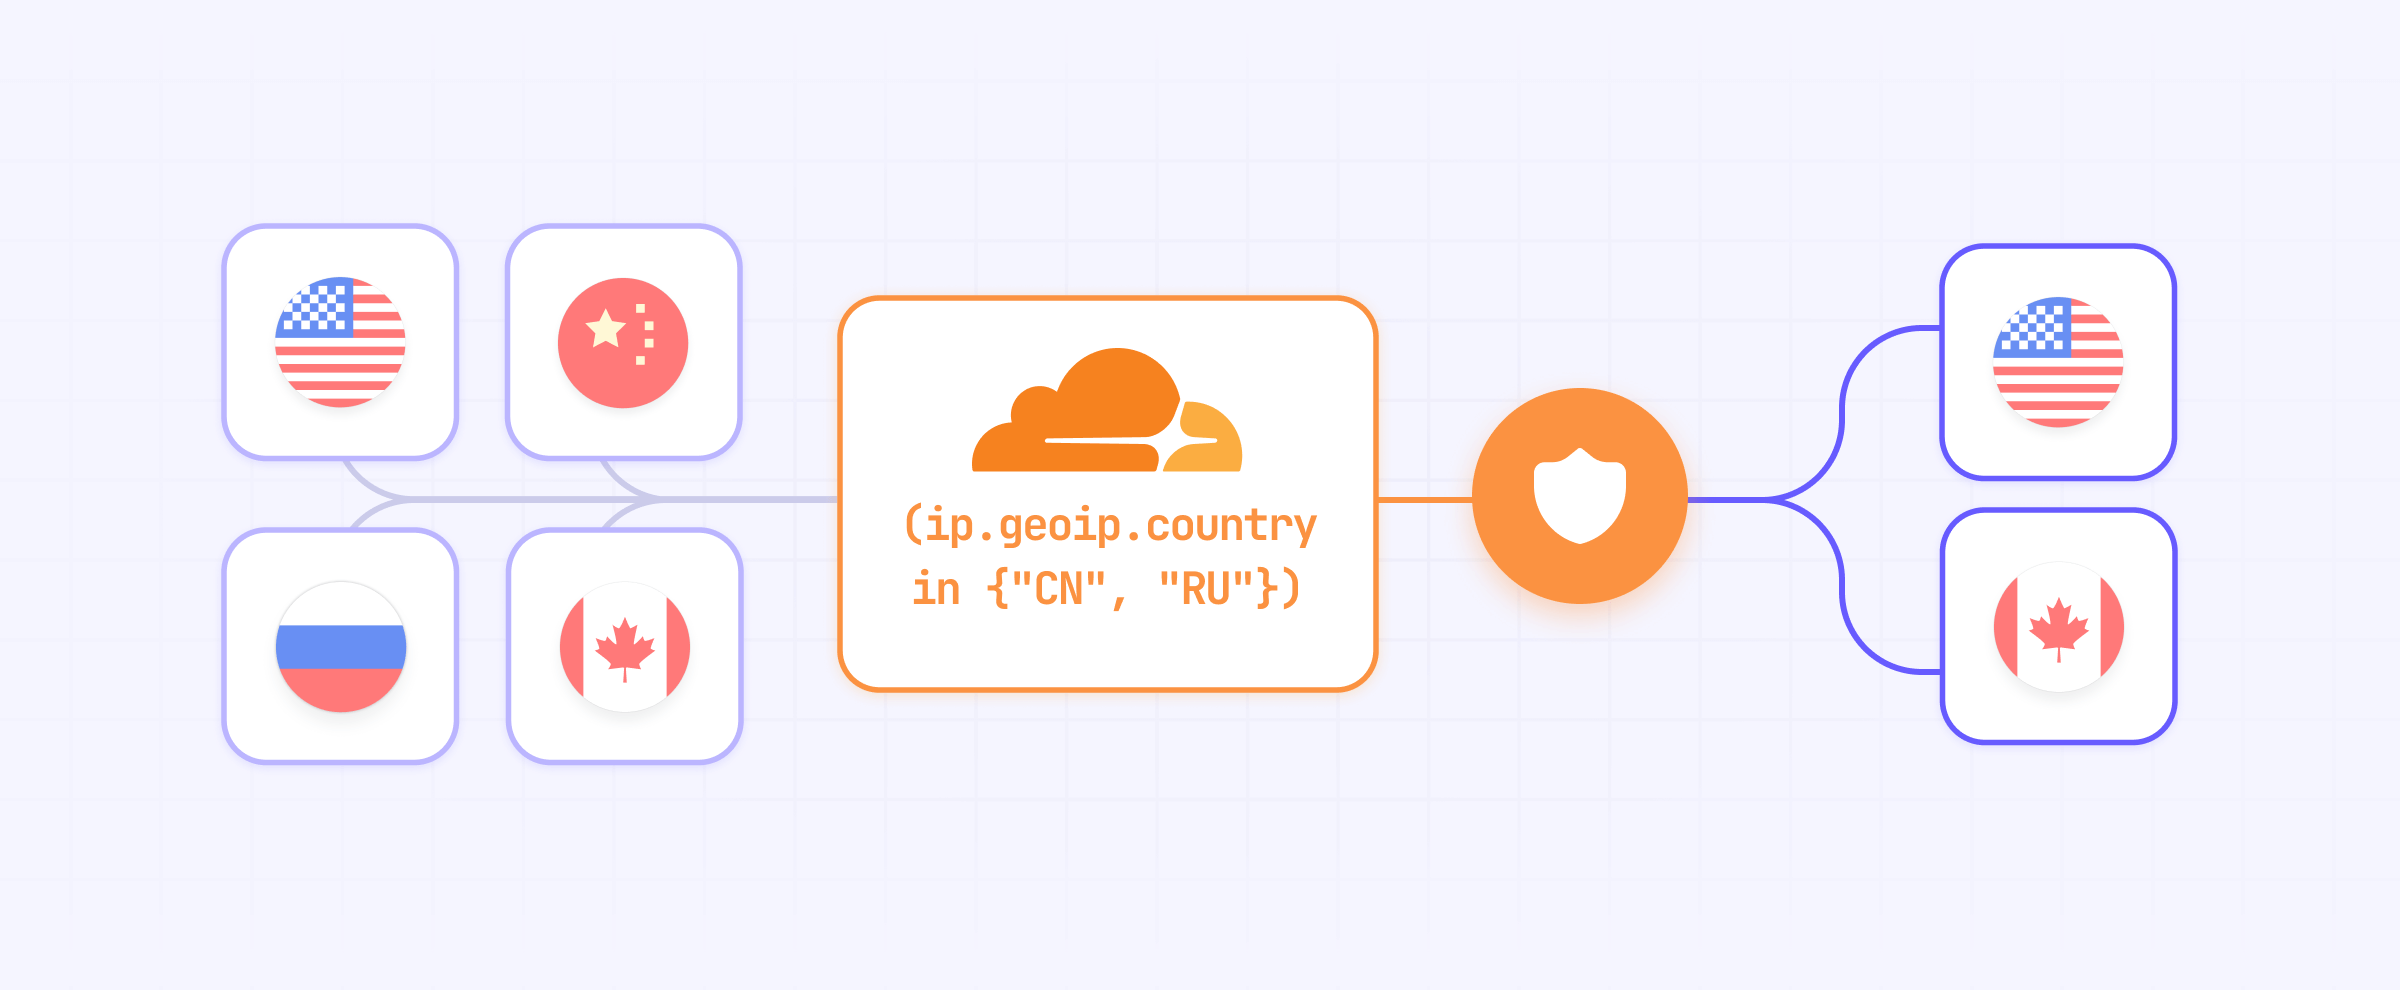
- Block China and Russia: (ip.geoip.country in {"CN" "RU"})
- Block China, Russia, and North Korea: (ip.geoip.country in {"CN" "RU" "KP"})
- Block multiple countries (e.g., Iran, Syria, Cuba, etc.): (ip.geoip.country in {"CN" "RU" "KP" "IR" "SY" "CU"})
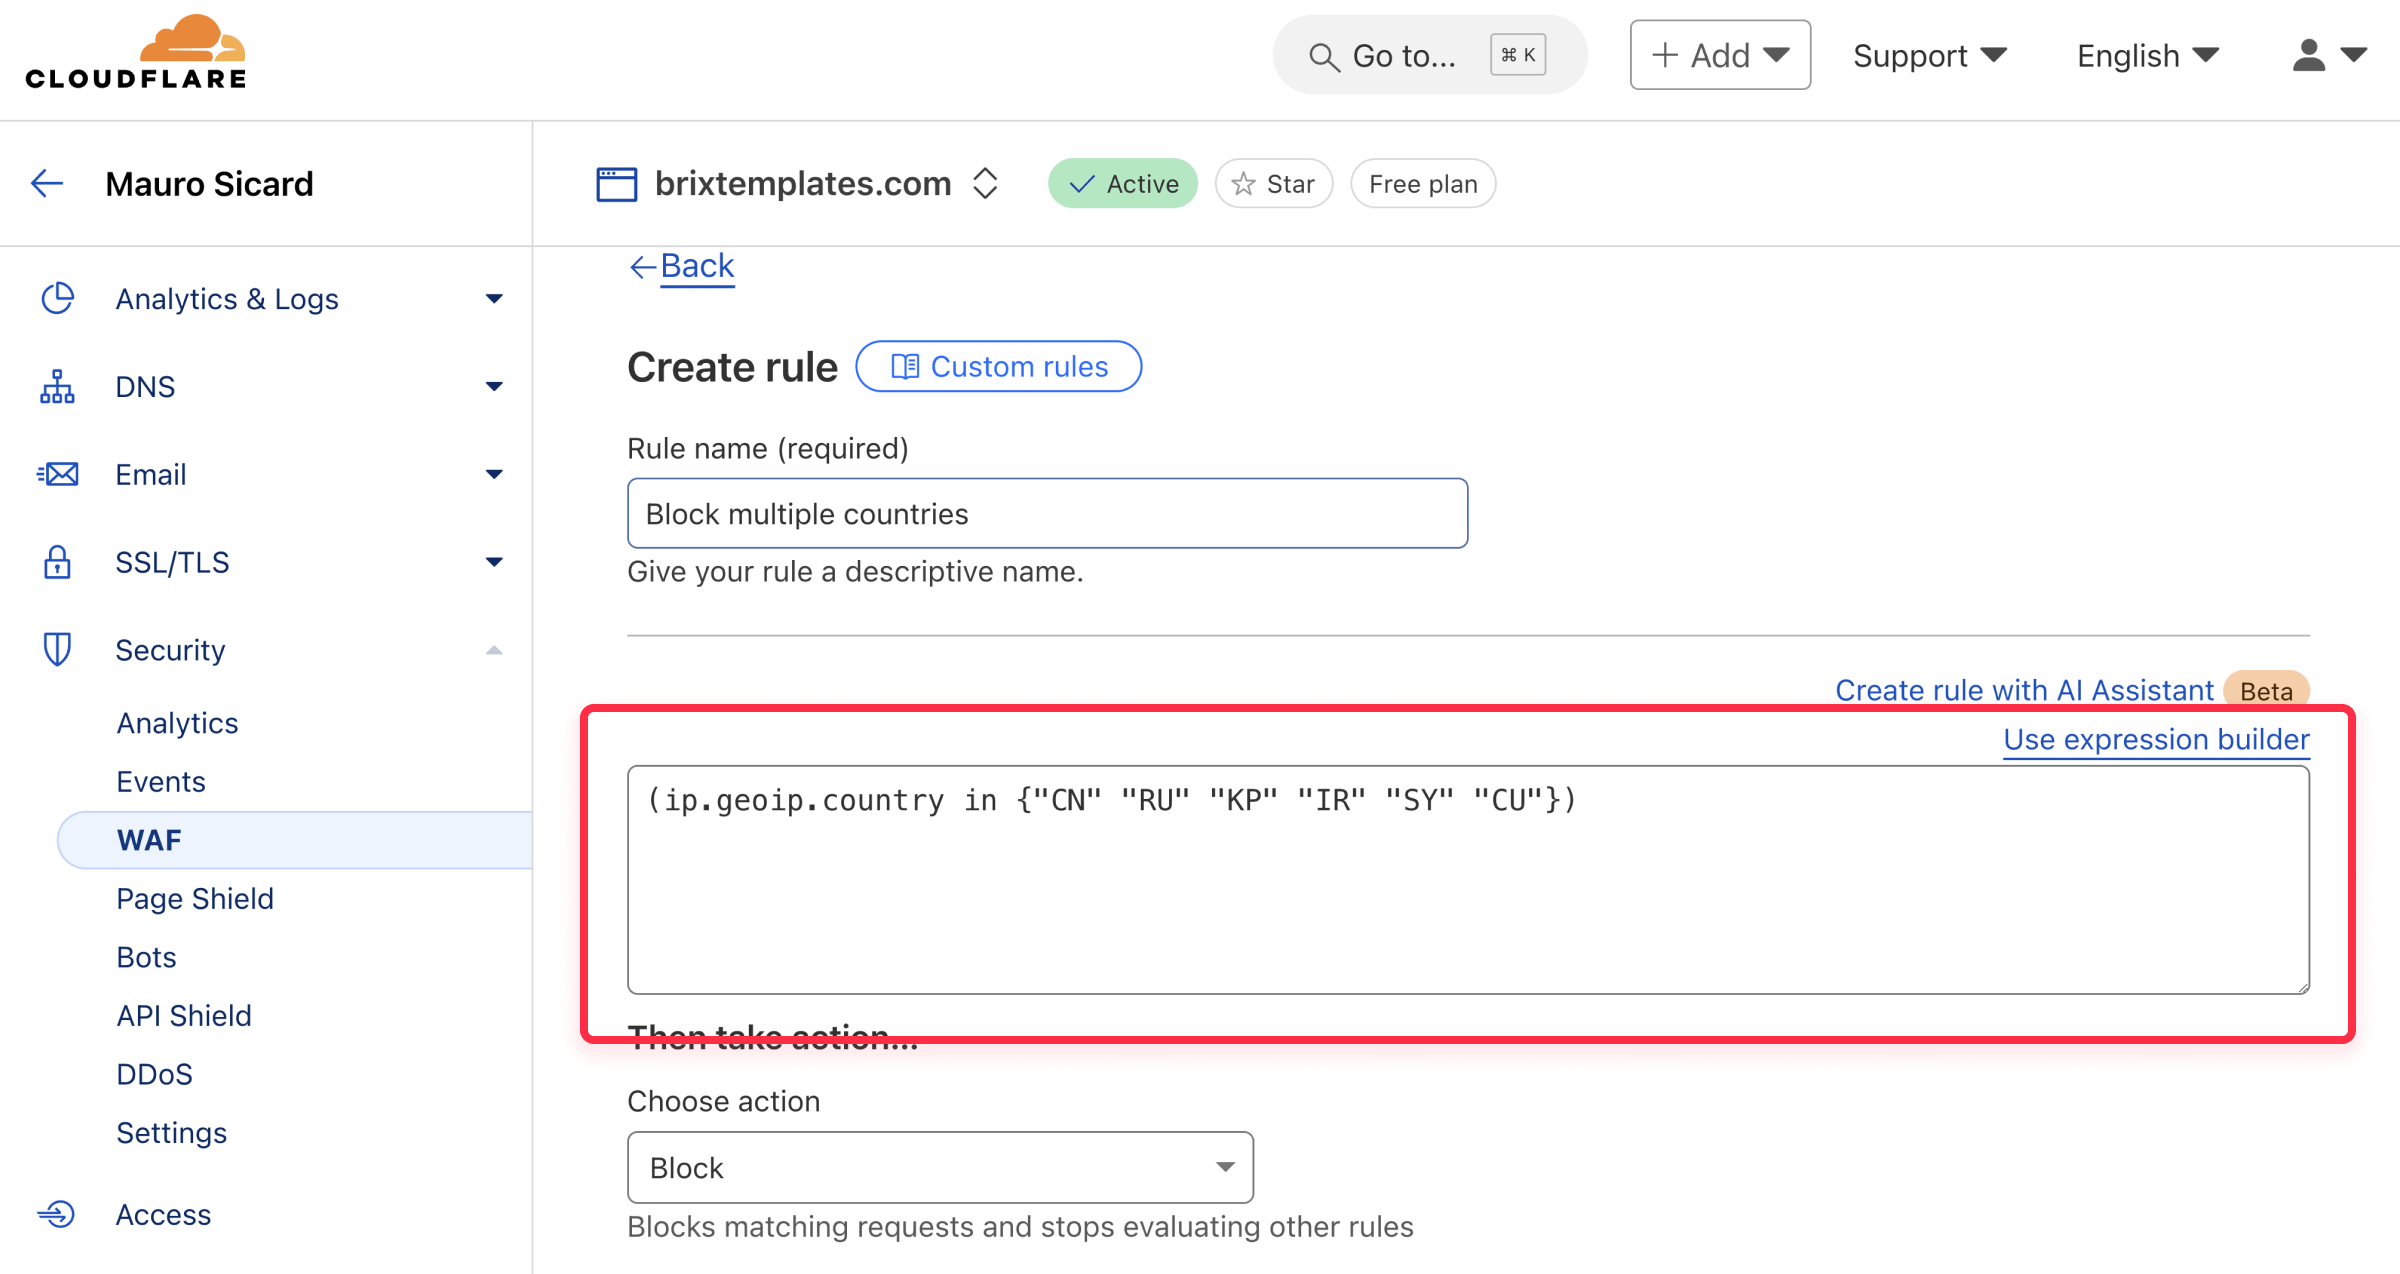
This method is one of the simplest ways to block multiple countries in Cloudflare’s WAF, but custom expressions can also be used for more advanced filtering, such as blocking traffic based on request headers, specific URLs, or rate limiting based on user behavior.
Allowing only specific countries access to your Webflow site
Sometimes, instead of blocking certain countries, you may want to allow only specific ones while blocking everything else. This is called a allowlist approach, and it’s useful for highly targeted Webflow sites.
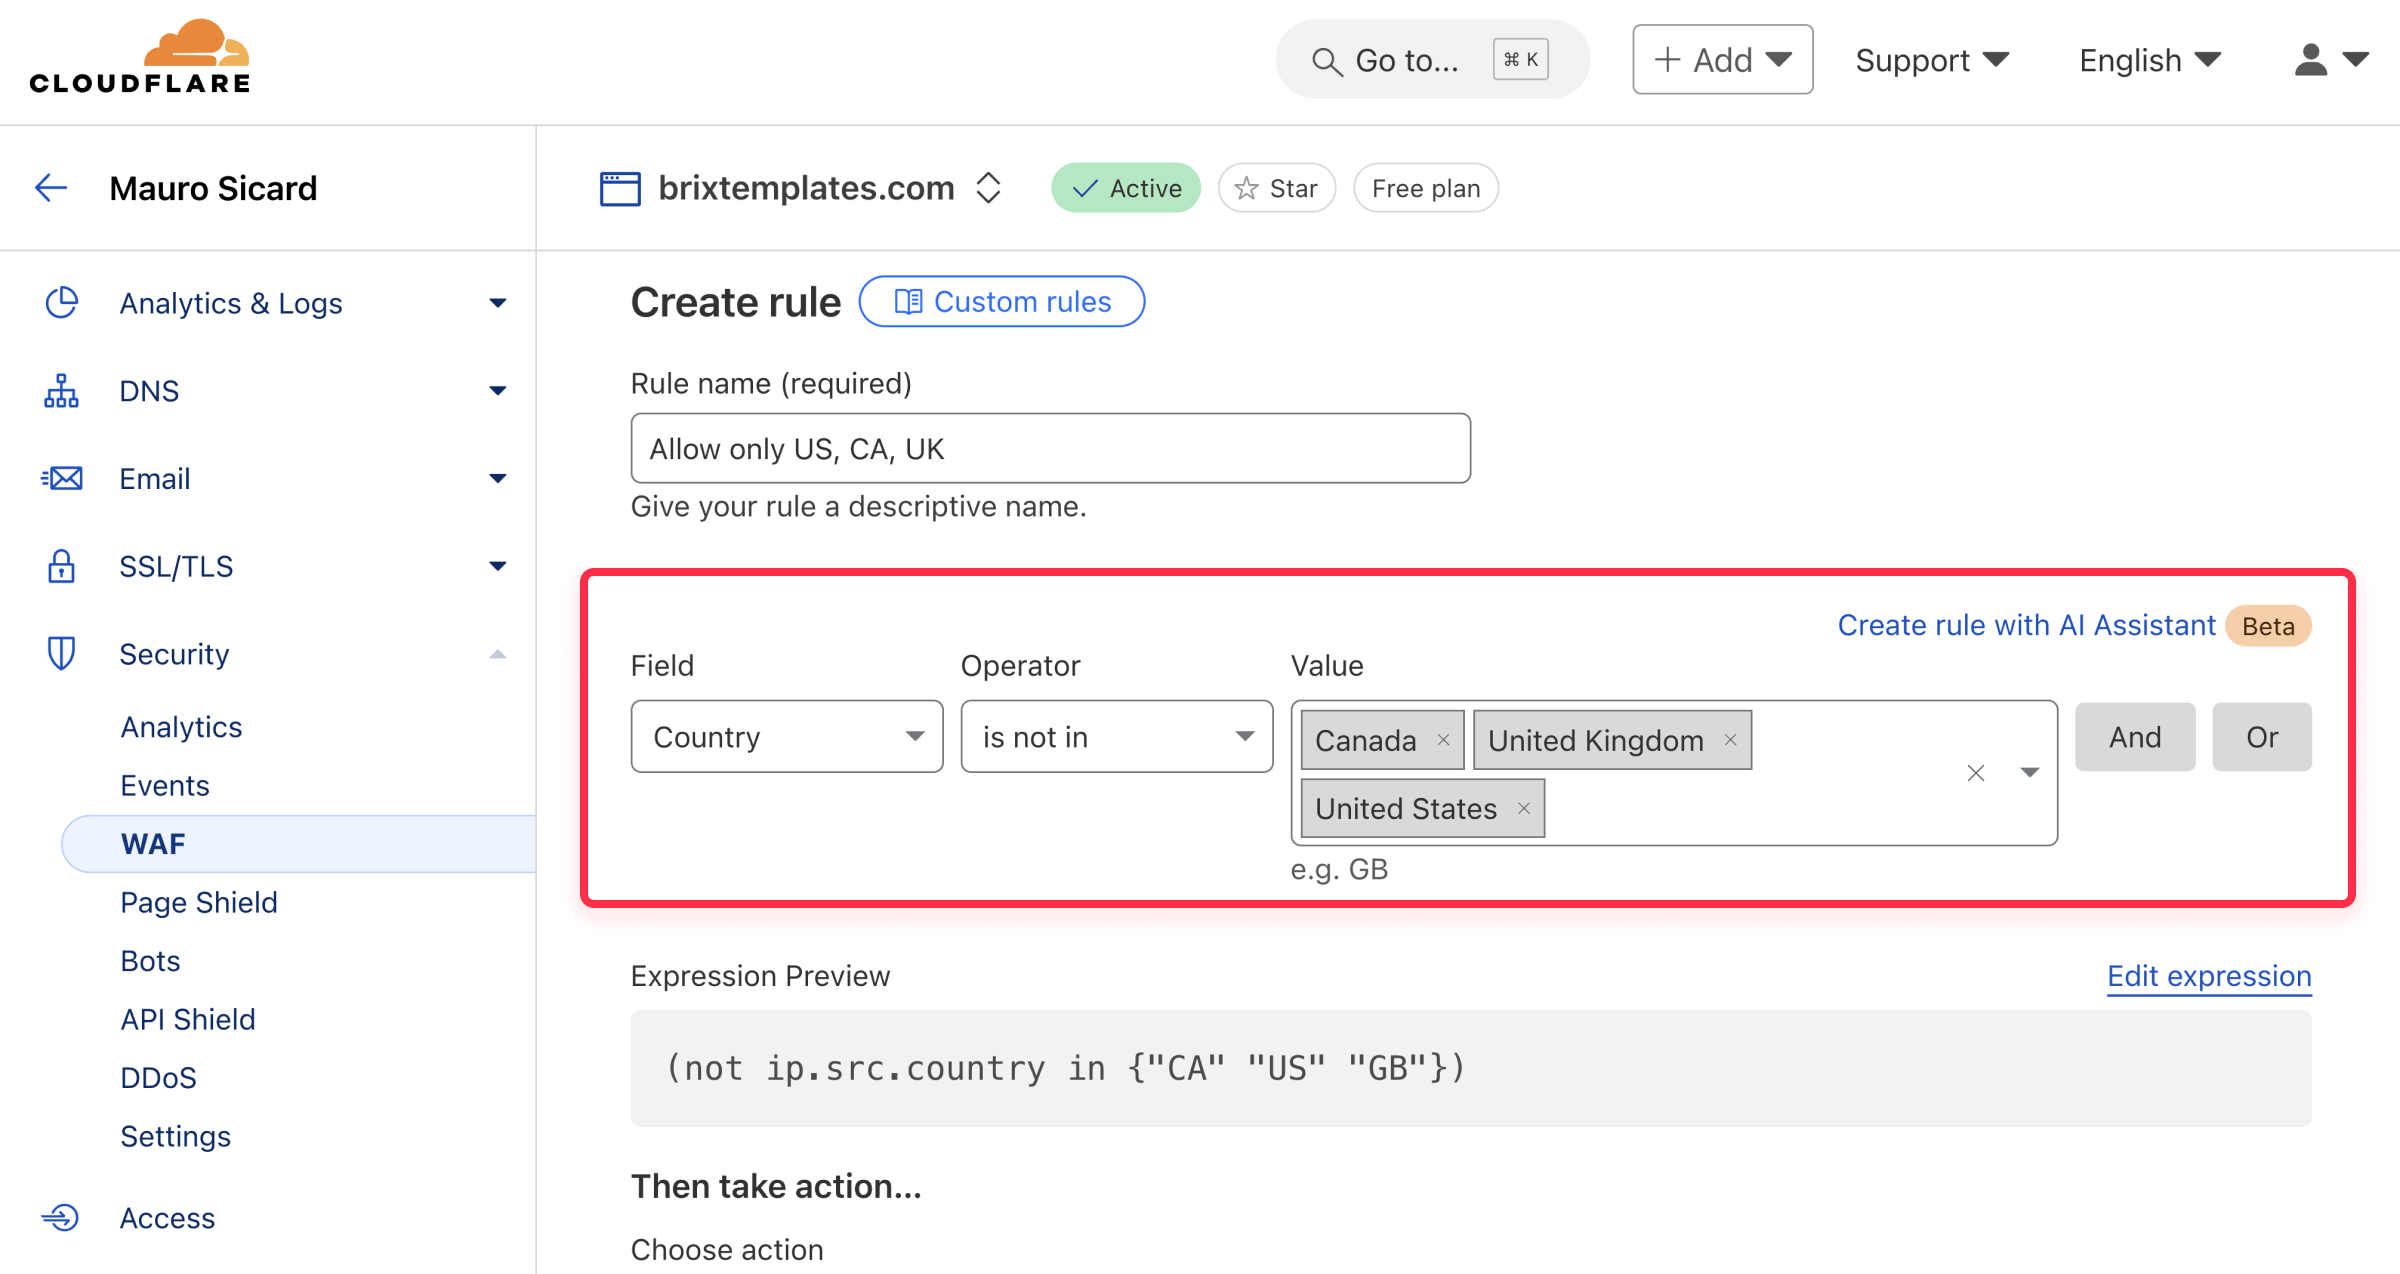
- Follow steps 1-5 above and give your rule a descriptive name (e.g., “Allow only US, CA, UK”).
- Configure the rule:
- Field: Select “Country”
- Operator: Choose “is not in”
- Value: Select the countries you want to allow (e.g., United States, Canada, United Kingdom)
- Select “Block” to block all traffic not in the allowed list
- Click “Deploy”
Advanced geo-blocking expressions for Webflow
Beyond basic country blocking, Cloudflare’s Expression Editor allows for more refined geo-blocking rules that are not possible in the standard rule builder. Below are real-world scenarios where custom expressions are useful:
- Allow only certain countries to access an event registration page:
A website is hosting an event only for European attendees and wants to block access to the registration page for visitors outside Europe:
not (ip.geoip.continent in {"EU"}) and (http.request.uri.path eq "/register")
- Block a specific state or region while allowing the rest of the country:
A website wants to be accessible across the entire United States, except for California, due to specific legal restrictions:
(ip.geoip.country eq "US") and (ip.geoip.subdivision eq "CA")
- Block access to pricing for visitors outside a target market:
A SaaS website only sells subscriptions in the US and Canada and wants to hide pricing information from users in other regions:
not (ip.geoip.country in {"US" "CA"}) and (http.request.uri.path eq "/pricing")
- Block a specific country from submitting forms while allowing browsing:
A website experiences a high amount of spam form submissions from Vietnam, but legitimate users may still want to browse the site:
(ip.geoip.country eq "VN") and (http.request.uri.path eq "/contact-form") and (http.request.method eq "POST")
If you need help setting up custom geo-blocking rules, our team can assist in configuring the right Cloudflare settings for your needs. Get in touch if you’d like support in setting up specific rules or refining your existing setup.
Enhancing Webflow security VPN and proxy blocking (Advanced)
While basic geo-blocking is effective, some users may attempt to bypass it using VPNs, proxies, or the TOR network. Cloudflare provides tools to help mitigate this, but VPN blocking is not 100% reliable due to constantly changing IP addresses and network identifiers.
For advanced users, Cloudflare allows for additional filtering techniques, such as:
- Blocking visitors based on IP reputation scores (e.g., higher-risk traffic)
- Detecting and restricting known VPNs, proxies, and TOR users
- Filtering traffic based on Autonomous System Numbers (ASNs) to block specific networks
However, implementing these methods incorrectly can lead to unintended consequences, such as blocking legitimate users who rely on VPNs for privacy, remote work, or security. It’s crucial to monitor traffic carefully and adjust rules based on actual usage patterns.
If you’re looking to enhance security beyond basic geo-blocking, Cloudflare provides a range of advanced filtering options. While these measures can help reduce unwanted traffic, they are most effective when combined with additional security layers, such as:
- CAPTCHA challenges
- Account verification
- Bot detection
- Rate limiting
VPN and proxy blocking should be used strategically—not as a guaranteed solution, but as part of a broader security strategy. If strict regional enforcement is required, consider alternative verification methods to prevent unauthorized access while minimizing disruption to legitimate users.
Need help setting this up? Reach out to us, and we’ll help you through the process.
What’s Next?
In upcoming articles, we’ll explore how to fine-tune Cloudflare’s WAF for even more advanced filtering and security improvements, including:
- Advanced WAF Rules for Webflow – Learn how to use HTTP headers, user agents, and request methods to create precise filtering rules that block unwanted bots and refine access control
- Rate Limiting in Webflow with Cloudflare – Discover how to prevent brute-force attacks and scrapers by limiting the number of requests from a single IP within a specific timeframe.
- Webflow Bot Management with Cloudflare – Go beyond basic country blocking to detect and mitigate sophisticated bot traffic with advanced techniques.
- Cloudflare Workers and Webflow – Explore how serverless functions can be used to customize security and traffic management, giving you powerful control over your site.
Stay tuned for these deep dives into Cloudflare’s security features and how they can be tailored to protect and optimize your Webflow site.
Troubleshooting Webflow geo-blocking issues
Website is completely inaccessible
- Double-check your DNS settings to ensure they are correctly pointing to Cloudflare’s nameservers
- If you recently made changes, DNS propagation can take time (usually within a few minutes but up to 24 hours)
- Use a tool like WhatsMyDNS to check whether your DNS records have propagated globally
Rules aren’t working as expected
- Carefully review your rule configuration in Cloudflare’s WAF settings.
- Ensure the correct fields, operators, and values are selected.
- If using custom expressions, double-check the syntax—a small typo can break the rule.
Cloudflare is not active
- Ensure your proxy settings (the orange cloud icon) are enabled for your domain.
- If Cloudflare’s proxy is disabled, your WAF and geo-blocking rules will not work.
Important considerations
- Free plan limits: Cloudflare's free plan has a limited number of WAF rules (usually 5). Upgrade for more.
- Testing: Always test your rules after deploying them. Make sure you're not blocking legitimate traffic.
- Monitoring: Regularly check your Cloudflare analytics to see the impact of your rules.
- False positives: Be aware that geo-blocking (and especially VPN blocking) can sometimes block legitimate users.
Conclusion
Cloudflare provides a powerful and user-friendly way to implement geo-blocking on your Webflow site. By understanding the core concepts of the WAF and following the steps in this guide, you can effectively control access to your website, enhance security, and tailor your content to specific geographic regions.
Need help implementing advanced geo-blocking or optimizing your Webflow security with Cloudflare? Our team specializes in fine-tuning Cloudflare’s settings for Webflow users. Get in touch to set up custom rules and enhance your site’s security.


Join readers commenting on this post!