
In this article, we will see how to add rich snippets with the Article Schema Markup to your Webflow CMS so that you have a higher chance of gaining more visibility in your search results.
At the same time, we will do this in a way that applies to your entire CMS with a single implementation—quick, automatic, and very fast. The process will be simple, so let's begin.
Why add rich snippets to your Webflow site?
Whether you're a web developer tasked with implementing this or a head of marketing who's heard about its benefits, understanding rich snippets is crucial to increase your organic visibility.
Think of rich snippets as visually enhanced search results that make your content more attractive in Google's search results. When you search for a movie and see the movie poster and actors alongside the result, that's a rich snippet in action.
This enhanced display is powered by schema markup standard. Schema is essentially a standardized format that Google uses to understand the structure of your content. It helps search engines identify specific elements like titles, images, and other important information.
You can think of schema as a library card that clearly labels different aspects of your content, making it easier for search engines to display it in a more visually appealing way.
How to add article schema markup to your Webflow CMS
The process is straightforward and can be completed in just a few steps. Here's how to do it:
Step 1: Access your Webflow project
- Log into your Webflow account
- Open your project in the Webflow Designer
Step 2: Locate your CMS collection
Now it's time to locate your CMS collection — If you don't have a Webflow CMS set up yet, you'll need to create one first, and you can learn how to set up your Webflow blog CMS here.
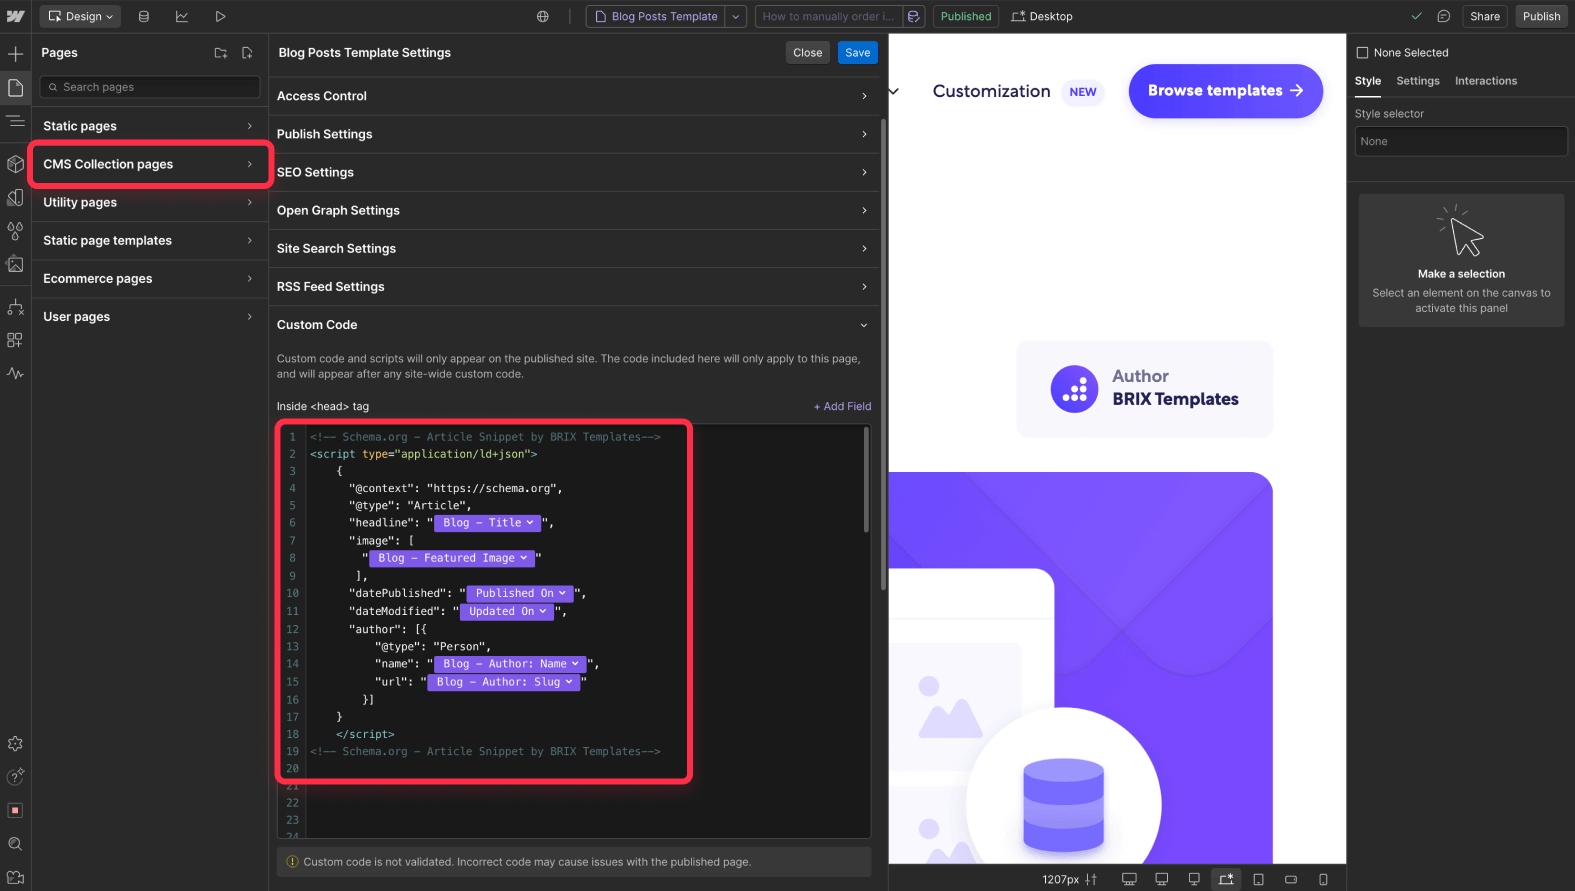
- Go to "Pages" in the left sidebar
- Look for "CMS Collection Pages"
- Select your blog post template
- Click the settings icon (gear symbol)
Step 3: Add the schema markup code to CMS collection
- In the Settings panel, scroll down to "Custom Code"
- Find the "Inside <head> tag" section
- Paste the following code"
<!-- Schema.org - Article Schema Markup by BRIX Templates-->
<script type="application/ld+json">
{
  "@context": "https://schema.org",
  "@type": "Article",
  "headline": "[Blog - Title]",
  "image": [
    "[Blog - Featured Image]"
  ],
  "datePublished": "[Published On]",
  "dateModified": "[Updated On]",
  "author": [{
    "@type": "Person",
    "name": "[Blog - Author: Name]",
    "url": "[Blog - Author: Slug]"
  }]
}
</script>
<!-- Schema.org - Article Schema Markup by BRIX Templates-->
Step 4: Connect your CMS fields to schema code
After pasting the code, you'll need to connect it with your CMS fields:
- Click the "Add Field" button on the top left of the code box
- Select the corresponding CMS field:
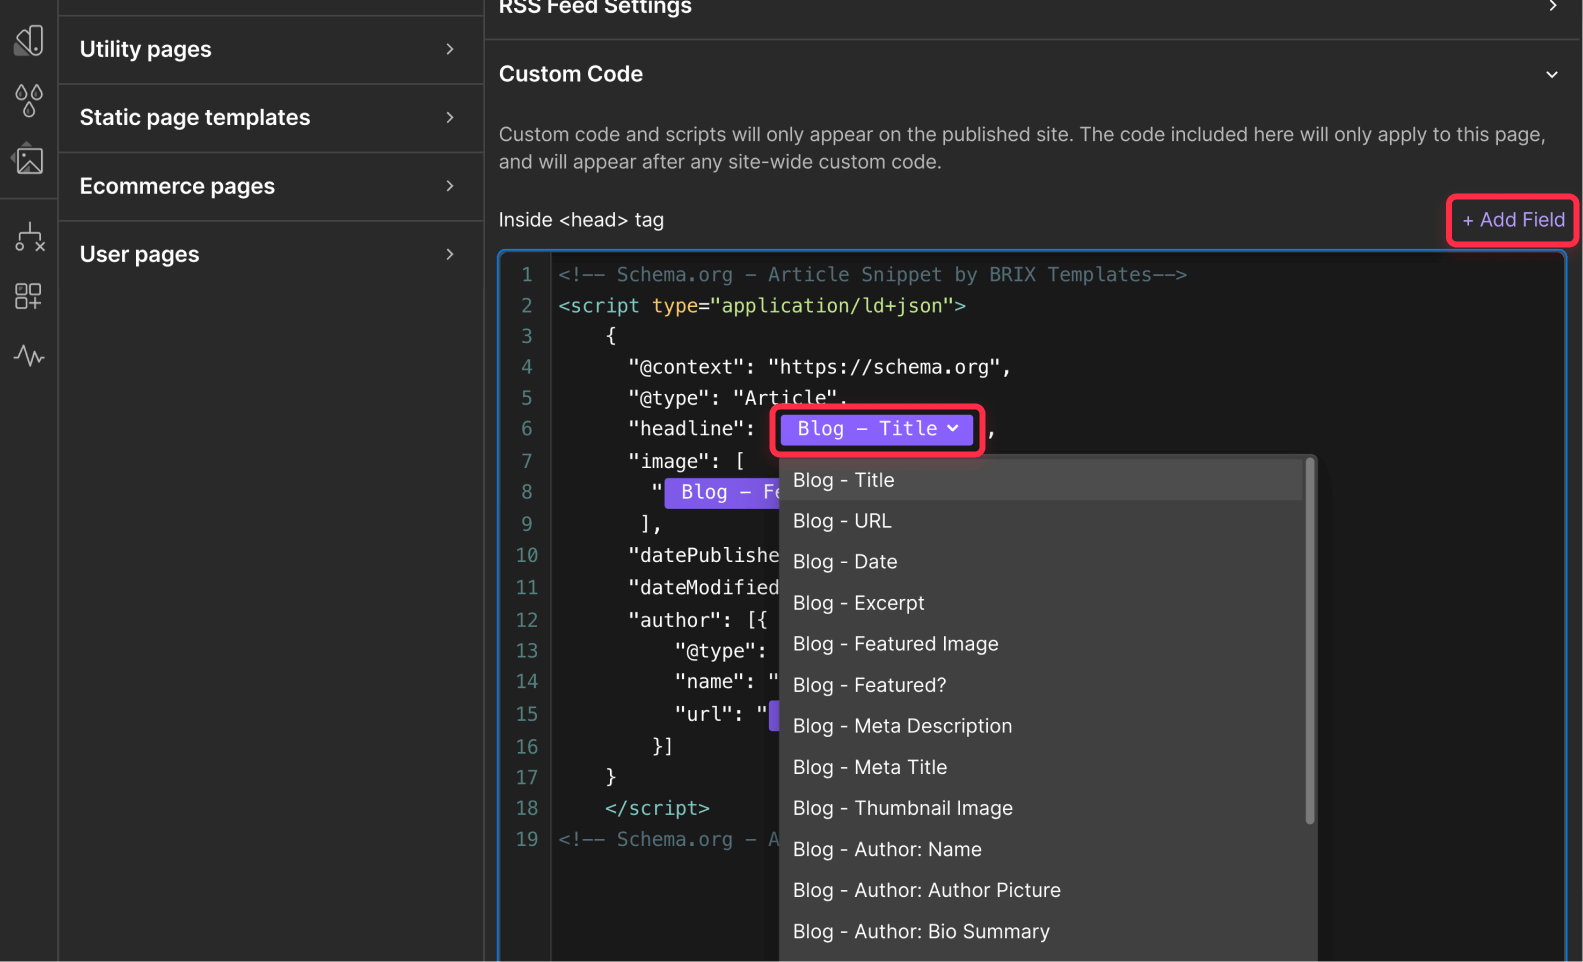
- For "headline": Choose your blog title field
- For "image": Select your featured image field
- For "datePublished": Pick your publication date field
- For "dateModified": Select your last modified date field
For the author section, you have two options:
Option A: Single organization author
If your blog posts are published under your company name:
- Set "@type": "Organization"
- Use static values for name and URL (Example: "name": "BRIX Templates", "url": "https://brixtemplates.com")
Option B: Multiple authors
If you have multiple contributors:
- Keep "@type": "Person"
- Connect dynamic fields for name and URL
- Link to your Authors collection if you have one (if not, create it)
Step 5: Test your Webflow CMS article rich snippets
- Publish your site to staging (webflow.io version)
- Visit Google's Rich Results Test tool
- Enter your staging URL
- Verify that you see "1 valid item detected" for Article markup
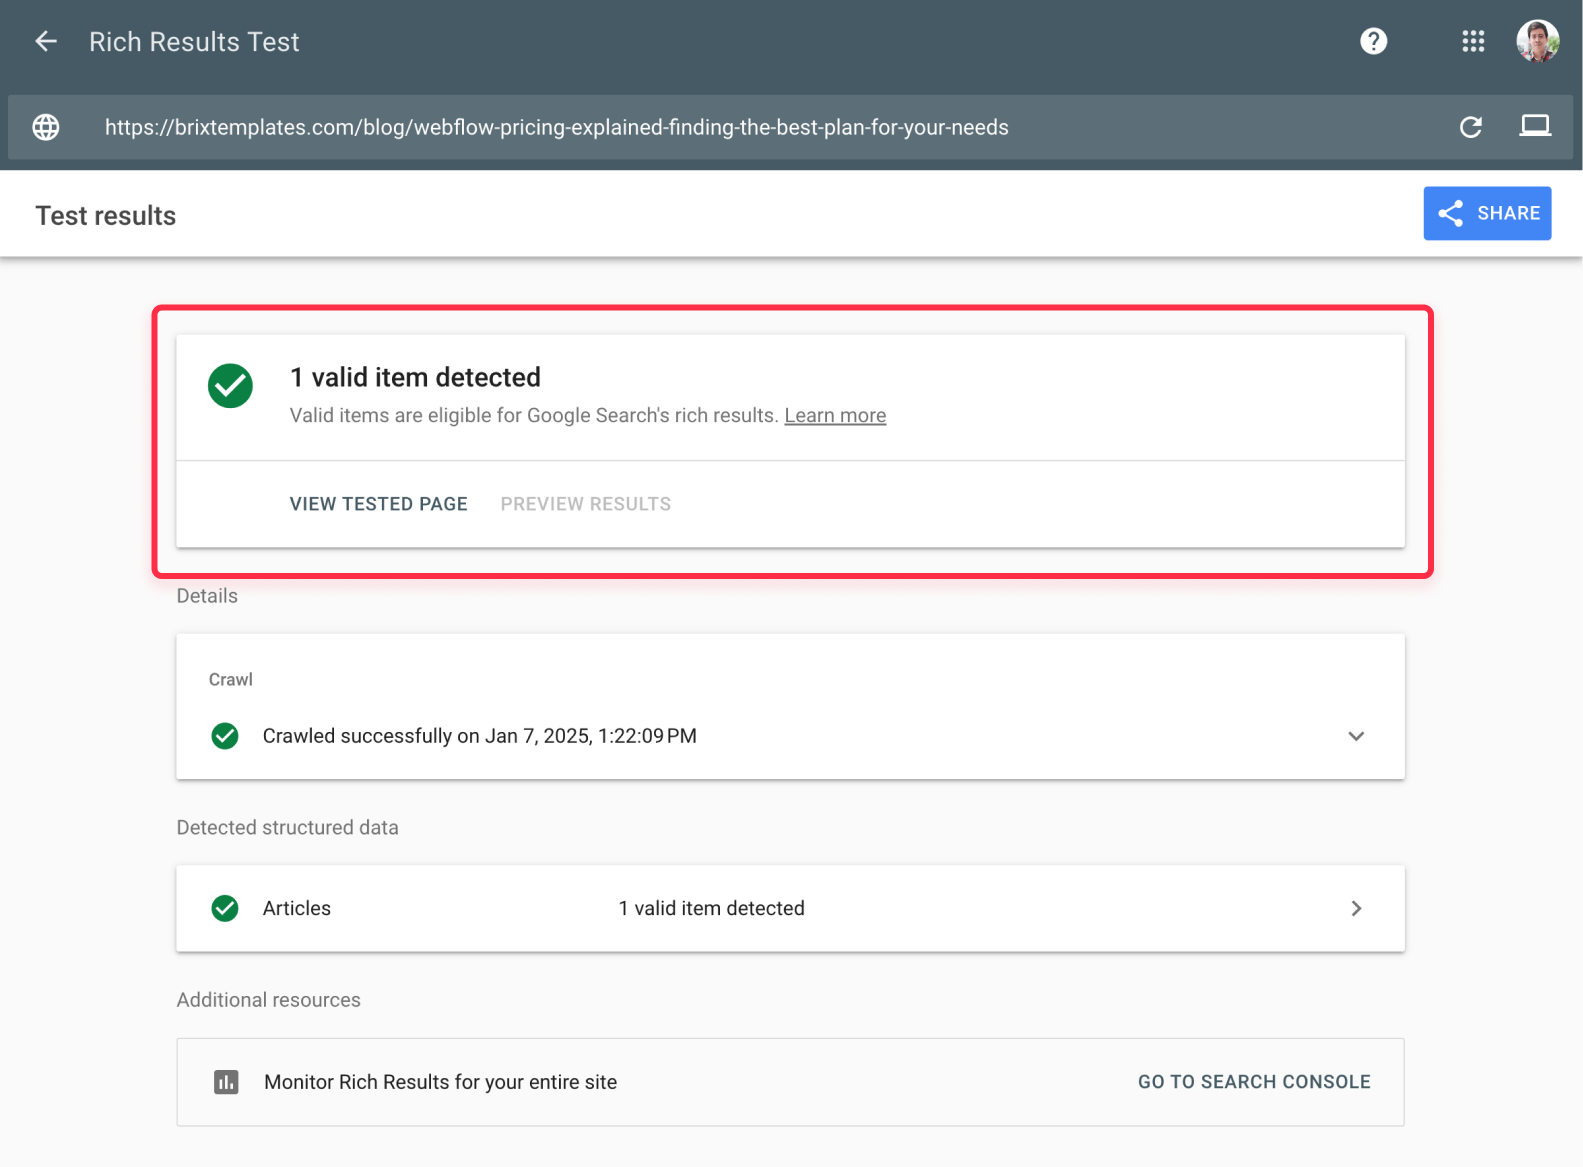
Note: If you have multiple schema types implemented (like breadcrumbs or organization), you might see more than one valid item. This is normal and expected.
Step 6: Publish your site
Once you've confirmed that your rich snippets are working correctly in the testing tool:
- Return to your Webflow project
- Click the "Publish" button and select your production domain
- Test one final time on Google's Rich Results Tests tool, now with your production URL
Final considerations to keep in mind
- Google reindexing timelines: The speed at which your rich snippets appear in search results depends heavily on your site's authority and crawl frequency.
- New sites might take several weeks to show rich snippets, while established sites could see results within days. Don't be discouraged if you don't see immediate results.
- Search Console monitoring: Registering your site with Google Search Console is crucial for tracking rich snippet implementation and indexing status. This tool provides detailed reports about how Google sees and interprets your schema markup, helping you identify and fix any issues quickly.
- If you don't have your Webflow website registered on Google Search Console, read our article and do it in less than 5 minutes!
- CMS field preparation: Before implementing schema markup, ensure all necessary CMS fields are properly configured and populated. Missing or incorrect field configurations can lead to invalid schema markup, which won't display in search results.
- Take time to audit your CMS collection and make any necessary adjustments before publishing to production.
Need more advanced schema implementation on Webflow?
If you need to implement more complex schema markup solutions, such as nested FAQs or other types of dynamic content, our team at BRIX Templates specializes in technical SEO for Webflow. Contact our Webflow agency to speak with one of our experts and get a hand!
By following these steps, you'll have successfully implemented Article schema markup across your Webflow CMS, so kudos to you — This implementation will help search engines better understand your content and display it more prominently in the SERPs.


Join readers commenting on this post!