
If you've just created your Webflow site or moved your website to Webflow, one of your first steps should be getting your site properly indexed on Google. This is essential because Google is how most people will find your website when searching for your products, services, or content.
This guide focuses on the process for Webflow, but if you're building your site on Framer, we have a dedicated article for you as well. You can find our step-by-step tutorial on how to submit your Framer sitemap to Google here.
The first step to getting indexed is submitting your sitemap to Google. A sitemap is simply a file that lists all the pages on your website in a way that Google can easily read and understand. Creating and submitting this sitemap tells Google about all your pages and helps them appear in search results faster.
Let's walk through how to do this for your Webflow site.
Understanding Webflow sitemaps
What's a sitemap and why do you need one?
A sitemap is exactly what it sounds like - a map of your website's pages. It tells Google:
- Which pages you have on your website
- When you last updated them
- How often you typically make changes
- Which pages are most important
Without a sitemap, Google might miss some of your pages or take longer to find new content you've added. With a proper sitemap, you're essentially helping Google do its job better, which means your content can be found more easily by potential visitors.
How Webflow makes sitemaps easy
One of the best things about Webflow is that it handles all the technical stuff for you. Every time you publish your site, Webflow automatically creates and updates your sitemap with all your latest changes. You don't need to worry about the technical format or coding - Webflow takes care of everything behind the scenes.
Preparing your Webflow sitemap
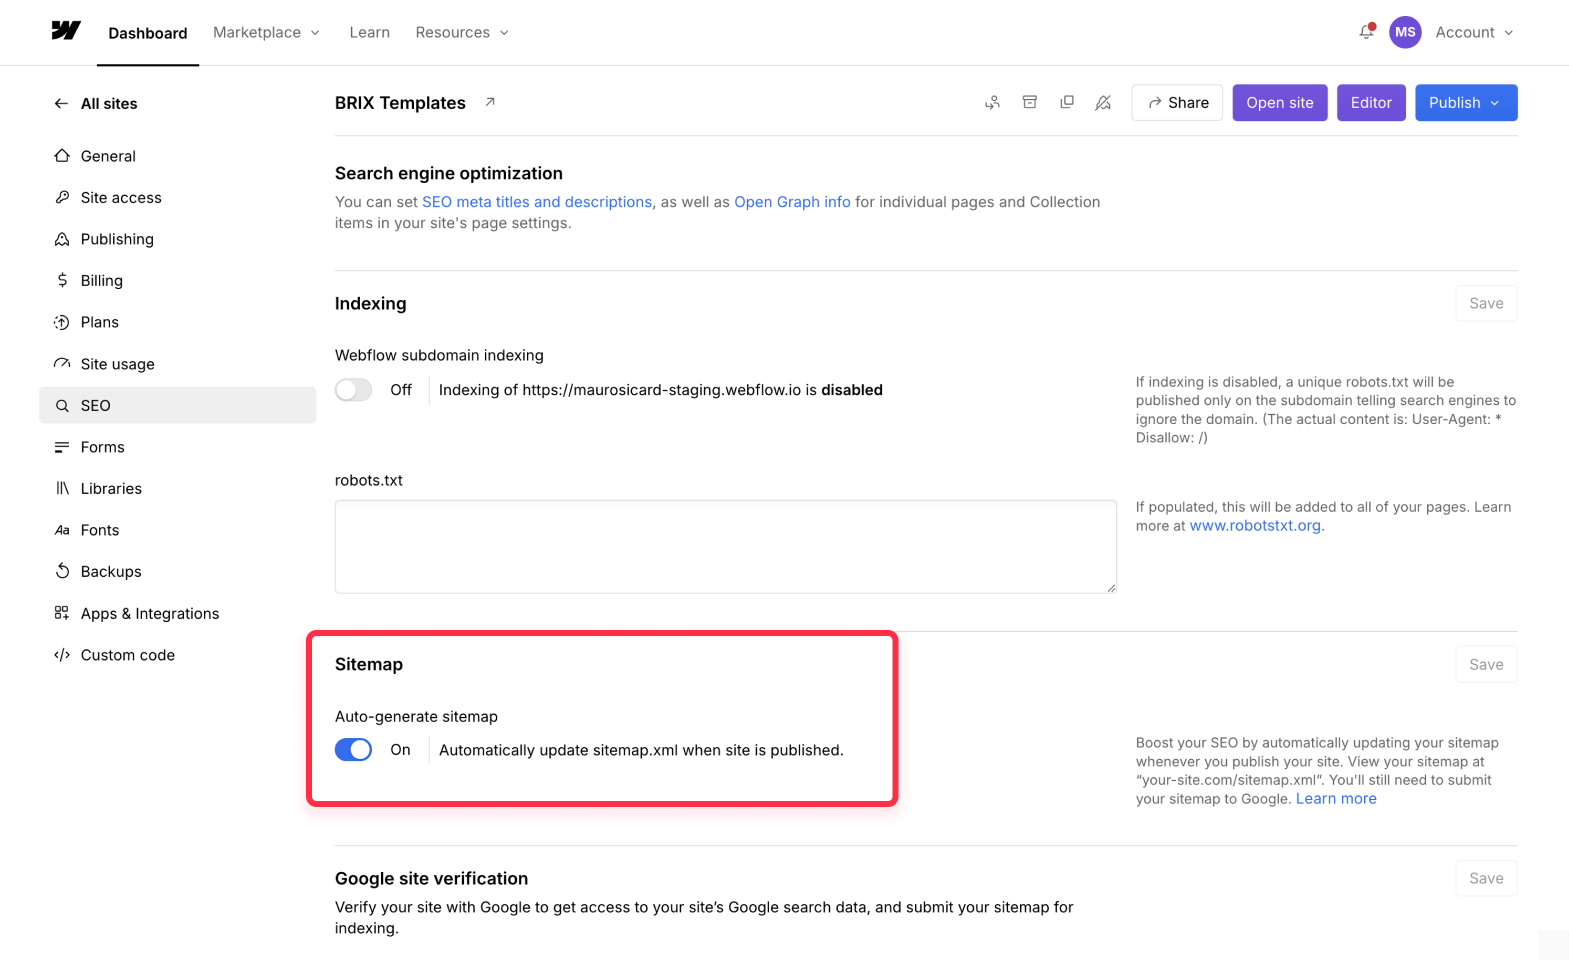
1. Enable sitemap generation
First, let's make sure your sitemap is turned on in Webflow:
- Log into your Webflow account
- Navigate to your project's dashboard
- Click on "Project Settings"
- Select "SEO"
- Locate "Auto-generate sitemap"
- Ensure the checkbox is enabled
- Click "Save Changes"
- Publish your site to apply changes
2. Review sitemap settings for individual pages
Before submitting your sitemap to Google, take a moment to review which pages are included:
- Open the Webflow Designer
- Navigate to the Pages panel
- Select each page you want to verify
- Check the "Show this page in the auto-generated sitemap" option in page settings
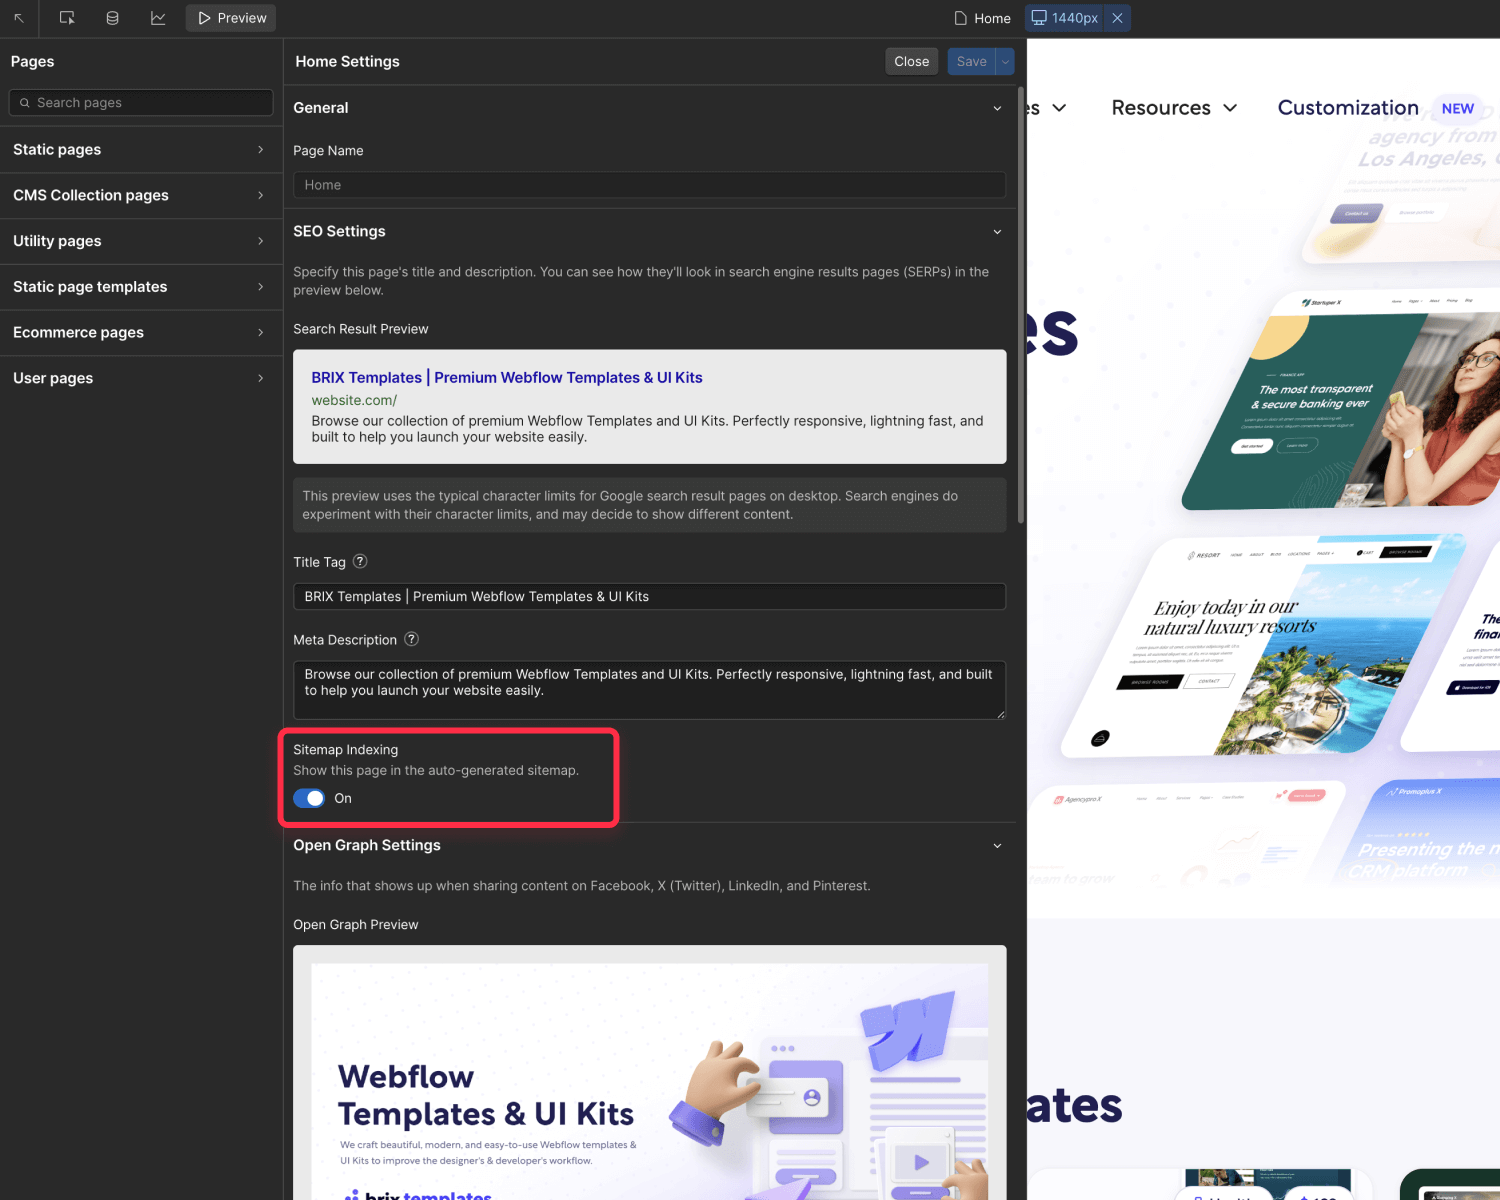
We recommend checking all your pages to ensure the important ones are not excluded from your sitemap. If you want to remove any pages from the sitemap, make these changes before submitting it to Google.
Submitting your sitemap to Google Search Console
1. Access Google Search Console
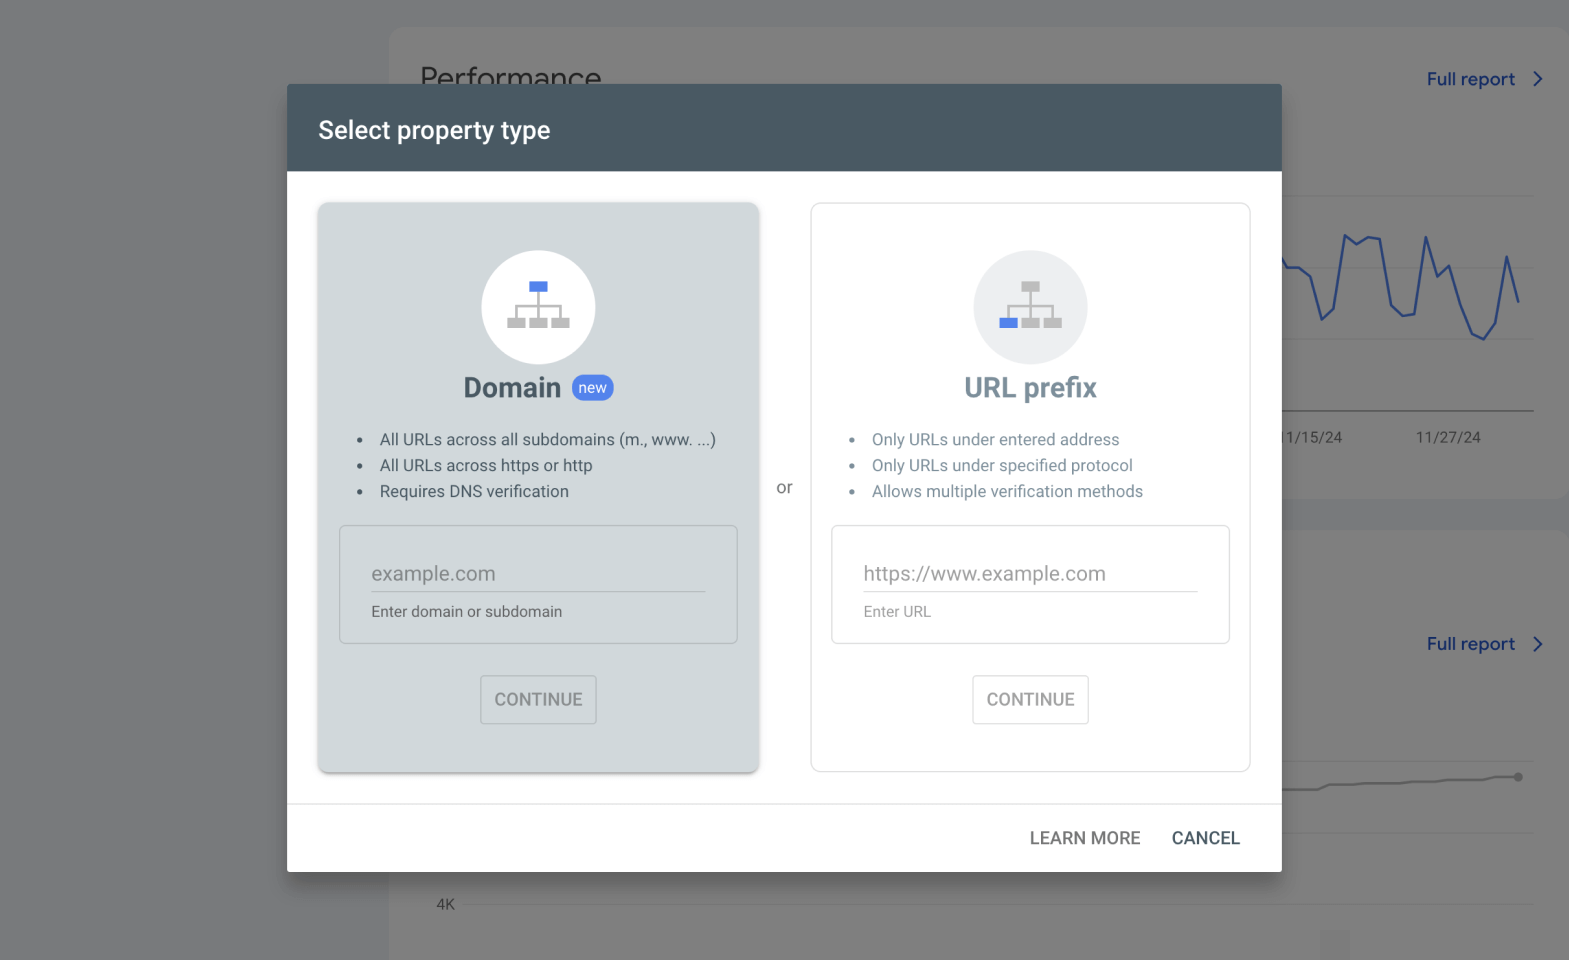
To submit your sitemap, you'll first need to verify your site with Google Search Console. You have two ways to do this:
Domain Property Verification: This is the best choice if you can access your domain's DNS settings. It's like giving Google a master key to your entire domain, covering:
- Your main website and any subdomains
- Both www and non-www versions
- Any new subdomains you might add later
We recommend to choose this if you manage your domain settings or can work with your IT team to verify it.
URL Prefix Verification: This is simpler verification mode (only covering the subdomain you verify), but it still works great if you:
- Only manage the website itself
- Don't have access to domain settings
- Need to get things set up quickly
While it only covers the specific website address you verify, it gives you all the essential tools you need.
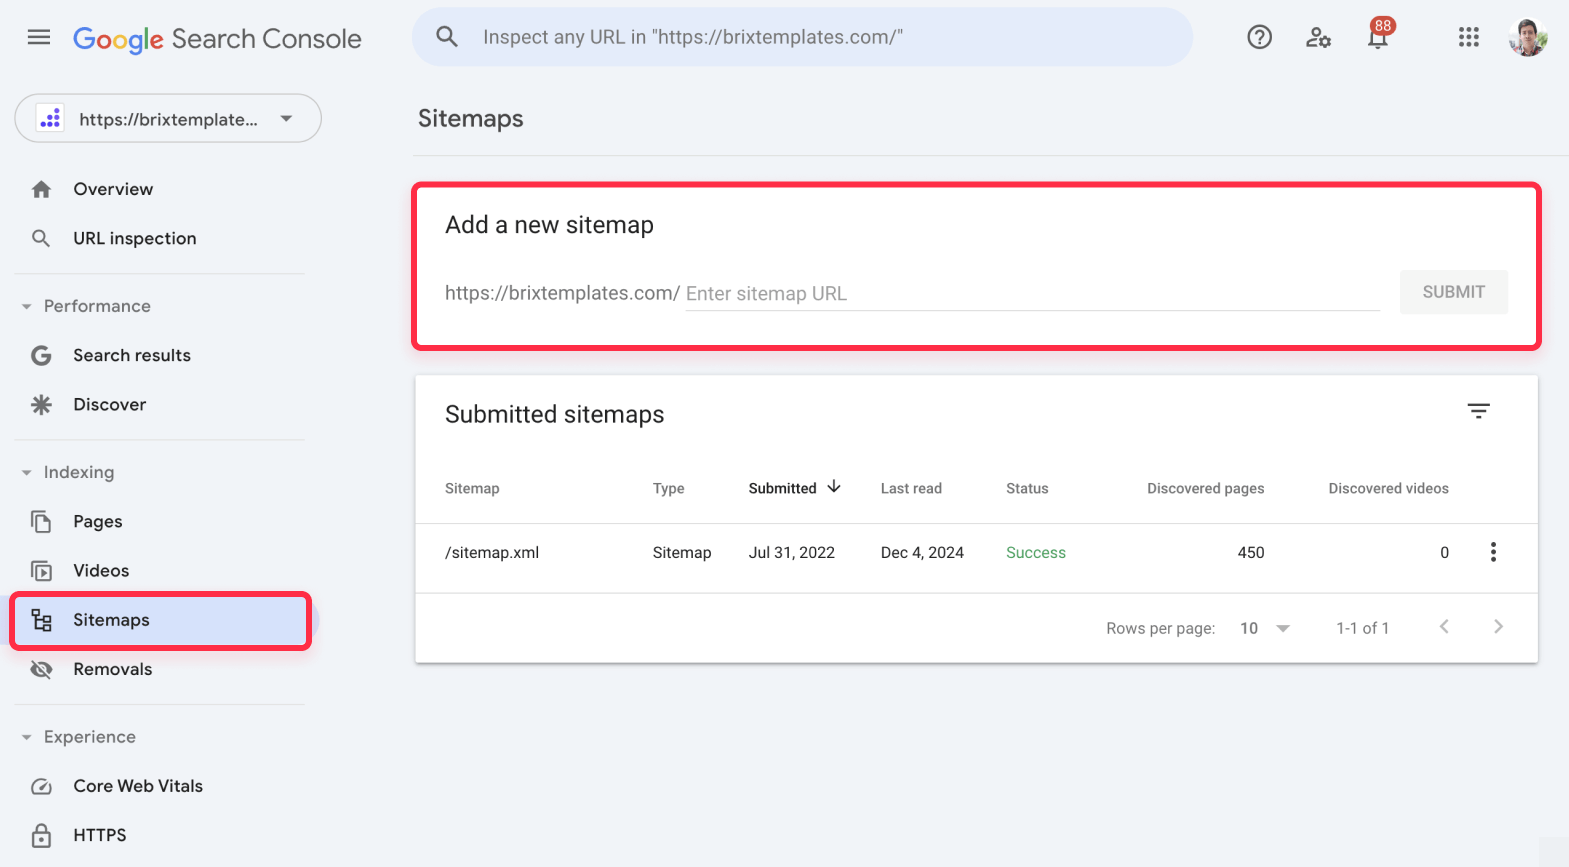
2. Submit your sitemap
Once your site is verified, here's how to submit your XML sitemap:
- In Google Search Console:
- Click "Sitemaps" in the left navigation menu
- Look for the "Add a new sitemap" field
- Enter "sitemap.xml"
- Click "Submit"
- Verify submission:
- Check the sitemap status in the Sitemaps report
- Look for any processing errors
- Confirm the number of URLs discovered
3. Monitor sitemap status
After submission, keep an eye on how Google is processing your sitemap:
- Coverage status:
- Number of URLs discovered
- Number of URLs indexed
- Any indexing issues found
- Update frequency:
- Last read date
- Processing status
- Any errors encountered
We recommend checking your sitemap status every few weeks, especially after adding new pages to your site. This way you can be sure that Google is finding and indexing all your latest content.
Troubleshooting common sitemap issues
Let's walk through the most common problems you might encounter with your sitemap and how to fix them:
If Google Search Console isn't accepting your sitemap
If you're trying to submit your sitemap and Google Search Console shows validation errors, follow these steps:
- First, check if your sitemap is accessible:
- Open a new browser tab
- Go to yourdomain.com/sitemap.xml
- Verify the file loads properly
- If the sitemap doesn't load:
- Make sure you've published your latest changes in Webflow
- Check that your domain is properly connected to Webflow
If pages are missing from your sitemap
Sometimes you might notice that certain pages aren't appearing in your sitemap. Here's how to fix this:
- Check your page settings in Webflow:
- Open the Webflow Designer
- Go to the Pages panel
- Select each missing page
- Look for "Show this page in the auto-generated sitemap" in the settings
- Enable it if it's turned off
- After making changes:
- Publish your site
- Check your sitemap again
If specific pages aren't being indexed
If Google Search Console shows that some pages are indexed but others aren't, and you already verified that those pages are indexable (they don't have a meta no-index tag):
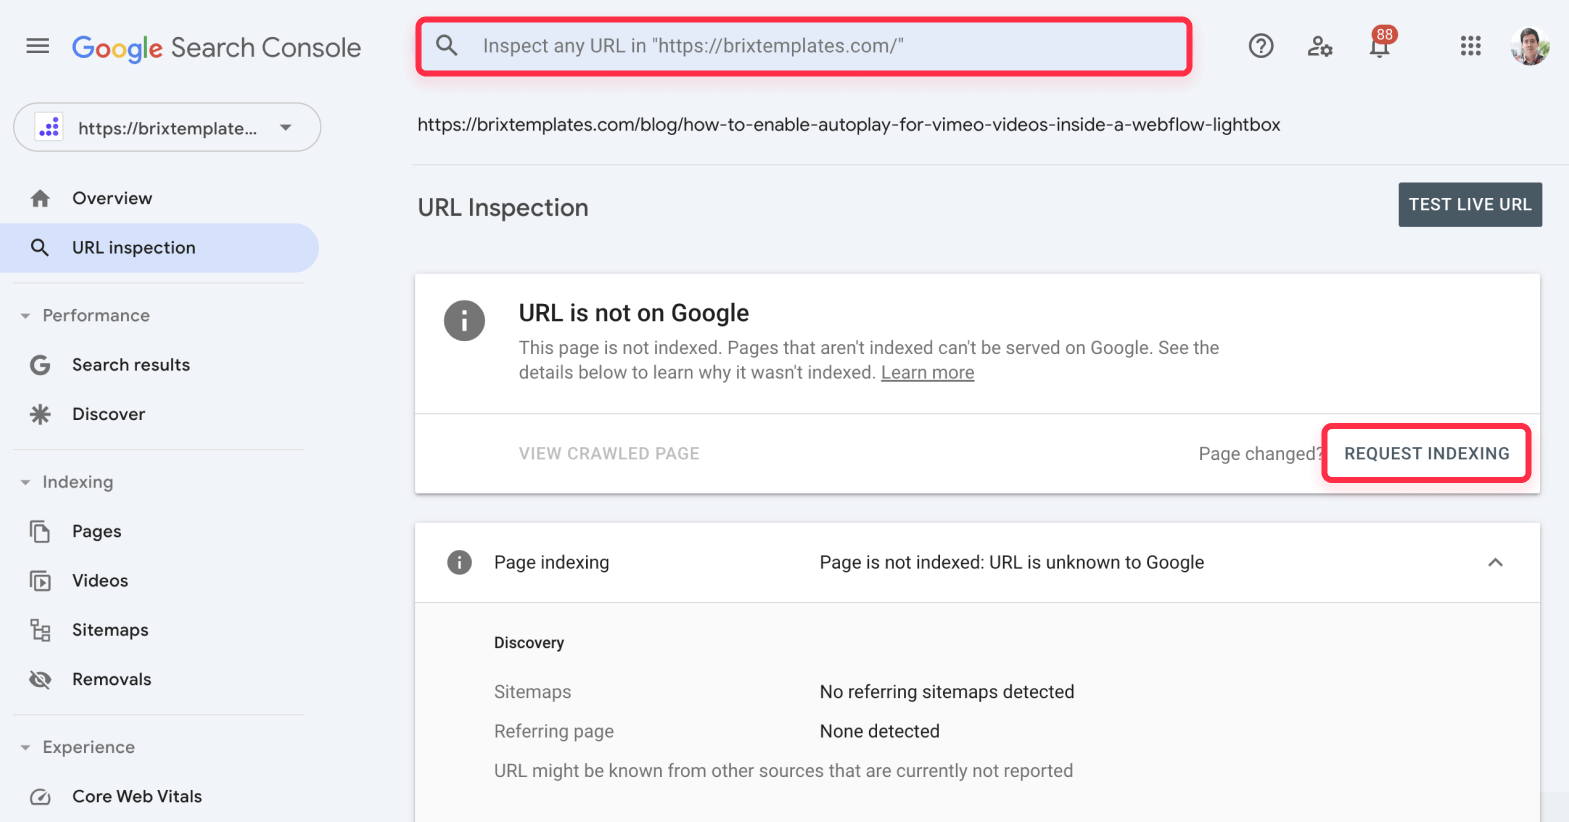
- For each unindexed page:
- Go to Google Search Console
- Click the URL inspection tool at the top
- Paste in the specific page URL
- Click "Request Indexing"
- After requesting indexing:
- Wait 24-48 hours
- Check the page status again
If you run into any persistent issues with your sitemap or need help with more complex configurations, don't hesitate to send a message to our Webflow agency. We understand how important it is to get your content properly indexed and are here to help you succeed.
Remember, submitting your sitemap is just the beginning. Keep creating valuable content for your visitors, and make sure to check back regularly to ensure Google is finding and indexing all your latest pages.


Join readers commenting on this post!