

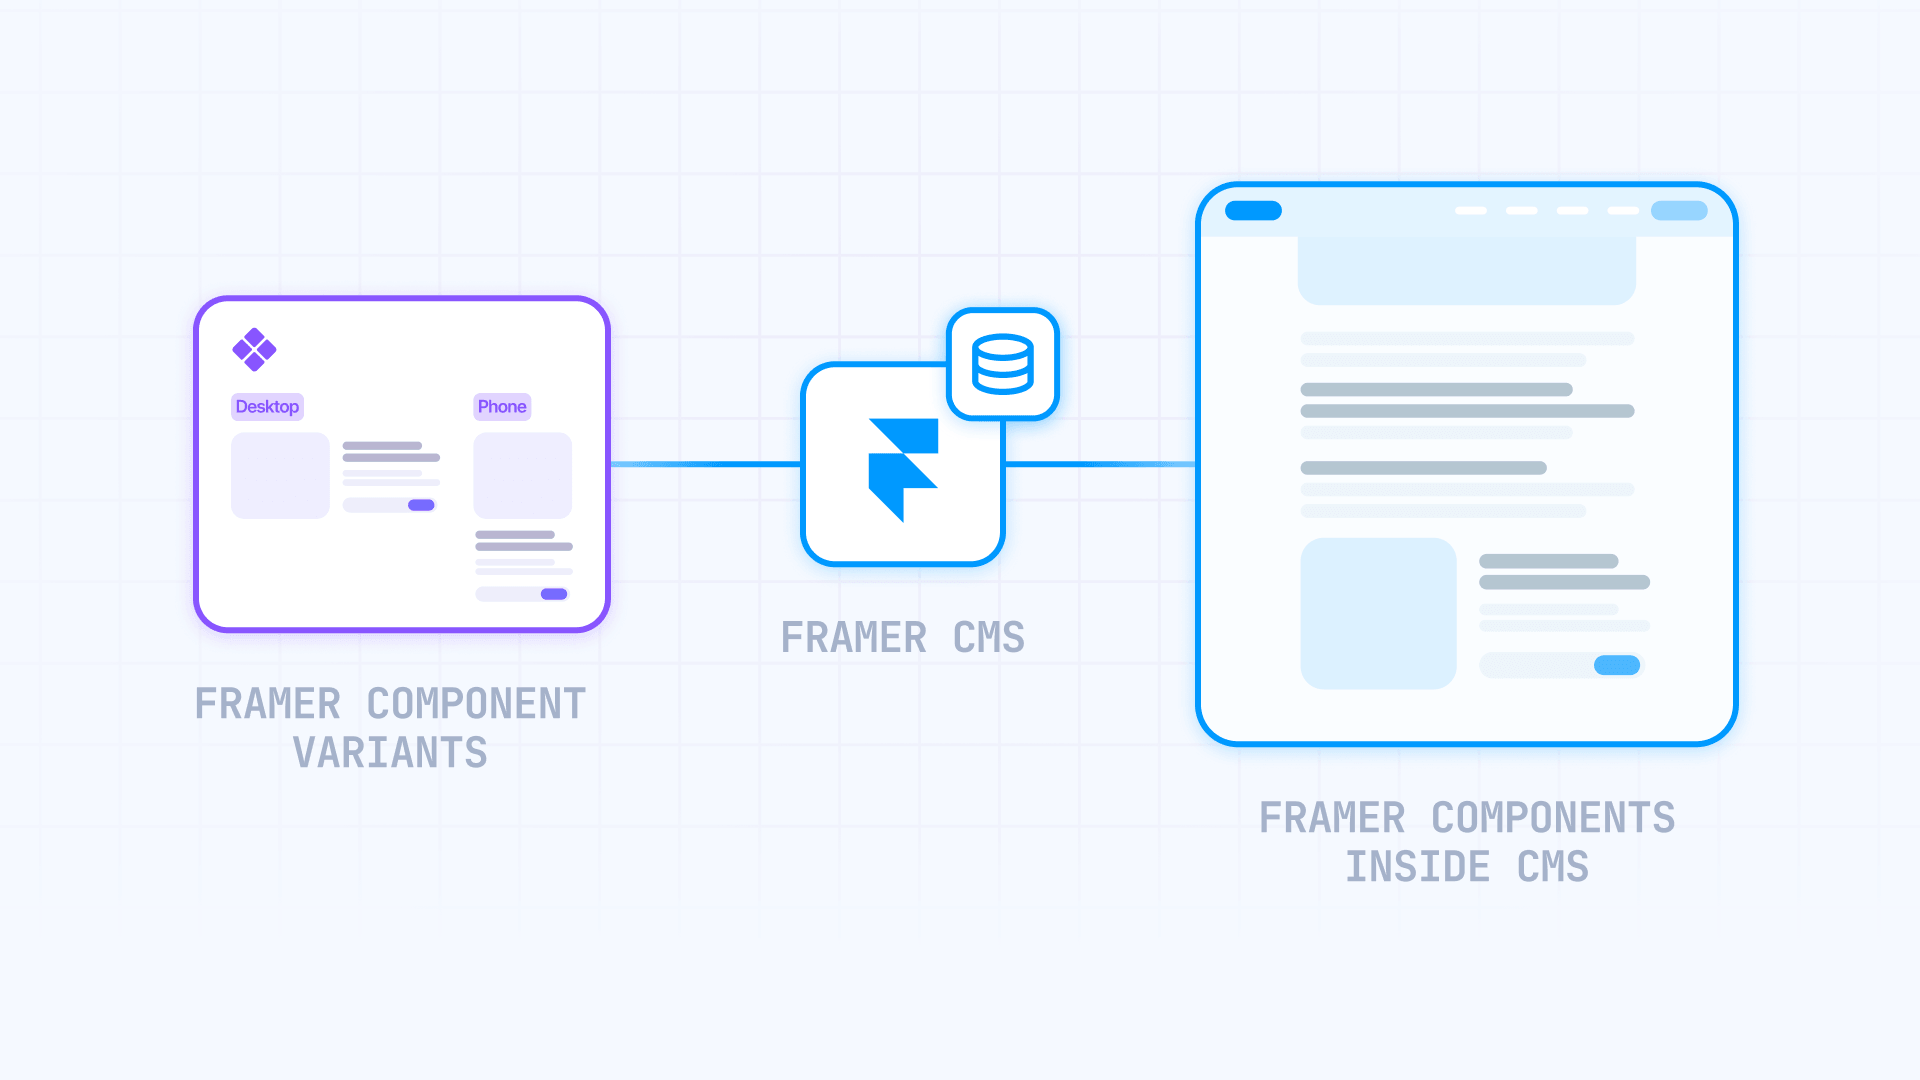
If your Framer blog template only gives you one rich text body, adding a polished CTA used to mean splitting the article into multiple fields, hard-coding one banner in the template, or rebuilding important posts manually. Framer's CMS Components update changed this by allowing Canvas-created components to be inserted directly into formatted CMS content — with properties, variants, alignment, and responsive behavior all intact.
A reusable CTA block — or any inline CMS component like a newsletter signup, resource card, quote section, or content module — is a designed component that editors place inside a blog post exactly where it makes the most sense. Build it once, optionally expose editable properties, and reuse it across different articles.
Why this matters:
- Better conversion placement — Add a CTA right after the section where the reader is most interested.
- Reusable design system — Build once, reuse across posts without copying frames manually.
- Cleaner editor workflow — Writers change Headline, Button label, and URL without touching the blog template.
- No more CMS workarounds — Skip creating fields like Body before CTA, CTA section, and Body after CTA just to place one button.
- Multiple CTA types per article — Newsletter near the top, resource in the middle, consultation at the end.
Quick rule: If the editor needs to decide where the CTA goes while writing, use a CMS Component inside rich text. If the CTA should appear in the same place on every post, place it in the blog post template instead.
Plan your reusable component before building
Before creating the component, decide what role it should play inside the CMS content. In this guide, we are using a CTA block as the example, but the same workflow applies to any reusable component editors may need to place inside formatted CMS content — newsletter blocks, resource cards, product highlights, comparison tables, quote sections, embeds, galleries, or custom content modules.
Start by defining what should stay fixed and what should be editable. The component's layout, spacing, typography, styling, and responsive behavior should usually stay controlled by the master component. Only expose the fields that need to change from post to post.
For a CTA, that might include Headline, Body text, Button label, Button URL, or Theme/Variant. For other components, the editable fields may be different. A quote block may only need Quote and Author. A resource card may need Title, Description, Image, and Link. A newsletter block may not need any editable fields if the same signup message appears across every article.
The goal is to keep the component flexible without making it fragile. If editors only need to place the component inside an article, keep the content locked. If they need to adapt the message for each post, expose only the safest fields.
A good rule: expose content, not design decisions. Let editors change the message, link, or approved variant — but keep padding, layout, breakpoints, colors, and typography inside the master component.
Create the CTA component on the Canvas
Treat this like a small design system component, not a one-off section.
Build the layout
- Create a new Frame on the Canvas.
- Add a Stack layout for consistent spacing.
- Add text layers for Eyebrow, Headline, and Body.
- Add a button frame with a text layer for Button label.
- Apply your brand styles — typography, border radius, background, padding.
- Set the CTA width to work inside your article layout, not only on a full-width landing page.
For blog CTAs, a single-column layout is usually more reliable. If you use a two-column CTA with an image, make sure it collapses cleanly on mobile.
Convert to component
- Select the full CTA frame.
- Right-click → Create Component (or use the shortcut).
- Rename with a clear folder structure: Blog / CTA / Inline.
- Confirm internal layers are named clearly.
- The component now appears in the Assets panel.
Framer recommends using slash-based names to organize components into folders, which helps editors search later.
Make properties editable when needed
Not every component needs editable fields. If the same content works across every article — like a fixed newsletter signup — you can leave everything locked inside the master component.
If editors need to customize the message per article, expose only the properties that should change. Common examples: Headline, Body, Button label, Button URL, Image, or Variant. Keep design controls like padding, colors, and layout locked.
To expose a property in Framer:
- Select the text layer or element → Content → Create Variable.
- Repeat for each field that editors need to control.
- Use plain labels like Headline or Button URL — avoid internal naming, since clients will see these fields inside the CMS editor.
After exposing the properties, test the component by inserting it inside a CMS formatted content field and editing the fields on that instance. These properties are edited manually per inserted component, which is ideal when each article needs its own CTA message, image, link, or variant.
If you need centrally managed content that updates from one CMS source, use a separate CMS Reference workflow in a fixed template area instead of treating it as the same inline rich text component setup.
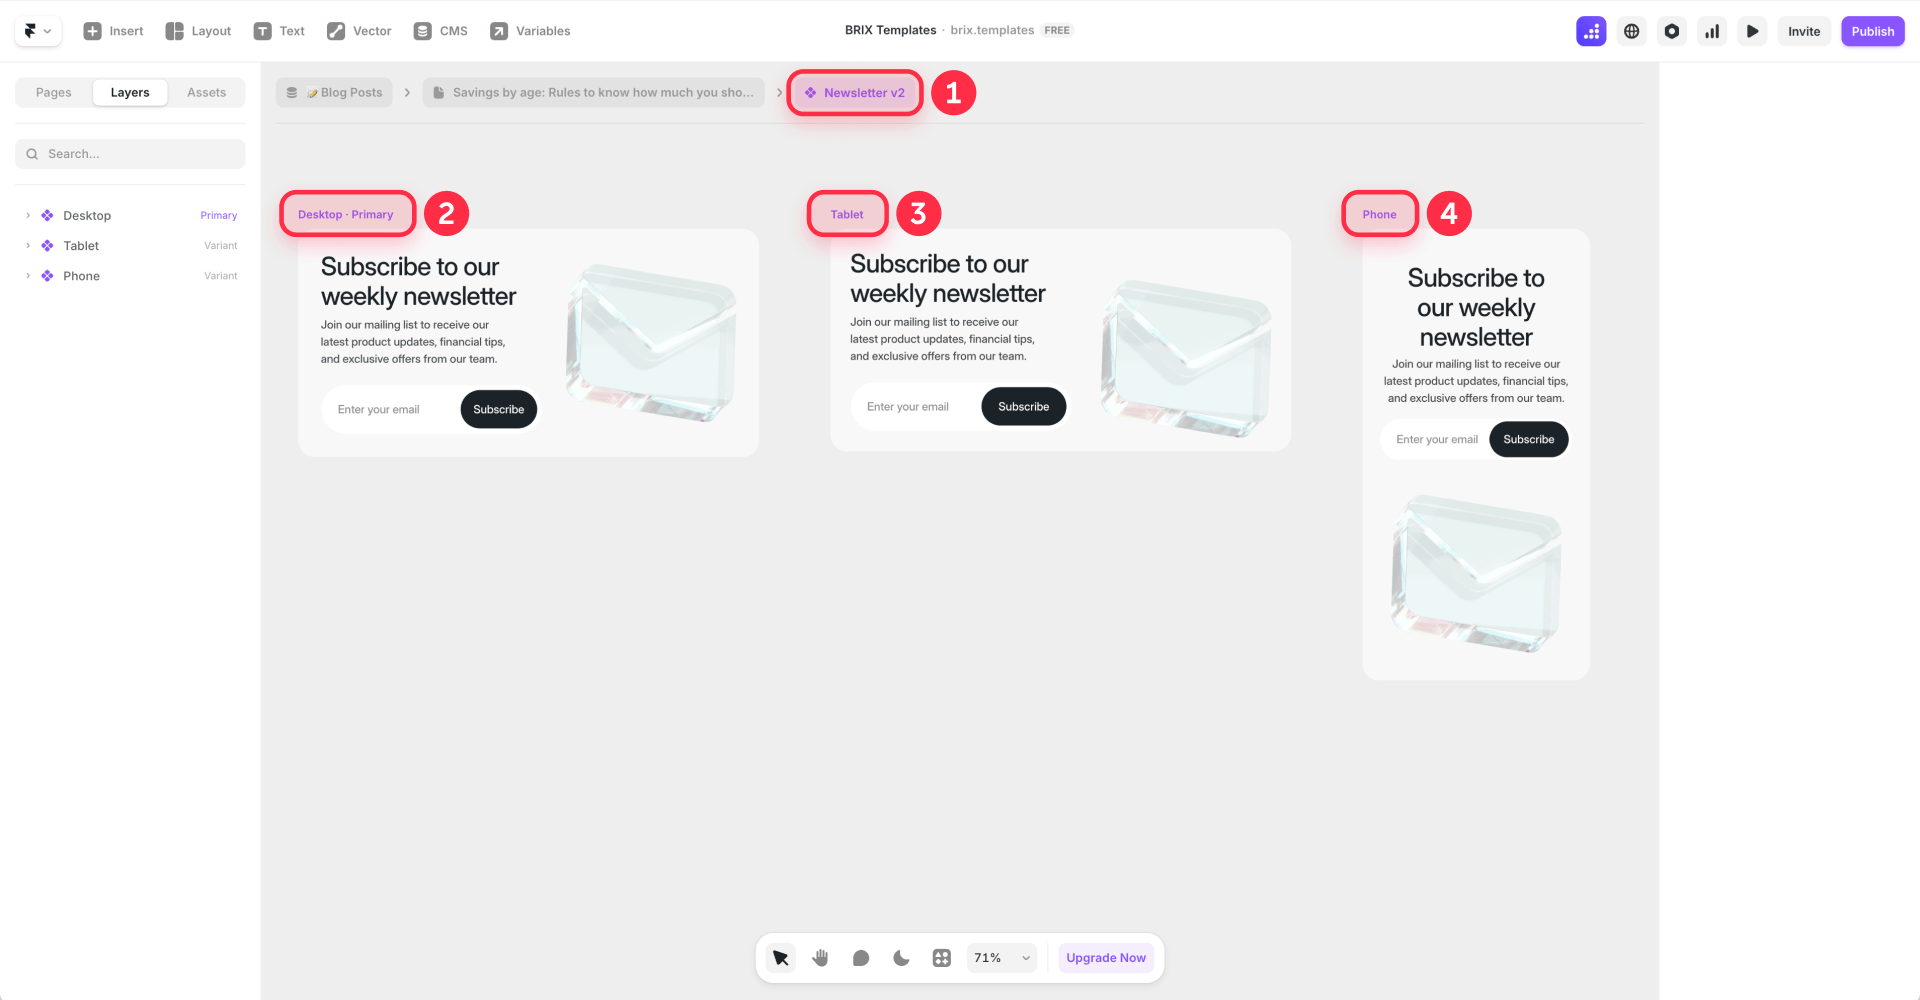
Add responsive variants before inserting into posts
A component that looks great on desktop but breaks on mobile won't work as a reusable CMS block. Build responsive variants before adding the component to real posts.
- Open the CTA component editor.
- Keep the default variant as desktop.
- Add a Phone variant for narrow screens (and Tablet if your layout changes significantly at medium widths).
- In the phone variant, switch multi-column layouts to single column.
- Reduce side padding if the CTA feels cramped.
- Confirm the button remains easy to tap and the headline doesn't wrap awkwardly.
If your Framer project uses specific breakpoint names, keep your CTA variant names aligned with them. If your CTA uses a grid layout, check out how to fix uneven card heights in Framer grids to keep things consistent.
Test the CTA inside a real article, not only on an empty Canvas. Blog content width, surrounding paragraph spacing, and parent layout constraints can affect how the component feels.
Insert the CTA inside CMS rich text
This is the step that replaces the old workaround of splitting posts into several formatted text fields.
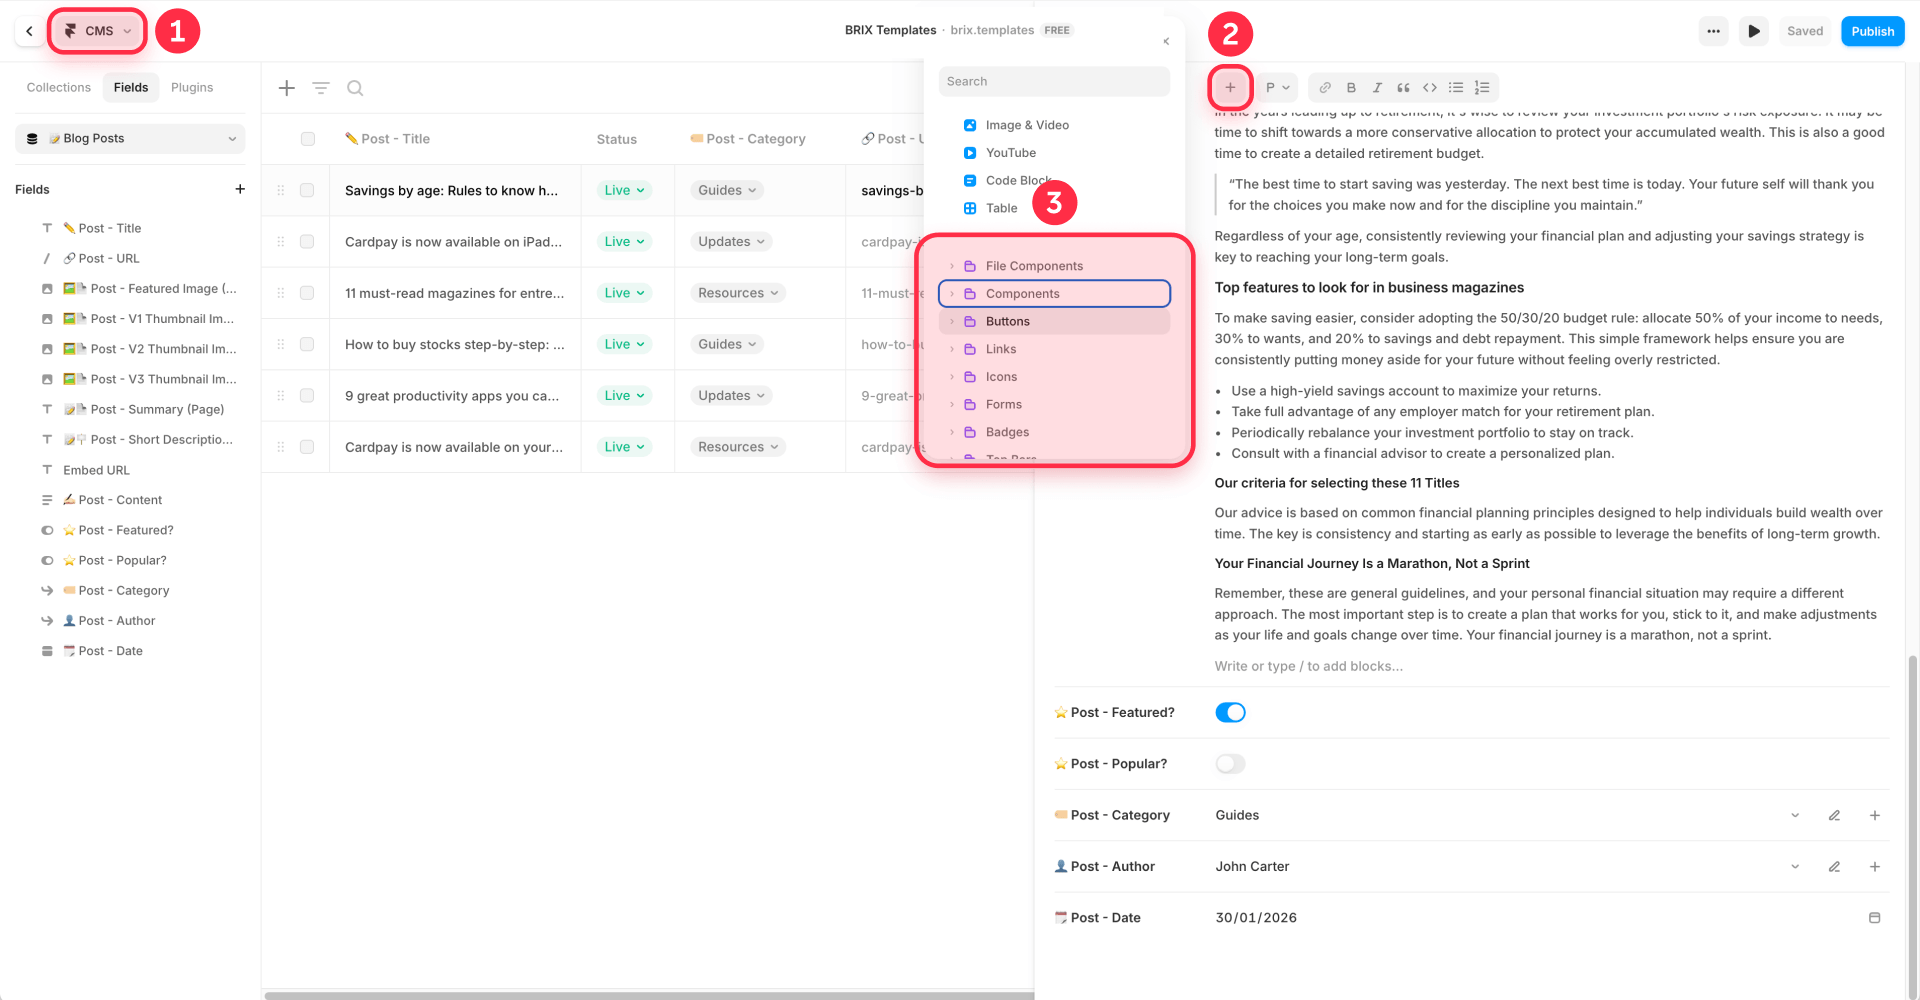
Add the CTA from the CMS editor
- Open your Framer project → CMS.
- Open your blog collection (e.g., Blog posts or Articles).
- Select the CMS item you want to edit.
- Click inside the Body or Formatted Text field.
- Place your cursor where the CTA should appear.
- Click Insert in the toolbar, or type / to open the insert menu.
- Search for your component (e.g., Blog / CTA / Inline).
- Select it to insert it into the post.
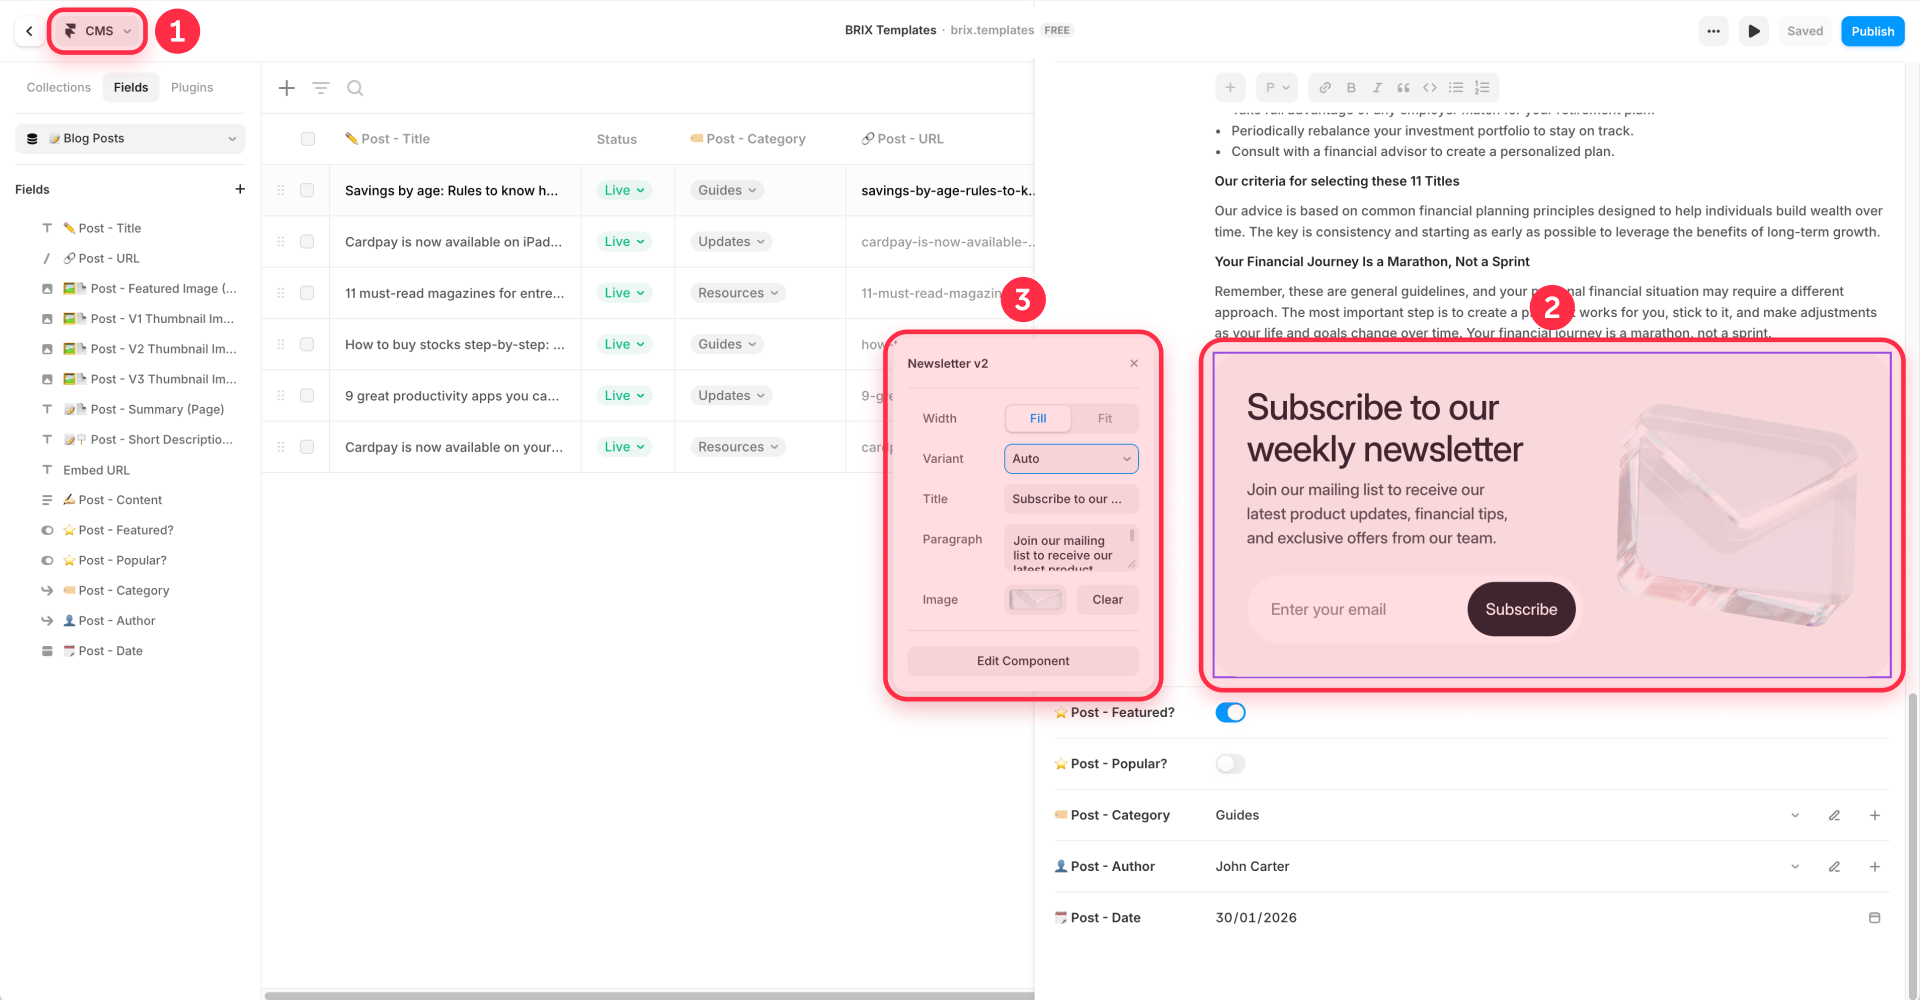
- Click the inserted CTA block and adjust its editable properties.
- Publish or preview to verify the layout.
Configure the instance
After inserting the component, click on it inside the formatted content field. If the component exposes editable properties, you can manually adjust those fields for that specific instance — for example, the Headline, Body text, Button label, Button URL, Image, Variant, or Alignment.
If the component is fully locked, no configuration is needed. The editor only needs to place it in the right position inside the article.
Before publishing, preview the post on desktop and mobile to confirm the component fits naturally between the surrounding paragraphs, uses the right responsive variant, and has the correct copy, image, and link if those fields are editable.
Optional: Use CMS References for fixed, centralized content
Inline CMS Components are best when editors need flexible placement inside the article body. They can insert a component between paragraphs and manually adjust any exposed properties for that specific instance.
If you need content to be managed from one central CMS source, use a CMS Reference workflow instead. For example, you could create a CTA Library collection with fields like Name, Headline, Body, Button label, Button URL, Image, Theme, and Status, then add a Featured CTA reference field to your Blog Posts collection. That referenced CTA is best displayed in a fixed template area — such as a sidebar module, end-of-post section, or global offer area — so teams can update the content from one place and keep it consistent across posts.
If you need help setting up a more advanced Framer CMS system with reusable components, editable properties, CMS references, or custom publishing workflows, the Framer experts at BRIX Templates can help you build it properly.
Troubleshooting
The CTA component does not appear in the insert menu Confirm the CTA is a real component (not just a frame). Check the Assets panel, rename it clearly, then reopen the CMS item and try Insert again.
The CTA block looks too wide inside rich text Select the inserted component and check its Width, Fill, Fit, and alignment settings. Set a max-width inside the component itself if needed. Verify on desktop and tablet.
The CTA breaks on mobile Create a phone-specific variant. Stack the layout vertically, reduce side padding, and avoid fixed-width inner elements. Preview at the phone breakpoint to confirm.
The CTA text cannot be edited in the CMS Open the master component and expose only the text, image, link, or variant properties that editors should be allowed to change. For a CTA, that might include Headline, Body, Button label, Button URL, or Image. If the component should stay the same everywhere, keep those properties locked.
The CTA button does not link anywhere Select the button inside the master component and expose the link as an editable variable. Then update Button URL on the inserted instance. Verify on the live page.
FAQ
What is a reusable CTA block in Framer CMS?
A reusable CTA block in Framer CMS is a designed component that can be inserted into CMS blog content and reused across posts. It usually includes a headline, short message, button, link, and optional visual treatment. You can update the master design once while each inserted instance keeps the approved structure. If editors need to customize the CTA per article, expose only safe editable properties like Headline, Body, Button label, Button URL, or Image. If the CTA should stay the same everywhere, keep the content locked.
How do I add a button inside a Framer CMS blog post?
Create the button or CTA as a Framer component, then insert it into the post's formatted content. Open the CMS item, click inside the Body field, place the cursor where the button should appear, and use Insert or type / to find your component. A small CTA block is usually better than a standalone button because it gives the button context — include a headline or short line of copy above the button so the action is clear to the reader.
Can I insert Framer components inside CMS rich text?
Yes. Framer now supports inserting components inside CMS formatted content, including CTAs, newsletter sections, interactive embeds, galleries, and custom UI elements. The component must exist in your Framer project as a reusable component first. Once inserted, you can adjust editable properties and select variants. Organize CMS-ready components in the Assets panel with names like Blog / CTA / Inline so editors and clients can find them easily.
What is the difference between Framer CMS Components and CMS References for CTAs?
CMS Components solve placement. They let you insert a designed CTA or content module directly inside formatted CMS content, exactly where the article needs it. If the component exposes editable properties, editors can manually customize that instance with approved fields like text, image, link, variant, or alignment.
CMS References solve centralized content management. They let one CMS item reference content from another collection, such as a CTA library, author profile, related resource, or featured download. References are usually better for fixed template sections, such as a sidebar CTA or end-of-post CTA, where the content should be managed from one place.
Use CMS Components for flexible inline placement. Use CMS References for centralized content in fixed CMS template areas.
Is a Framer CMS CTA block better than splitting the blog post into multiple fields?
Usually yes, if the CTA placement changes from article to article. Splitting content into Body before CTA and Body after CTA can work for one fixed CTA slot, but becomes awkward when some posts need two CTAs, some need none, and others need the CTA in a different location. Inline CTA components keep the article as one natural writing flow. Use multiple rich text fields only when the layout is fixed; for flexible editorial placement, a CMS CTA block is the stronger long-term workflow.
How do I make Framer CMS CTA blocks responsive on mobile?
Create breakpoint-friendly variants inside the CTA component before inserting it into CMS content. Start with the desktop layout, then add a phone variant that stacks content vertically, reduces padding, and avoids fixed-width elements. If your CTA includes an image, decide whether it should move above the text, below the text, or hide on small screens. Always test inside a real CMS post at mobile width — a responsive CTA must work within the article column, not just on the Canvas.
Can I reuse the same Framer CTA block across multiple blog posts?
Yes. Insert the same component into different CMS items, and each instance can have its own message, button label, link, and variant. The master component still controls the design structure, so updates to typography, spacing, radius, or button styling are maintained centrally. Create a small CTA component library — for example, Blog / CTA / Inline, Blog / CTA / Newsletter, and Blog / CTA / Resource — to keep things organized and maintainable.
Conclusion
Reusable CTA blocks give Framer CMS blogs a much better content workflow: editors place conversion sections inside the article body, designers keep the layout consistent, and clients reuse approved CTA patterns without rebuilding pages manually.
Turn your most common blog offers into a small CTA component library. Use inline CMS Components when editors need flexible placement inside the article body, and use CMS References when a fixed template section needs centrally managed content. If you want help building a scalable Framer CMS system with reusable components, clean blog templates, and conversion-focused layouts, the experienced Framer development team at BRIX Templates can help you set it up properly.










Join readers commenting on this post!