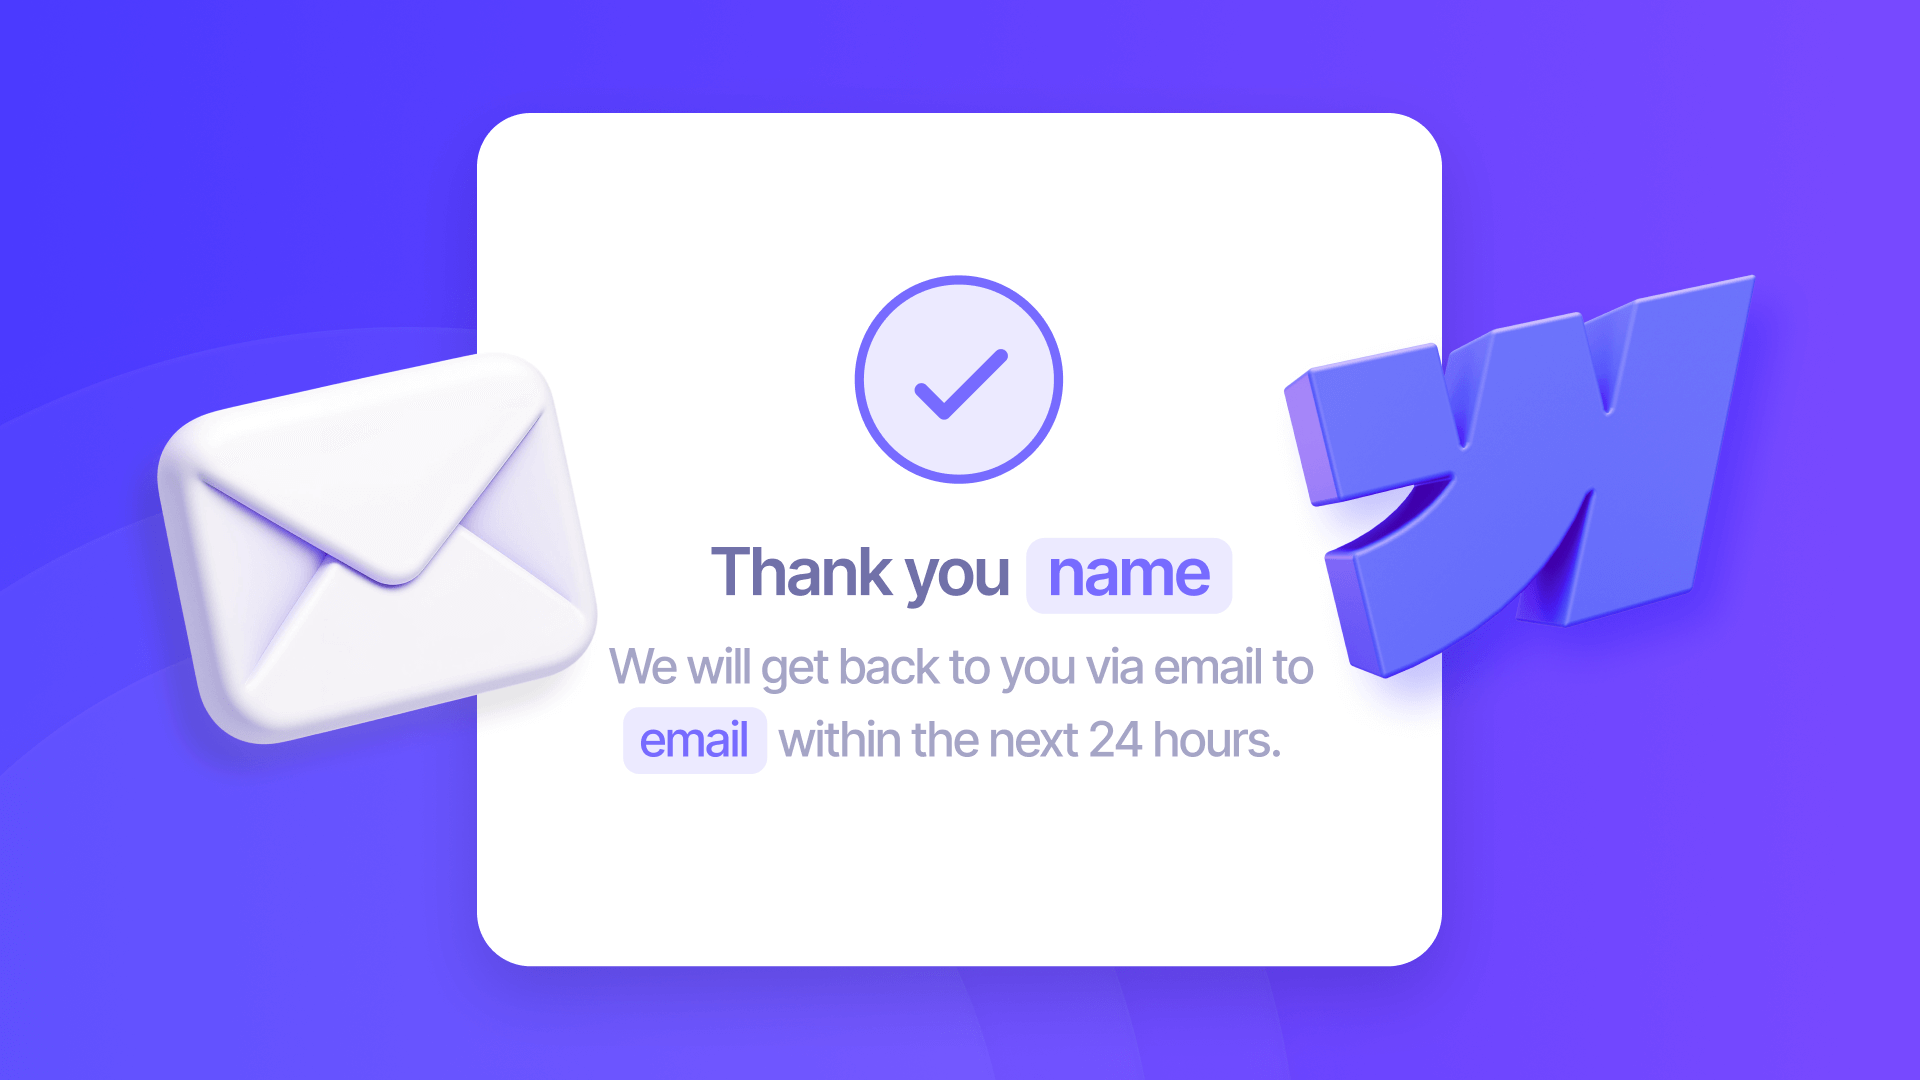
Personalizing form success messages creates meaningful connections with your users by acknowledging their input directly in the confirmation.
While traditional Webflow forms display generic "Thank you" messages, brix-form-success attribute automatically captures and displays user data in your success states, turning cold confirmations into warm, personalized responses.
Best of all, this Webflow attribute implementation takes under 5 minutes and requires no external services (and is 100% free too!).
Introduction
The brix-form-success attribute transforms generic form confirmations into dynamic, personalized messages that reflect the data users just submitted. You'll implement this using a single custom attribute and simple JavaScript that captures form values and displays them instantly in your success message.
Why personalized form success messages matter
- Lead generation forms: Display the user's name to create an immediate personal connection and confirm that their information was received
- Newsletter signups: Show their email address to reduce submission uncertainty and allow instant verification
- Contact forms: Include their name and inquiry details for professional confirmation and easy reference
- Multi-step forms: Display all collected information to reduce support inquiries and provide submission summaries
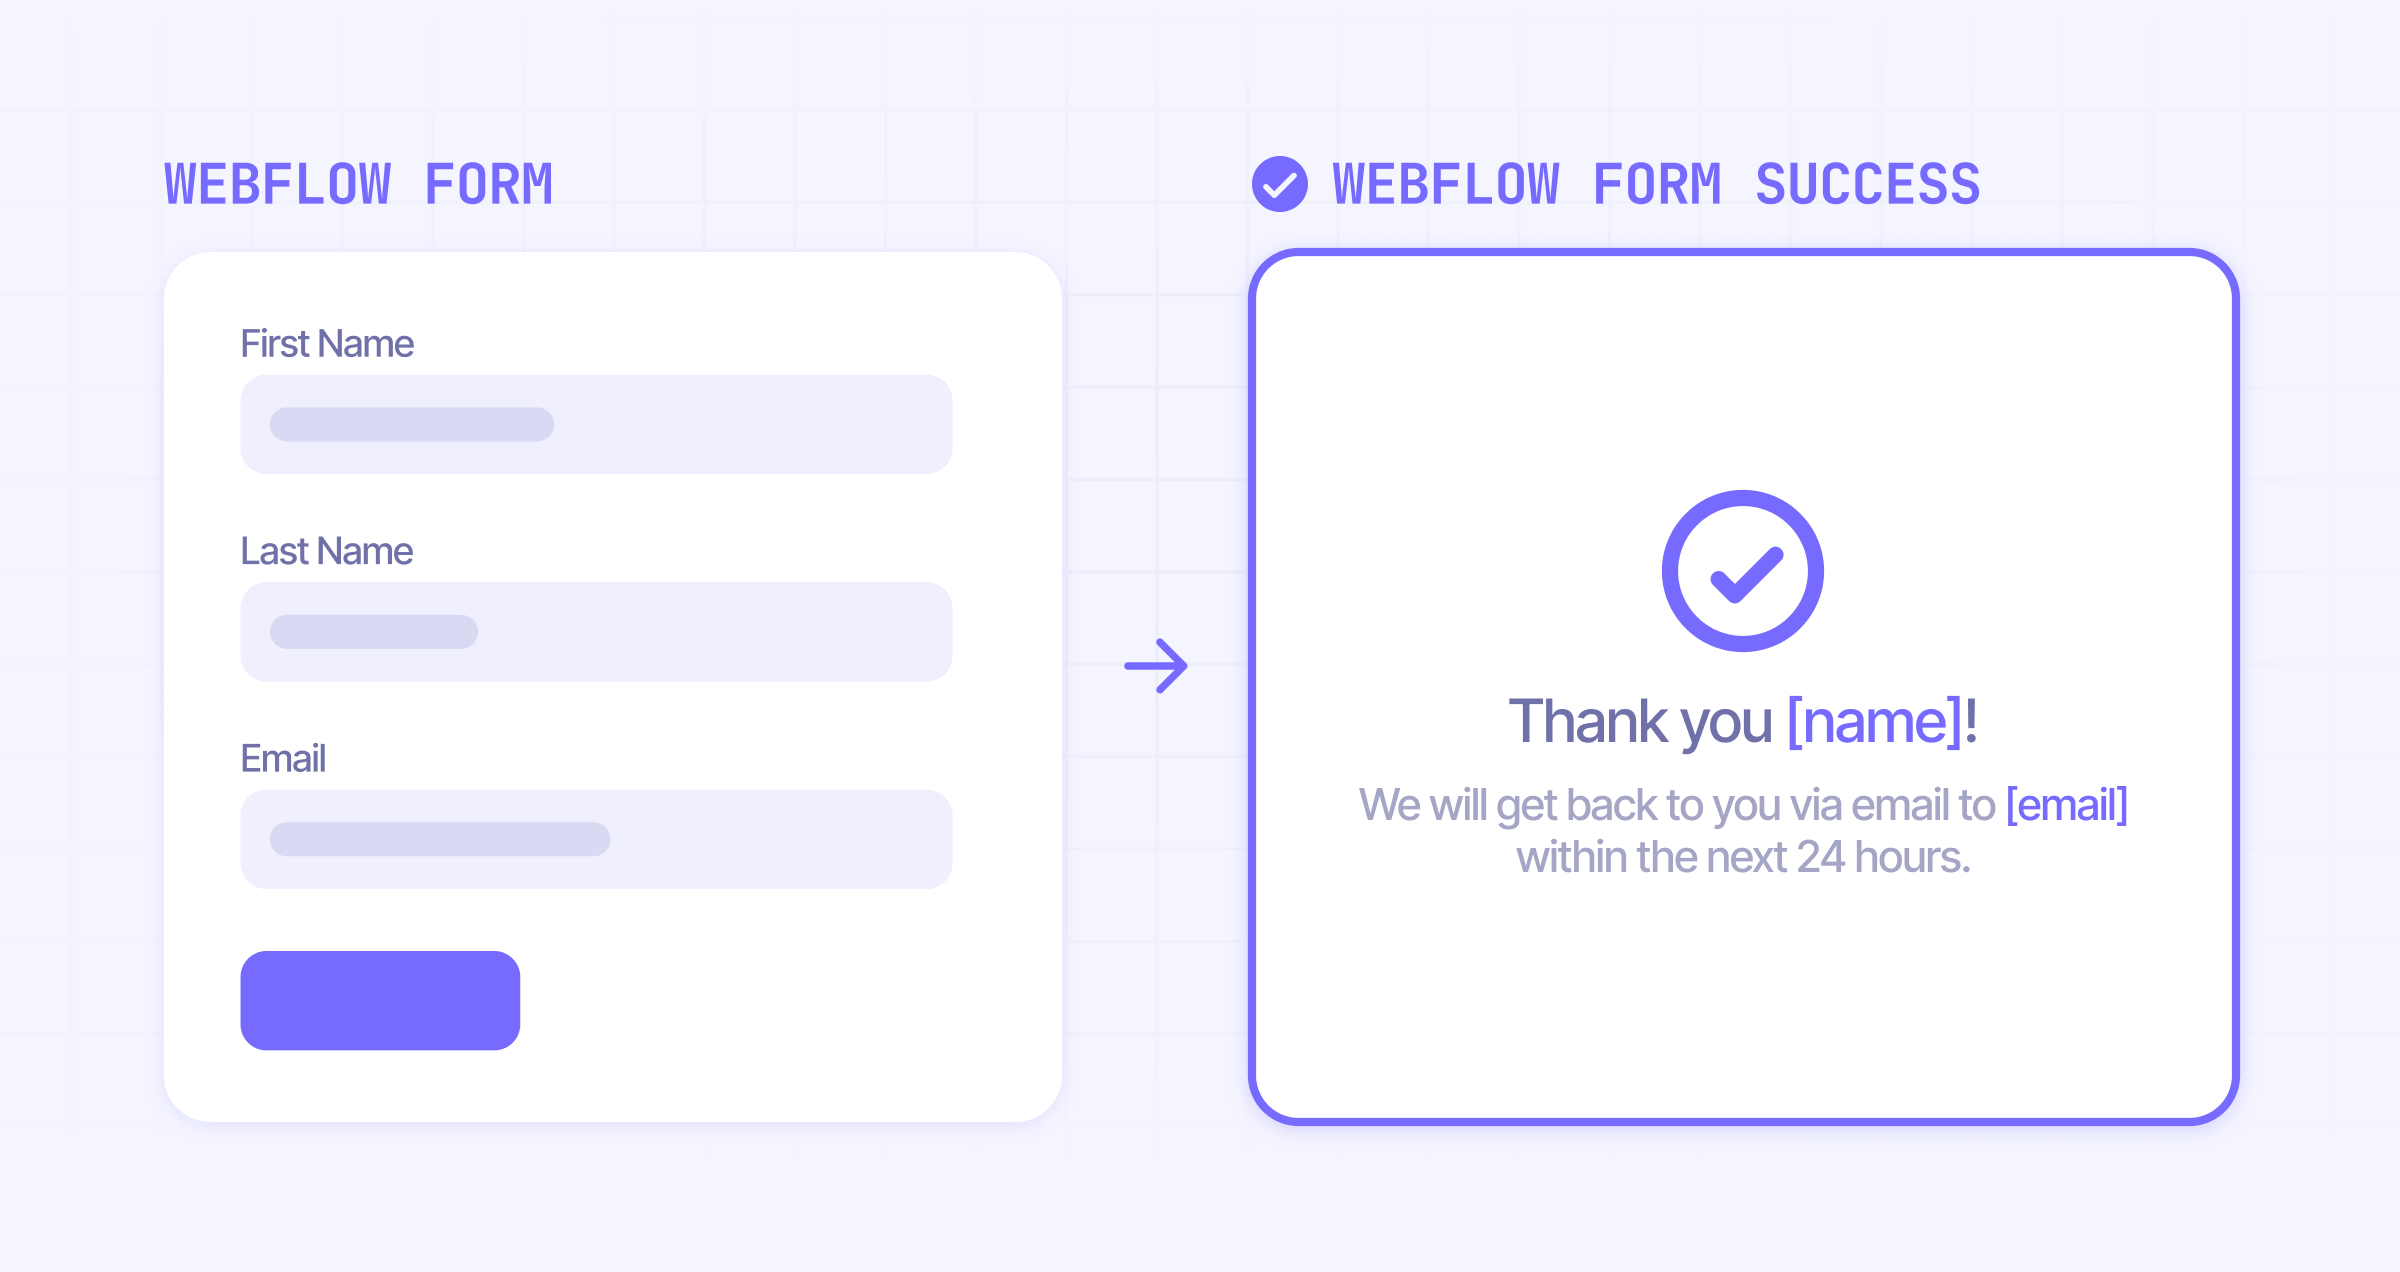
Understanding Webflow's form state system
Webflow forms include three distinct states: Normal (the default form view), Success (shown after submission), and Error (displayed when submission fails). The success state typically shows static content - but with JavaScript, we can dynamically update this content based on the submitted form data.
This works because Webflow triggers the success state on your page, giving us the opportunity to capture and display form values right after submission.
1 - Setting up your form structure in Webflow
Before implementing the dynamic success message, we need to properly structure our form with the right settings and elements.
1.1 - Creating your form with proper naming conventions
Follow these steps to set up your form foundation. If you already have a form created, all of these steps are likely already completed:
1 - Add a form block:
- Drag a Form Block from the Add Panel onto your page
- You'll see it contains a form, a success message, and an error message
2 - Configure your form:
- Click on the actual Form element inside the Form Block (not the outer Form Block wrapper)
- Look at the Settings panel on the right
- Set Form Name to something descriptive like "Contact Form", as this name will appear in your form submissions
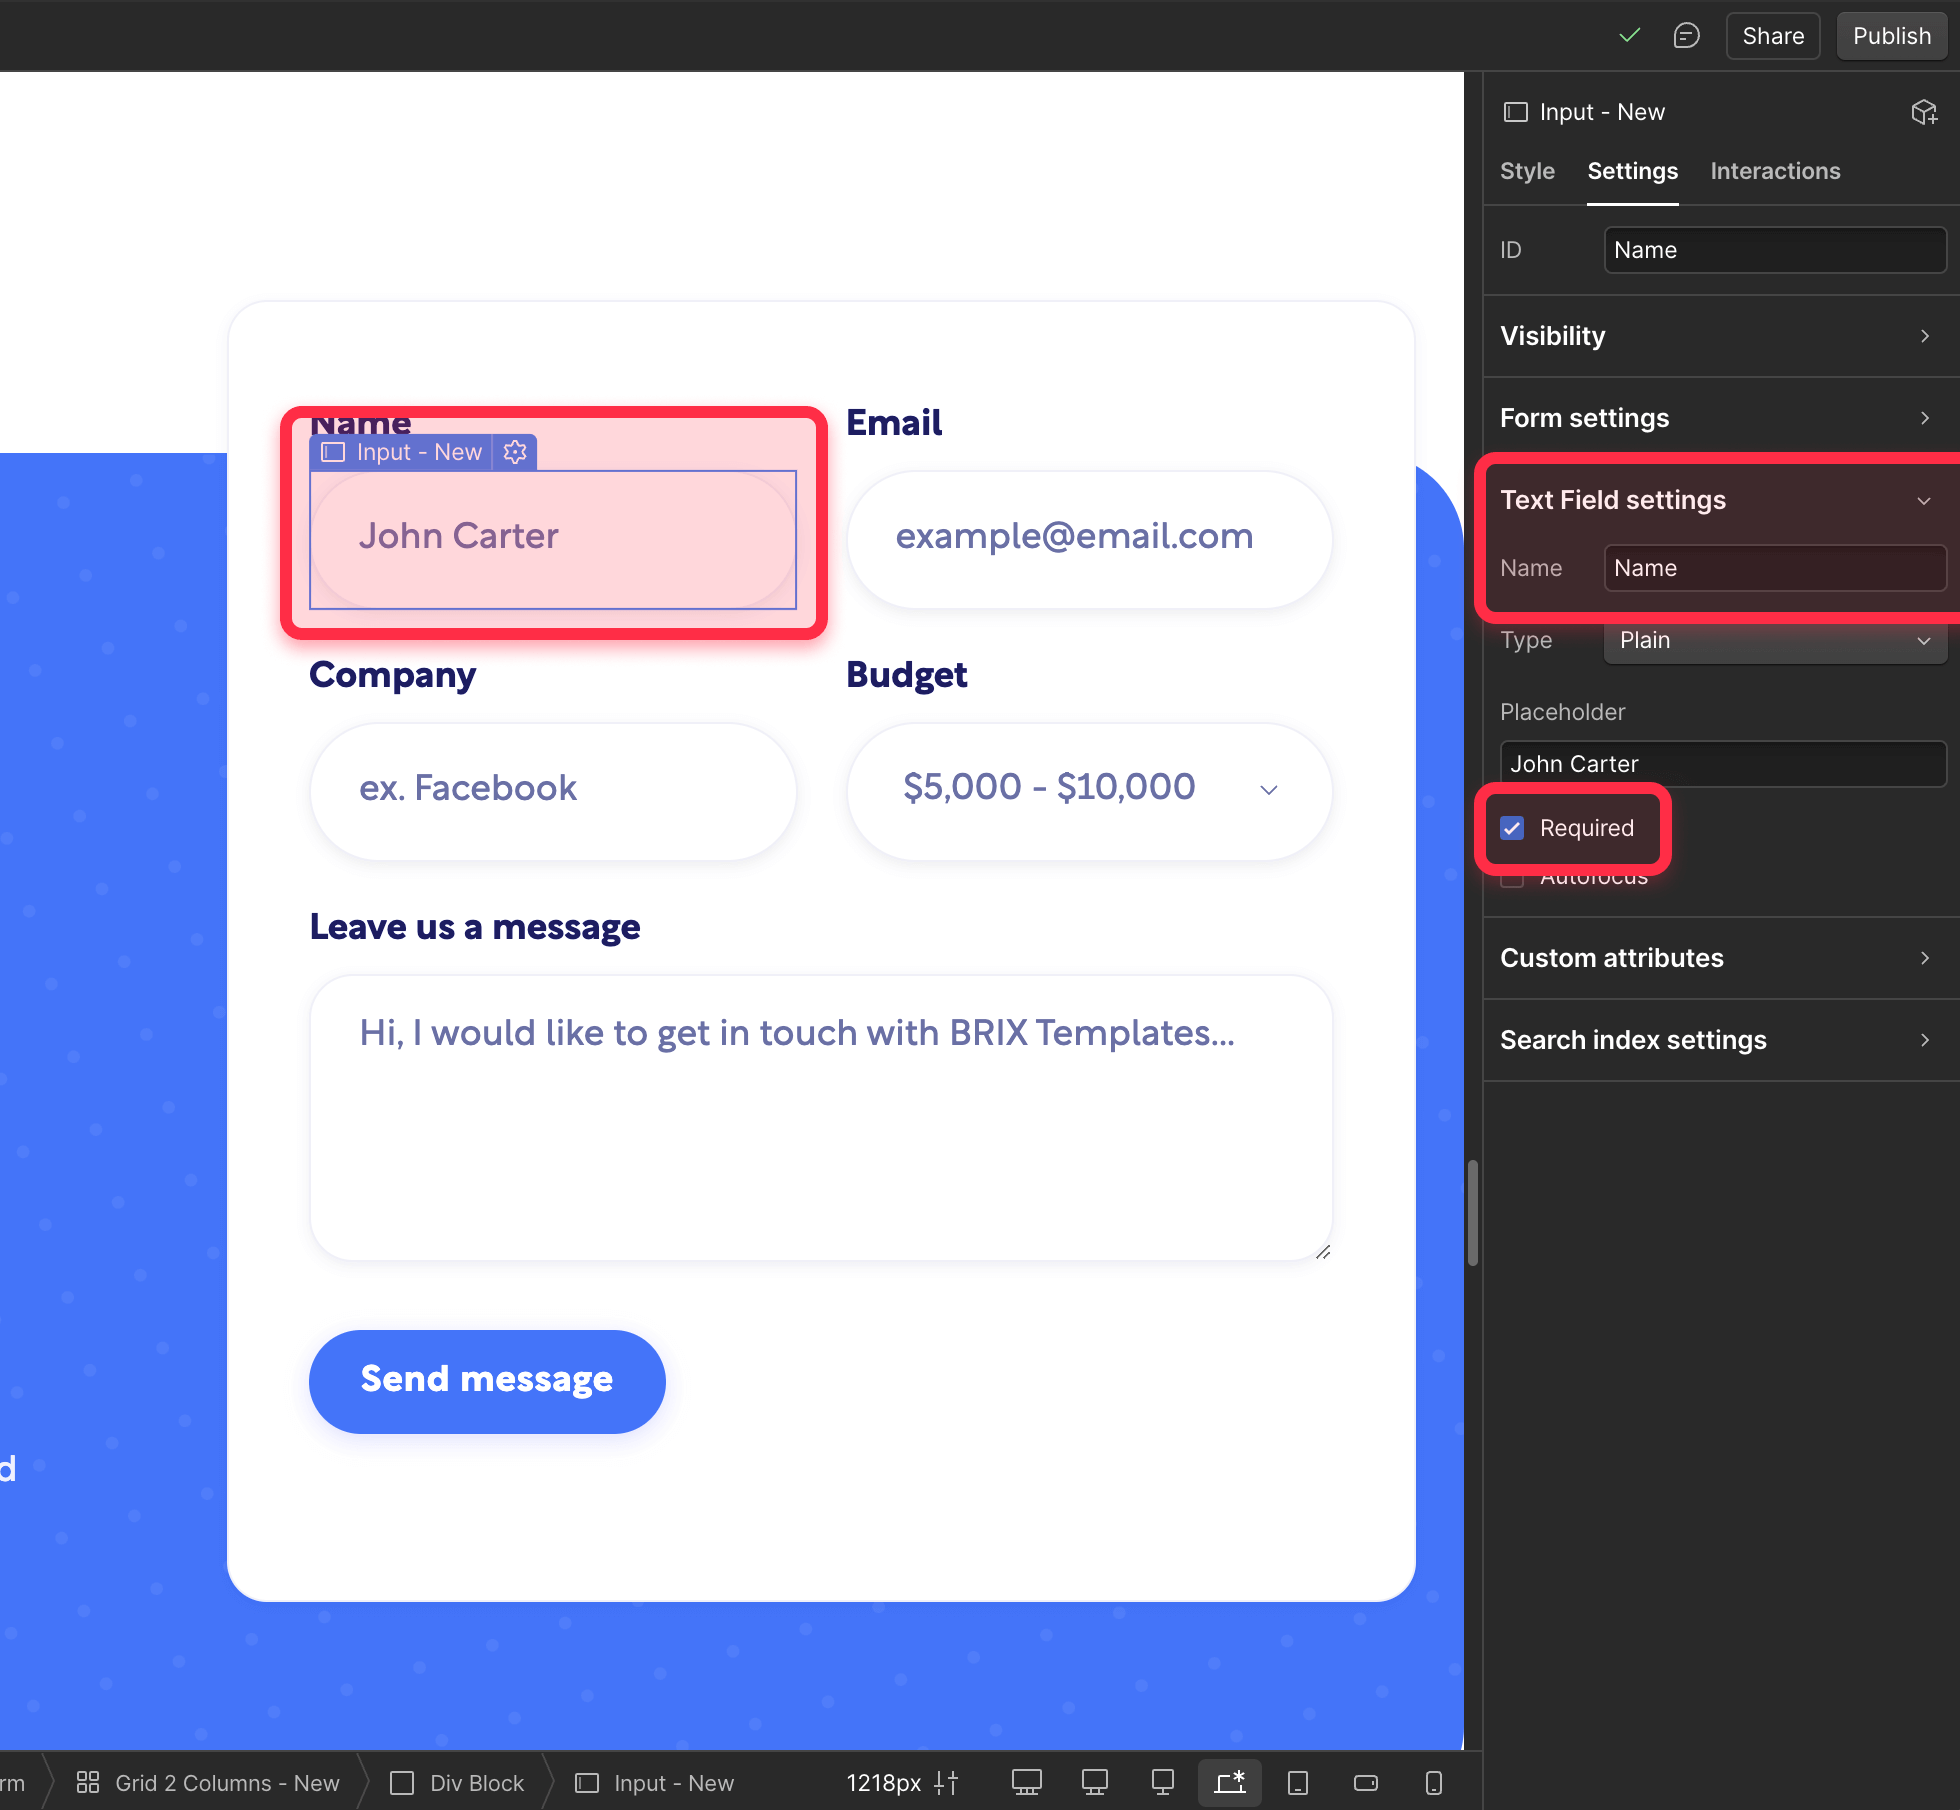
3 - Add your form fields:
- For this example, we will add common fields:
- Name field: Set the Name attribute to "name"
- Email field: Set the Name attribute to "email"
- Phone field: Set the Name attribute to "phone"
- Mark these as required fields
Important note about optional fields: If any field is optional and left empty by the user, the success message will simply omit that data rather than showing placeholder text.
This applies to all field types - text inputs, dropdowns, radio buttons, etc. Consider making key fields required if you always want them in your success message.
1.2 - Preparing the success message for dynamic content
Now let's set up the success state to receive our personalized content:
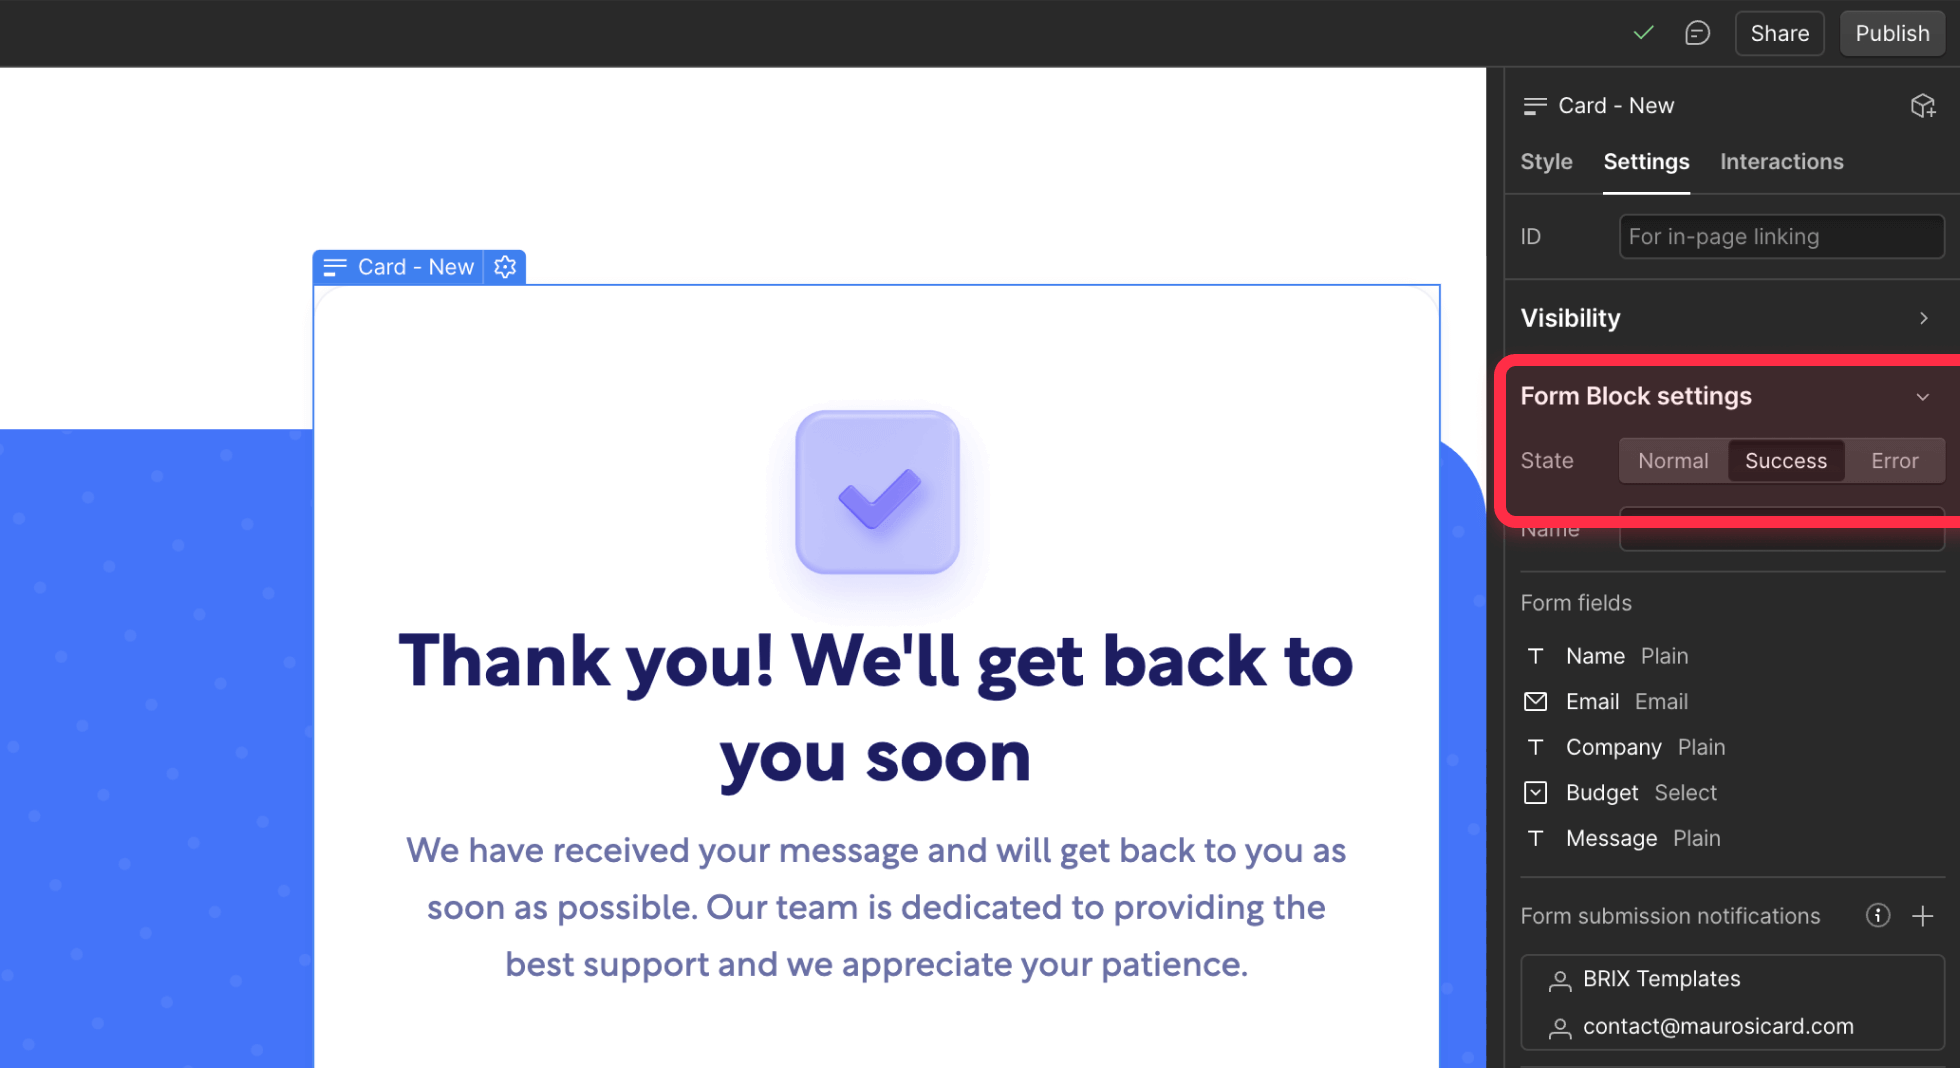
1 - Switch to the success state:
- With your Form Block selected
- In the Settings panel, find the dropdown that says "Normal"
- Switch it to "Success"
- You'll now see the form success message
2 - Create your personalized message:
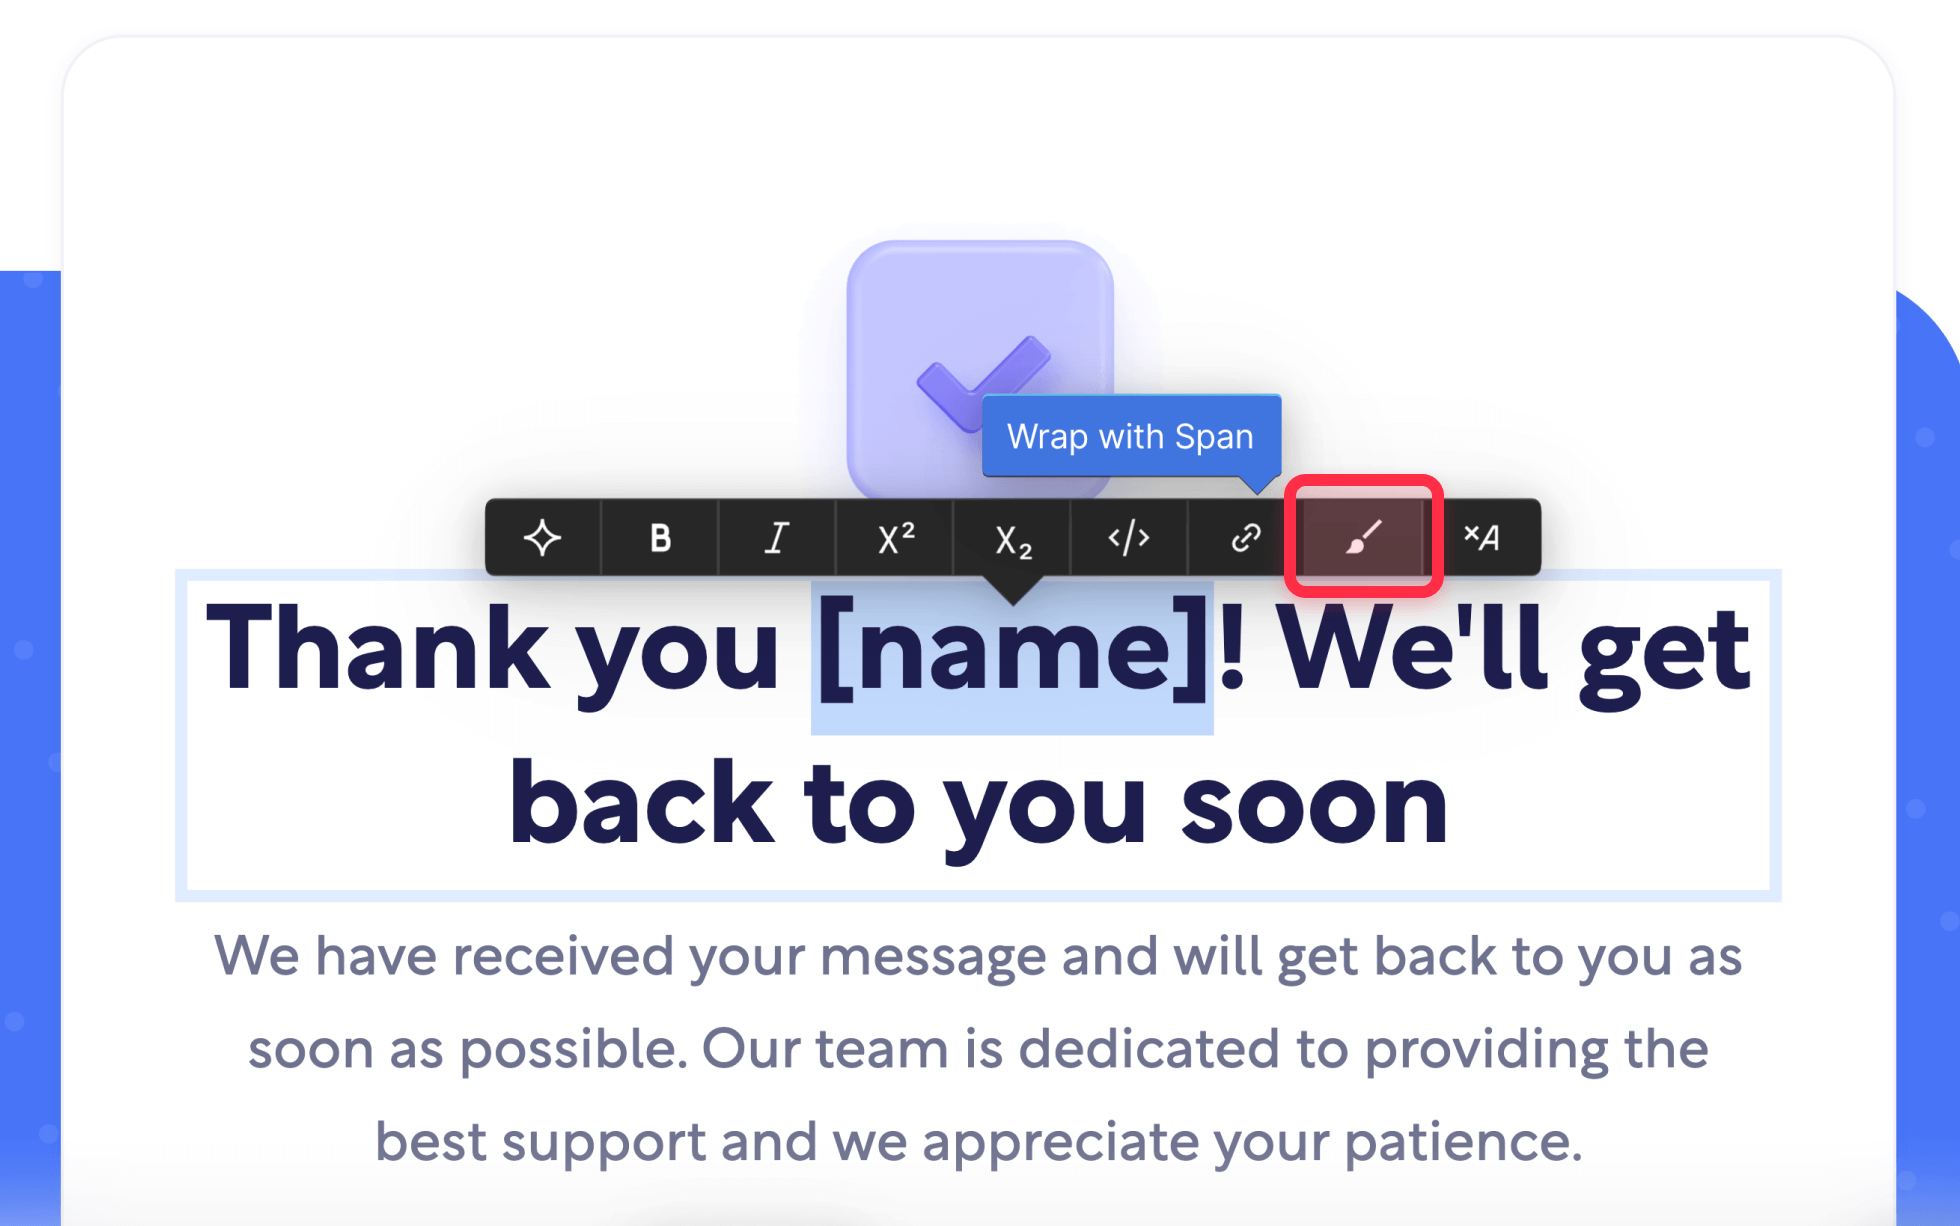
- Delete the default "Thank you!" text
- Type your message like: "Thank you [name]! We'll send confirmation to [email]"
- Select just the "[name]" placeholder text
- With it selected, click the Wrap with Span button
- Do the same for "[email]" and any other placeholders you added
3 - The result:
- You'll have a message with regular text and spans where the dynamic content will appear (We'll explain how to connect these spans to your form fields in the next step, no worries)
2 - Implementing the brix-form-success attribute system
Now we'll add the attribute that automatically captures form data and displays it in your success message.
Adding the brix-form-success attribute
Here's the simple process to connect everything:
1 - Mark your input fields:
- Select the input field (name, email, phone, etc.)
- Scroll to Custom Attributes in the Settings panel
- Click the + to add an attribute
- Name: brix-form-success
- Value: A unique identifier like name, email, or phone
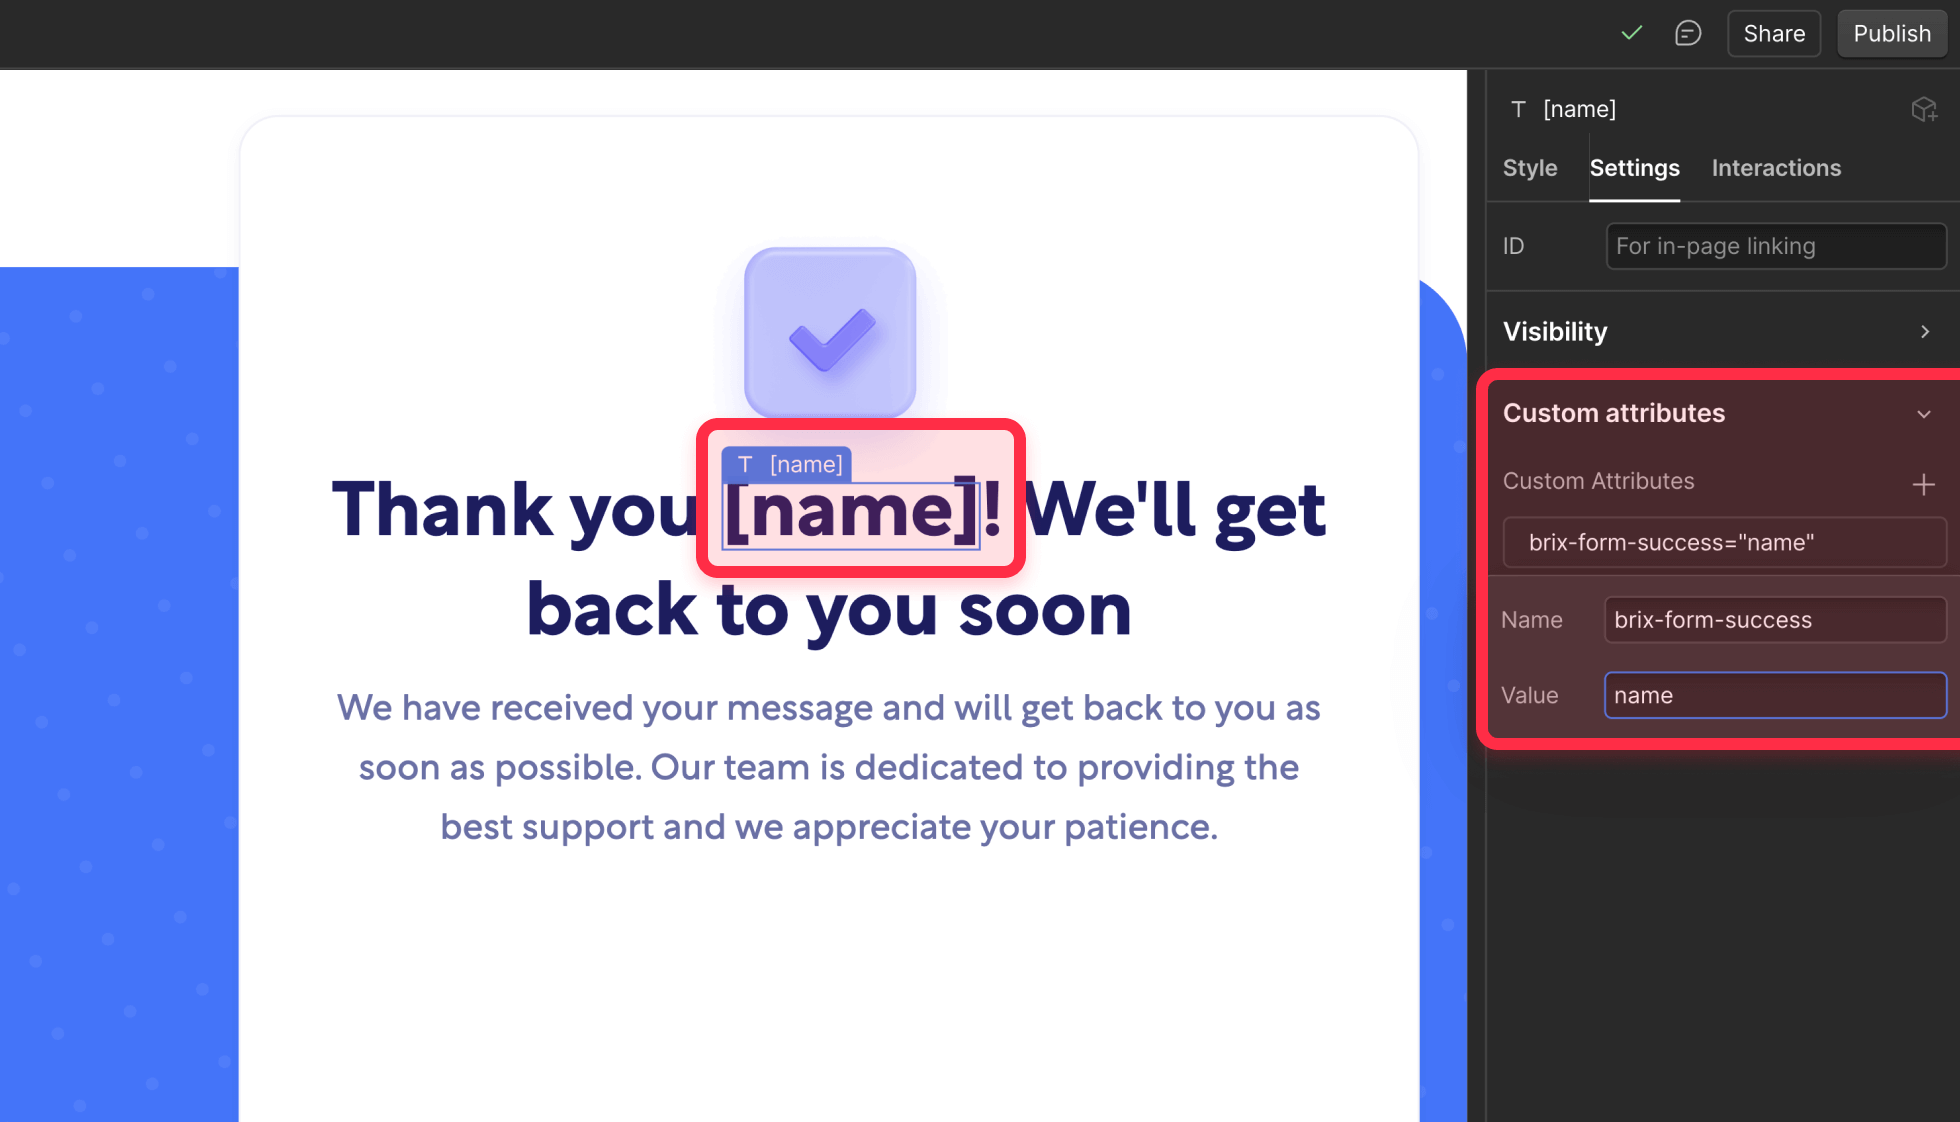
2 - Mark your success message spans:
- Select the span element in your success message
- Add a custom attribute:
- Name: brix-form-success
- Value: Use the same identifier as the corresponding input
Important note: Only add the brix-form-success attribute to actual form inputs (INPUT, SELECT, TEXTAREA) and to text spans inside your success message.
Avoid adding it to other elements like divs or paragraphs in the Normal state, as they will be treated as display targets, like the spans inside the success text.
Understanding what field types are supported
The brix-form-success system works with all Webflow form elements:
- Text inputs: Name, email, phone, etc. - captures exactly what users type
- Textareas: Multi-line text fields work perfectly for messages or comments
- Select dropdowns: Displays the selected option text (not the value)
- Checkboxes: Shows "Yes" if checked, "No" if unchecked
- Radio buttons: Displays the value of the selected option
- Number inputs: Captures numeric values as entered
- Date inputs: Shows the date in browser's default format
- All other HTML5 inputs: Tel, URL, password (though be careful with sensitive data)
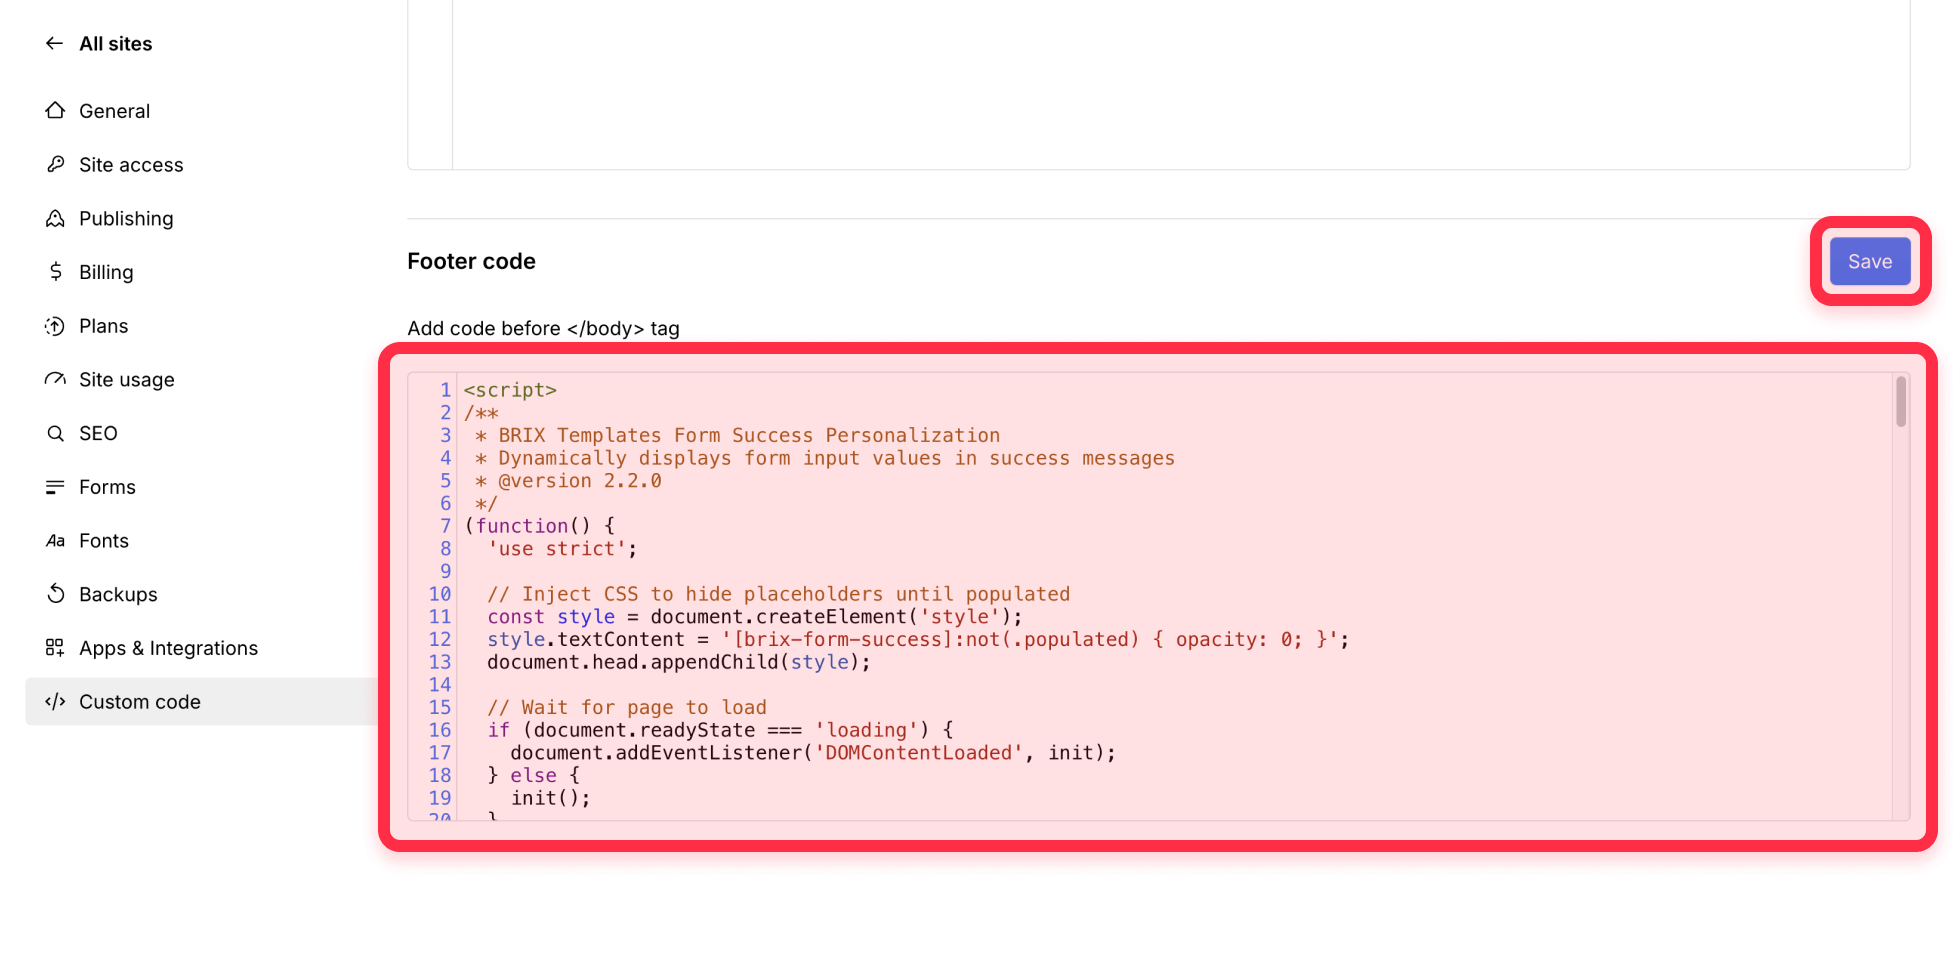
Adding the personalization script to your Webflow project
Here's the JavaScript that makes the magic happen. The script includes everything you need - both the functionality and the CSS to prevent placeholder flashes:
1 - Copy this single code block:
essage(form, formName) {
    let attempts = 0;
    const maxAttempts = 30; // 3 seconds max wait

    const checkInterval = setInterval(function() {
      // Look for success message within the specific form
      const successMessage = form.querySelector('.w-form-done');

      if (successMessage && window.getComputedStyle(successMessage).display !== 'none') {
        // Success message is visible - populate it
        clearInterval(checkInterval);
        populateSuccessMessage(form, formName);
      } else if (attempts++ >= maxAttempts) {
        // Give up after 3 seconds
        clearInterval(checkInterval);
        console.warn('brix-form-success: Success message did not appear within 3 seconds');
        // Clean up stored data
        sessionStorage.removeItem('brixForm_' + formName);
        sessionStorage.removeItem('brixFormElement_' + formName);
      }
    }, 100);
  }

  function populateSuccessMessage(form, formName) {
    // Get saved form data
    const savedData = sessionStorage.getItem('brixForm_' + formName);
    if (!savedData) return;

    const formData = JSON.parse(savedData);

    // Find all display elements within this form's success message
    const successMessage = form.querySelector('.w-form-done');
    const displayElements = successMessage.querySelectorAll('[brix-form-success]');

    displayElements.forEach(function(el) {
      // Skip input elements (shouldn't be in success message, but just in case)
      if (el.tagName === 'INPUT' || el.tagName === 'SELECT' || el.tagName === 'TEXTAREA') {
        return;
      }

      const identifier = el.getAttribute('brix-form-success');
      if (formData[identifier]) {
        // Format the value
        let displayValue = formData[identifier];

        // Capitalize names
        if (identifier.toLowerCase().includes('name')) {
          displayValue = displayValue.charAt(0).toUpperCase() + displayValue.slice(1);
        }

        // Update the text
        el.textContent = displayValue;

        // Mark as populated for CSS
        el.classList.add('populated');

        // Add subtle fade-in effect
        setTimeout(function() {
          el.style.transition = 'opacity 0.3s ease';
          el.style.opacity = '1';
        }, 50);
      }
    });

    // Clean up stored data
    sessionStorage.removeItem('brixForm_' + formName);
    sessionStorage.removeItem('brixFormElement_' + formName);

    // Success confirmation in console
    console.log('✉️ BRIX Form Success - Personalized message displayed for form: ' + formName);
  }
})();
</script>
2 - Add to your Webflow project:
- Go to Project Settings > Custom Code > Paste in the Footer Code section
- Or if the form is only on one page: Go to Page Settings > Custom Code > Before </body> tag
- Save and publish
3 - That's it! The script automatically handles all form submissions on your site
3 - Creating effective personalized success messages
Transform your confirmations with these message patterns:
Simple personalization examples
- "Thank you, [name]! Your message has been received."
- "Thanks [name]! We'll send details to [email]."
- "Perfect, [name]! We'll contact you about [service] within 24 hours."
Combine multiple fields for richer confirmations, for example: "Hi [name], thanks for reaching out! We'll call you at [phone] to discuss your inquiry. Confirmation sent to [email]."
Styling your personalized content (optional)
If you want to make dynamic content stand out, select your spans and add Text Color, Bold font weight, or subtle Background Color to draw attention to the personalized elements.
4 - Testing your personalized success messages
Ensure everything works with these quick tests:
1 - Basic test:
- Publish your site
- Fill out and submit your form
- Verify personalized data appears in the success message
- Note: This won't work in Designer preview, so test on your webflow.io staging site
2 - Test different scenarios:
- Leave optional fields empty - message should handle gracefully
- Try different input types if you have them
- Submit multiple forms to ensure they work independently
5 - Troubleshooting common issues
Here are the most common problems and solutions:
No personalized data appears:
- Attribute values must match exactly (case-sensitive)
- Test on the published site, not in the Webflow Designer
- Ensure spans are inside the success message element
I see [name] instead of the actual name:
- Check for console warnings about timeouts or JavaScript errors
Some dynamic texts are missing:
- Verify the field's Name attribute is set
- Radio buttons need one option selected
- Check attribute spelling matches exactly
Frequently asked questions
How to show the user's name in the Webflow form success message?
To display a user's name in your Webflow form success message, add the brix-form-success attribute to both your name input field and a text span in your success message, using the same value like "name" for both.
When the form submits, our JavaScript automatically captures the name and displays it in the success message, creating a personalized "Thank you, [name]!" experience.
How to display the submitted email in a form thank you message on Webflow?
Add the brix-form-success attribute with value "email" to your email input field and to a span element in your success message where you want the email to appear.
The script will automatically show the submitted email address in your success message, allowing users to verify they entered the correct email and creating messages like "We'll send confirmation to [email]."
How to personalize Webflow form confirmation with multiple fields?
You can personalize your entire success message by adding the brix-form-success attribute to multiple form fields (name, email, phone, service type) with unique values for each. Create corresponding spans in your success message with matching attribute values.
This lets you build rich confirmations like "Thanks [name]! We'll call [phone] about your [service] project."
Conclusion
Implementing personalized success messages with the brix-form-success attribute transforms your Webflow forms from generic endpoints into engaging, user-centric experiences. The single-attribute approach makes implementation remarkably simple while maintaining full flexibility.
For implementations requiring complex conditional logic, multi-language support, or integration with marketing automation systems like HubSpot forms, our Webflow development team can create sophisticated personalization systems that perfectly align with your business objectives.


Join readers commenting on this post!