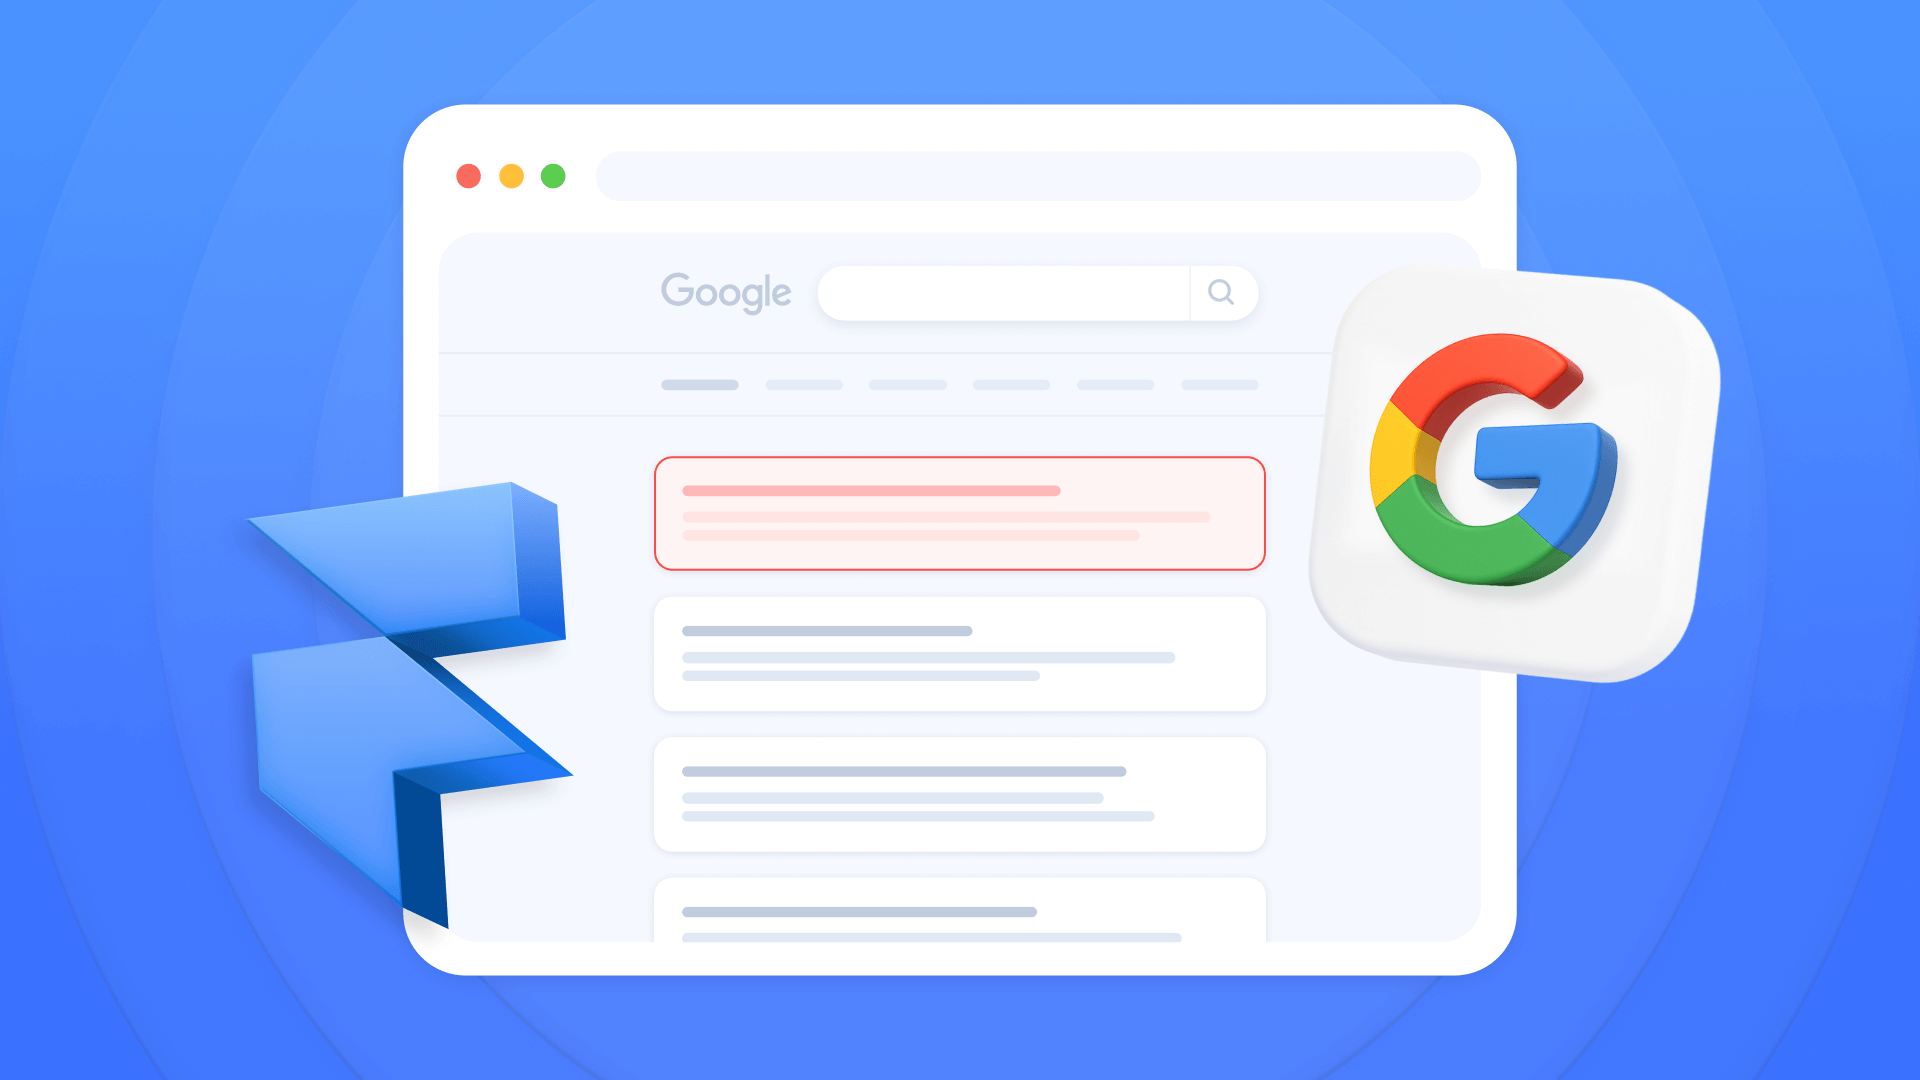
Have you ever needed to control which pages from your Framer site appear in Google search results? While more visibility is usually the goal, knowing how to unindex specific content is equally crucial for a well-managed SEO strategy and user experience.
The problem is it's not always obvious how to tell search engines to ignore certain pages. A single mistake could make private content public or let test pages damage your rankings. This guide will teach you the most direct and effective methods to manage your content visibility in Framer.
Why unindexing pages matters for Framer sites
Knowing how and when to unindex content gives you precise control over your site's digital footprint. It's an essential tool for maintaining a clean, professional, and strategic online presence.
- Hide work in progress: Keep pages in the design phase out of public reach until they're ready for official launch.
- Prevent duplicate content: Stop the default test subdomain (yoursite.framer.website) from competing with your main domain in search results.
- Protect private access pages: Ensure thank you pages, purchase confirmations, or internal portfolios aren't accessible through search.
- Improve user experience: Hide functional pages that don't add value in search results, keeping results clean for your users.
- Optimize crawl budget: Help Google focus on your most important pages, ignoring low-value content for more efficient indexing.
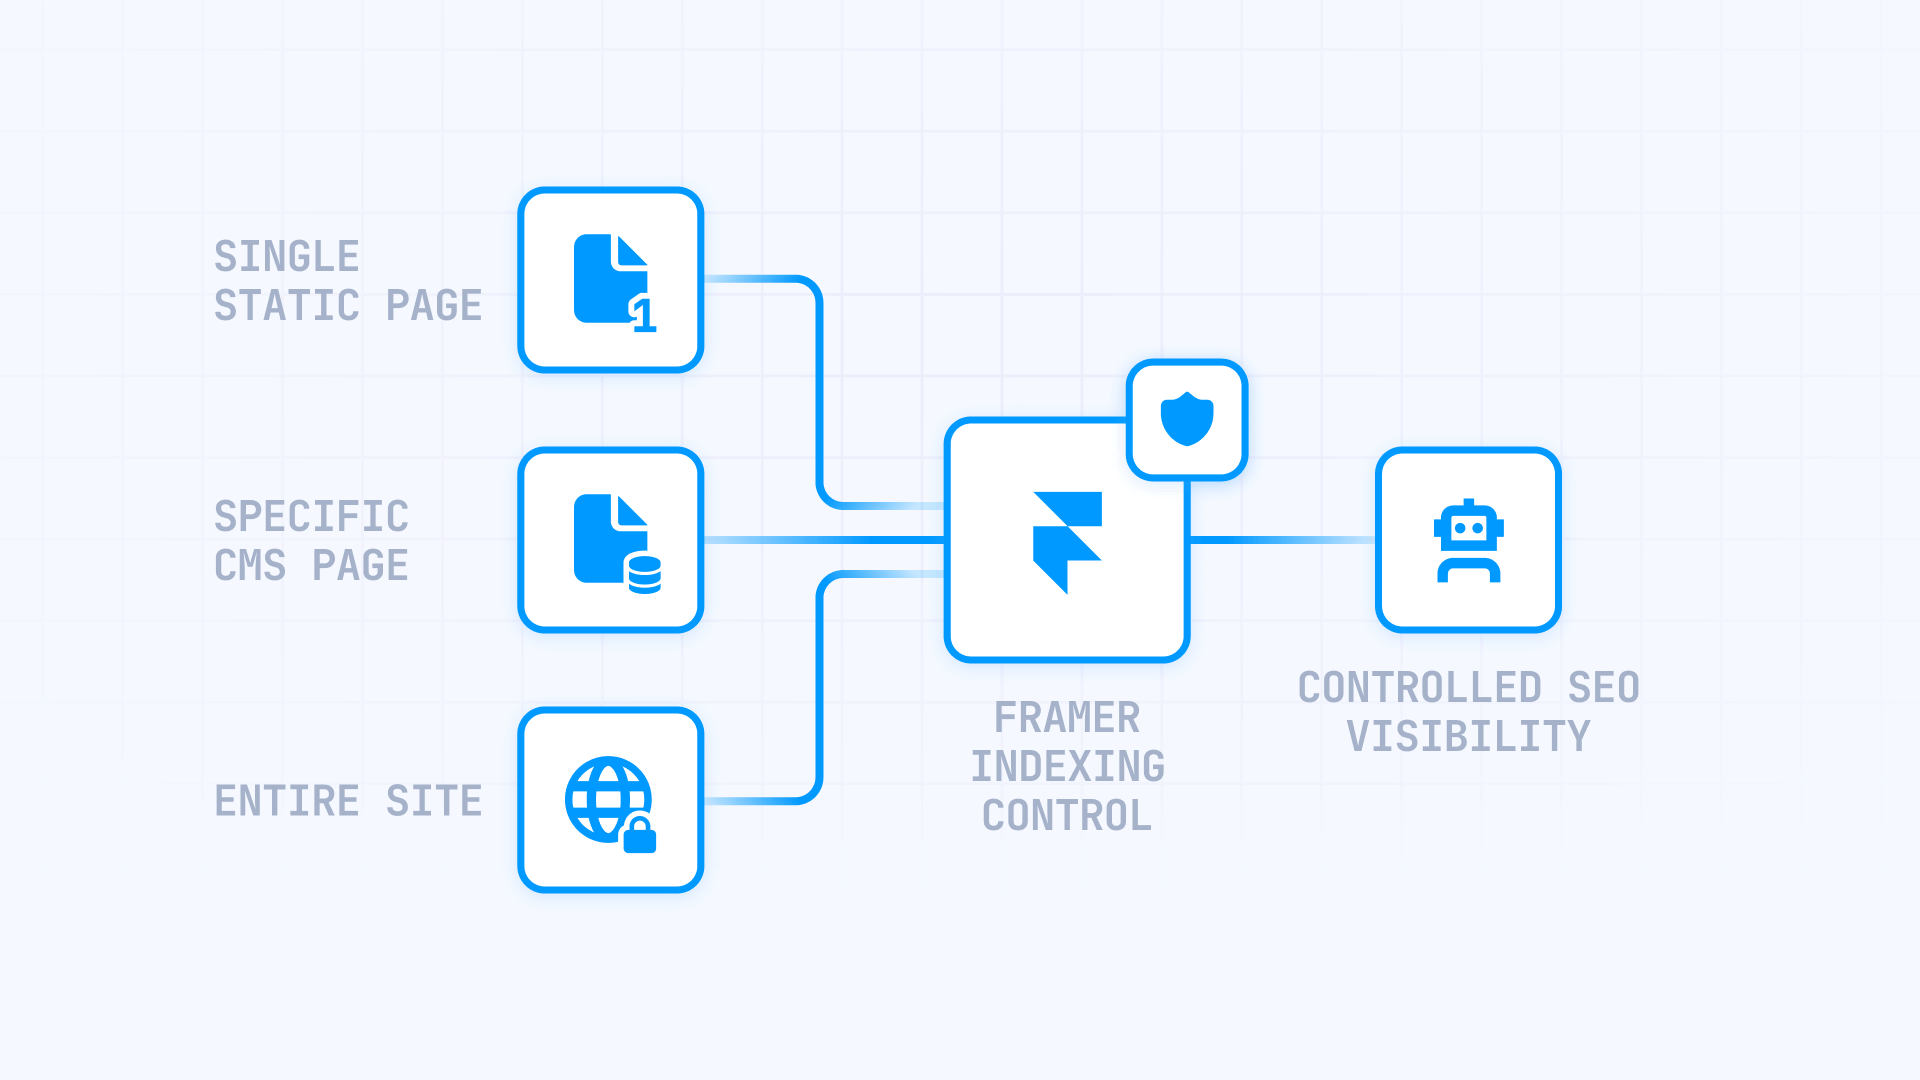
How to unindex individual static pages in Framer
This is the most common and straightforward method, perfect for "thank you" pages, form submission confirmations, or any other static page that shouldn't appear in search results. Framer makes this incredibly simple.
We'll walk you through the steps to apply a "noindex" tag to any static page, ensuring search engines ignore it during crawling.
Steps to unindex a static page in Framer
To start, you need to open Page Settings. You can do this two ways:
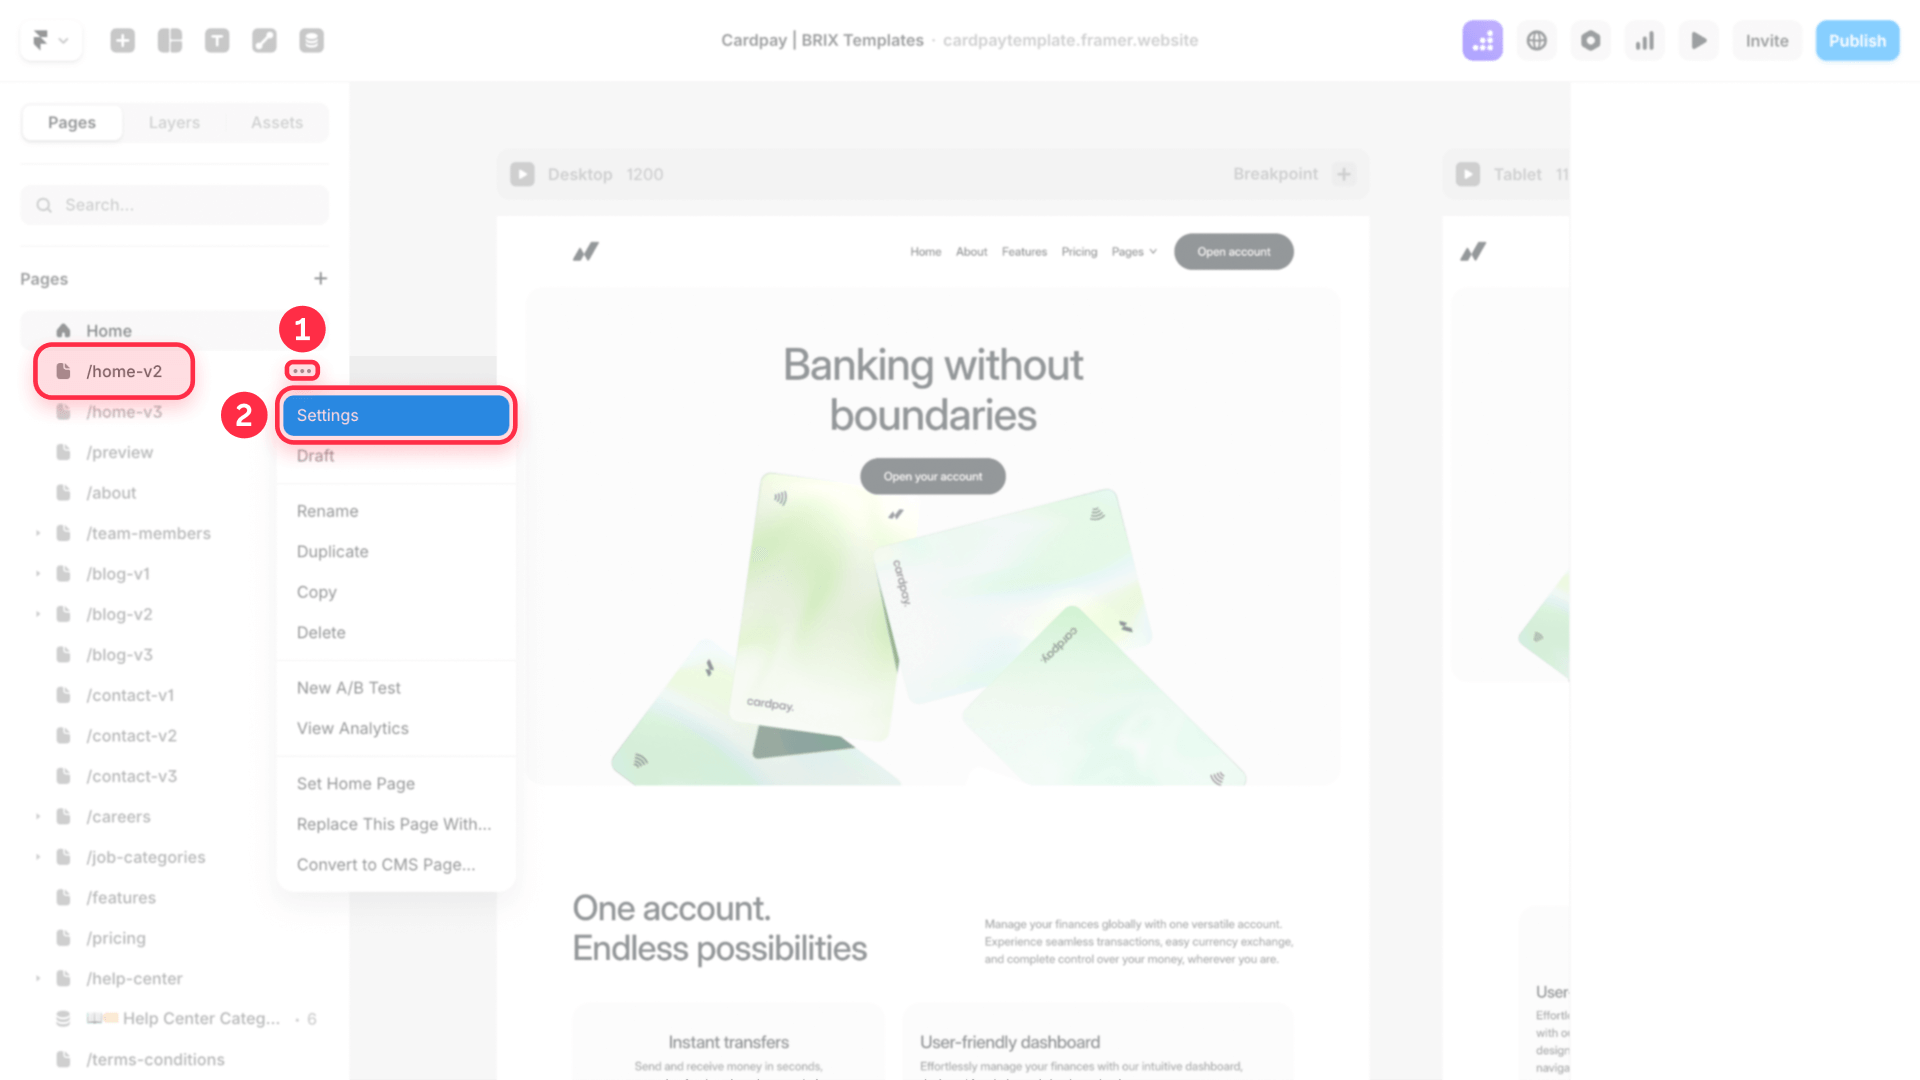
Method A: From the Pages panel inside Framer
1 - In the top left of the interface, make sure you're in the Pages panel.
2 - Hover over the page you want to unindex. A three-dot icon (...) will appear.
3 - Click the three-dot icon and select Settings from the dropdown menu.
Method B: From Framer Site Settings
1 - Click the Framer menu in the top left corner of the screen.
2 - Select Site Settings.
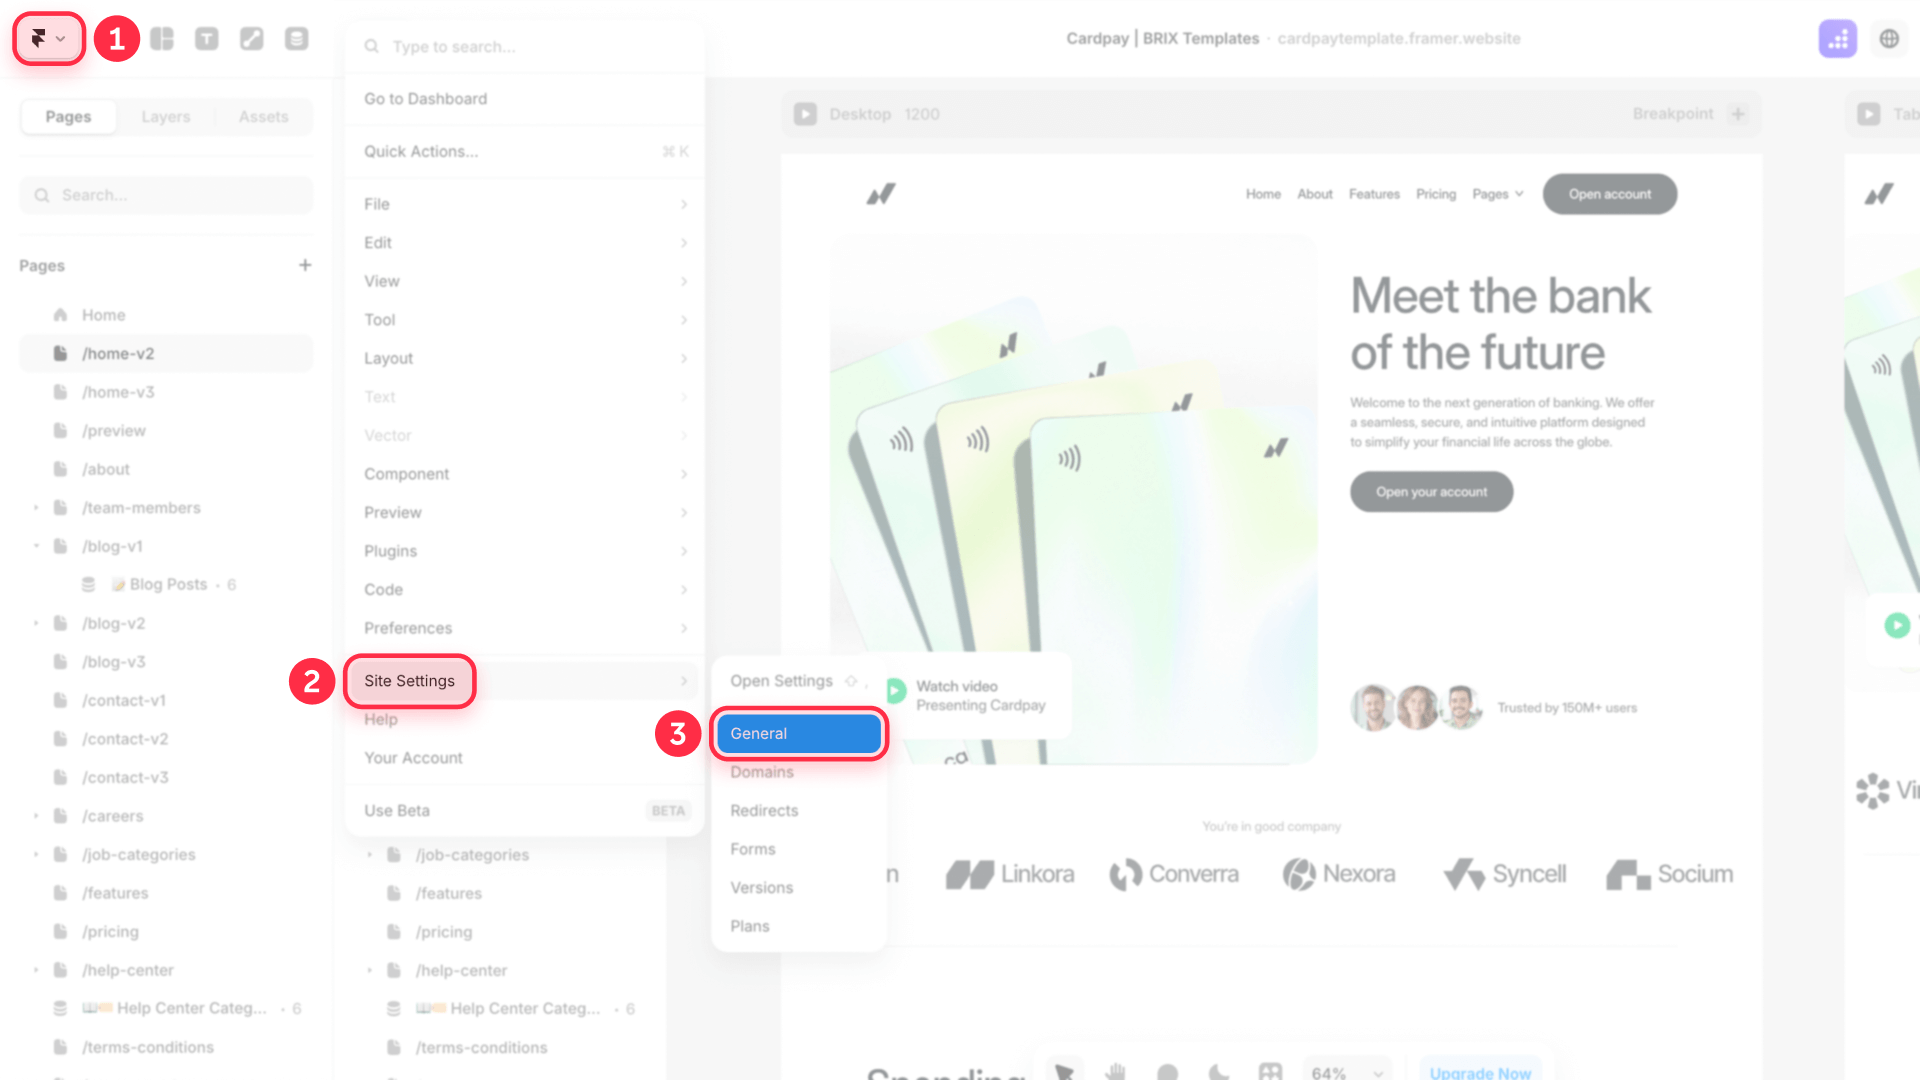
3 - In the new view, look for the Page Settings category in the left sidebar and click on the specific page you want to configure.
4 - Now you'll see the Page Settings panel. Scroll down to the Search section.
5 - Locate the "Show page in search engines" option and uncheck it.
6 - Finally, click Save and then Publish for the changes to apply to your live site.
By disabling this option, Framer automatically adds the <meta name="robots" content="noindex"> meta tag to the page.

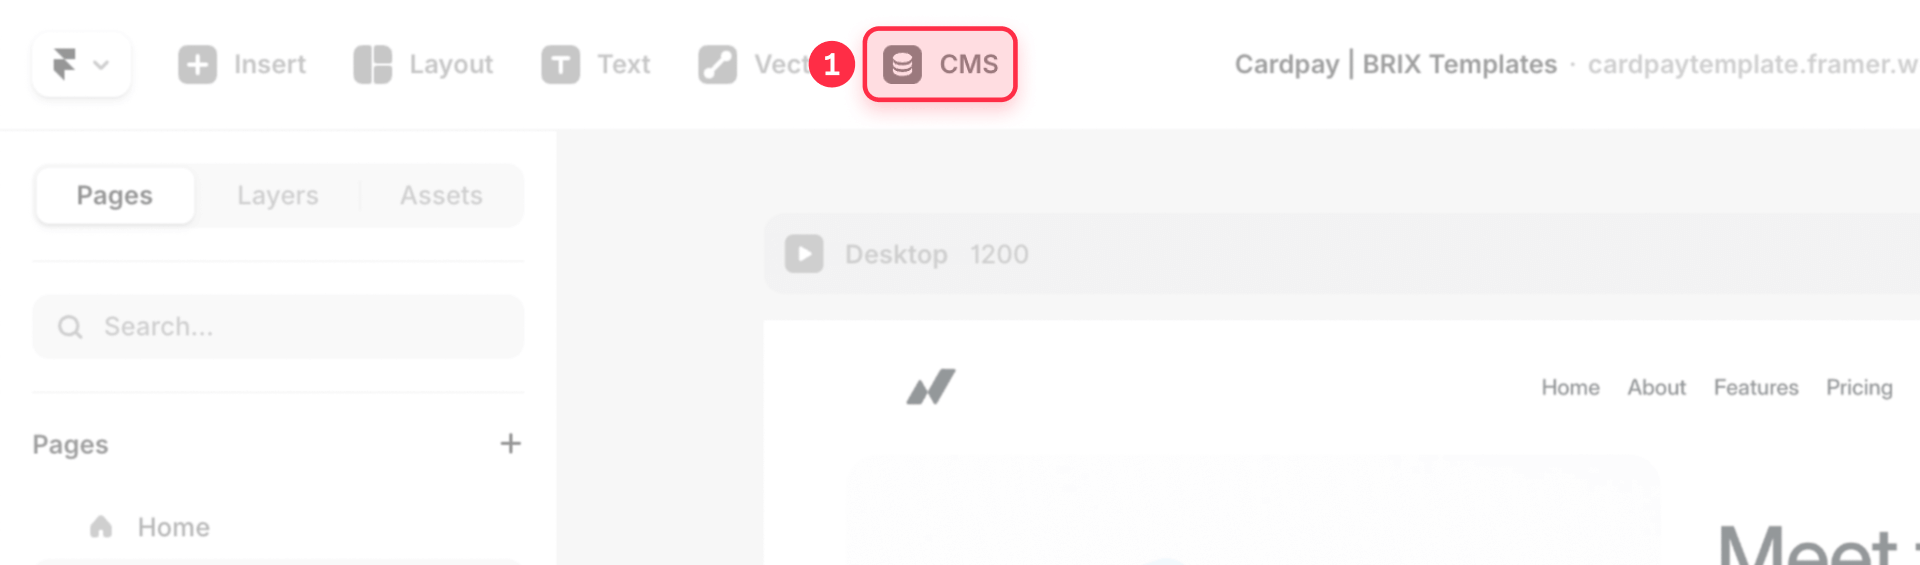
How to unindex specific CMS pages in Framer
This manual method is the universal solution for unindexing individual items from a CMS collection and works in all Framer projects, based on the functionality visible in the interface.
The process involves creating a custom field in your collection and then manually writing the reference to that field in the template page's custom code section.
Steps to unindex a unique CMS item in Framer
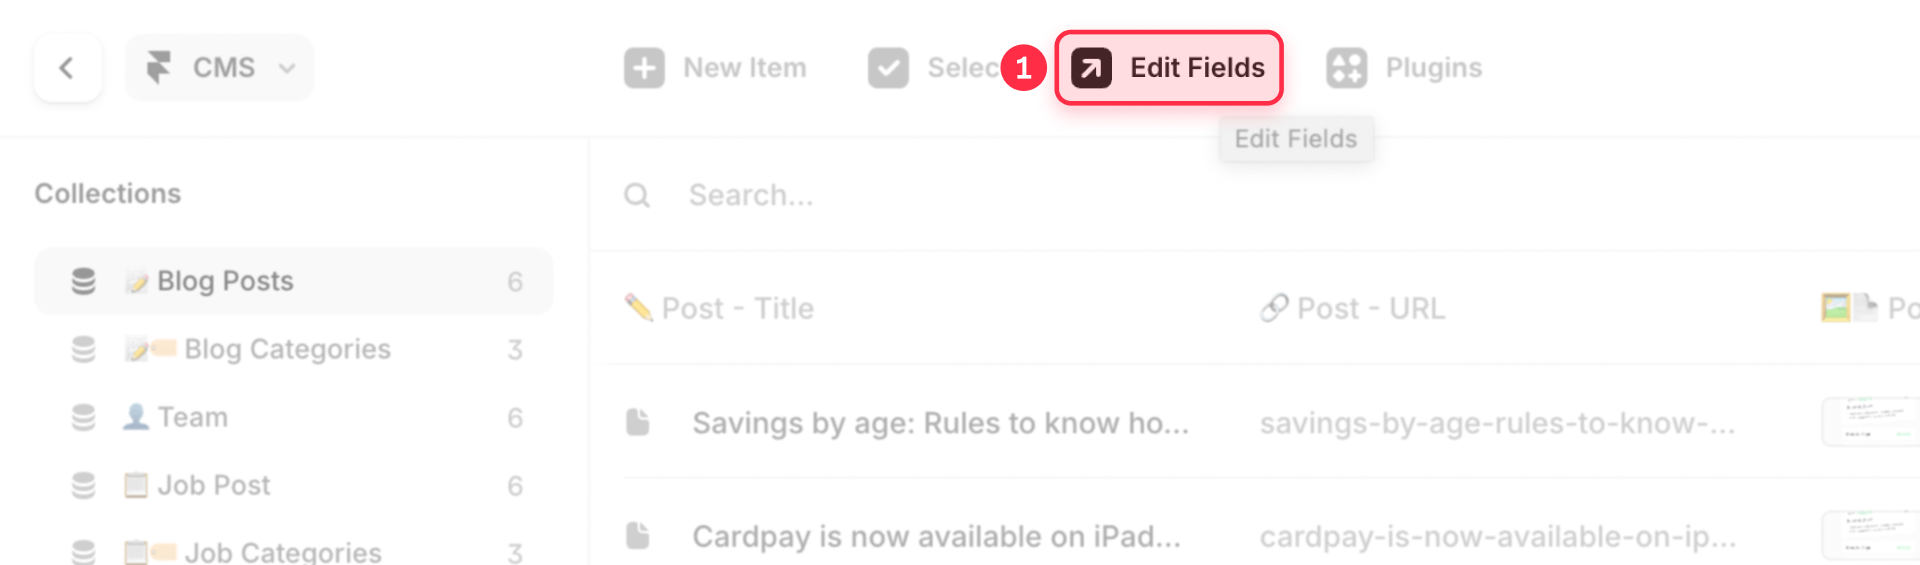
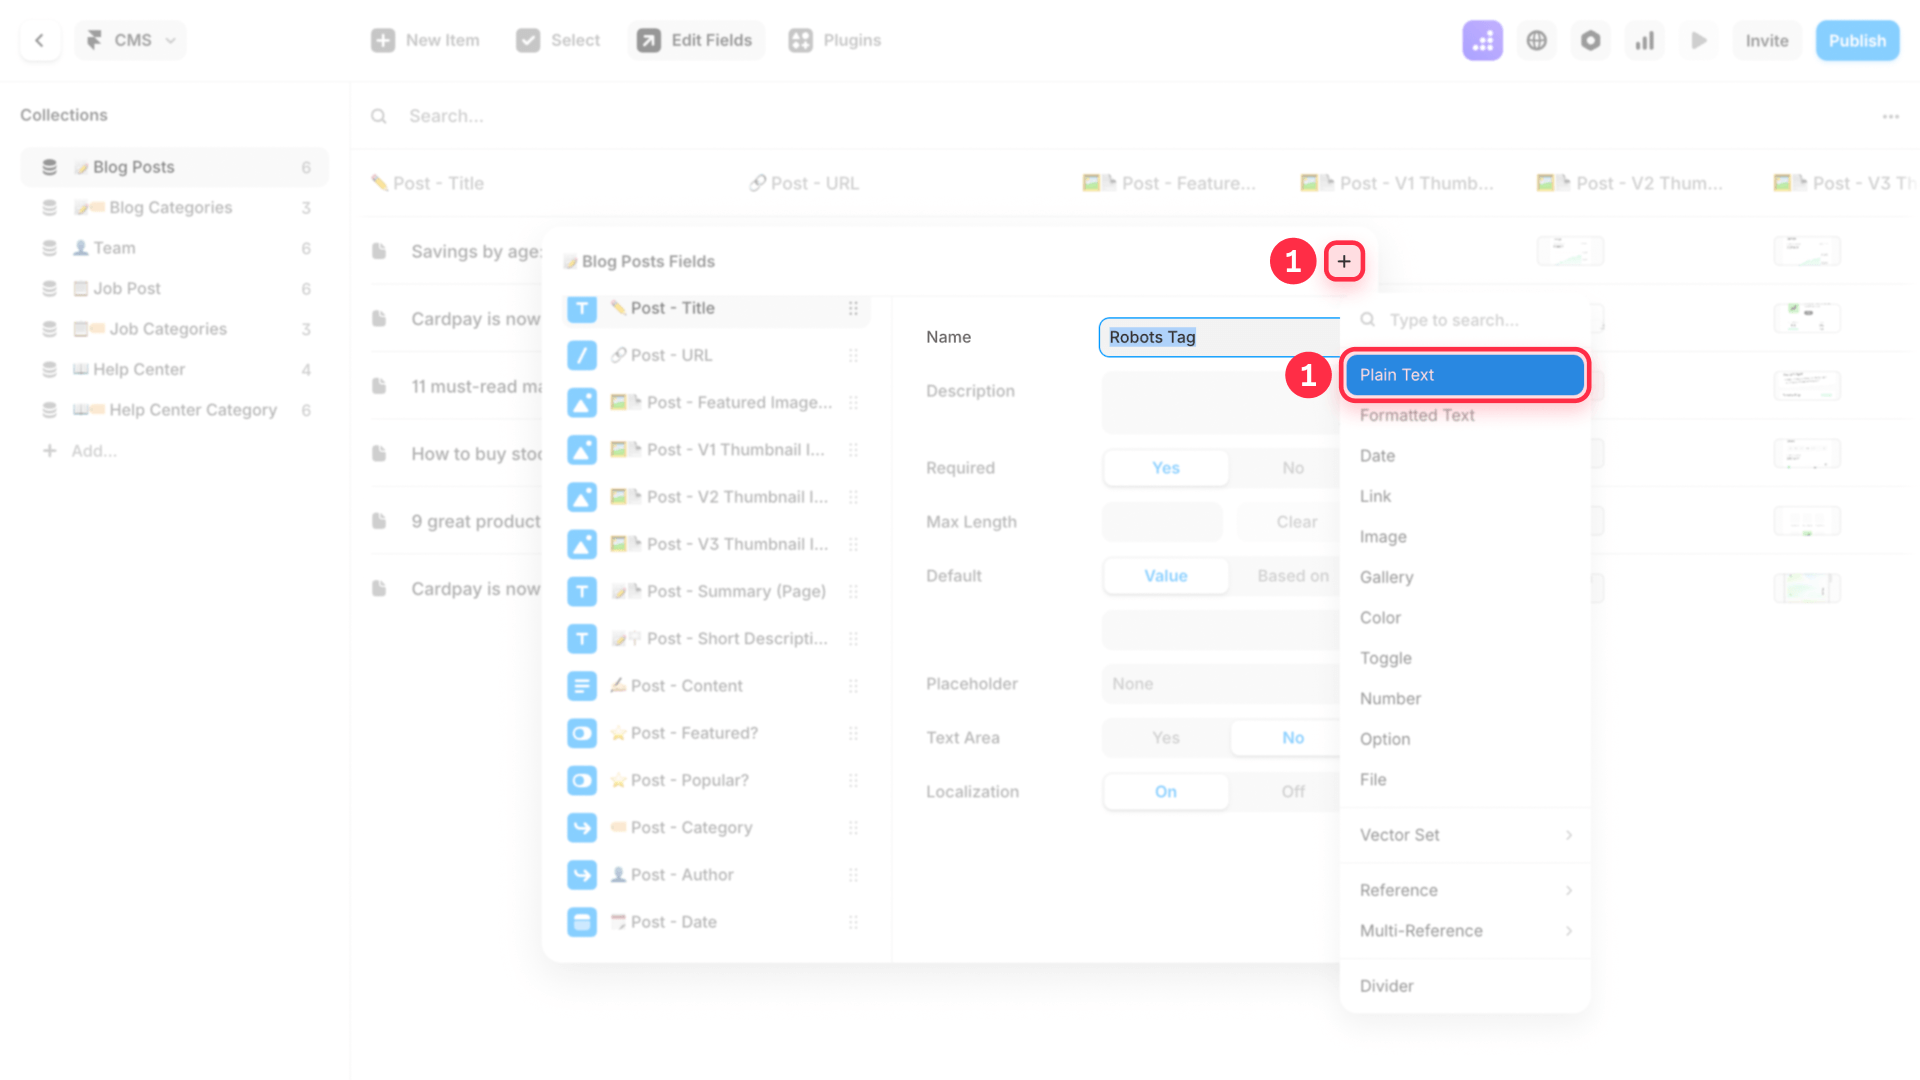
1. Add a new Plain Text field to your Collection
1.1 - In the top bar, go to the CMS panel and select the collection you want to modify (e.g., "Blog Posts").
1.2 - In the top right, click the Edit Fields button.
1.3 - Click the + icon to add a New Field. It's crucial you choose the Plain Text type.
1.4 - Give it a clear name without spaces, such as: Robots Tag.
1.5 - Close the fields window.
2. Configure the field value for each CMS item
Now, you need to tell each post whether it should be indexed or not.
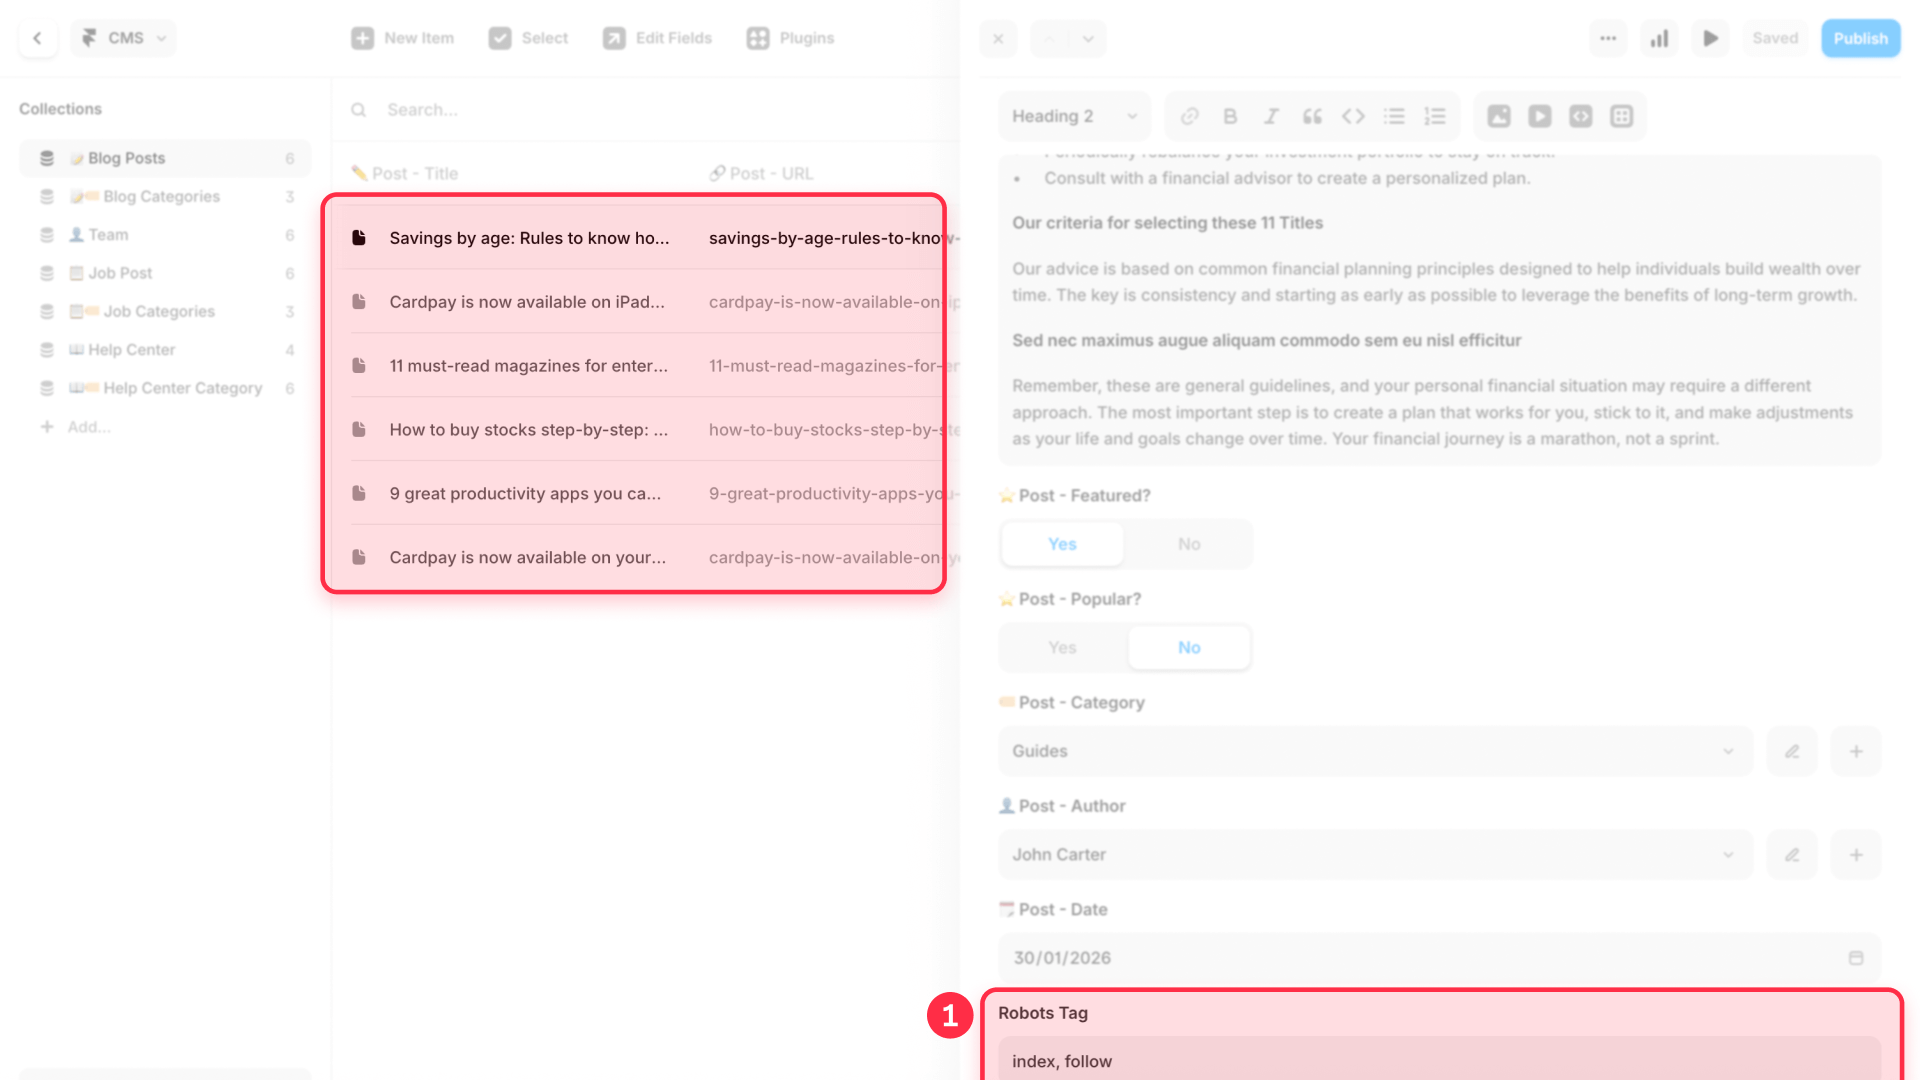
2.1 - Open the first item in your content list.
2.2 - Find the new field you created ("Robots Tag").
2.3 - In this field, write only the directive value, without quotes or HTML code. You have two options:
- For posts you do want to appear in Google, write: index, follow
- For posts you don't want to appear in Google, write: noindex, nofollow
Important: Repeat this process for all items in your collection. No field can be left empty, otherwise this meta tag will be printed empty in the live site.
3. Insert the code in the page template
This is the key step where the magic happens.
3.1 - While you're in your CMS collection view (e.g., "Blog Posts"), click the Settings gear icon in the top right bar. This will take you directly to the Page Settings of that collection's template.
3.2 - In the right panel, scroll down to the Custom Code section.
3.3 - Look for the "Start of <head> tag" field.

3.4 - Paste the following line, replacing Robots Tag with the exact name you gave your field in step 1:
<meta name="robots" content="{{Robots Tag}}">4. Save and Publish the changes
Click Save to save the template configuration. The button should be enabled and not show any errors.
Finally, and most importantly, click the blue Publish button in the top right corner for the changes to apply to your live site.
5. Verify the implementation
To confirm everything is correct, open the URL of a published post in your browser. Right-click, select "Inspect element" and search (Ctrl+F or Cmd+F) for the word "robots". You should find the <meta> tag with the corresponding content ("noindex, nofollow" or "index, follow") according to what you configured in the CMS.
How to unindex an entire site in Framer
If you're working on a test site for a client or an internal project, you can unindex all site pages at once in two very simple ways.
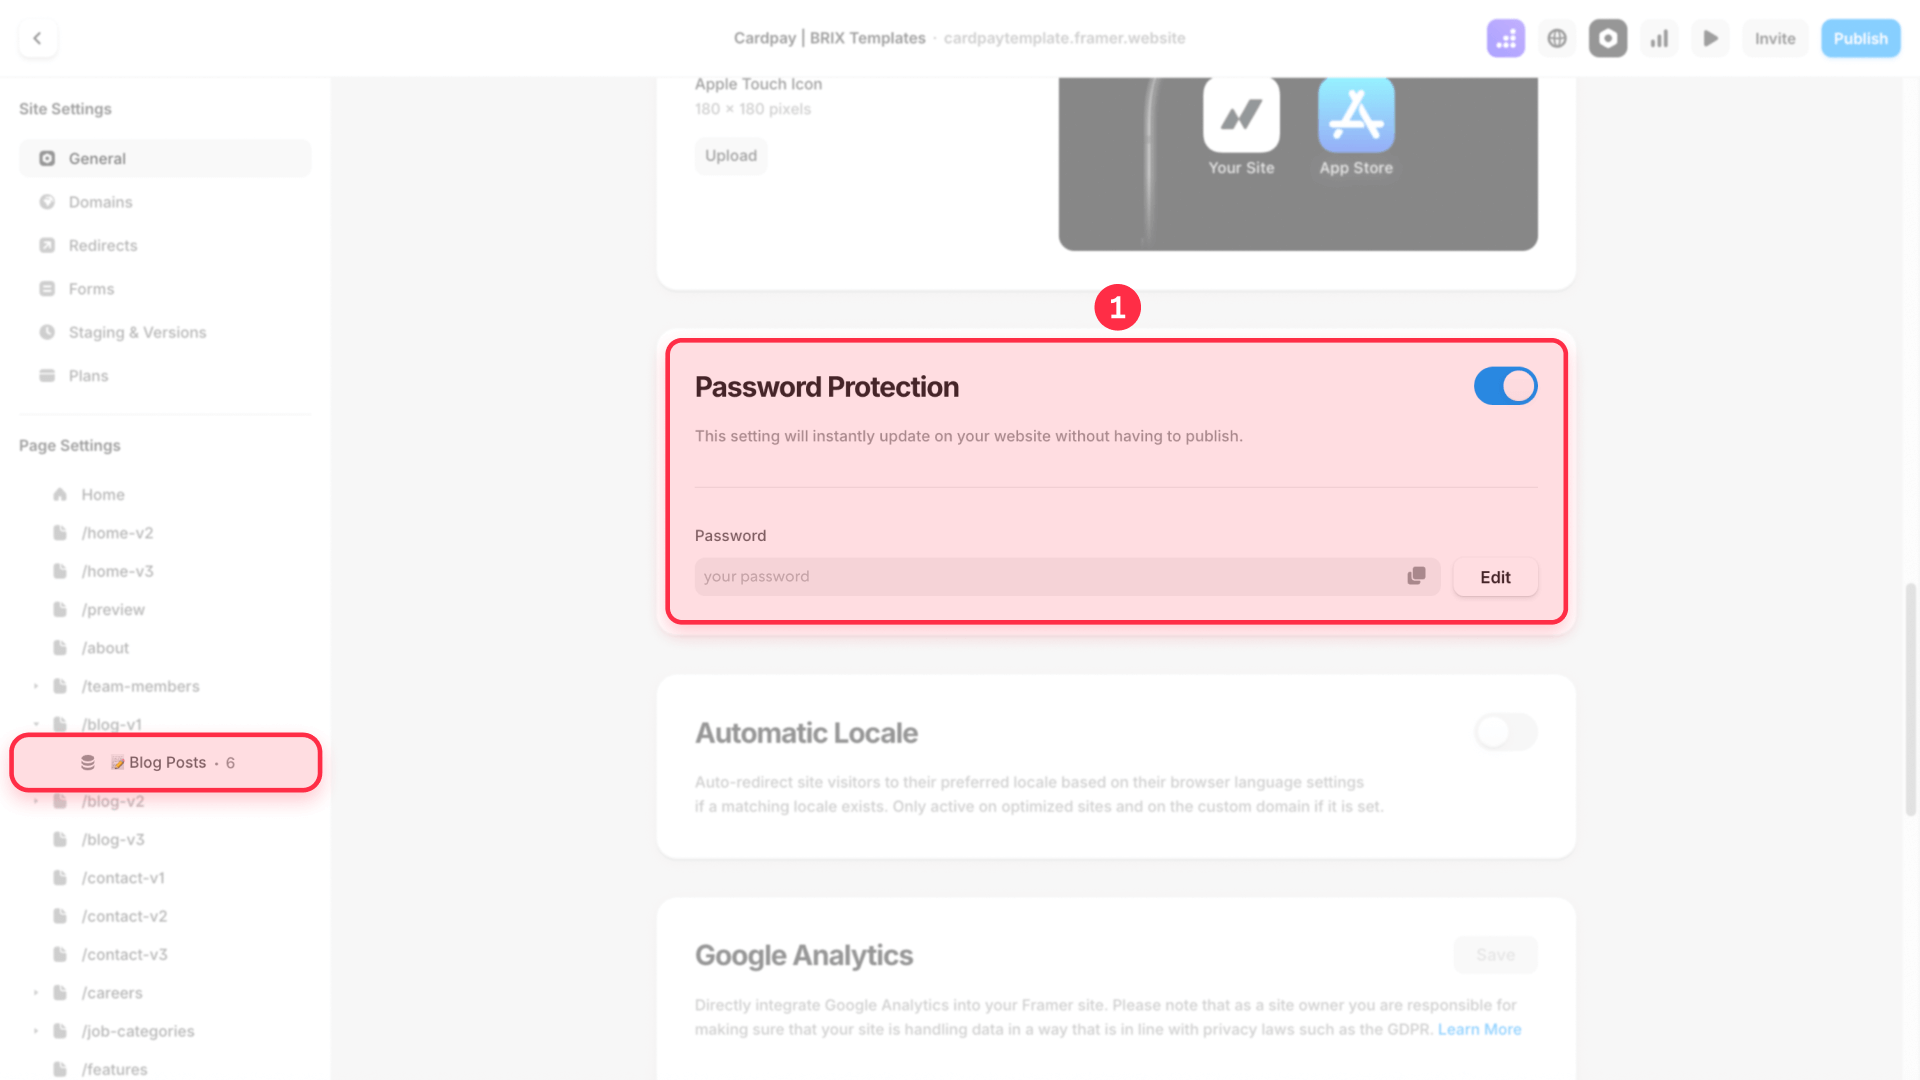
Option 1: Password protect the site
This is the fastest and most secure way to block total access, both for users and search engines.
1 - Go to Site Settings > General.
2 - Look for the Password Protection section.
3 - Enable it and set a password.
4 - Publish the changes. The site will become inaccessible and therefore won't be indexed.
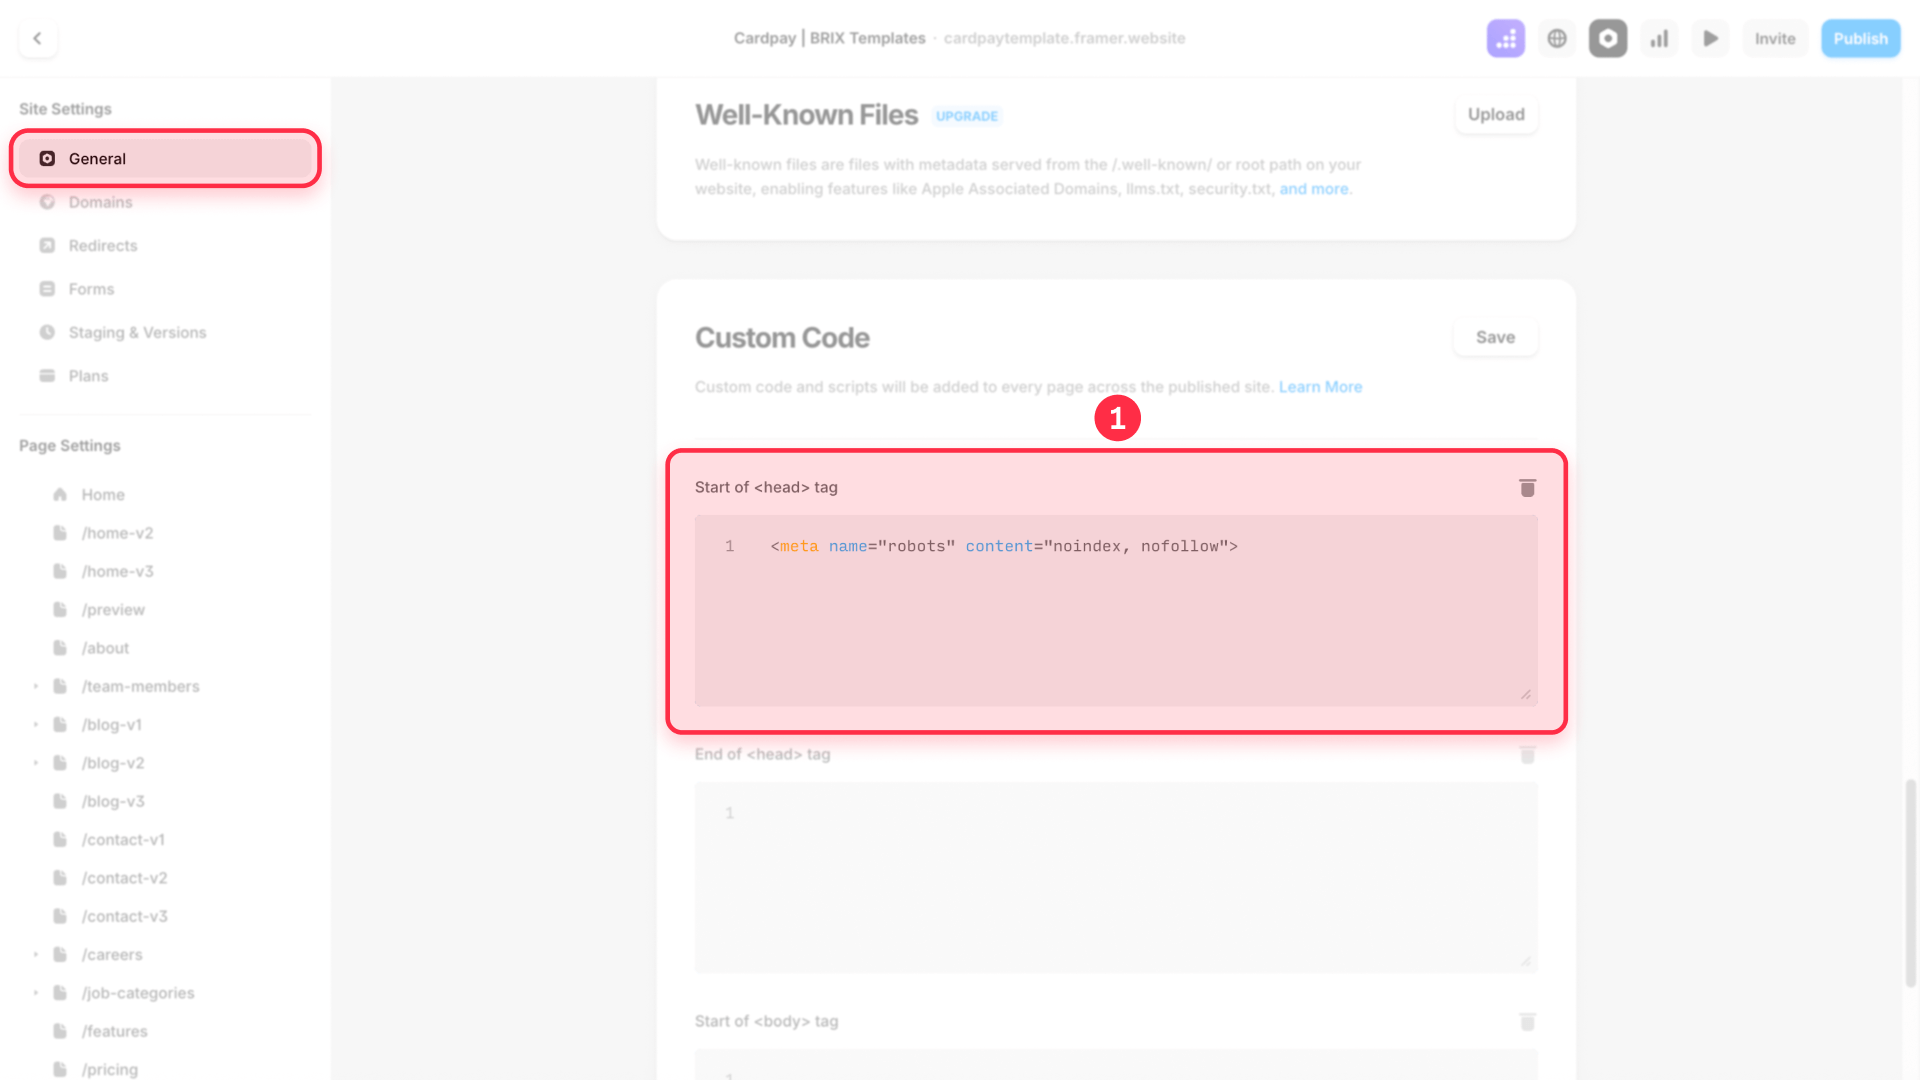
Option 2: Use custom code to unindex your Framer site
If you want the site to remain accessible to anyone with the link, but without appearing in search results, you can use global code.
1 - Go to Site Settings > General.
2 - Scroll to the Custom Code section.
3 - In the "Start of <head> tag" field, paste the following code:
<meta name="robots" content="noindex, nofollow">4 - Save the changes and publish your site. This tag will apply to all pages, telling search engines not to index or follow any links on the entire site.
Troubleshooting common issues when unindexing in Framer
- My unindexed page still appears in Google: This is normal. Search engines can take from a few days to several weeks to process the change. To speed up the process, you can use the "URL Removal" tool in Google Search Console.
- I've re-enabled indexing but the page doesn't appear: Just like with unindexing, re-indexing also takes time. To speed it up, you can ask Google to crawl the URL again through Google Search Console.
Frequently asked questions about unindexing pages in Framer
How long does it take Google to remove an unindexed Framer page?
The time varies depending on how frequently Google crawls your site, but it generally takes from a few days to several weeks. If you need urgent removal (less than 24 hours), the best option is to use the URL removal tool in Google Search Console.
What's the difference between noindex and nofollow in Framer?
The noindex directive tells Google not to show the page in its results. The nofollow directive tells it not to follow any links on that page. For simple unindexing, noindex is sufficient, but using noindex, nofollow is a more robust practice to completely isolate a page.
How can I re-index a page in Framer?
Simply reverse the process. Go back to Page Settings and enable the "Show page in search engines" option. After publishing the changes, Google will crawl and index the page again. To speed up the process, you can manually request indexing in Google Search Console.
What is a 'noindex' tag and how does it work in Framer?
A 'noindex' tag is a code snippet (<meta name="robots" content="noindex">) that's added to a page's HTML to tell search engines not to include it in their results. Framer automates this process: when you disable the "Show page in search engines" option, Framer inserts this tag for you, making the process technical but incredibly easy to execute.
If I password-protect a page in Framer, do I also need to unindex it?
No, it's not necessary. Password protection is the strongest blocking method. When a search engine tries to access the page, it encounters a login barrier and can't see (or index) the content. Password protection already prevents indexing implicitly and effectively.
Conclusion
Managing the indexing of your pages in Framer is a fundamental skill that gives you total control over your online presence. By using these straightforward methods, you can ensure only relevant and finished content reaches search engines, improving your SEO and protecting your work in development.
If you need help with advanced on-page SEO settings for Framer, contact our Framer agency today


Join readers commenting on this post!