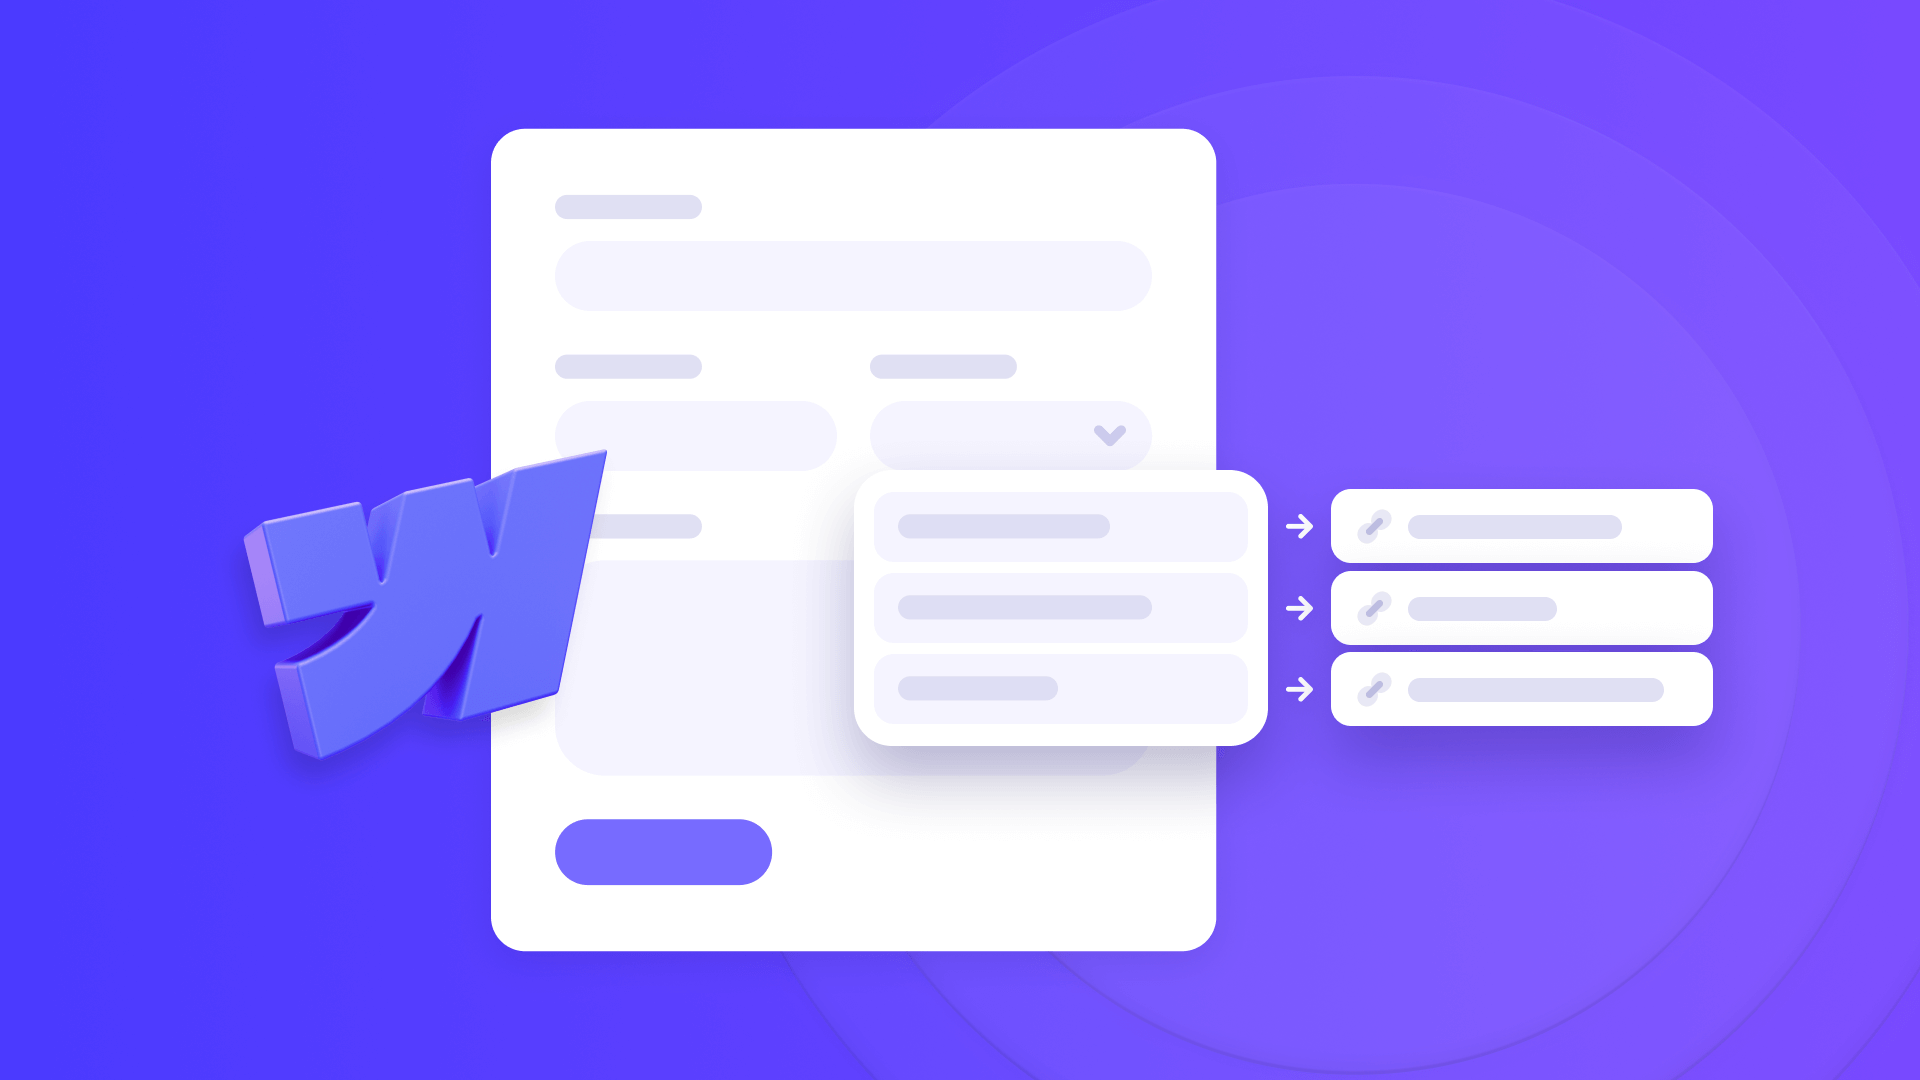
Creating personalized user journeys in Webflow often requires directing users to different pages based on their form selections. While Webflow's native form settings only allow a single redirect URL, you can implement dynamic redirects using a select input and custom code.
This guide will show you how to create attribute-driven redirects that automatically send users to different pages based on their form dropdown selections.
When to use select-based redirects in Webflow
Before diving into the implementation, let's explore some common scenarios where select-based redirects can enhance your user experience:
- Service selection flows
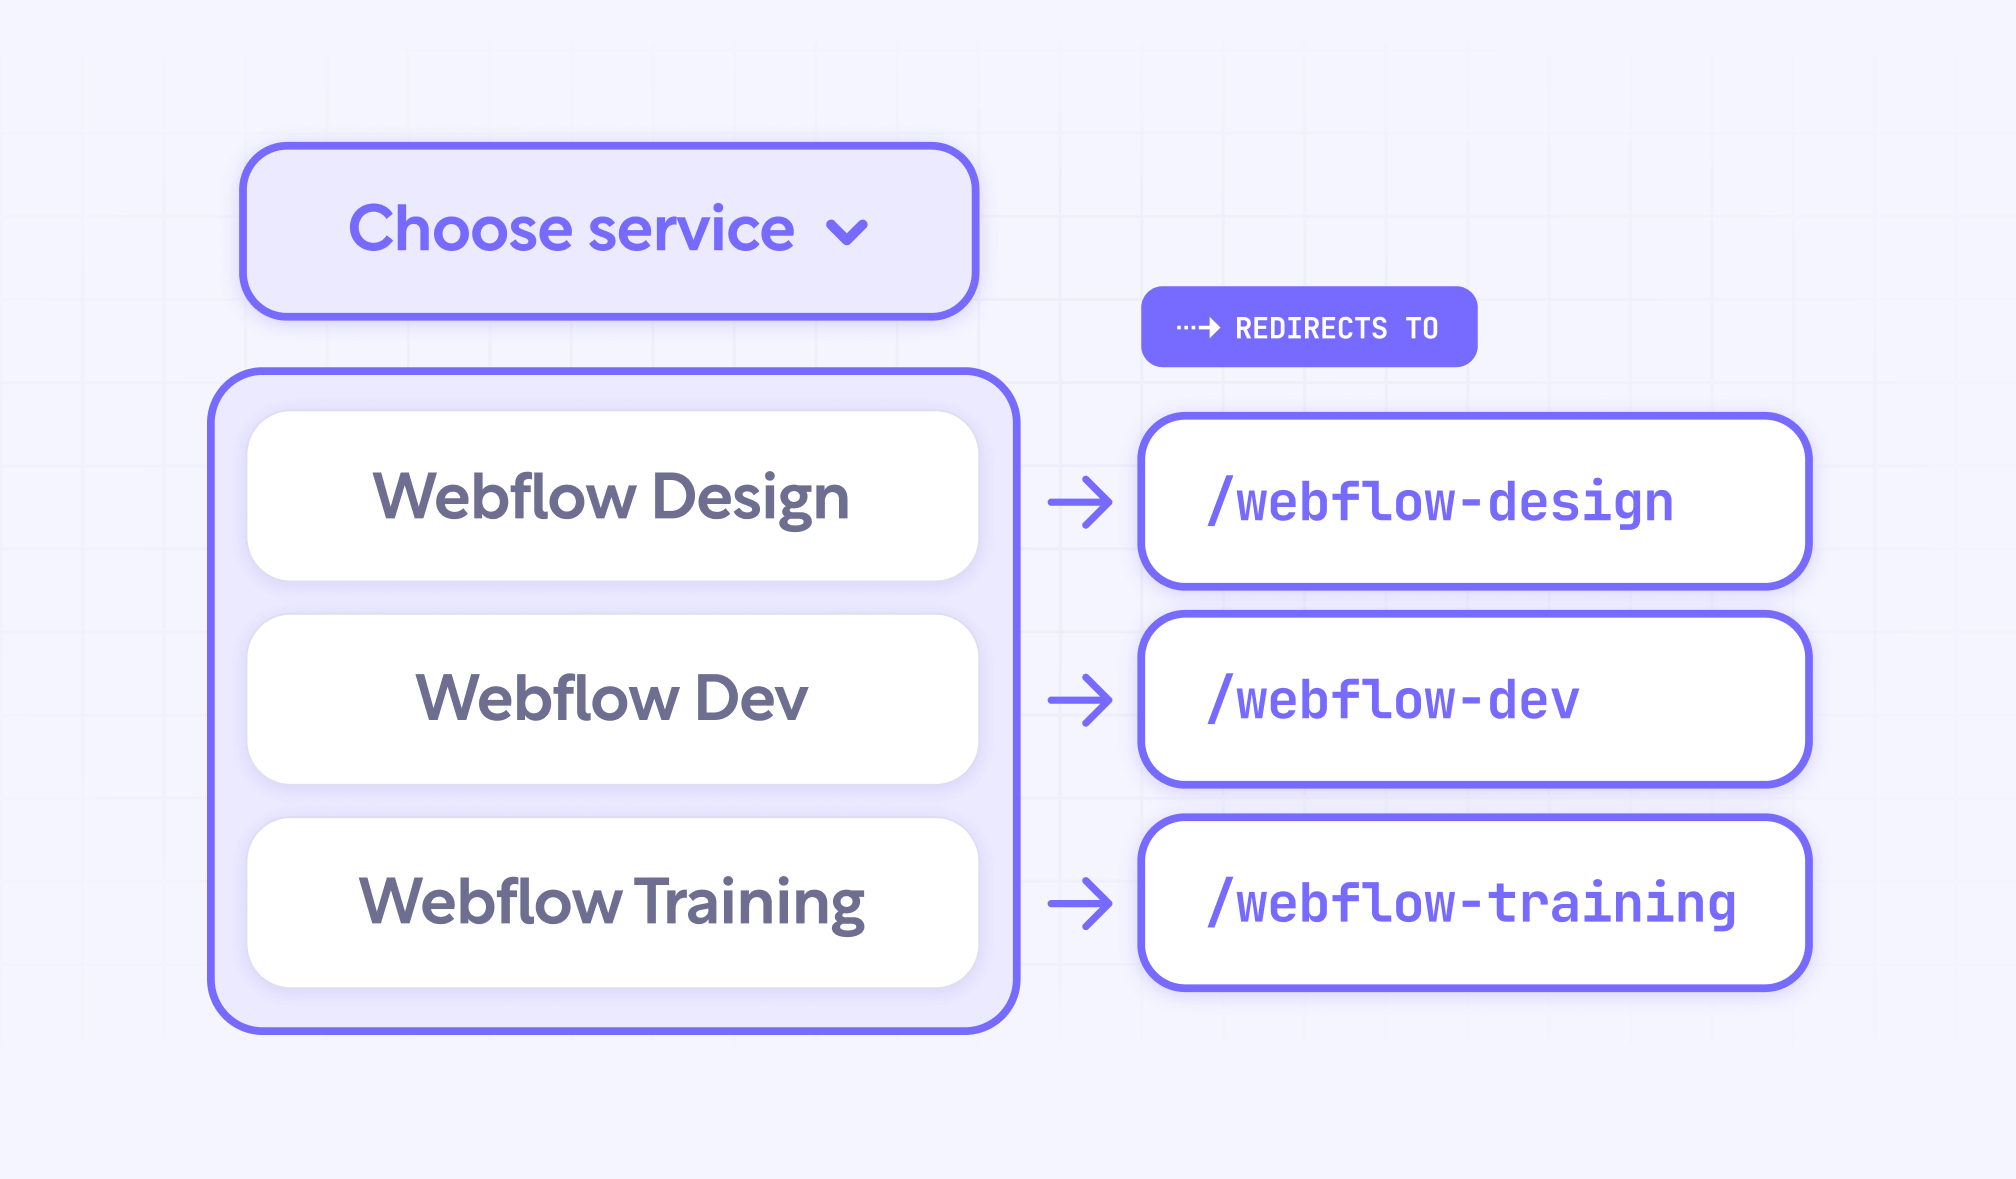
- Users choose a specific service from a dropdown
- Form submission redirects them to a tailored thank you page
- Each page contains relevant next steps and resources
- Result: More engaging post-submission experience
- Multi-product funnels
- Single form handles multiple product inquiries
- Users select their product of interest
- Redirect leads to product-specific onboarding
- Result: Streamlined onboading process
- Regional or language-based routing
- Users select their region or language preference
- Form redirects to localized content
- Information presented in their chosen language or region
- Result: Improved user engagement and satisfaction
Understanding select-based redirects functionality on Webflow
The key concept behind this solution is storing destination URLs within your select input's options. When a user submits the form, a custom script reads the selected value and redirects accordingly. This approach has many advantages, such as:
- Requires no server-side processing
- It's free, so you don't need to pay for third-party form subscriptions
- Works with Webflow's native form system
- Provides instant redirects after submission
Implementation guide to redirect forms based on dropdown choices in Webflow
Let's walk through the process of setting up select-based redirects on your Webflow forms.
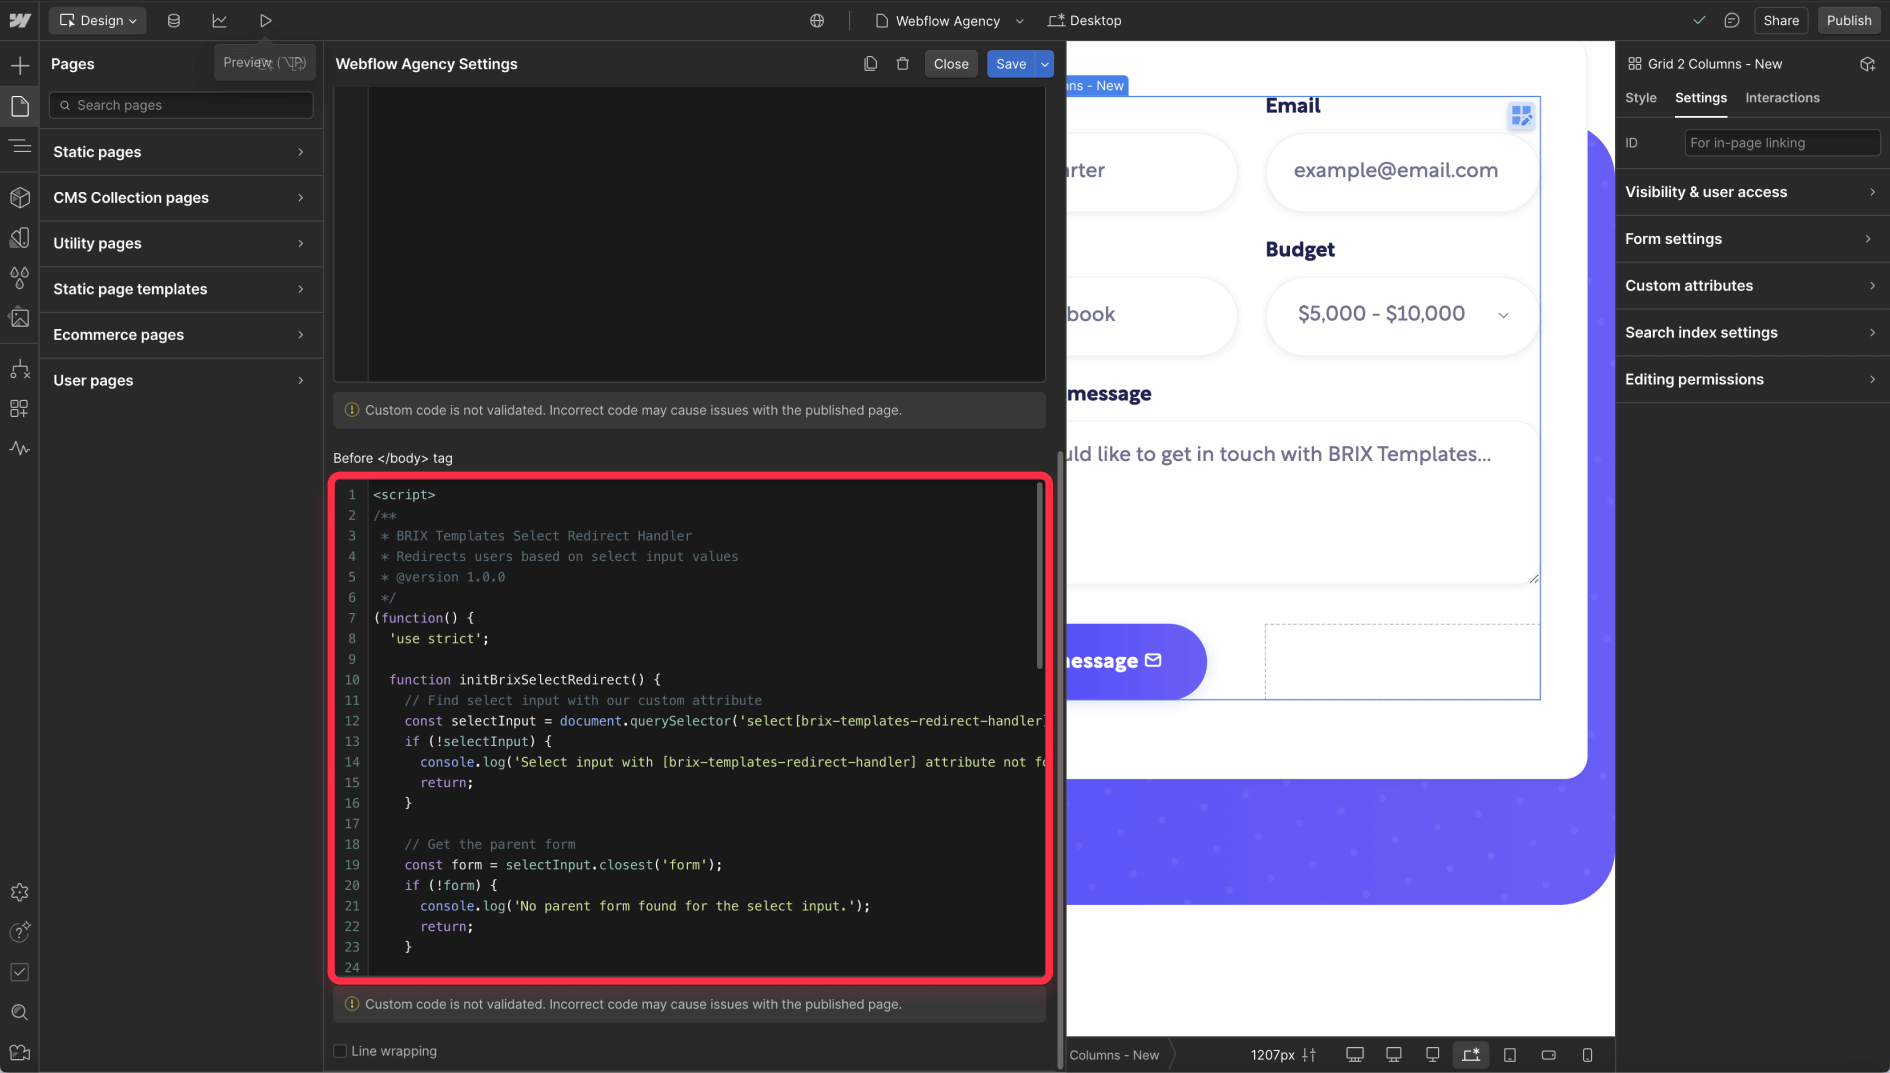
Step 1: Add the Webflow dynamic redirection JavaScript code
First, add this custom script to your Webflow site:
<script>
/**
 * BRIX Templates Select Redirect Handler
 * Redirects users based on select input values
 * @version 1.0.0
 */
(function() {
  'use strict';

  function initBrixSelectRedirect() {
    // Find select input with our custom attribute
    const selectInput = document.querySelector('select[brix-templates-redirect-handler]');
    if (!selectInput) {
      console.log('Select input with [brix-templates-redirect-handler] attribute not found.');
      return;
    }

    // Get the parent form
    const form = selectInput.closest('form');
    if (!form) {
      console.log('No parent form found for the select input.');
      return;
    }

    // Update redirect URL when selection changes
    function updateRedirect() {
      const selectedValue = selectInput.value;
      form.setAttribute('redirect', selectedValue);
      form.setAttribute('data-redirect', selectedValue);
      console.log(`Redirect URL updated to: ${selectedValue}`);
    }

    // Handle form submission
    function handleSubmit(event) {
      event.preventDefault();
      const redirectUrl = form.getAttribute('data-redirect');

      if (redirectUrl) {
        console.log(`Redirecting to: ${redirectUrl}`);
        window.location.href = redirectUrl;
      } else {
        console.log('No redirect URL found, proceeding with normal submission');
        form.submit();
      }
    }

    // Set up event listeners
    selectInput.addEventListener('change', updateRedirect);
    form.addEventListener('submit', handleSubmit);

    // Initialize redirect value
    updateRedirect();
  }

  // Run when DOM is ready
  if (document.readyState === 'loading') {
    document.addEventListener('DOMContentLoaded', initBrixSelectRedirect);
  } else {
    initBrixSelectRedirect();
  }
})();
</script>
You can add this code in two different places:
Page-specific implementation:
- Open the page settings in Webflow Designer
- Navigate to the "Before </body> tag" section
- Paste the code and save
Site-wide implementation:
- Go to Project Settings > Custom Code
- Add the code to the Footer Code section
- Save your changes

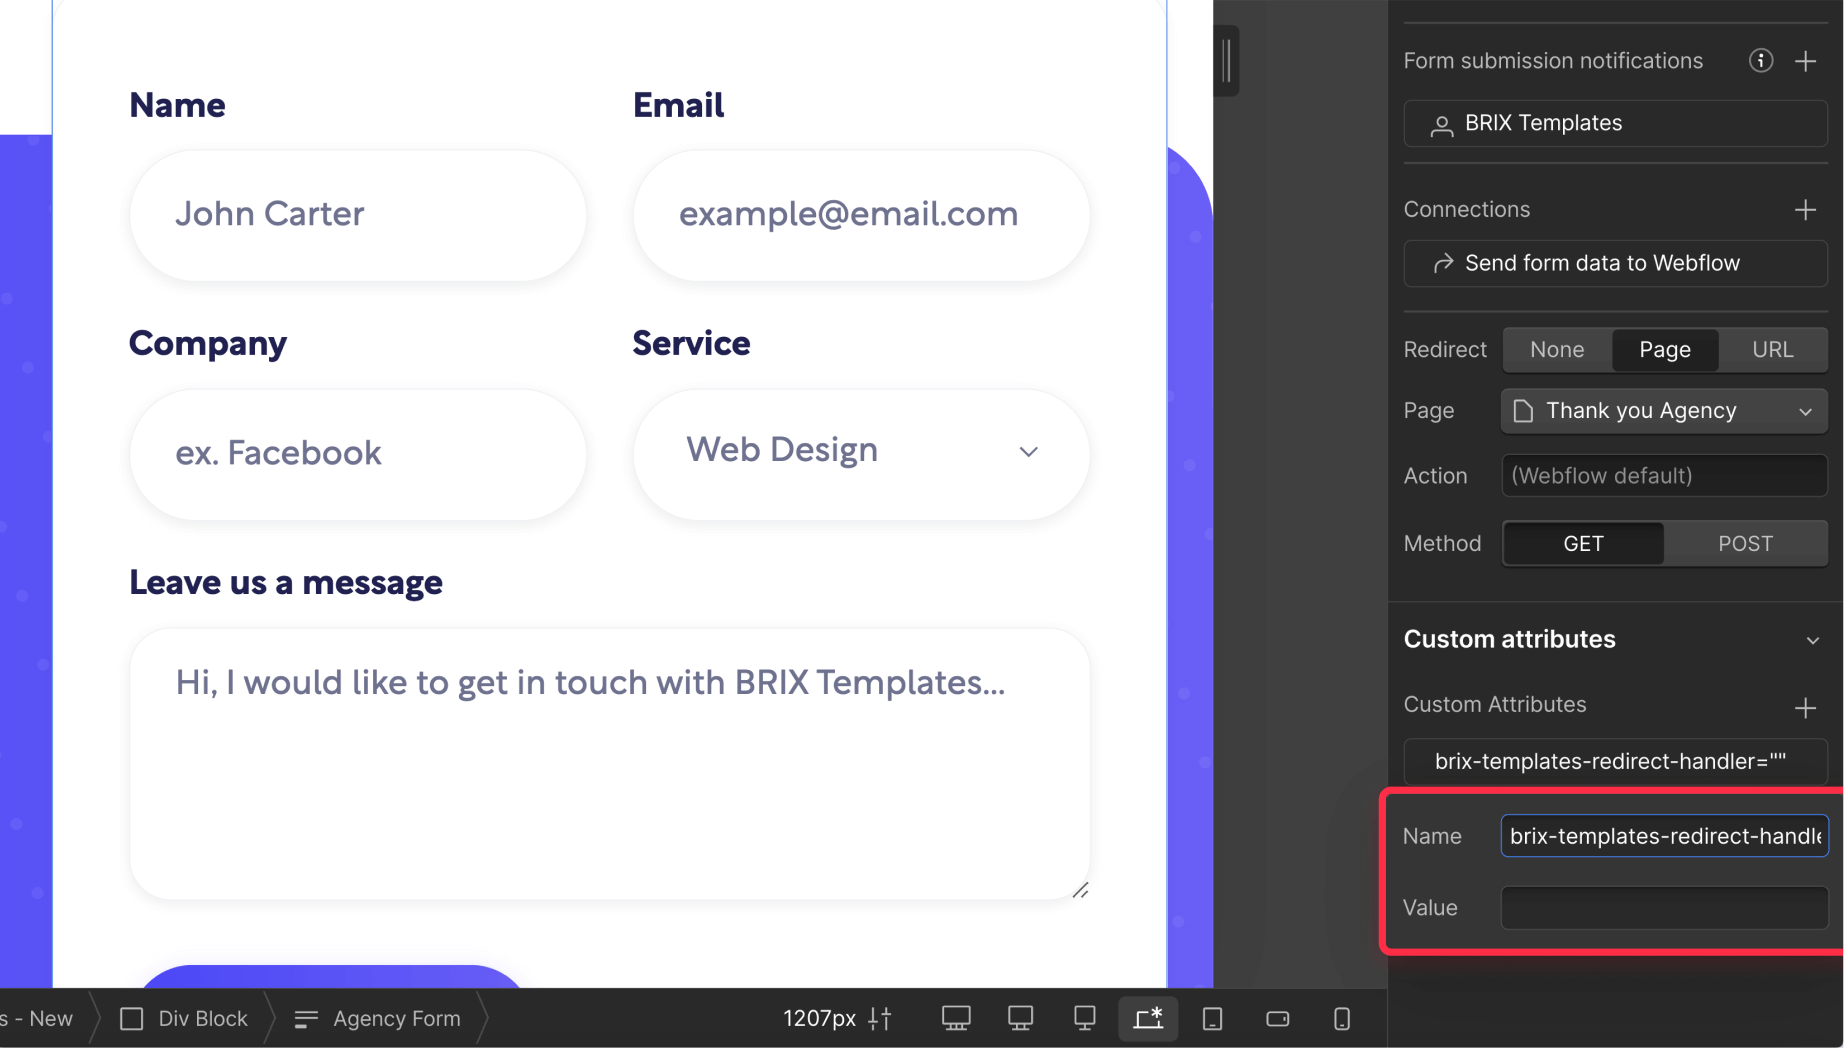
Step 2: Configure your select input inside your Webflow form
Now, set up your form's select input:
- Add or select your Select input in your desired form, inside the Webflow Designer
- Open the Settings panel (gear icon)
- Under Custom Attributes, add:
- Name: brix-templates-redirect-handler
- Value: (leave blank)
Step 3: Add redirect URLs to each select input choices
Configure each option in your select input:
- Select your Select input in your desired form
- For each option:
- Set a clear Text label (what users see, i.e. 'Website Design')
- Add the full redirect URL as the Value
- Include https:// in all URLs, otherwise the redirection will fail
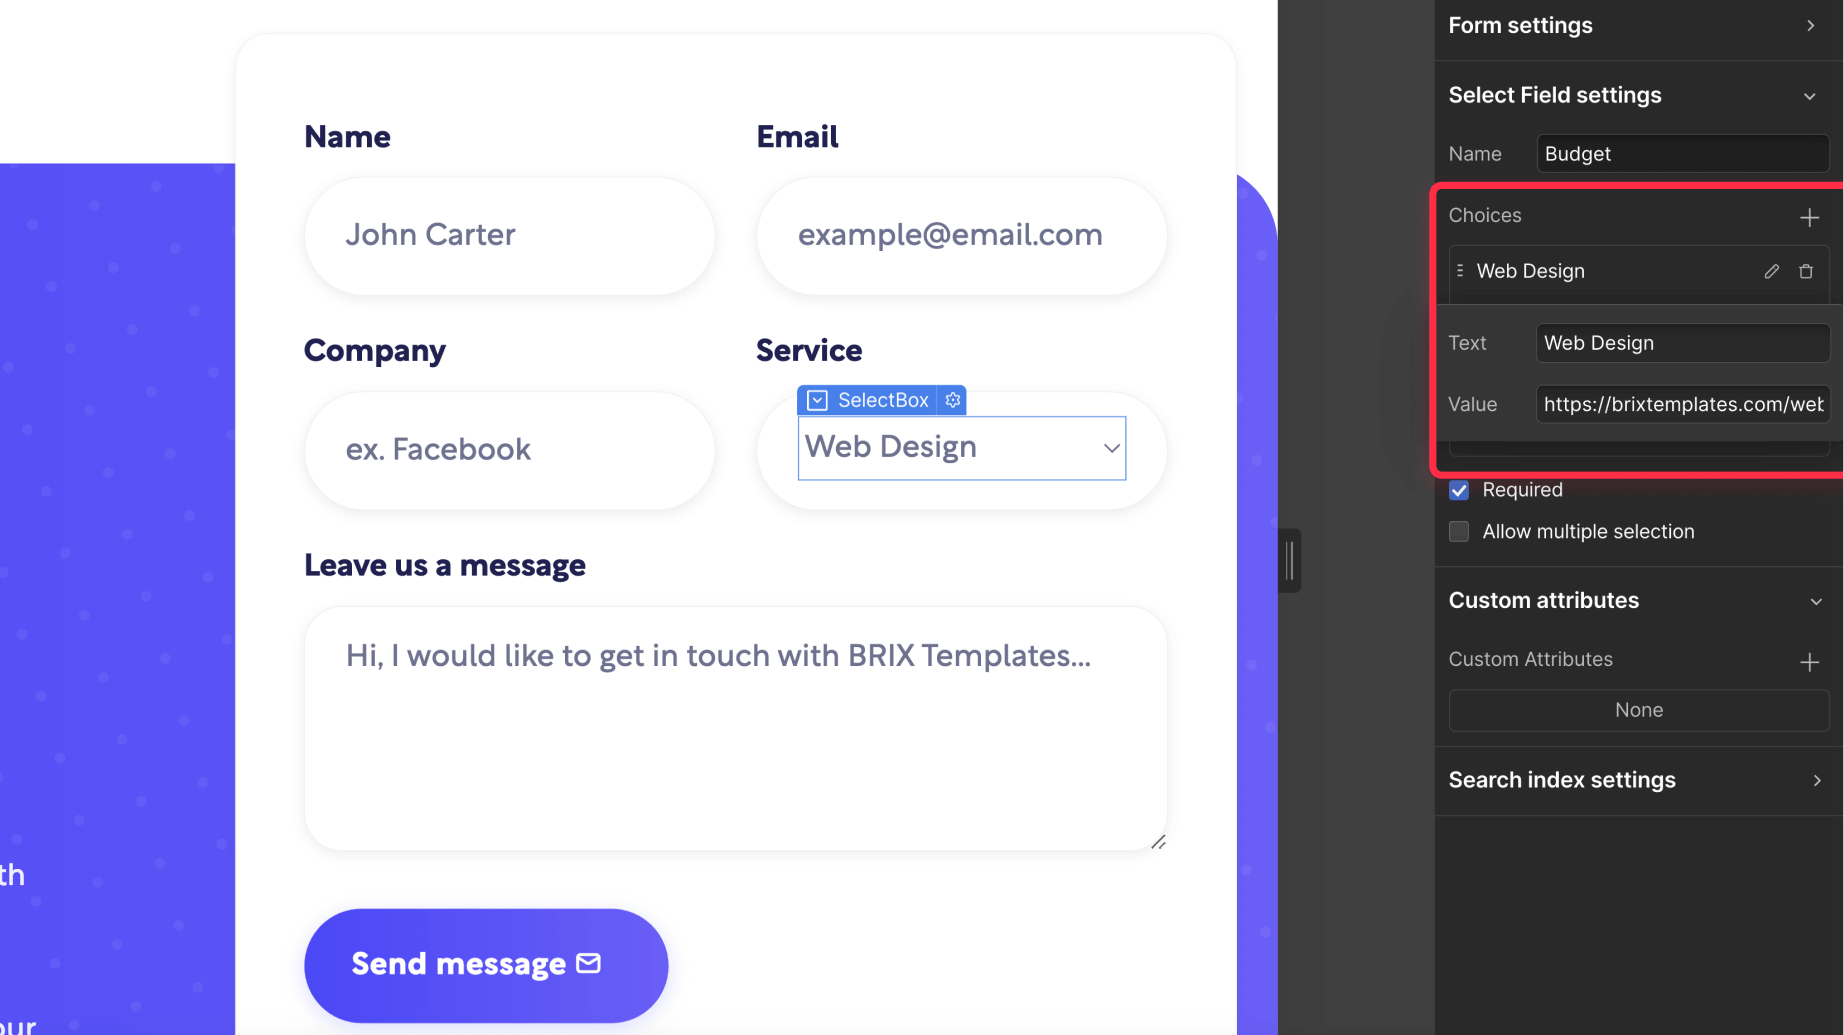
Example configuration:
Option 1:
- Text: "Website Design"
- Value: https://yoursite.com/thank-you-design

Option 2:
- Text: "Digital Marketing"
- Value: https://yoursite.com/thank-you-marketing

Option 3:
- Text: "Brand Strategy"
- Value: https://yoursite.com/thank-you-strategy
Step 4: Test your Webflow form redirect functionality
Before publishing, verify everything works:
- Publish your Webflow site
- Test each dropdown option by submitting the form
- Confirm correct redirects
If any redirect is not working as expected, watch the browser console (F12) for any error messages during testing, and see what is the cause behind.
Final tips for proper select-based redirect on Webflow forms
- Use full URLs: When configuring your select input options, proper URL formatting is crucial for redirects to work. Always include the complete protocol (https:// or http://) in your URLs to ensure proper functionality.
- Handle default states: Setting up proper default handling improves your form's reliability and user experience. Add a "Please select" option as your first dropdown choice, using either an empty value or a default redirect URL. This helps manage cases where users might submit the form without making a selection and provides clear guidance on what action to take.
Conclusion
Select-based redirects provide a powerful way to create personalized user journeys in Webflow. By implementing this solution, you can:
- Guide users to relevant content
- Streamline your conversion process
- Maintain a clean, organized form structure
- Create sophisticated user flows without complexity
Remember to test thoroughly after implementation and consider your users' experience when designing the redirect flow.
While this setup handles basic redirect needs, you can extend the script for more complex scenarios like tracking, multiple selects, or conditional logic. If you need help with advanced implementations or custom solutions, don't hesitate to reach out to our team — The top notch team behind or Webflow dev agency will be happy to help you!


Join readers commenting on this post!