
When working with Webflow's Content Management System (CMS), you might find that the default ordering options don't provide the flexibility you need. By default, CMS items are displayed based on their creation date, and while Webflow offers basic sorting options like alphabetical ordering, these may not always meet your specific requirements. This guide will show you how to implement a custom ordering system for your CMS items.
Default sorting limitations in Webflow
Before we dive into the solution, let's understand the current limitations:
- CMS items are initially ordered by their creation date
- Basic sorting options are available (alphabetical, reverse alphabetical, etc)
- Direct drag-and-drop reordering is not possible
- In some cases, the default sorting options may not reflect your desired presentation order
Implementing custom order functionality on Webflow CMS collections
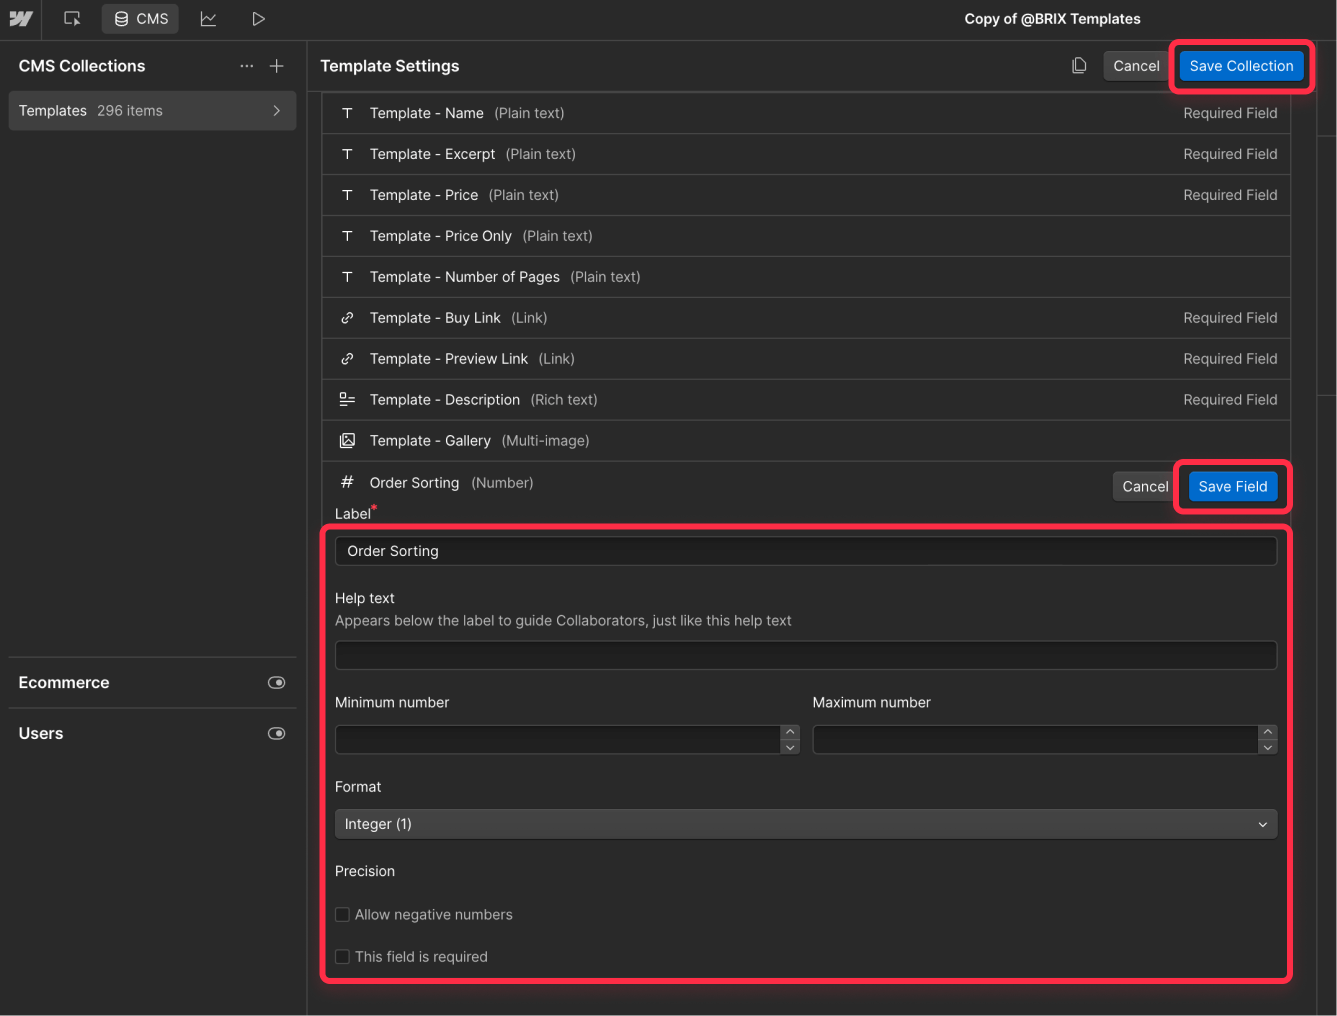
Step 1: Create a new number field
- Navigate to your CMS collection settings:
- Go to your CMS collections
- Select the collection you want to reorder
- Click the settings icon (gear symbol) to access collection settings
- Add a new field for ordering:
- Click "Add New Field"
- Select "Number" as the field type
- Name the field "Order Sorting" (or any other meaningful name)
- Choose whether to make this field required
- Click "Save Field"
- Click "Save Collection" to confirm your changes
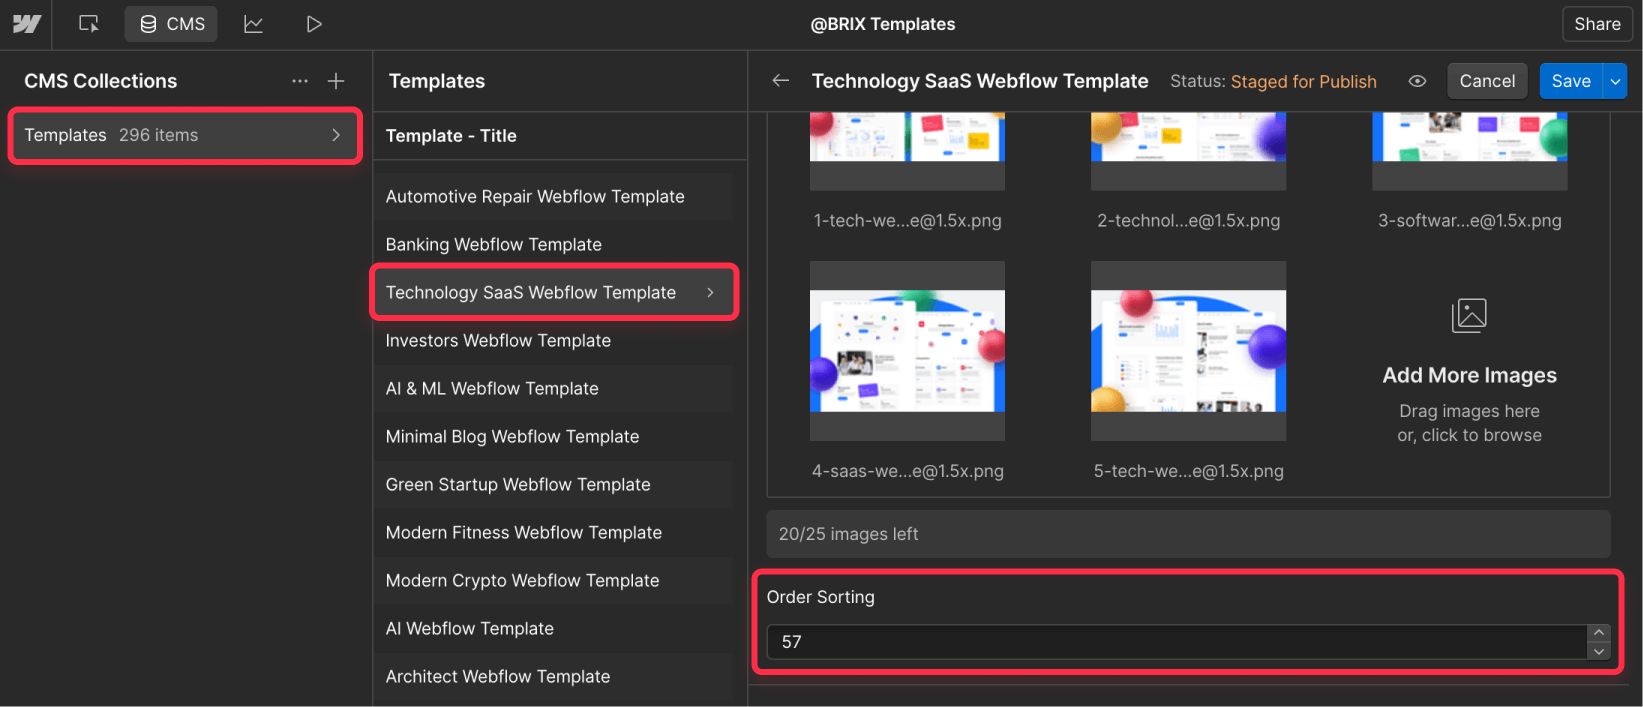
Step 2: Assign order numbers to CMS items
- Open your CMS collection
- For each item in your collection:
- Click on the item to edit
- Locate your newly created Order Sorting field
- Assign a number that represents its desired position
- Save your changes
- Repeat for all items you want to order
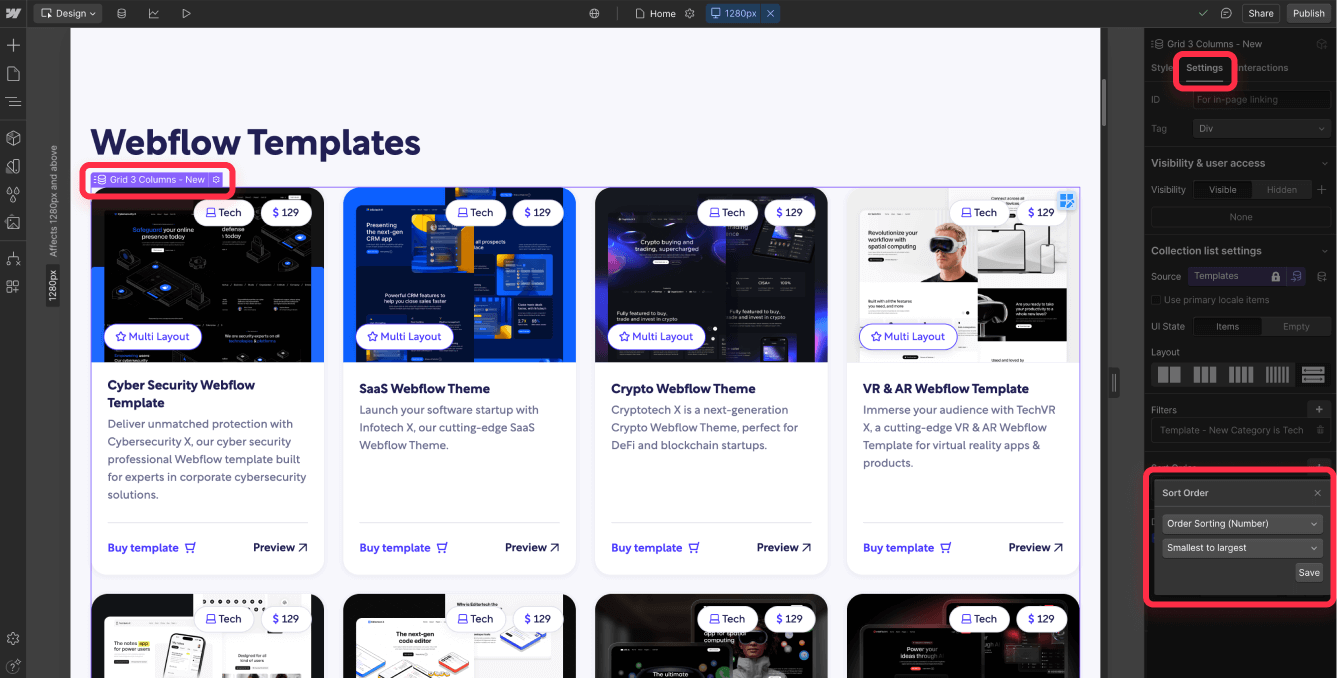
Step 3: Configure collection list sorting
- In the Webflow Designer:
- Select your Collection List element
- Open the element's settings
- Find the sorting options section
- Set up the new sorting:
- Click the "+" icon to add a new sorting rule
- Select your 'Order Sorting' field
- Choose "Smallest to Largest" for ascending order
- Or select "Largest to Smallest" for descending order
- Save your changes
Best practices for number assignment
When implementing your ordering system, it's crucial to use whole numbers rather than decimals or fractions. This practice ensures consistency across your CMS and makes it easier to maintain your ordering system over time. For example, use 1, 2, 3 instead of 1.5 or 2.7.
Additionally, it's highly recommended to leave significant gaps between your numbers when initially setting up your order. Instead of using consecutive numbers like 1, 2, 3, consider using intervals of 10 or even 100 (such as 10, 20, 30 or 100, 200, 300). This approach provides flexibility for future additions without requiring you to reorder your entire collection.
Troubleshooting common issues
- Missing order numbers: Ensure all items have Order Sorting numbers assigned. Otherwise, the items without sorting numbers will show at the start or at the end, depending on your sorting choice, disrupting your intended order.
- Collection list configuration: Verify that the Order Sorting rule is properly set up in every Collection List on your website. This includes not just your main collection page, but all instances where these items appear.
- Publishing changes: Remember to publish your changes after configuring the Order Sorting field or updating order numbers. Your modifications won't be visible on the live site until you publish them.
Advanced implementation tips for Webflow CMS item ordering
For more complex implementations, several advanced options are available to streamline your ordering process. Third-party tools like Whalesync, Airtable, or Webflow's API can be used to enhance your ordering capabilities. These tools enable powerful features such as:
- Updating order numbers in bulk
- Implementing dynamic sorting based on popularity metrics
- Integrating sorting data from external APIs
- Automating order updates based on custom criteria

While these methods offer powerful functionality, they typically require intermediate to advanced Webflow knowledge and may not be suitable for beginners.
If you find yourself needing assistance with implementing these ordering systems or have questions about more advanced implementations, our team at BRIX Templates is here to help. Our experts can help you with the process and ensure your CMS is properly configured to meet your specific needs.
Conclusion
Implementing a custom ordering system in Webflow's CMS provides the flexibility to arrange your content exactly as needed. By following this guide and utilizing the Order Sorting field properly, you can create an organized and maintainable content structure.
Remember to use whole numbers, leave gaps between values for future additions, and ensure proper configuration across all collection lists. While advanced implementation options exist for more complex needs, this basic setup will serve most use cases effectively.


Join readers commenting on this post!