
Having users leave your Webflow site when clicking external links is a common problem that directly impacts bounce rates and engagement. When visitors click a link and lose their original tab, they often don't return, reducing your site's effectiveness and user retention.
By making external links open in new tabs, you keep your website active in the background while users explore other content. This simple change significantly improves user retention and keeps visitors engaged with your content for longer sessions.
Current native Webflow link handling is limited
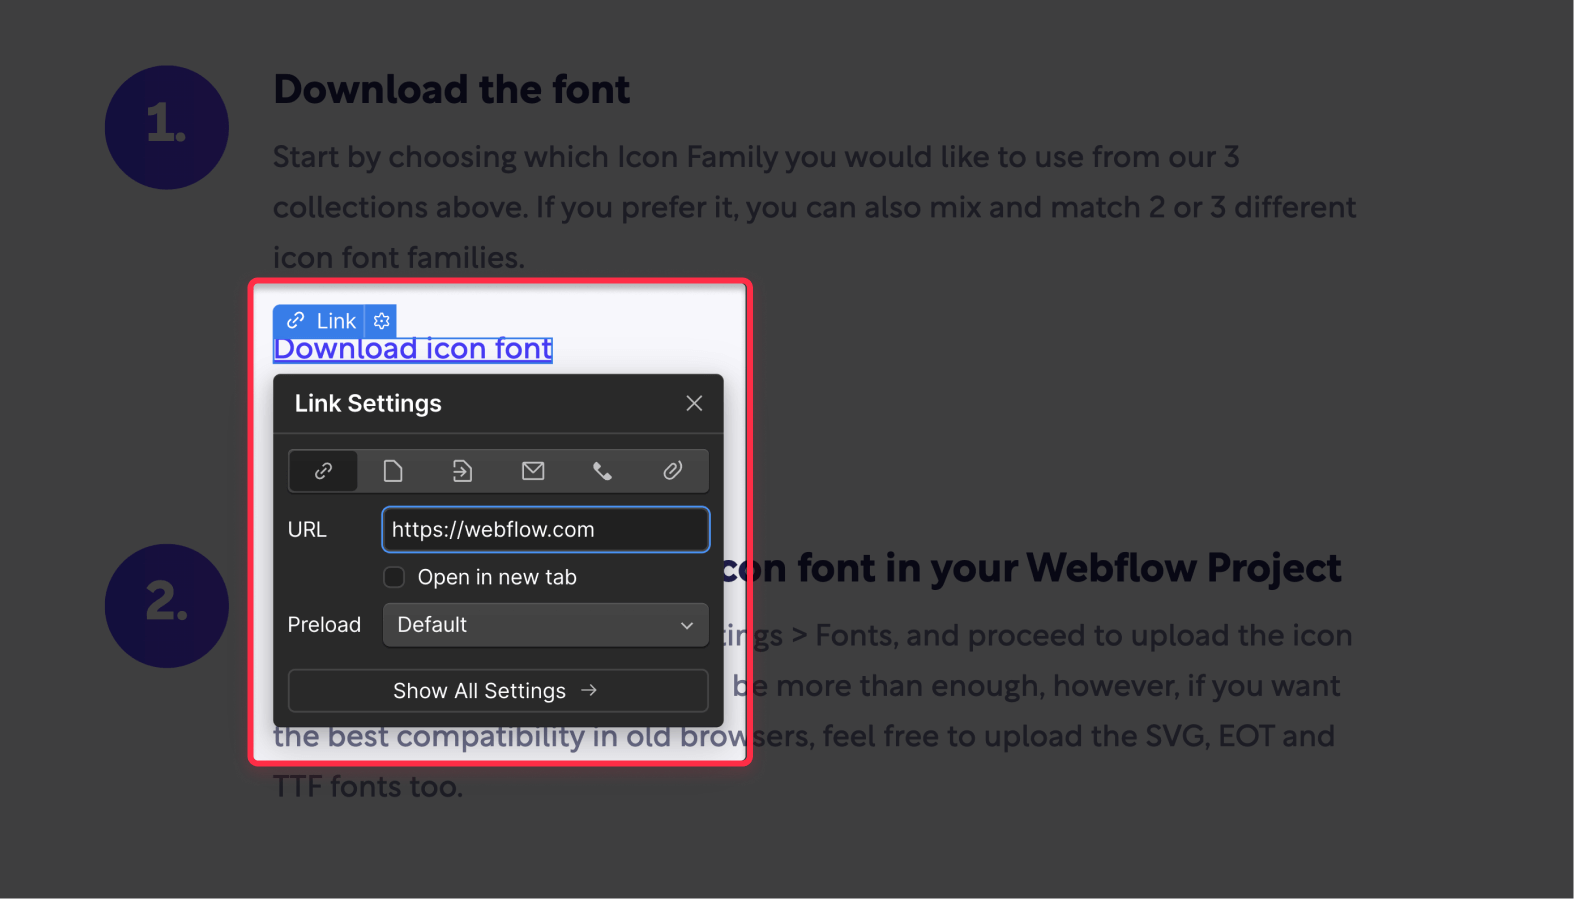
Webflow provides a built-in solution for controlling how links open through its visual interface. When creating or editing a link in either the Webflow Designer or Editor, you'll find a checkbox option labeled "Open in new tab." This native approach offers:
- Simple implementation through a visual interface
- Direct control over individual link behavior
- No coding knowledge required
However, while Webflow's built-in solution works well for small-scale implementations, it presents several significant limitations that can be challenging for medium or large-scale websites, resulting in multiple issues:
- Time-intensive manual configuration: Each link requires individual attention and setup, making it impractical for larger websites. This process becomes particularly challenging when managing hundreds of pages or implementing site-wide changes, potentially requiring hours or days of dedicated work to ensure consistent implementation
- Scalability issues: For content-heavy websites, particularly those with extensive blog sections or documentation areas, the manual approach becomes increasingly difficult to maintain. Every new piece of content requires careful attention to external link configuration, creating an ongoing maintenance burden that grows with your content.
- CMS integration limitations: When working with Webflow's CMS, the native link handling option isn't consistently available across all link types.
These limitations can significantly impact both development efficiency and the overall user experience of your website, making it essential to consider alternative approaches for managing external links in larger or more complex Webflow projects.
Automating external link behavior on Webflow with JavaScript
To overcome these limitations, we can implement a JavaScript solution that automatically handles external links across your entire site. This approach offers several key advantages:
- Complete automation: Once implemented, the solution handles all external links automatically, eliminating the need for manual configuration and ensuring consistency across your entire website.
- Universal compatibility: The script works seamlessly with all types of content, including dynamic CMS entries, custom components, and retroactively added links, providing a unified approach to link handling.
- Flexible configuration: You can easily customize which domains should open in new tabs and modify the behavior site-wide with a single code update.
Performance optimized: The script runs only once when the page loads, with minimal impact on your site's performance and user experience.
How the automated link handler script works
The JavaScript code performs the following operations:
- Scans all links (<a> tags) on the page when it loads
- Identifies external links by comparing their domains against your allowed domains list
- Automatically adds the target="_blank" attribute to external links
- Respects existing configurations for internal links
Implementation code for the link handler
1<script>
2/**
3 * External Link Handler for Webflow
4 * Automatically opens external links in new tabs
5 * @author BRIX Templates
6 * @version 1.0.0
7 */
8window.addEventListener('load', function() {
9  // Configure your allowed domains here
10  const allowedDomains = [
11    'yourdomain.com',
12    'subdomain.yourdomain.com'
13    // Add additional allowed domains as needed
14  ];
15
16  // Get all links on the page
17  const links = document.getElementsByTagName('a');
18
19  // Process each link
20  Array.from(links).forEach(link => {
21    try {
22      const href = link.href;
23      if (!href) return;
24
25      const url = new URL(href);
26      const domain = url.hostname.replace('www.', '');
27
28      // Check if the link's domain is not in the allowed list
29      if (!allowedDomains.some(allowed => domain.includes(allowed))) {
30        link.setAttribute('target', '_blank');
31      }
32    } catch (error) {
33      console.warn('Error processing link:', link, error);
34    }
35  });
36});
37</script>
To use this code on your site, simply replace the domains in the `allowedDomains` array with your own website's domains. For example, if your website is "mywebsite.com" and you have a blog at "blog.mywebsite.com", your domains would look like this:
  // Configure your allowed domains here
  const allowedDomains = [
    'mywebsite.com',
    'blog.mywebsite.com'
    // Add additional allowed domains as needed
  ];
Adding the code to your Webflow site
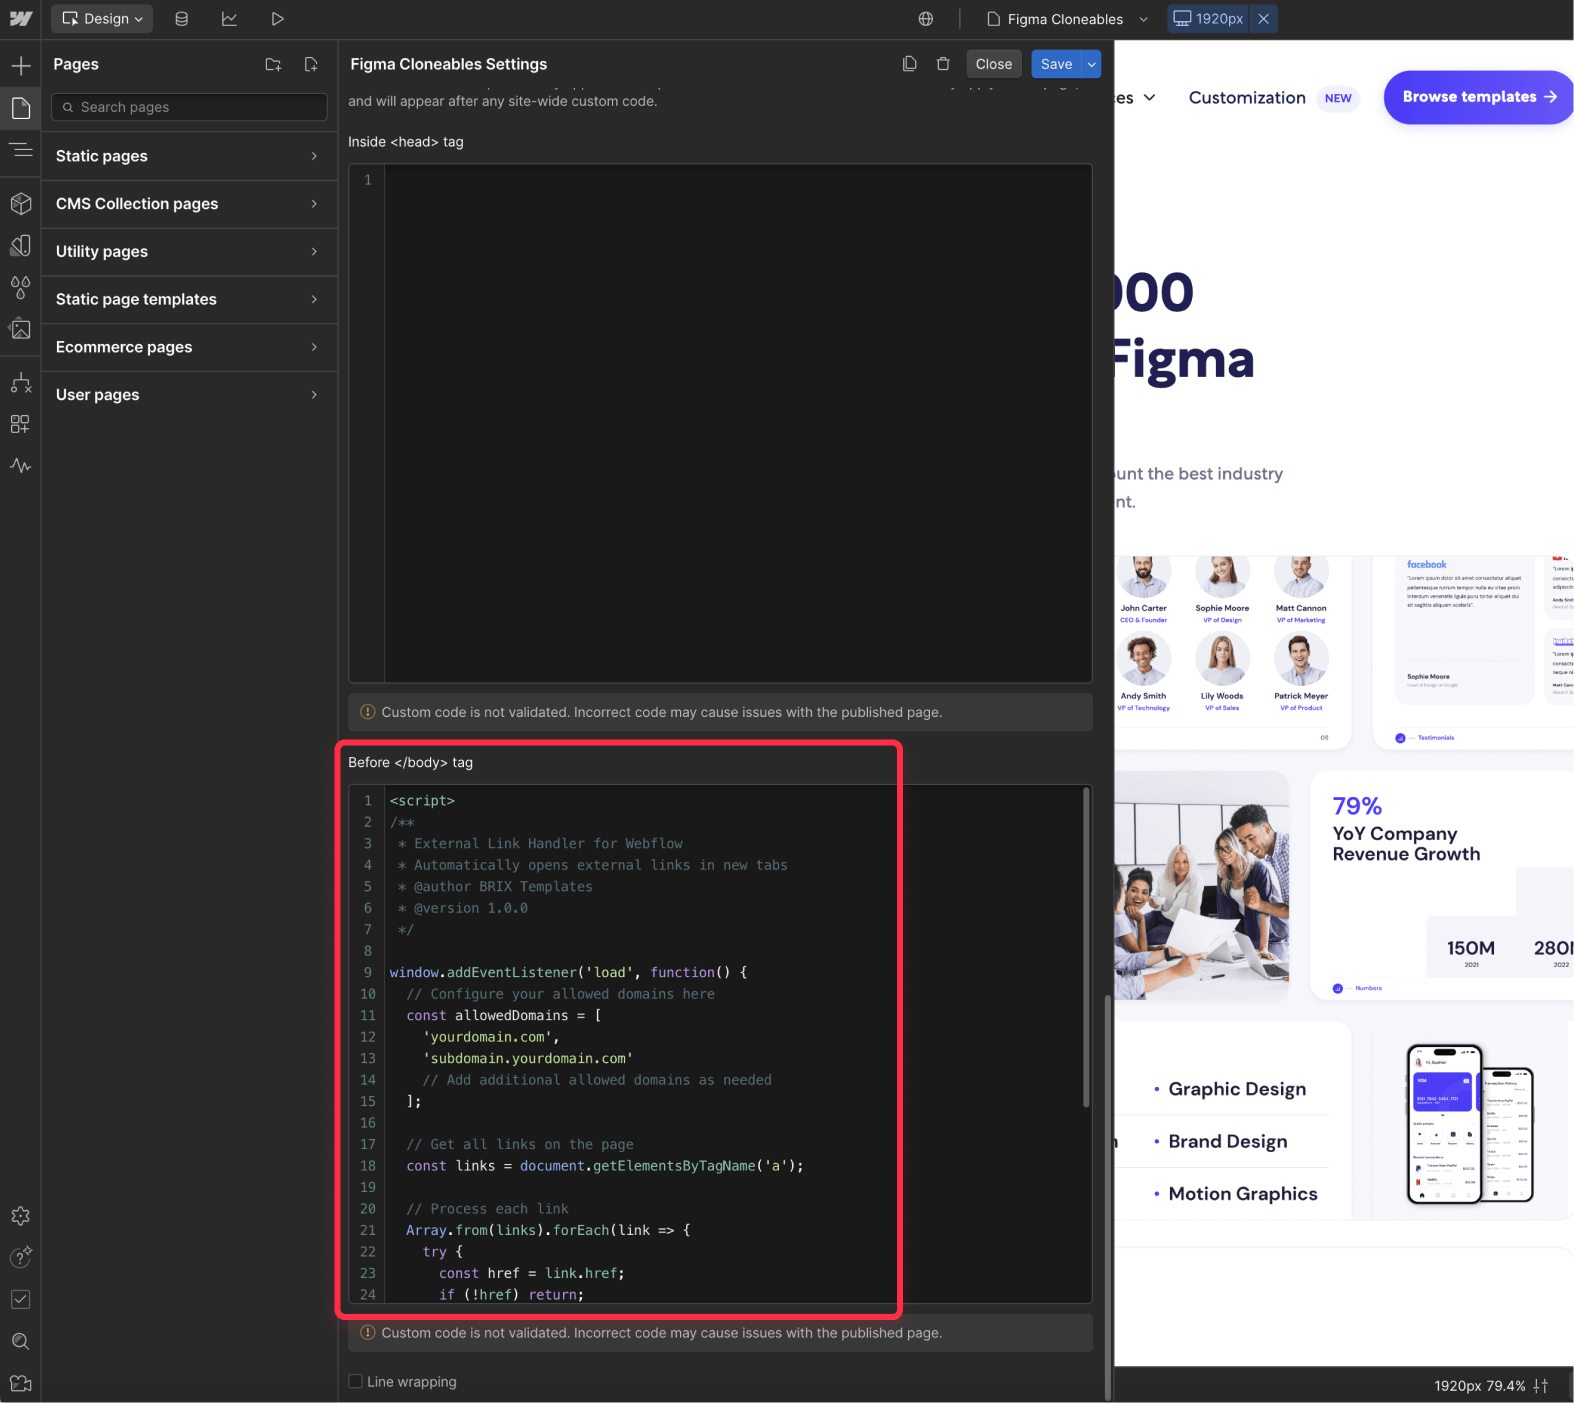
Page-specific implementation
For cases where you want to control external link behavior on individual pages, such as specific landing pages or unique content sections:
- Open the Webflow Designer
- Navigate to the desired page's settings
- Locate the "Custom Code" section
- Paste the code snippet in the "Before </body> tag" field
- Save and publish your changes
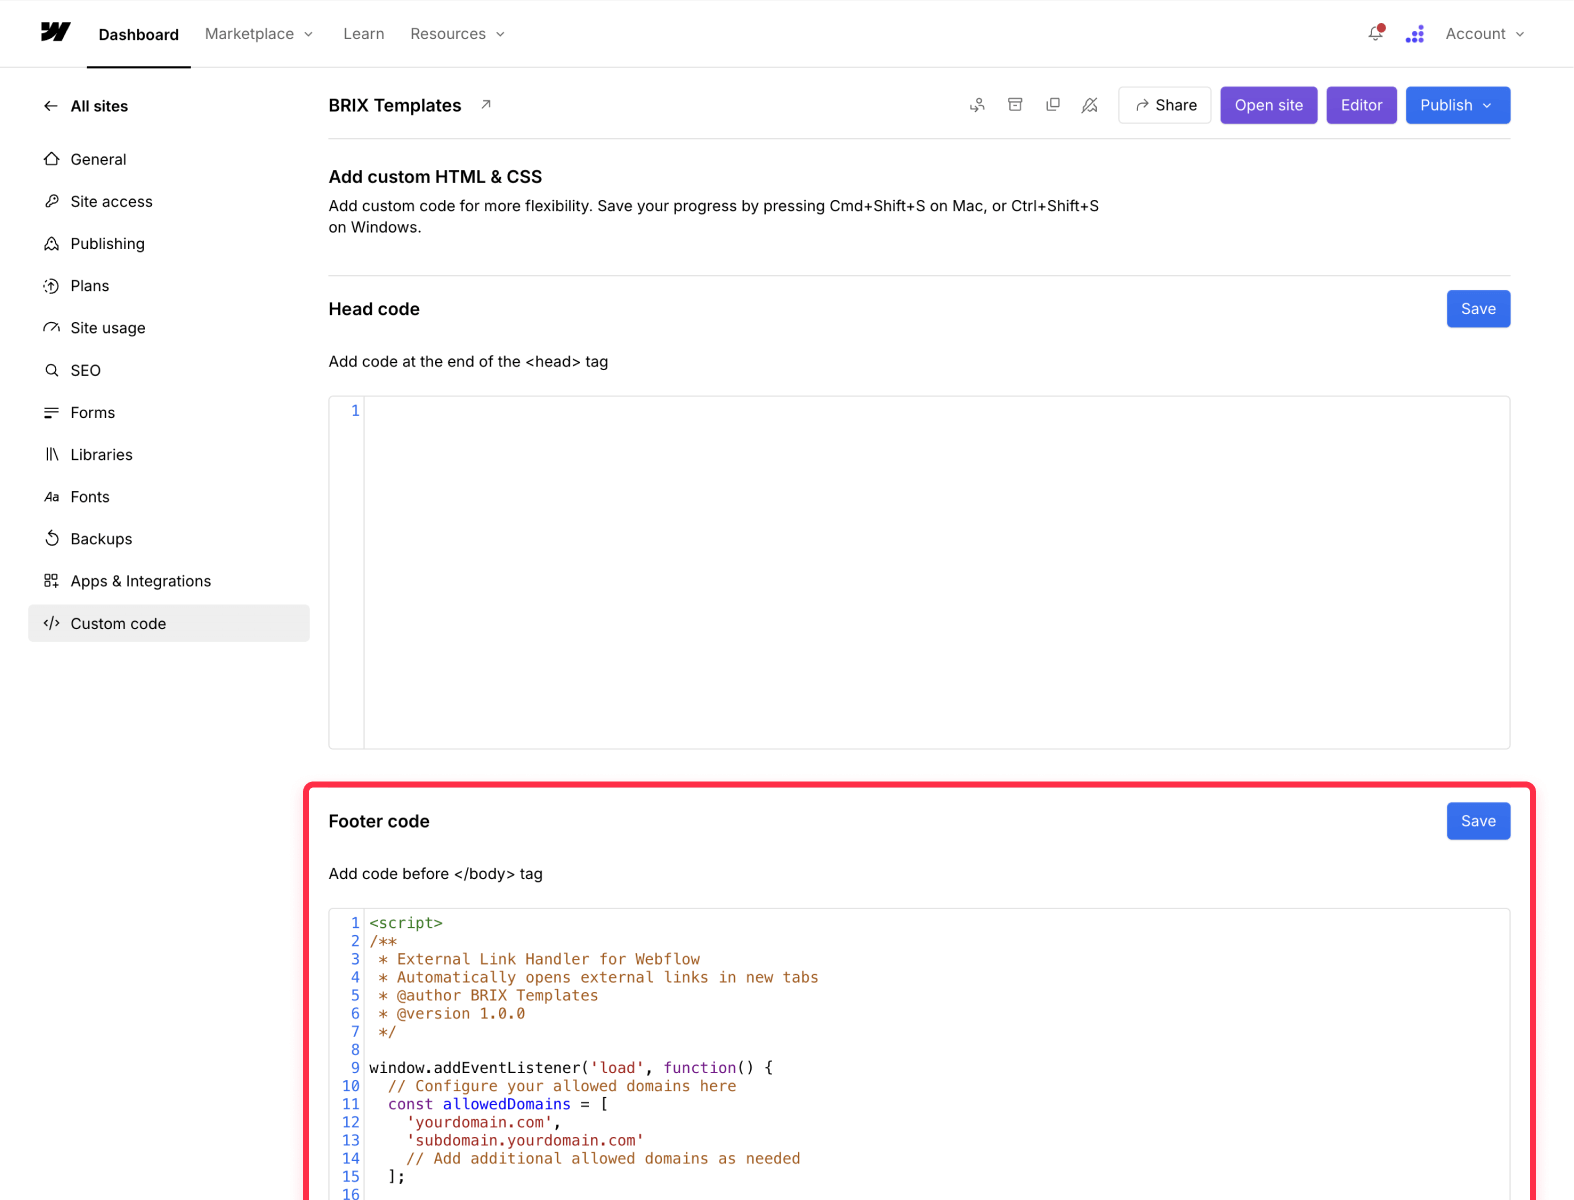
Site-wide implementation
When you want consistent external link handling across your entire website, implementing the code at the project level is the most efficient approach:
- Access your project settings in Webflow
- Navigate to "Custom Code"
- Add the code snippet in the "Footer Code" section
- Save and publish your changes
CMS collection implementation
For websites with dynamic content managed through Webflow's CMS, you can implement the solution specifically for collection pages:
- Open your CMS Collection Page settings
- Locate the "Custom Code" section
- Add the code to apply it to all collection pages
- Save and publish your changes to apply the changes across all collection items
Conclusion
While Webflow's native link handling provides a straightforward solution for simple websites, the JavaScript approach offers a more robust and maintainable solution for larger sites or those with significant CMS content. This automated method ensures consistent behavior across your entire site while saving valuable development time.
For additional customizations or advanced Webflow implementations that go beyond standard functionality, the BRIX Templates team is available to provide expert assistance and tailored solutions for your specific needs.


Join readers commenting on this post!