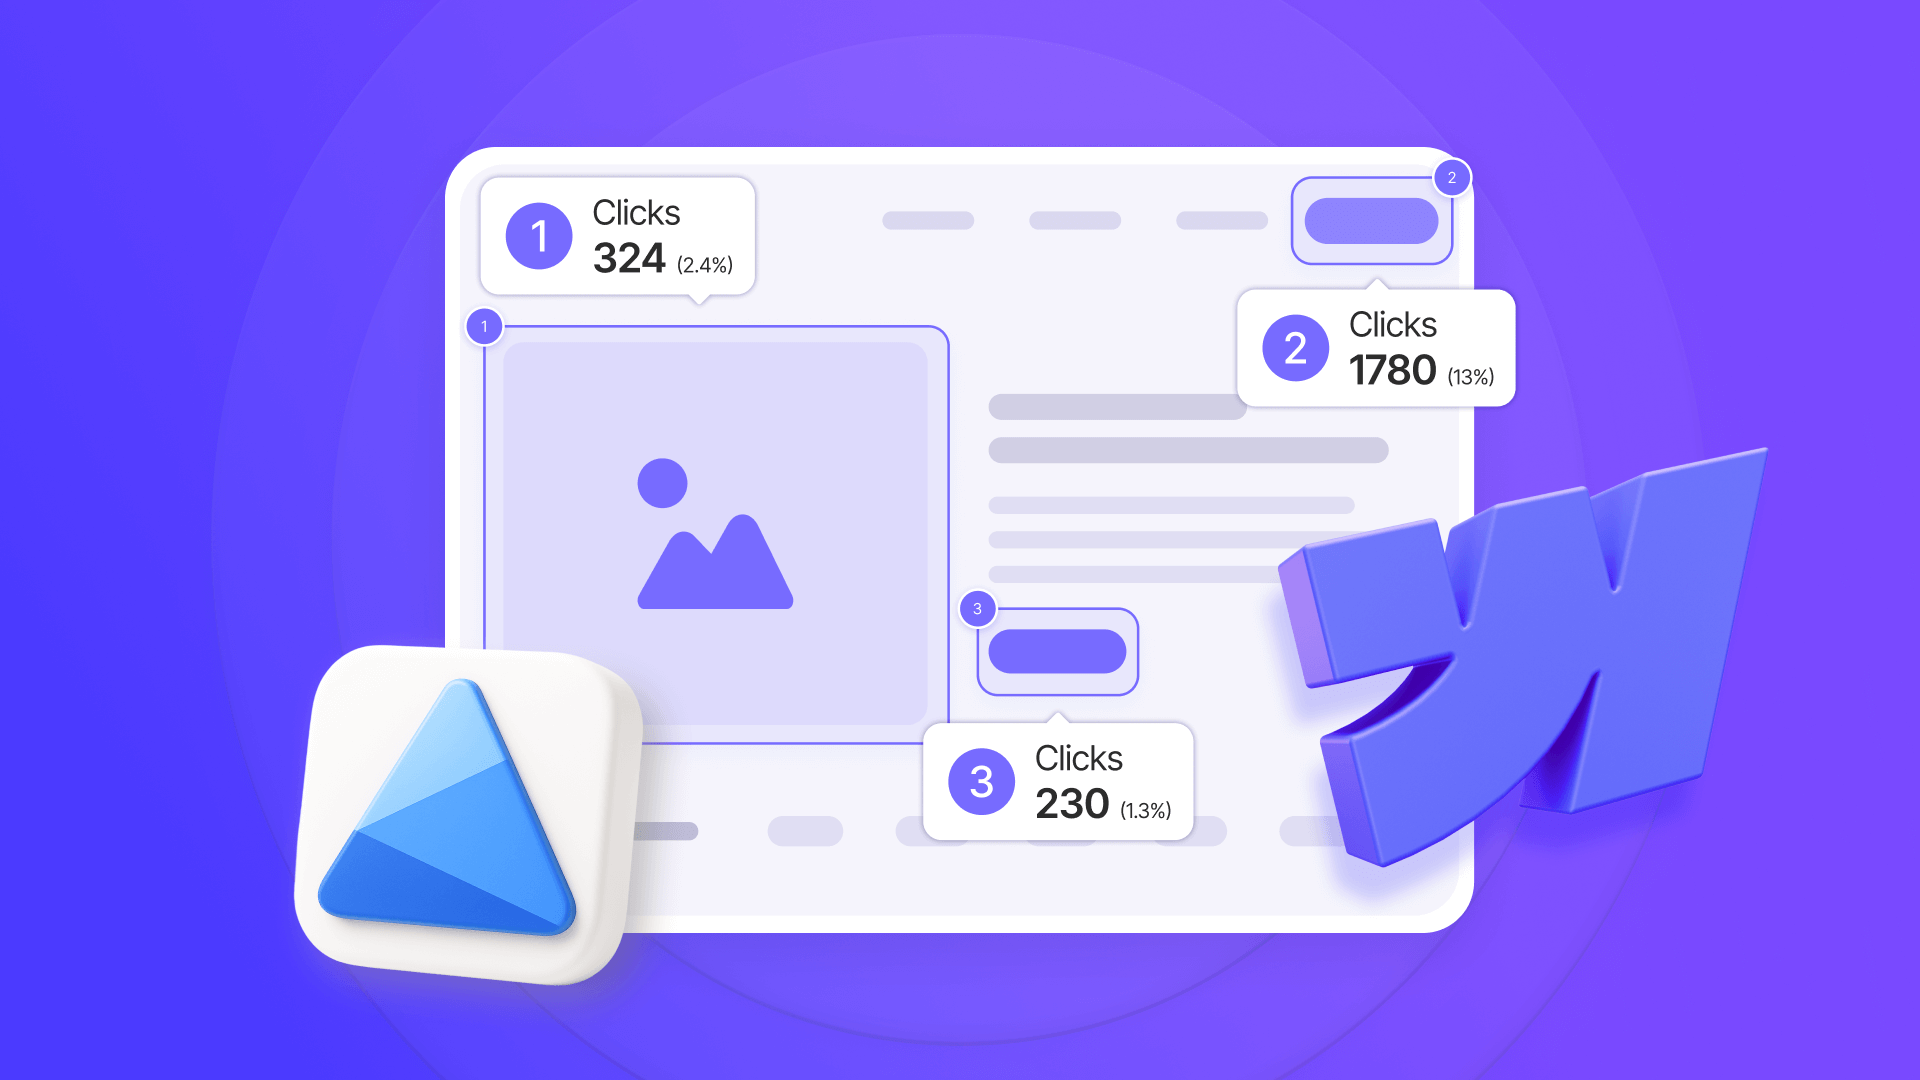
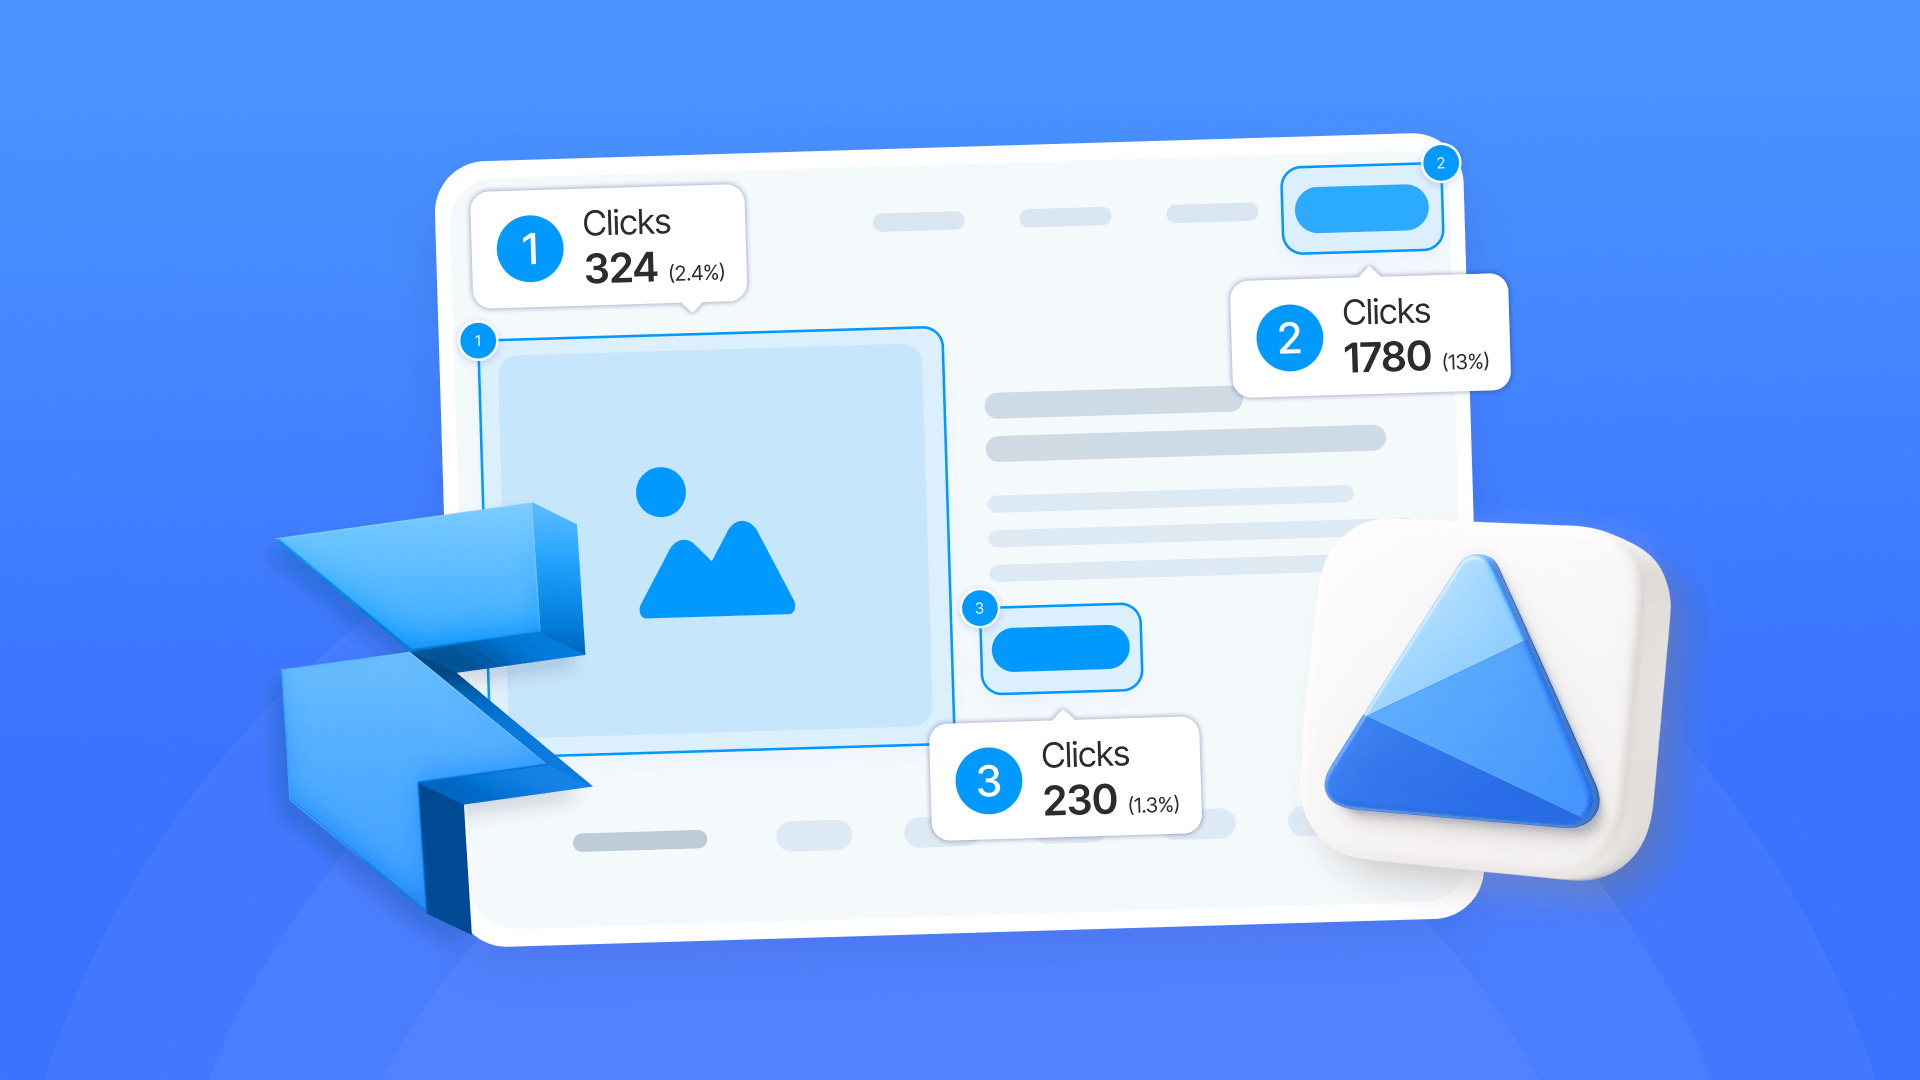
Understanding how visitors interact with your Webflow site helps you move from guessing what works to making data-informed decisions about where your design succeeds and where it needs improvement. Microsoft Clarity is a free analytics tool from Microsoft that captures real user interactions through heatmaps, session recordings, and AI-powered insights. It reveals where users click, how far they scroll, where they get stuck, and what makes them leave—all with unlimited sessions and no traffic limits.
This guide walks you through two installation methods for Microsoft Clarity on Webflow: the quick App Marketplace integration that embeds analytics directly in your Designer, and the manual code method for more control. Both take just a few minutes to set up and provide insights that can help you identify opportunities to improve your conversion rates and user experience.
Why Microsoft Clarity matters for Webflow sites
Understanding the strategic value of behavior analytics helps you implement Clarity effectively across your site:
- E-commerce sites tracking conversion paths: Watch session recordings to see exactly where customers abandon their shopping carts, identify confusing checkout steps, and optimize product page layouts based on real click data instead of assumptions
- Portfolio sites measuring engagement: Use heatmaps to discover which projects get the most attention, track how far visitors scroll through case studies, and identify content that gets ignored so you can restructure your portfolio for maximum impact
- Lead generation sites optimizing forms: Detect where users drop off in multi-step forms, identify form fields that cause confusion or rage clicks, and measure which call-to-action buttons actually get clicked versus which ones are missed entirely
- Content-heavy sites improving readability: Monitor scroll depth to see if readers actually reach your key content, identify sections where users consistently exit, and use AI-powered insights to understand patterns in how different audiences navigate your articles
- SaaS landing pages testing conversion elements: Track clicks on pricing tables to see which plans attract attention, analyze user behavior differences between traffic sources, and use session recordings to spot usability issues that prevent sign-ups
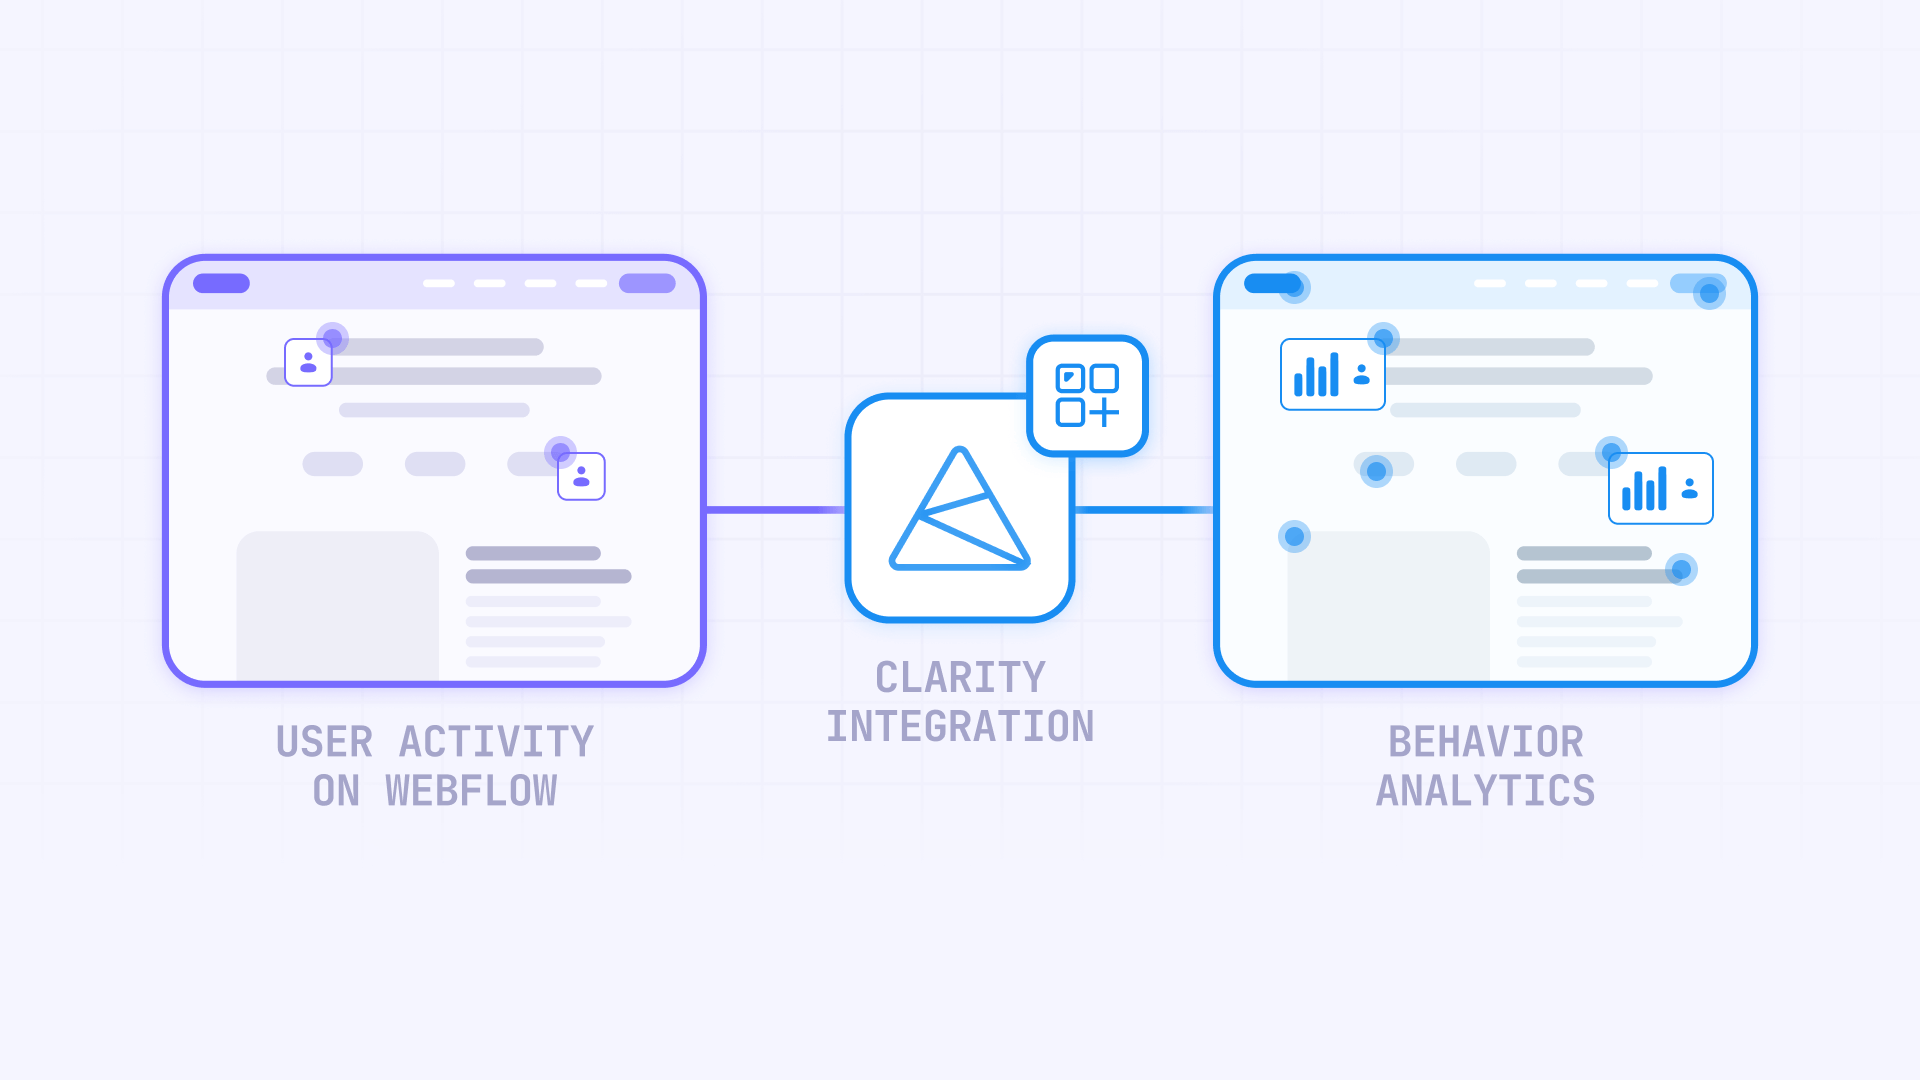
How Microsoft Clarity integrates with Webflow
Microsoft Clarity connects to your Webflow site through two methods: the official App Marketplace integration or manual code installation. Both approaches insert a lightweight tracking script that captures user interactions without affecting site performance.
The App Marketplace method provides a seamless experience with embedded analytics directly in your Webflow Designer, while manual installation gives you more control over script placement and loading behavior. Regardless of which method you choose, the setup takes just a few minutes and begins tracking immediately after you publish your site.
What you'll need:
- A free Microsoft Clarity account
- A Webflow site with publishing access
- For manual installation: A paid Webflow plan with custom code access
1 - Setting up your free Microsoft Clarity account
Creating your Clarity account is quick and gives you access to unlimited analytics with no credit card required.
Creating your Microsoft Clarity account for Webflow
Follow these steps to get your account ready:
- Visit Microsoft Clarity: Go to clarity.microsoft.com and click Sign up in the top right corner
- Choose your sign-in method: Select Microsoft Account, Google, or Facebook to authenticate. You can use any method regardless of your other Microsoft services.
- Accept the terms: Review and accept Microsoft Clarity's terms of service and privacy policy
Your account is now active and ready to track unlimited sessions across all your projects.
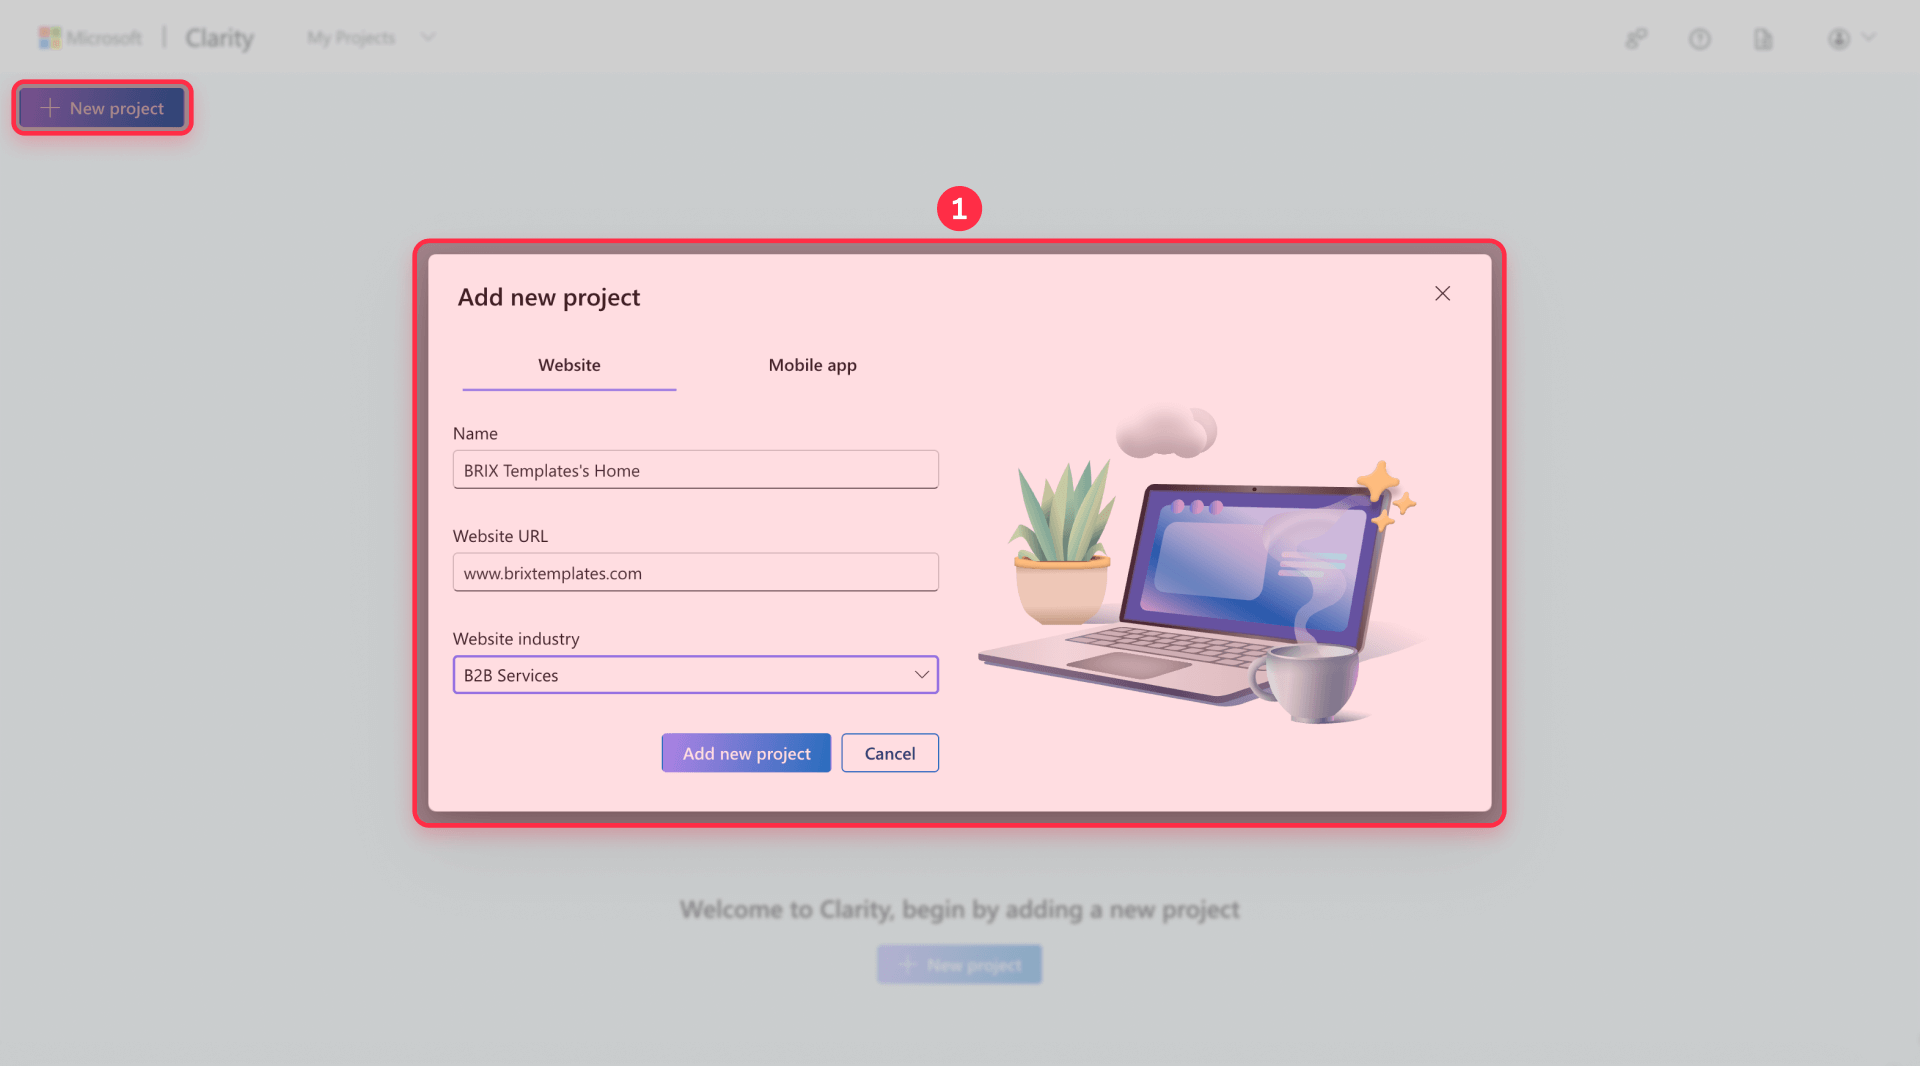
Creating a new project in Microsoft Clarity for your Webflow site
Set up your first tracking project:
- Start a new project: From the Clarity dashboard, click Add new project
- Enter project details: Add your Project name (like "My Webflow Site" or your business name), enter your Website URL (your full domain like https://yourdomain.com), and select your Industry from the dropdown
- Create the project: Click Add to generate your project
Clarity immediately creates a unique tracking code for this project. You'll need this code in the next step to connect Clarity with your Webflow site.
2 - Installing Microsoft Clarity in Webflow using the App Marketplace
The App Marketplace method is the fastest way to connect Clarity with Webflow and includes built-in features like embedded dashboards.
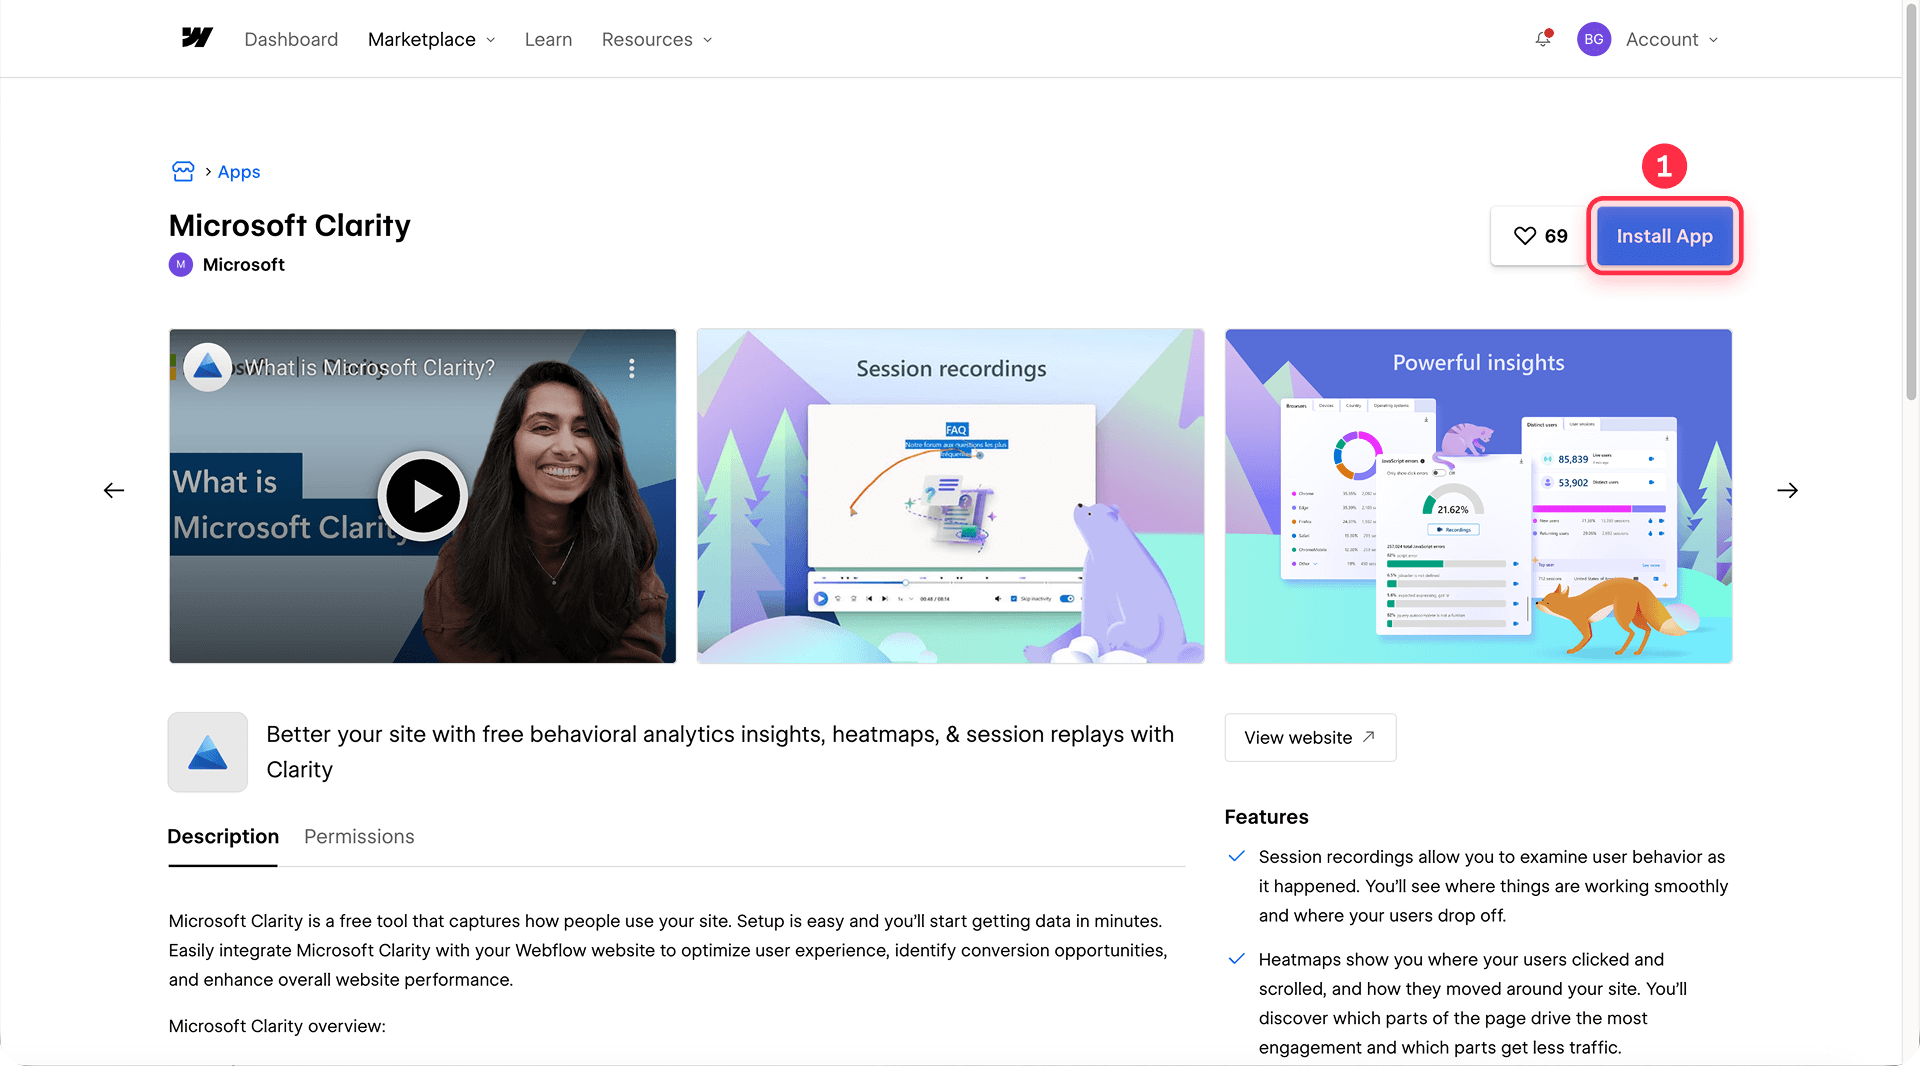
Finding the Microsoft Clarity app in the Webflow Marketplace
Here's how to locate and install the official Clarity app:
- Open the Webflow Marketplace: Log into your Webflow account and navigate to the Apps section from the left sidebar or visit webflow.com/apps
- Search for Clarity: Type Microsoft Clarity in the search bar
- Select the official app: Click on Microsoft Clarity from Microsoft Corporation. Look for the "Approved by Webflow" badge to ensure you're installing the official integration.
- Review the features: Check that the app includes heatmaps, session recordings, dashboard access, and Copilot AI features
The official Microsoft Clarity app is free to install and has no ongoing costs or subscription fees.
Installing the Microsoft Clarity app on your Webflow site
Complete the installation to activate tracking:
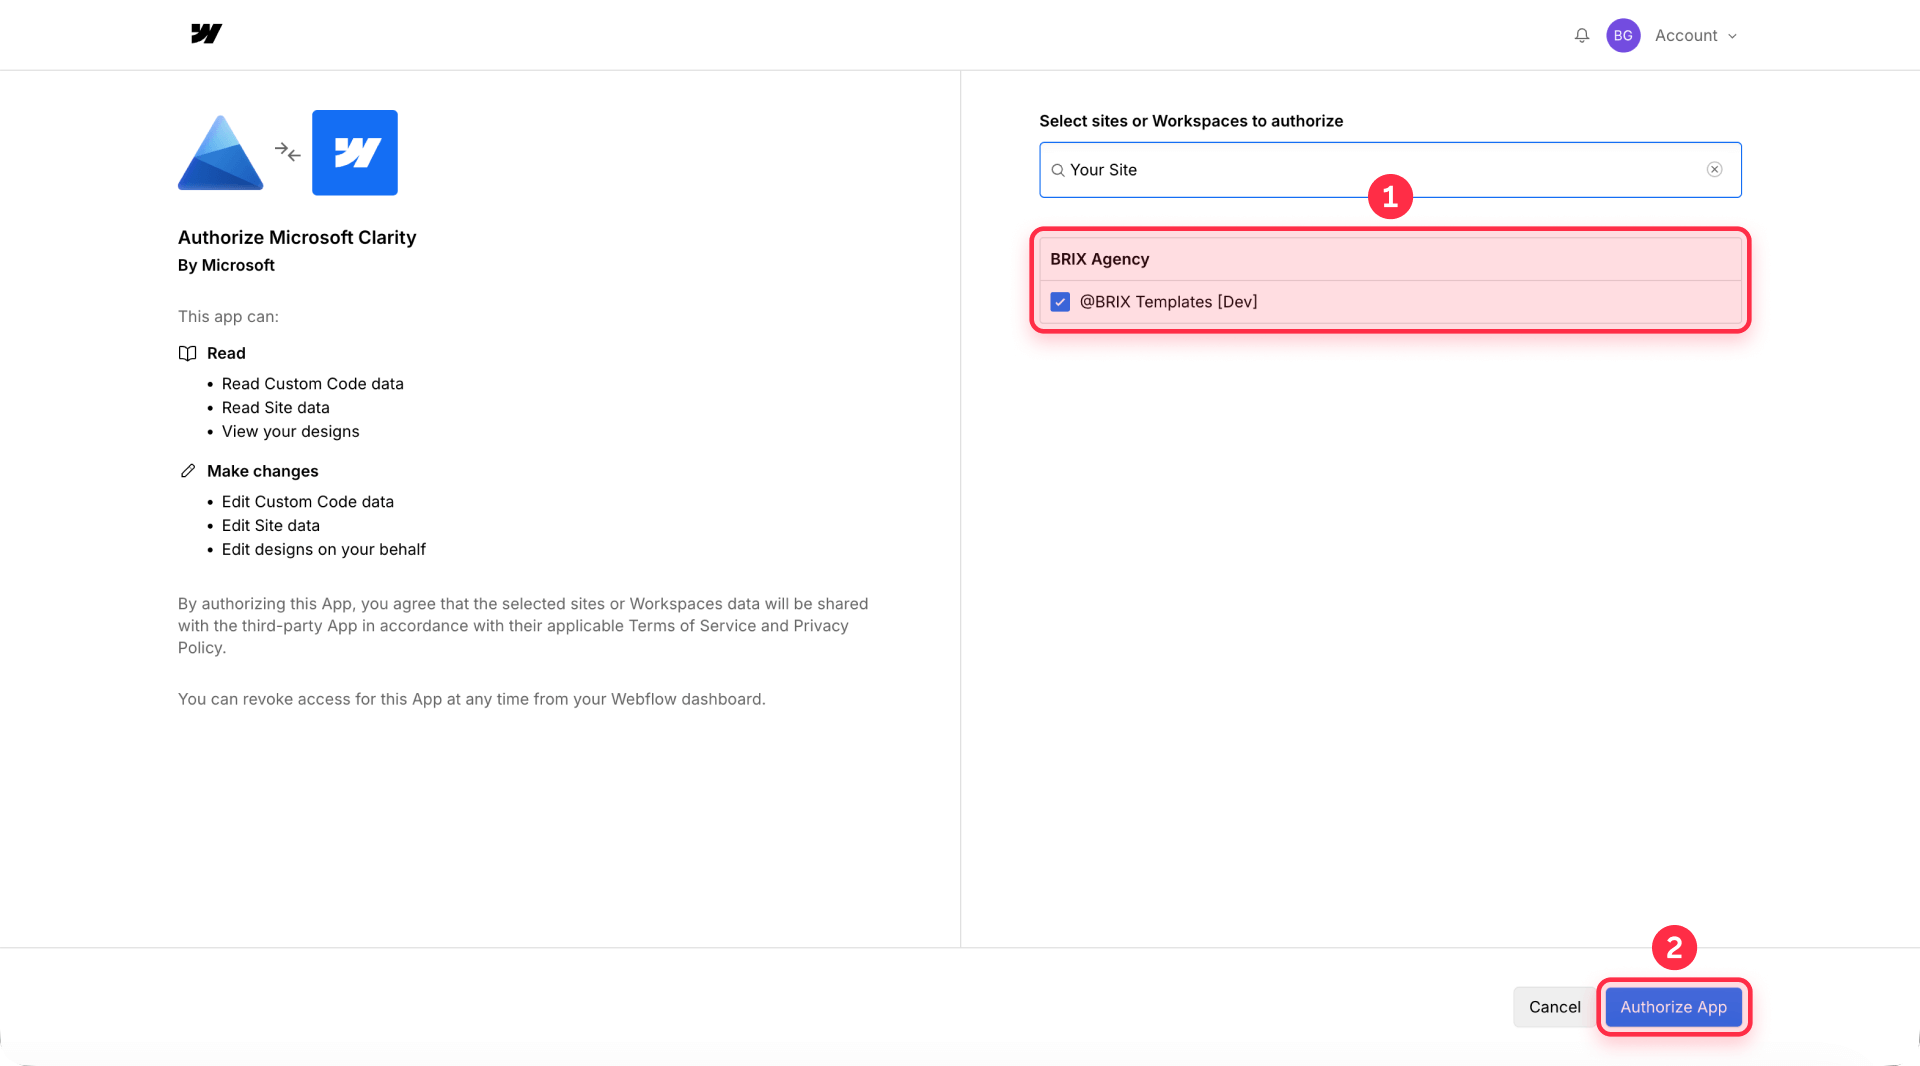
- Install the app: Click the Install app button on the Microsoft Clarity app page
- Choose installation scope: Select whether to install on your entire Workspace (all sites) or on Specific sites (one or more individual sites). For optimal performance during installation, Microsoft suggests limiting your selection to about 5 sites at a time.
- Authorize the connection: Click Authorize to allow Webflow to communicate with Microsoft Clarity
- Sign in to Clarity: When prompted, sign in using the same account you created earlier (Microsoft, Google, or Facebook)
- Link your project: Choose Link an existing project and select the project you created, or choose Add a new project to create one directly from Webflow
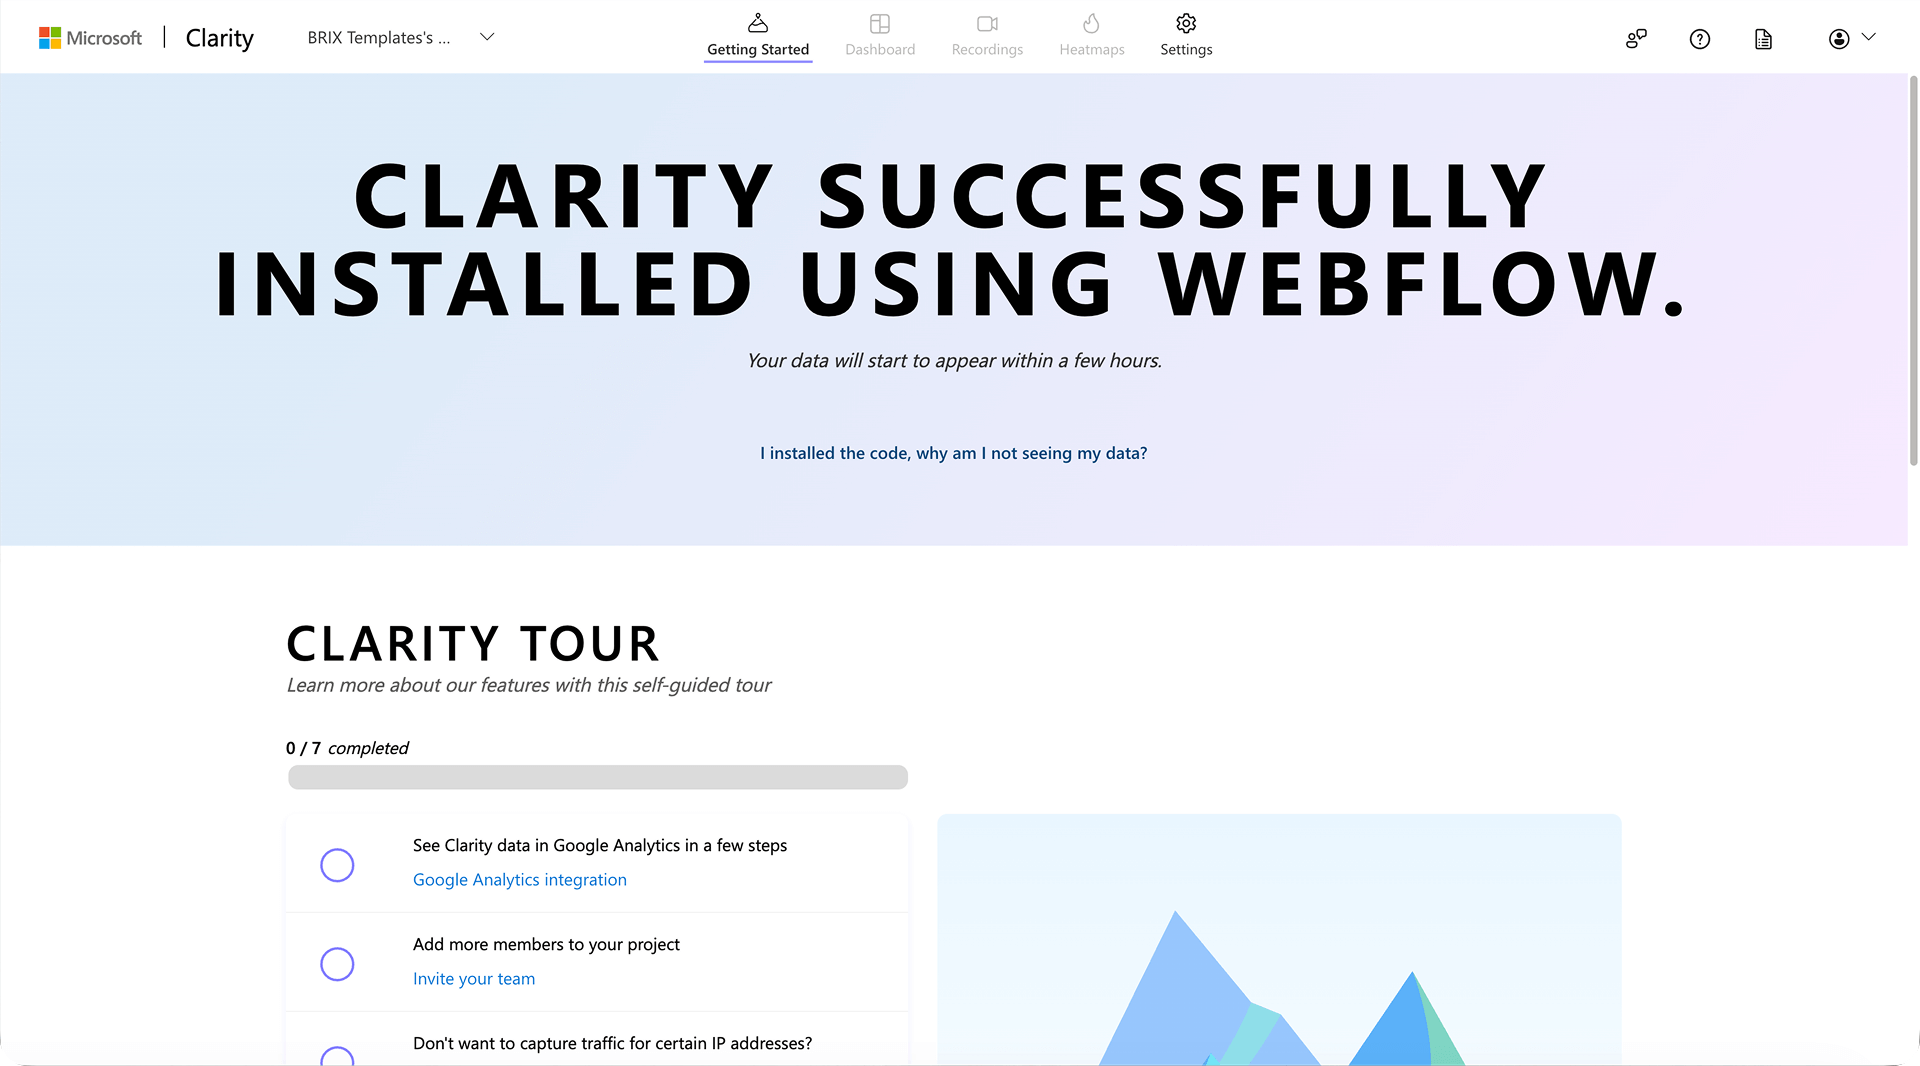
After installation, you'll see a confirmation that Microsoft Clarity is now connected to your Webflow site.
Publishing your Webflow site to activate Microsoft Clarity tracking
The final step activates the integration:
- Publish your site: Go to your Webflow Designer or Dashboard and click the Publish button in the top right
- Select domains: Choose which domains you want to publish to. Make sure to publish to the domain you entered in your Clarity project.
- Confirm publication: Click Publish to selected domains
Data typically appears within 30 minutes to 2 hours after publishing, though live session recordings may be available sooner. Visit your published site in a new browser tab to generate your first session.
Accessing Microsoft Clarity data from within Webflow
The integrated experience keeps everything in one place:
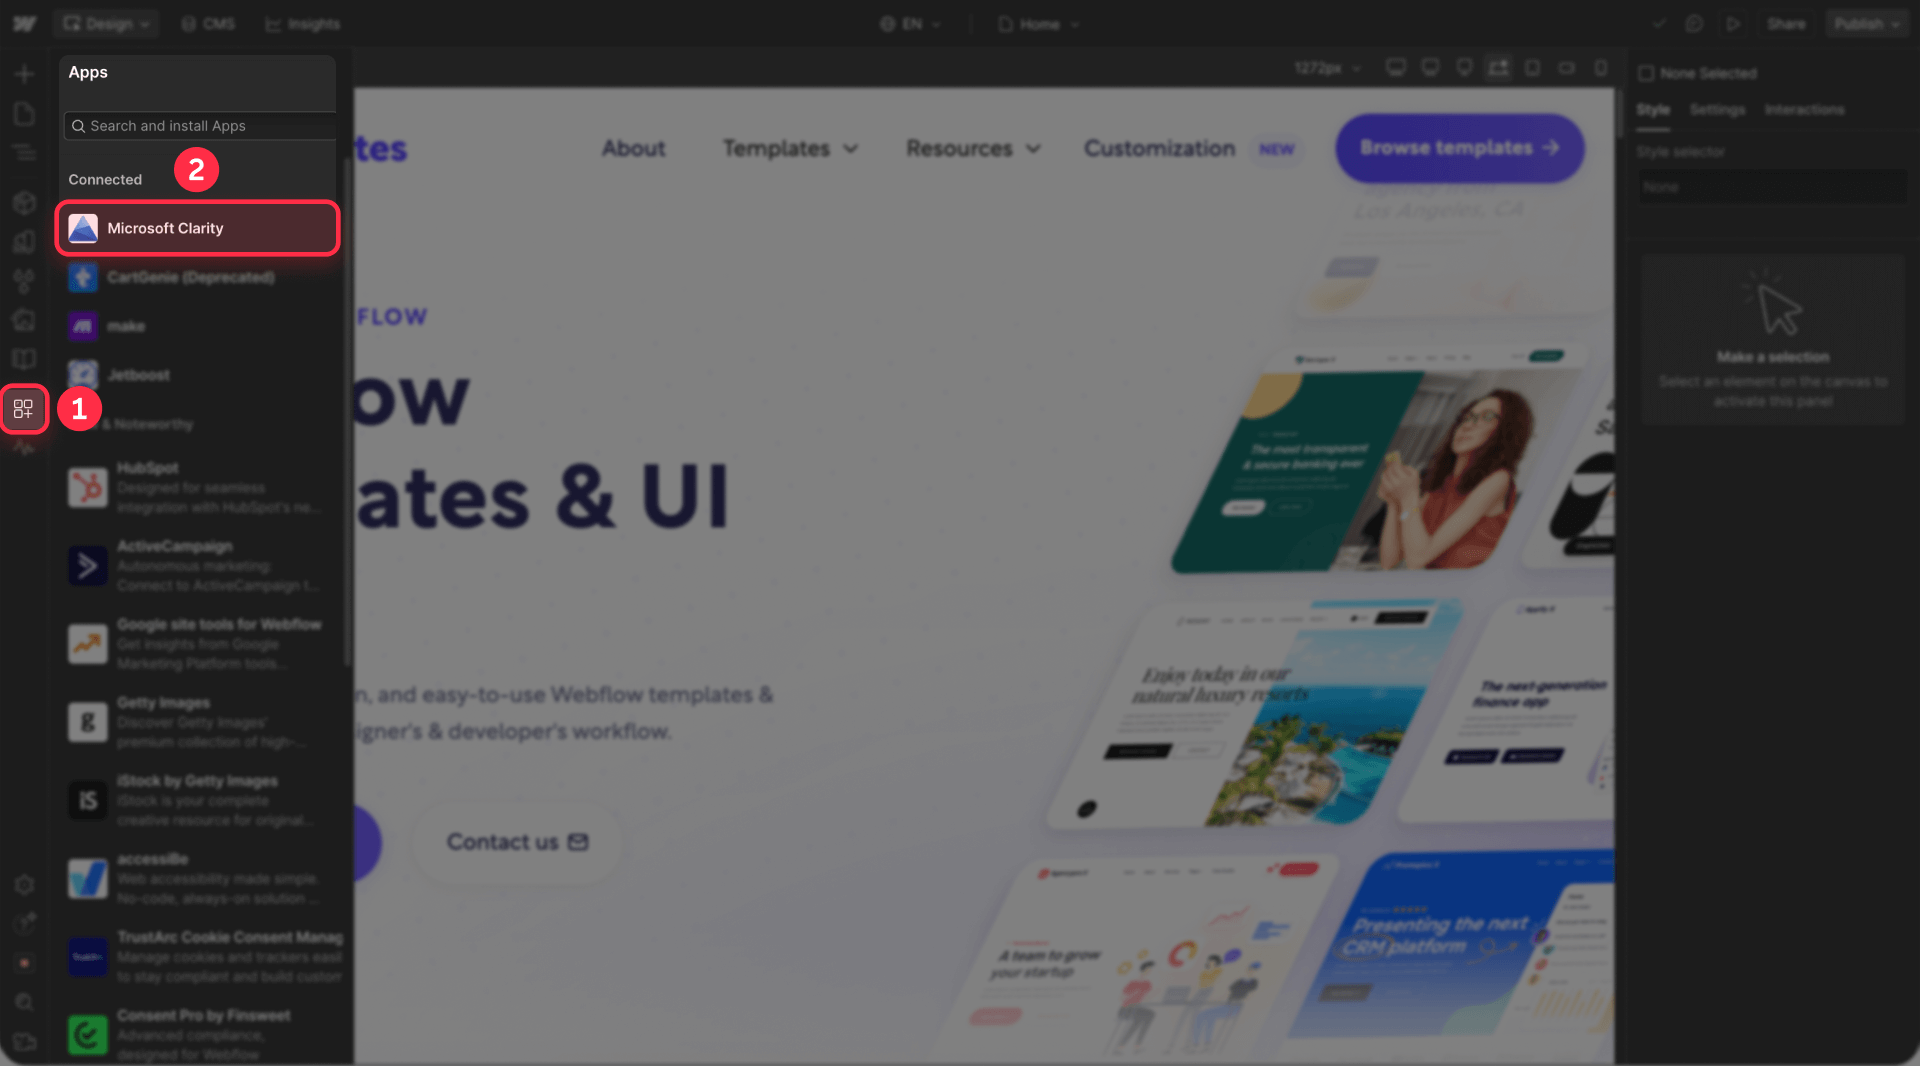
- Open the Apps panel: In the Webflow Designer, press E or click the Apps icon in the left toolbar
- Launch Microsoft Clarity: Find Microsoft Clarity in your installed apps and click to open
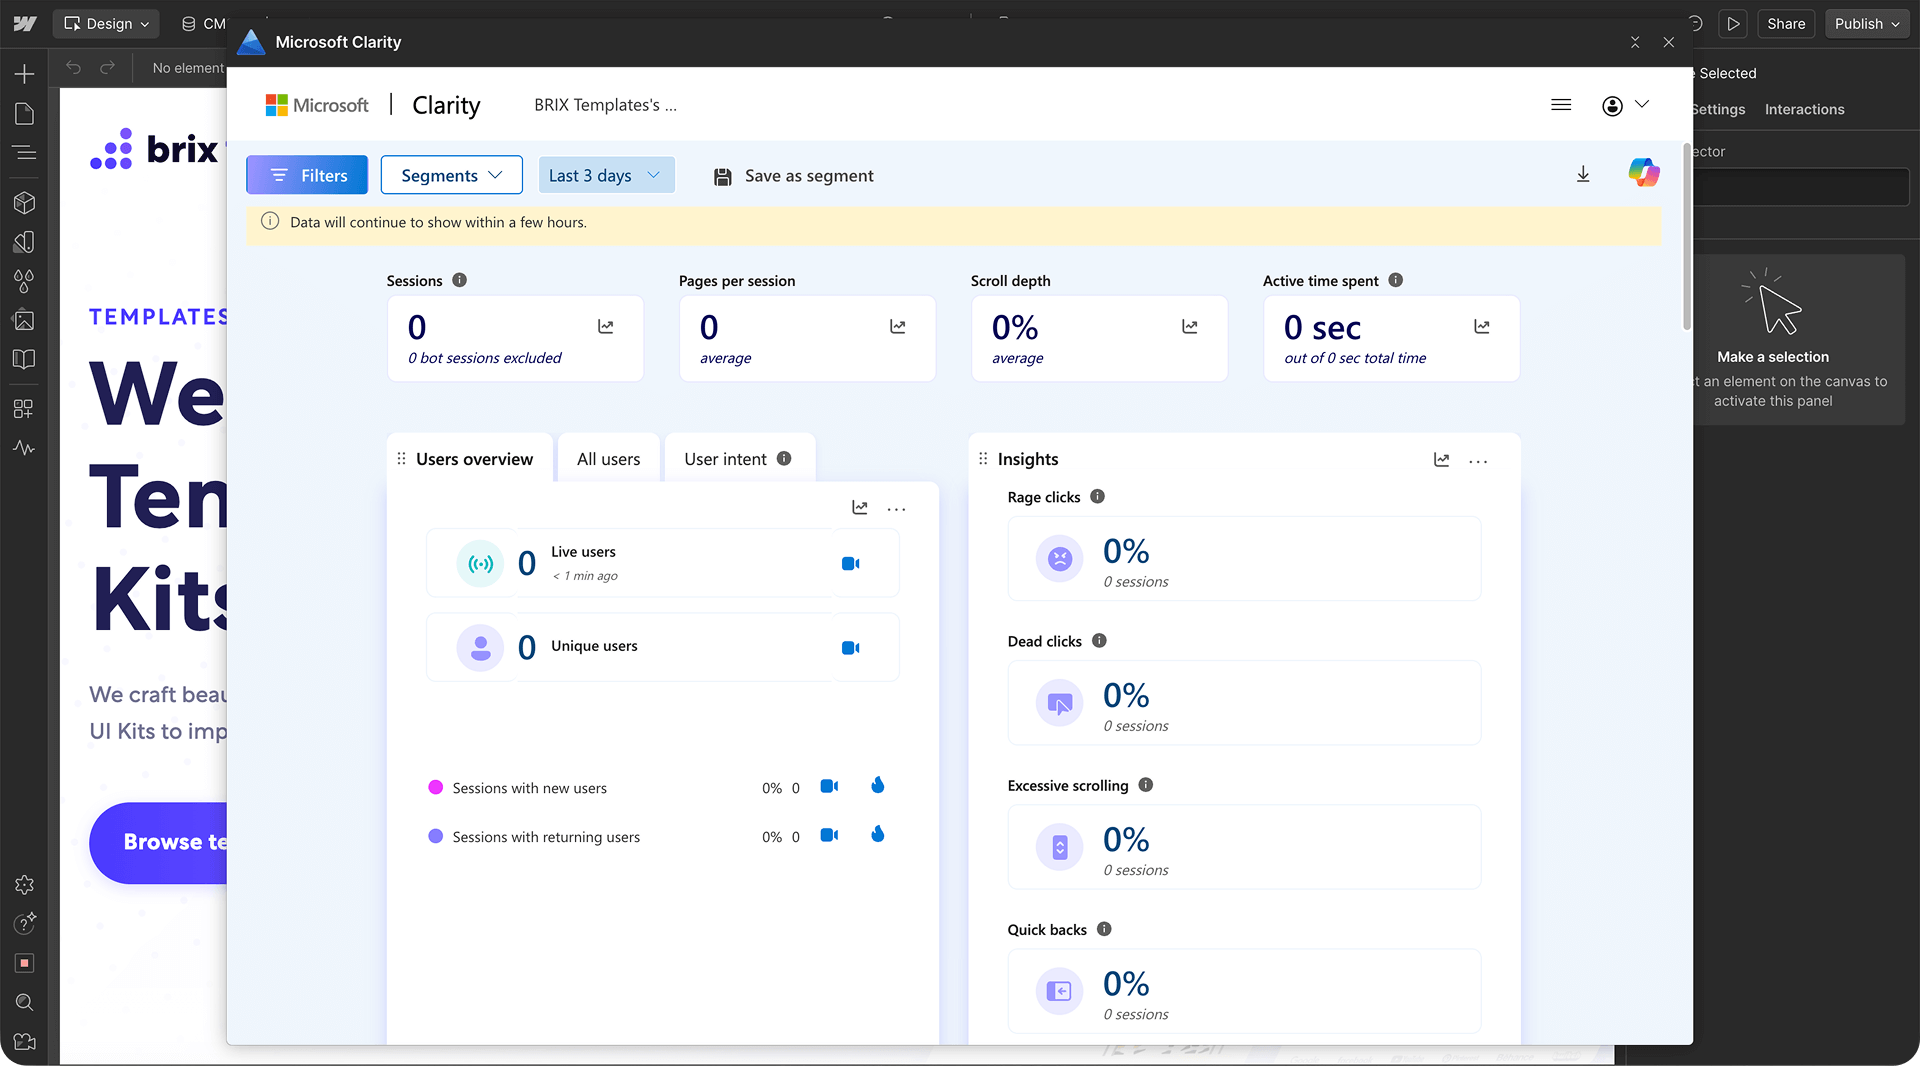
- View your dashboard: The Clarity dashboard opens inside Webflow showing live sessions, popular pages, and user insights
- Access recordings and heatmaps: Use the navigation to switch between Dashboard, Recordings, and Heatmaps views without leaving Webflow
This embedded access means you can watch user sessions and immediately make design adjustments in the same workspace.
3 - Installing Microsoft Clarity in Webflow using manual code
Manual installation gives you direct control over the tracking code and works well if you manage multiple analytics tools.
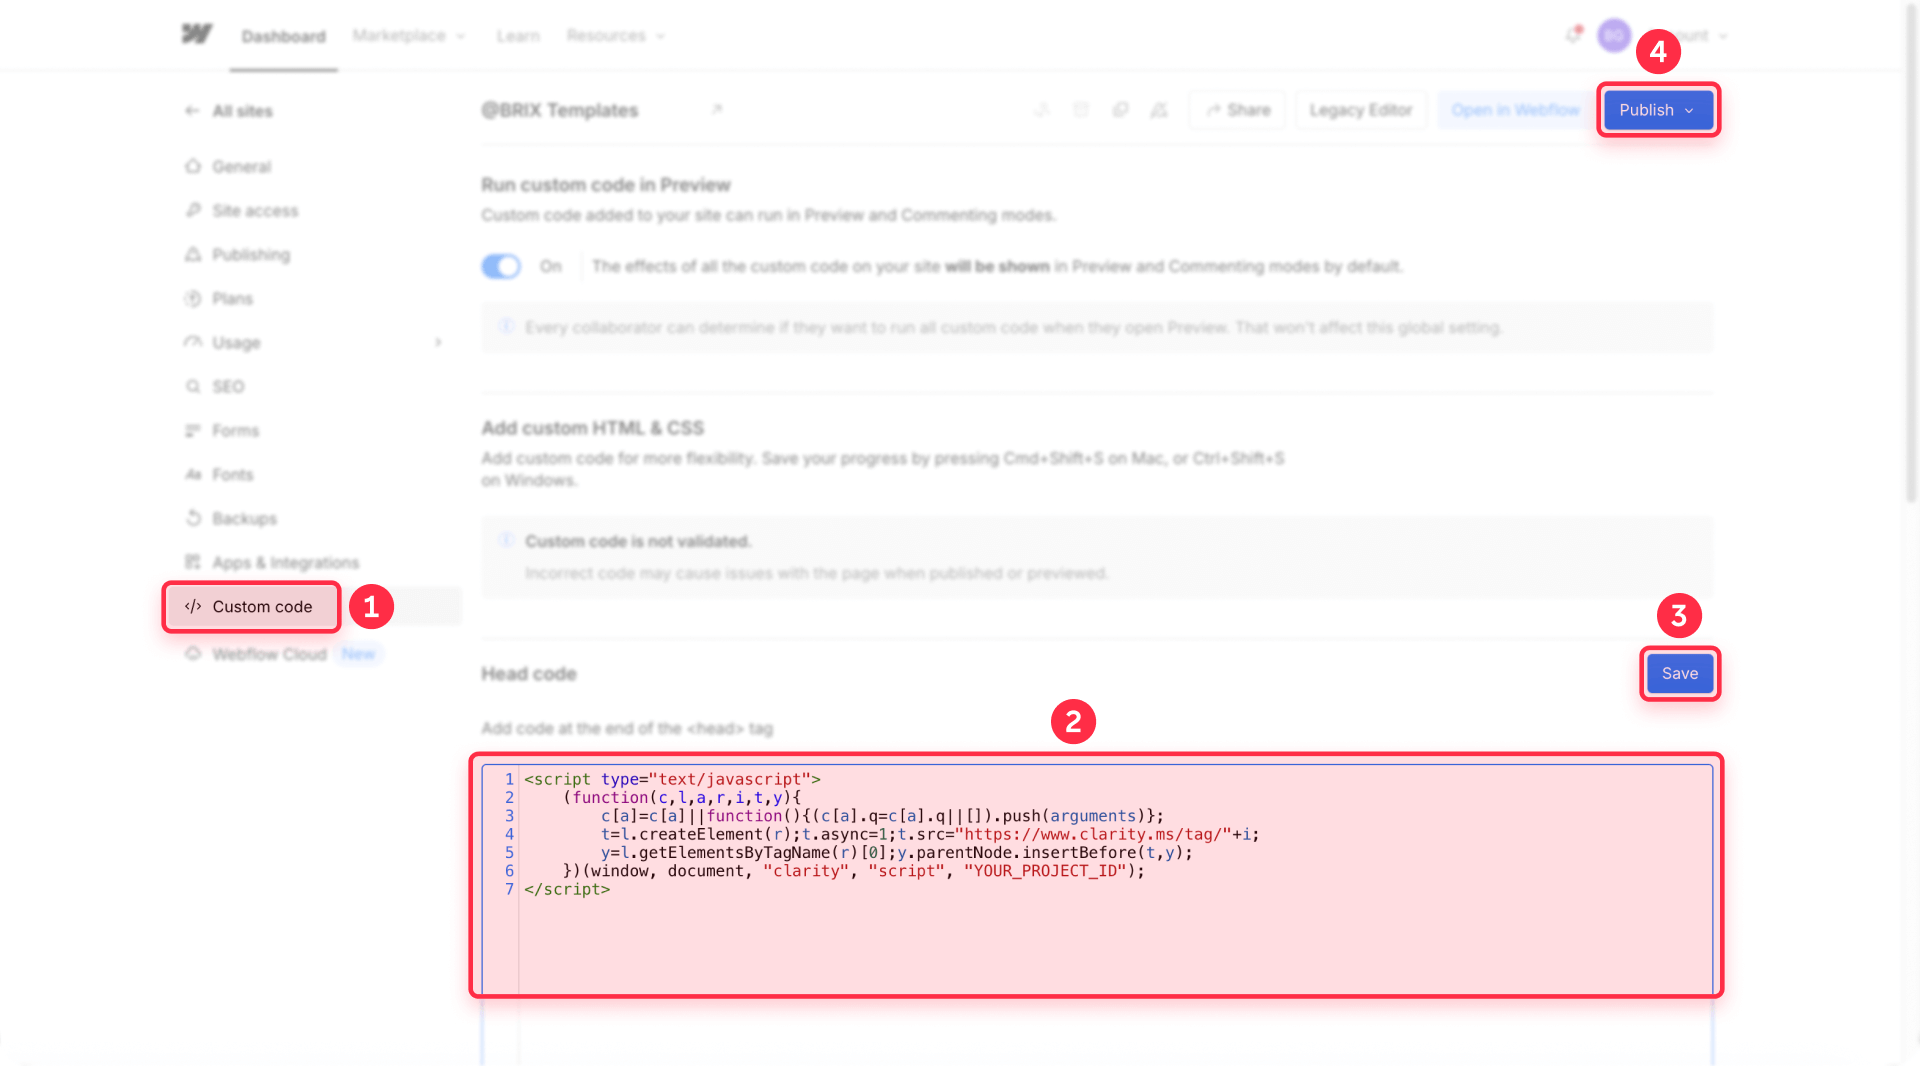
Getting your Microsoft Clarity tracking code
First, obtain your unique tracking code:
- Access your Clarity project: Log into clarity.microsoft.com and select your project
- Open Settings: Click the Settings gear icon in the left sidebar
- Copy the tracking code: Navigate to Setup → Install tracking code and copy the entire code snippet.
It will look similar to this:
<script type="text/javascript">
  (function(c, l, a, r, i, t, y) {
    c[a] = c[a] || function() {
      (c[a].q = c[a].q || []).push(arguments);
    };
    t = l.createElement(r);
    t.async = 1;
    t.src = "https://www.clarity.ms/tag/" + i;
    y = l.getElementsByTagName(r)[0];
    y.parentNode.insertBefore(t, y);
  })(window, document, "clarity", "script", "YOUR_PROJECT_ID");
</script>
Keep this code ready for the next step.
Adding the tracking code to your Webflow project settings
Now install the code in Webflow:
1 - Open Project Settings: In your Webflow project, click the Settings icon (gear) in the left sidebar or top menu
2 - Navigate to Custom Code: Select Custom Code from the settings menu
3 - Paste in Head Code: In the Head Code section, paste your complete Clarity tracking code
4 - Save changes: Click Save Changes at the bottom of the page
Publishing and verifying your manual installation
Complete the setup:
- Publish your site: Click the Publish button in the top right of the Designer
- Select domains: Choose the domain(s) you want to publish to
- Confirm and publish: Click Publish to selected domains
- Verify installation: Return to your Clarity dashboard and check the project status. It should show as "Active" within a few minutes
- Generate test sessions: Visit your live site in an incognito window to create your first tracked session
Data typically appears within 30 minutes to 2 hours after publishing, though live session recordings may be available sooner.
4 - Common issues and quick solutions
Clarity not tracking after installation: Make sure you published your Webflow site after installing the app or adding the tracking code. Check that the code is in the Head Code section, then clear your browser cache and test in an incognito window.
No data appearing in dashboard: Wait 30 minutes to 2 hours after publishing for data to process. Verify your Webflow domain matches exactly what you entered in your Clarity project settings.
Tracking stops after site updates: If using the App Marketplace, republish your site. For manual installation, confirm your custom code wasn't deleted during updates.
Dashboard not loading properly: Try accessing Clarity directly at clarity.microsoft.com instead of the embedded view, update your browser, or clear your cache and cookies.
Frequently asked questions about Microsoft Clarity in Webflow
How do I install Microsoft Clarity on my Webflow site?
Install Microsoft Clarity through the Webflow App Marketplace by searching for "Microsoft Clarity," clicking install, and linking your Clarity account. Alternatively, add the tracking code manually by pasting it into Project Settings → Custom Code → Head Code (requires a paid Webflow plan). Both methods take just a few minutes.
Is Microsoft Clarity free for Webflow sites?
Yes, Microsoft Clarity is completely free with unlimited session recordings, unlimited heatmaps, and all features including AI-powered Copilot insights. There are no hidden costs, traffic limits, or forced upgrades. You only need a free Microsoft Clarity account to get started.
Does Microsoft Clarity slow down my Webflow site?
No, Microsoft Clarity has minimal performance impact. The tracking script is lightweight and loads asynchronously, meaning it doesn't block other content. Microsoft's benchmarks show no measurable impact on page load times for most users, and it won't affect your Google PageSpeed scores.
How long does it take for Microsoft Clarity data to appear?
Data typically appears within 30 minutes to 2 hours after publishing your Webflow site with Clarity installed. Live session recordings may become available sooner. Visit your site in an incognito window after publishing to generate your first tracked session.
Is Microsoft Clarity GDPR compliant for Webflow sites?
Yes, Microsoft Clarity is GDPR, CCPA, and LGPD compliant with automatic IP anonymization and content masking. However, if your site serves EU, UK, or Swiss visitors, you must implement a cookie consent banner. Starting October 31, 2025, Clarity requires explicit consent signals for visitors from these regions.
Conclusion
Installing Microsoft Clarity on your Webflow site unlocks powerful user behavior insights that turn guesswork into data-driven decisions. The free tool provides unlimited session recordings, heatmaps, and AI-powered analytics that reveal exactly how visitors interact with your design. Whether you use the quick App Marketplace installation or the manual code method, you're just minutes away from understanding what works and what frustrates your users.
The combination of Webflow's visual design platform and Clarity's behavior analytics creates a powerful optimization loop. You can watch real users struggle with a confusing layout, make adjustments in Webflow, and immediately verify the improvement through new session data.
For complex implementations requiring custom event tracking across multi-step funnels, advanced segmentation for specific user journeys, or integration with your existing marketing stack, our Webflow development team can build sophisticated analytics solutions that deliver actionable insights for your specific business goals.


Join readers commenting on this post!