One of Webflow's limitations is that forms can only have a single redirect URL. This creates a challenge when you have forms within CMS templates where each item needs its own unique post-submission destination. For example, you might want to send users to different download links, product pages, or external resources depending on which CMS item's form they submitted.
This step-by-step guide shows you how to implement the BRIX Templates dynamic redirect attribute (brix-dynamic-redirect) to override Webflow's default behavior, allowing each CMS item's form to direct users to a unique URL specified in your CMS data.
When to use dynamic form redirects in Webflow
- Resource libraries: Direct users to specific downloads after form submission (PDF, videos, files)
- Product catalogs: Send visitors to unique thank-you pages with product-specific information
- Event registrations: Redirect to different confirmation pages with event-specific details
- Lead generation: Send prospects to different content based on their interests
This approach eliminates the need for a generic success page and reduces friction in the user experience.
1. Prepare your Webflow CMS collection for dynamic form redirects
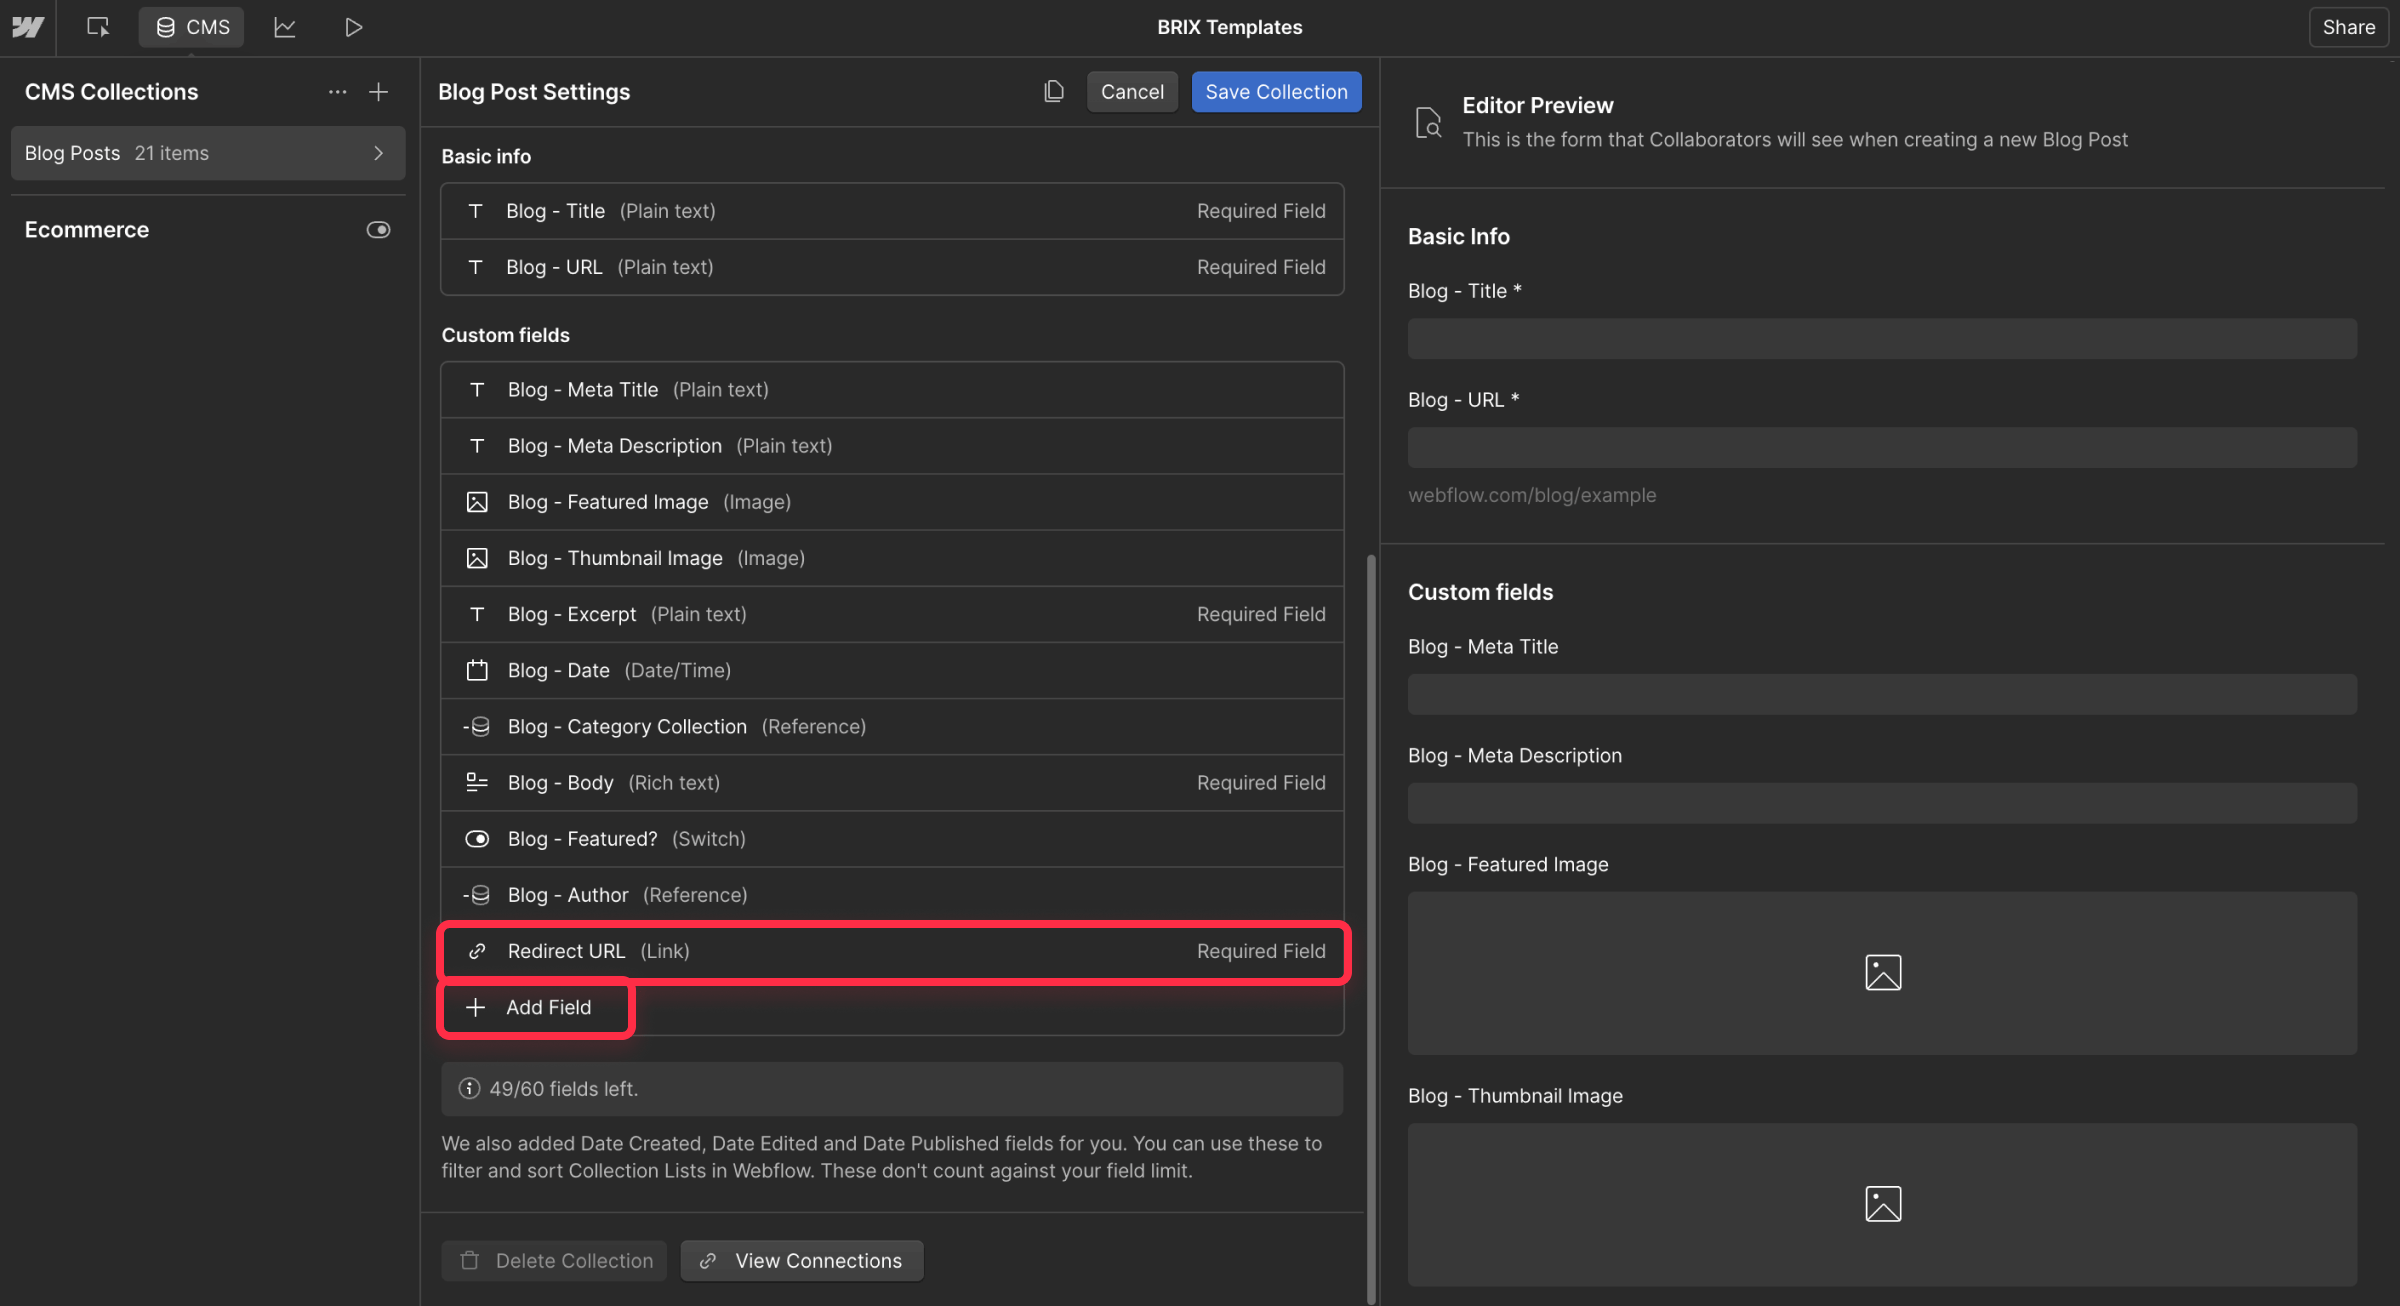
First, you need to add a field to store the unique destination URLs:
- Open your Webflow project and navigate to the CMS tab
- Select your collection (e.g., "Resources" or "Products")
- Click New Field + and add one of these field types:
- Link (recommended): This validates URLs automatically
- Plain Text: Use if you need more flexibility with URL parameters
- Name your field descriptively (e.g., "Redirect URL" or "Destination Link")
- For each CMS item, enter the complete URL where users should be directed after form submission
Tip: Always use absolute URLs starting with https:// to avoid navigation issues.
2. Add the dynamic redirect attribute to your Webflow form
Next, mark your form with the special attribute that connects to your CMS redirect URL:
- Open the CMS template page in Webflow Designer
- Select the form element that will use dynamic redirects
- In the right sidebar, click the Settings panel (⚙️ gear icon)
- Scroll down to Custom Attributes and click Add +
- Enter the following:
- Name: brix-dynamic-redirect
- Value: Click the "+" icon and select your CMS redirect URL field
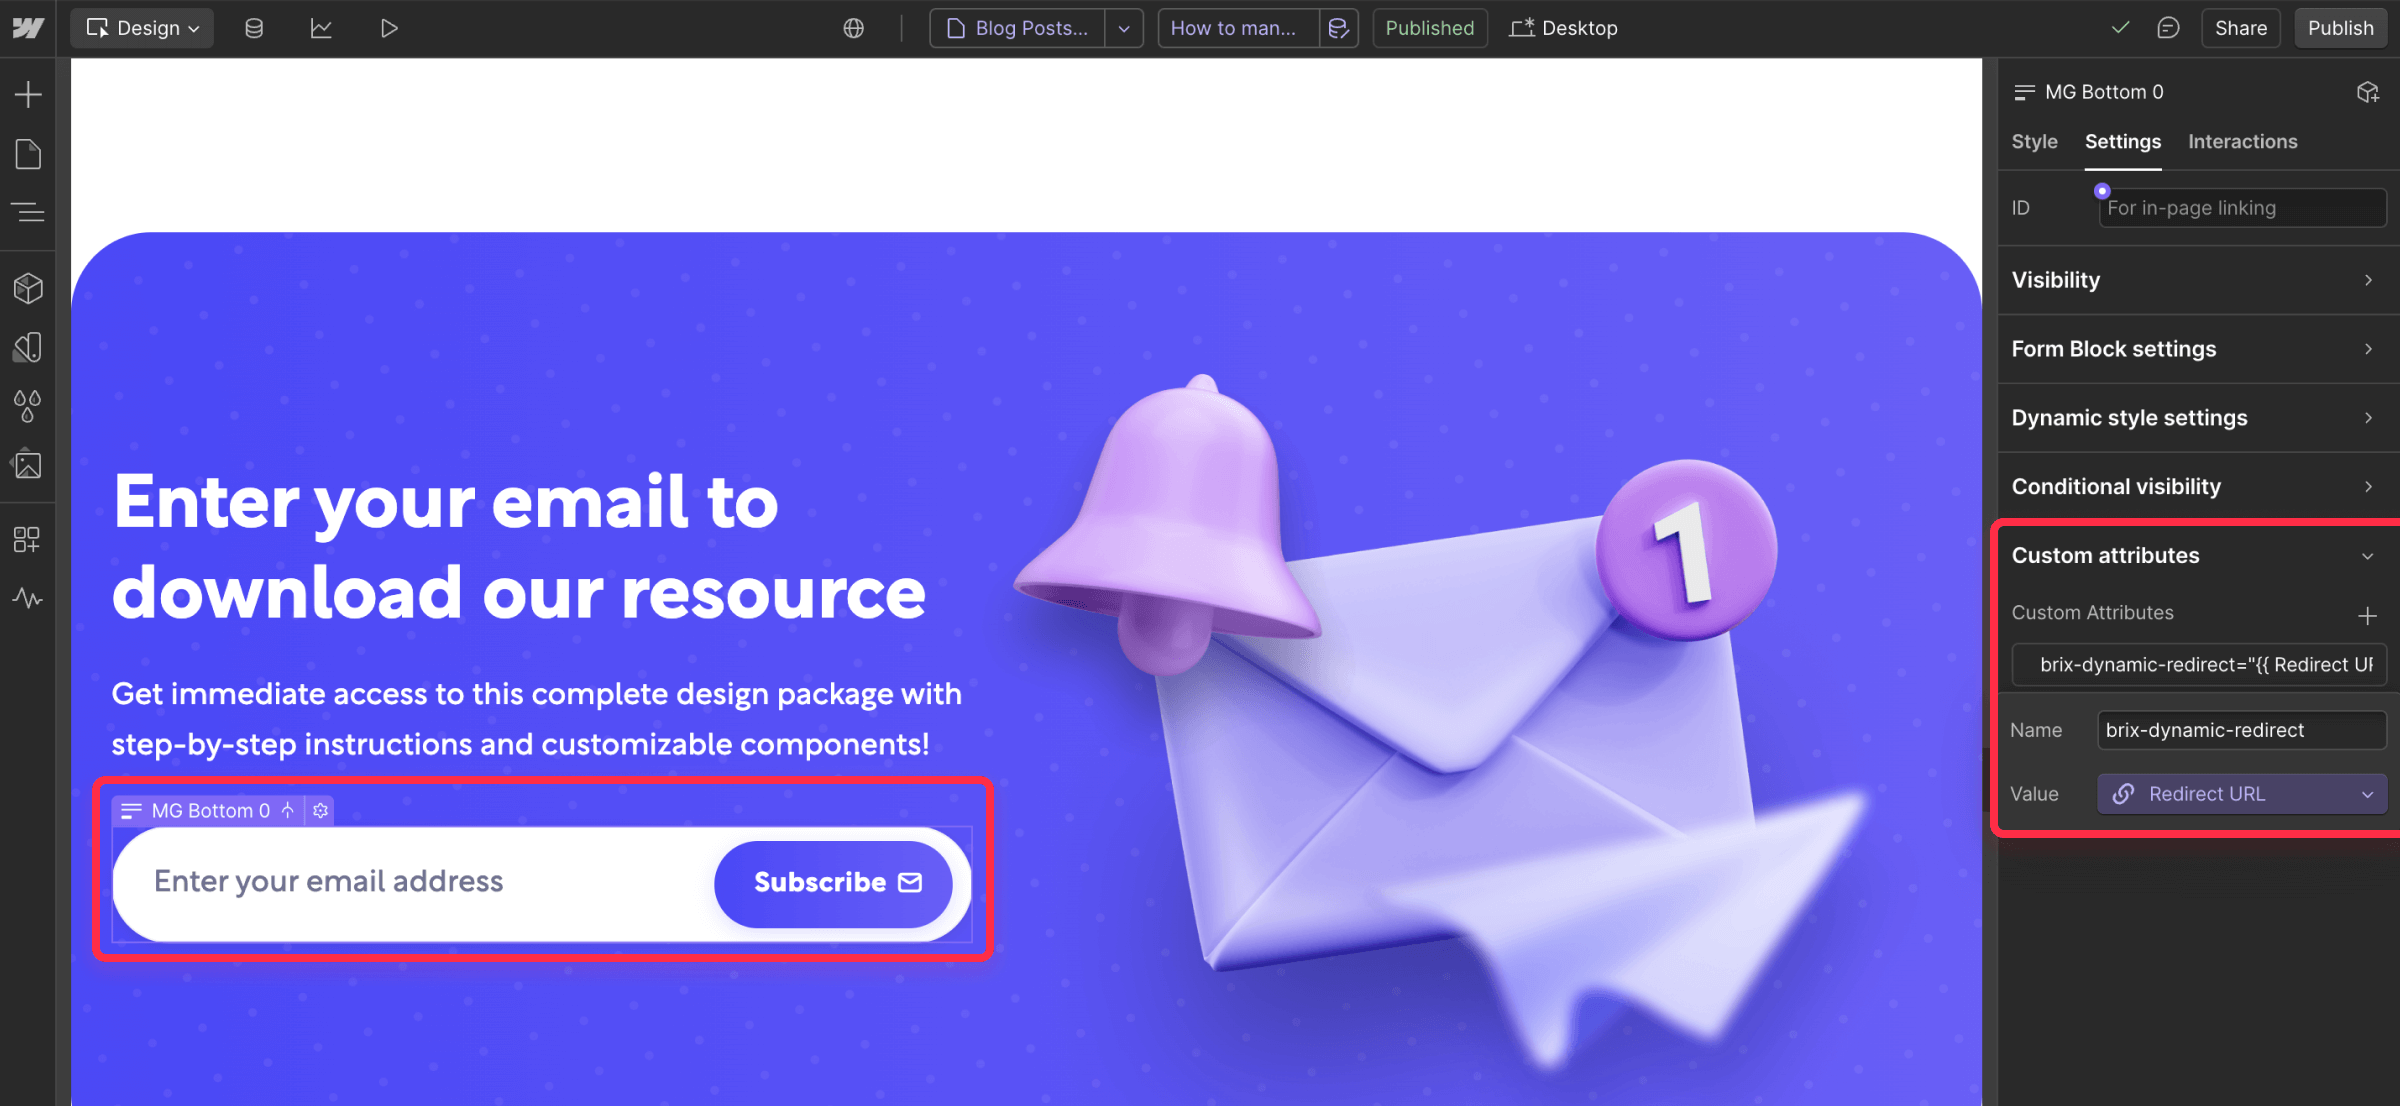
Note: In the form's standard settings, you can leave the Webflow "Redirect URL" blank or set a fallback URL.
3. Add the custom code for Webflow form dynamic redirects
Now you'll add the JavaScript that powers the dynamic redirect functionality:
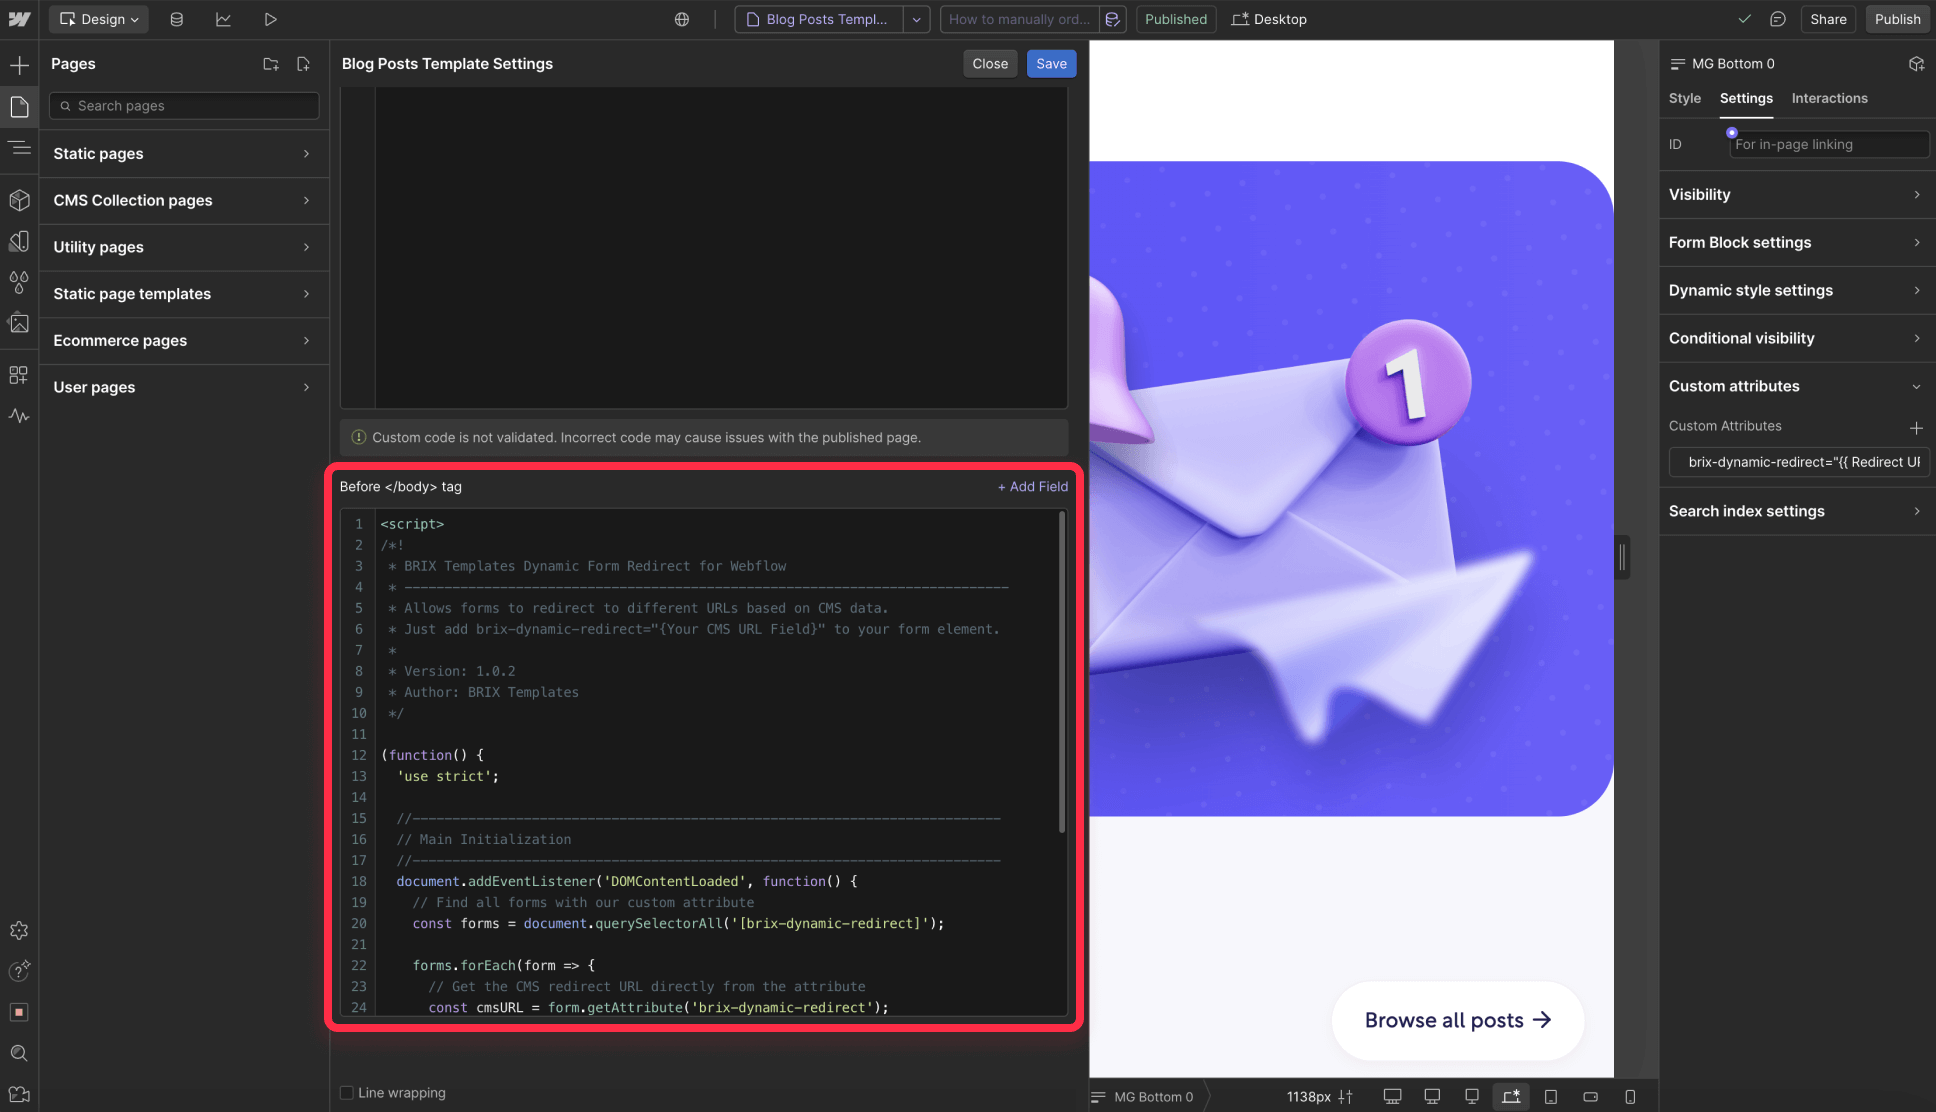
- In Webflow Designer, navigate to your CMS template page
- Click the Settings icon next to the page name in the left panel
- Scroll down to Before </body> tag in the Custom Code section
- Paste the following code:
<script>
/*!
 * BRIX Templates Dynamic Form Redirect for Webflow
 * ----------------------------------------------------------------------------
 * Allows forms to redirect to different URLs based on CMS data.
 * Just add brix-dynamic-redirect="{Your CMS URL Field}" to your form element.
 *
 * Version: 1.0.2
 * Author: BRIX Templates
 */

(function() {
  'use strict';

  //--------------------------------------------------------------------------
  // Main Initialization
  //--------------------------------------------------------------------------
  document.addEventListener('DOMContentLoaded', function() {
    // Find all forms with our custom attribute
    const forms = document.querySelectorAll('[brix-dynamic-redirect]');

    forms.forEach(form => {
      // Get the CMS redirect URL directly from the attribute
      const cmsURL = form.getAttribute('brix-dynamic-redirect');

      // Skip if no valid URL is found
      if (!cmsURL) return;

      // Set both redirect attributes for maximum compatibility
      form.setAttribute('redirect', cmsURL);
      form.setAttribute('data-redirect', cmsURL);

      console.log('BRIX Dynamic Redirect: Form will redirect to ' + cmsURL);
    });
  });
})();
</script>
The code automatically detects forms with the attribute and sets up the proper redirects using your CMS data. No code modification is needed.
Note: If you're using this functionality across multiple CMS templates, you can add the script to Project Settings > Custom Code > Footer Code instead. This applies the dynamic redirect behavior site-wide without having to add the code to each individual template page.
4. Publish and test your dynamic redirects
After setting up the code, it's time to get everything working:
- Save and publish your Webflow project to the staging webflow.io domain
- Navigate to one of your CMS pages with the form
- Fill out and submit the form
- Verify that you're redirected to the specific URL defined in that CMS item
- Test with several different CMS items to ensure the redirect varies correctly
Remember that form redirects only work in published environments, not in the Designer preview.
How to troubleshoot common issues
If your dynamic redirects aren't working properly, check these common problems:
- Incorrect attribute: Verify that brix-dynamic-redirect is applied correctly to the form element (not a container or button)
- CMS field mapping: Make sure you properly selected your CMS field for the attribute value using Webflow's "+" icon
- Empty CMS field: Ensure each CMS item has a valid URL in the redirect field
- Code placement: Confirm the script is added to the Before </body> section of your CMS template page
The script intentionally uses both redirect and data-redirect attributes to ensure compatibility with different versions of Webflow's form handling.
Conclusion
By implementing dynamic form redirects with the brix-dynamic-redirect attribute, you can create personalized user experiences that send visitors to the most relevant destination based on CMS context. This simple solution dramatically improves your site's usability by removing the limitation of Webflow's single redirect URL setting.
The approach requires minimal code and works reliably across all Webflow plans. Best of all, once implemented, it continues to work automatically as you add new items to your CMS collection—no need to update the code or create new forms.
Need more advanced form functionality or custom Webflow solutions? Our agency specializes in extending Webflow's capabilities with clean, maintainable code. Contact us to learn how we can help optimize your Webflow project.


Join readers commenting on this post!