Most people don't visit robots.txt out of technical curiosity. They get there because they need to restrict crawlers from accessing a folder, stop a bot from hammering their site, or figure out why Google Search Console says "blocked by robots.txt." If that's you, you're in the right place.
The good news: Webflow now lets you create and edit robots.txt rules natively from Site settings > SEO > Indexing. For many standard Webflow setups, this no longer requires Cloudflare Workers or other workarounds. The real challenge isn't whether you can edit robots.txt in Webflow — it's knowing which rules to write, how to publish them correctly, and how to verify they're actually working on the right domain.
This guide covers what robots.txt does in Webflow, how to set it up step by step, the most useful rules you can copy and adapt, how to test your setup, the common mistakes that break crawling, and when you might still need an advanced solution.
What robots.txt actually does in Webflow
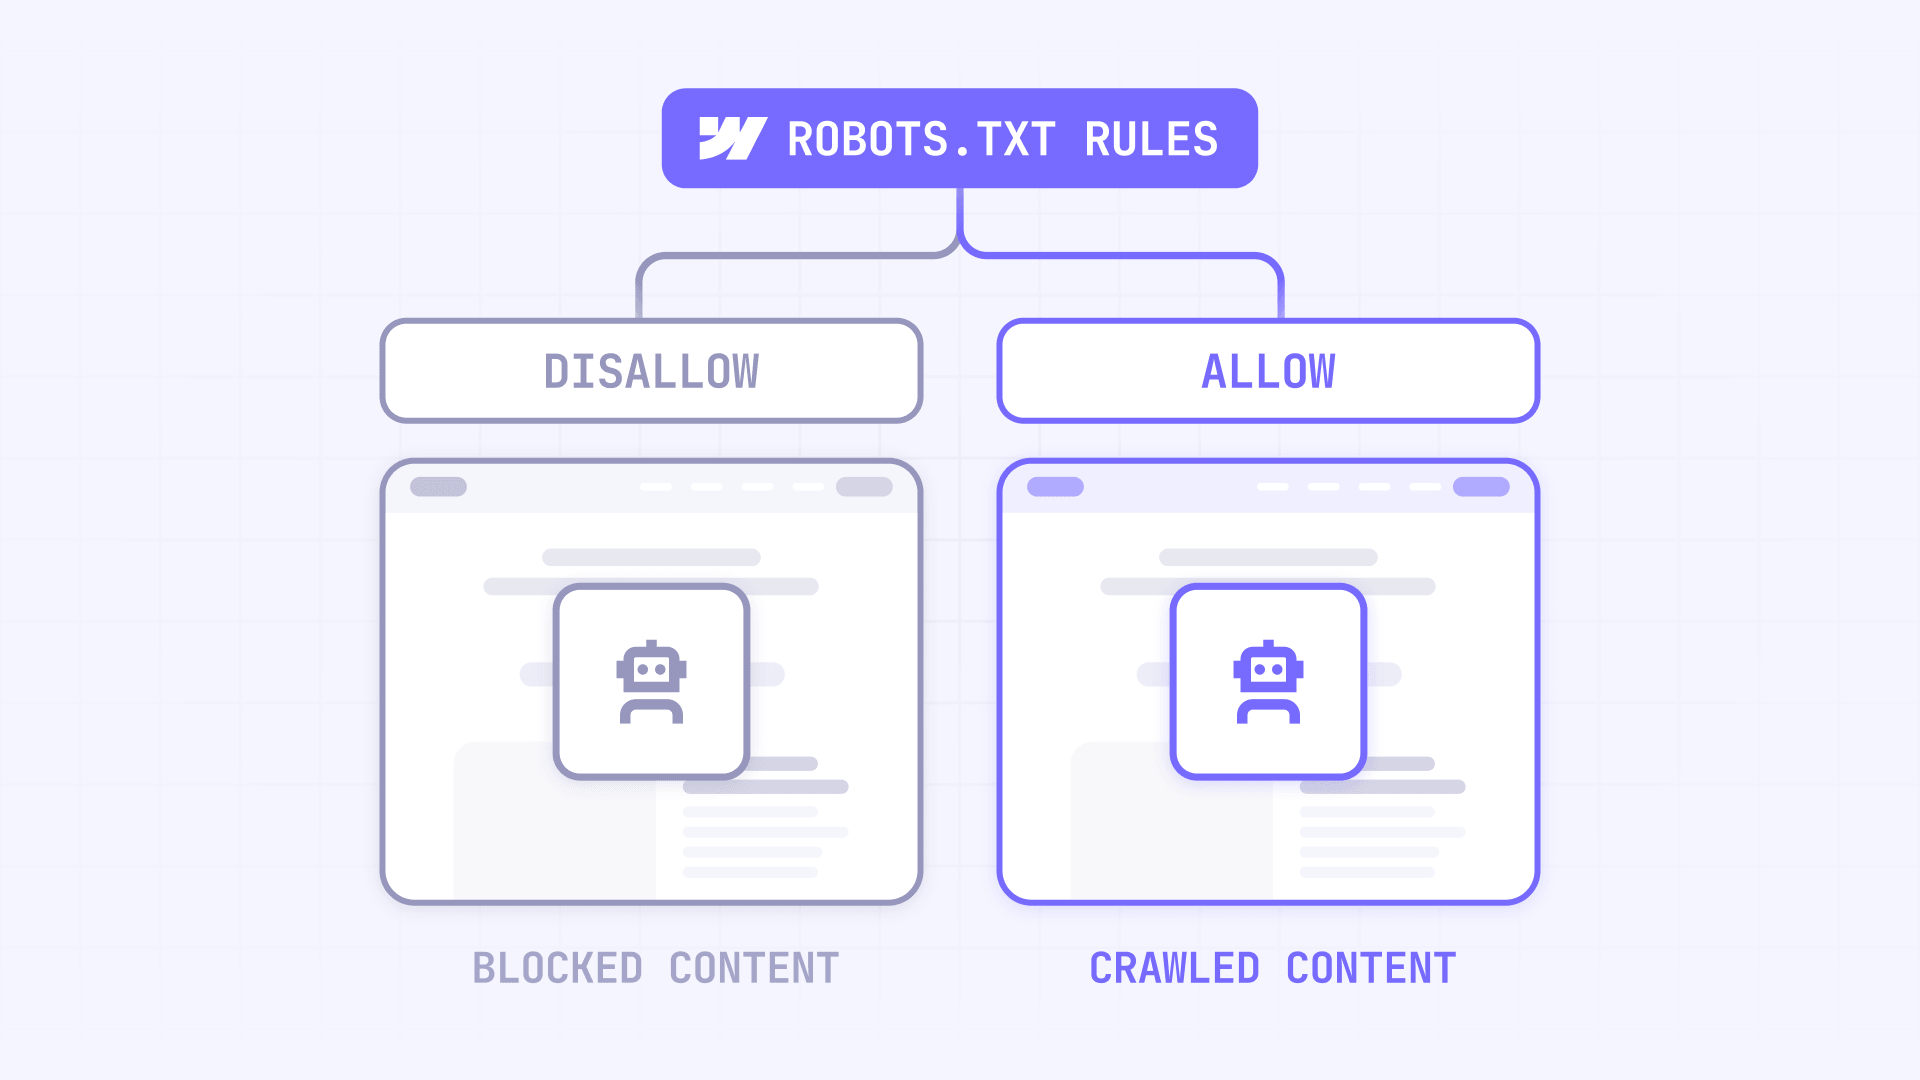
A robots.txt file tells bots — search engine crawlers, AI scrapers, monitoring tools — which pages and folders they're allowed to visit on your site. It lives at the root of your domain (yourdomain.com/robots.txt) and works as a set of instructions, not a wall. Most legitimate crawlers like Googlebot and Bingbot respect it. Others won't.
What robots.txt is good for in Webflow
robots.txt controls crawling, not indexing. This is an important distinction: a page blocked in robots.txt can still appear in search results if Google discovered it through an external link or other signal — it just won't have a description or snippet. robots.txt tells crawlers which pages to skip, but it does not guarantee that a URL will be removed from search results. If you need to remove a page from search results entirely, use a noindex tag instead.
robots.txt is useful when you want to:
- Block non-essential pages from being crawled: admin pages, internal tools, filtered URL variations, thank-you pages
- Prevent AI bots from scraping your content for training data
- Temporarily hide your entire site from search engine crawlers during development
- Manage crawl budget by directing bots toward your most important pages
If your goal is to remove pages from Google's index, check out our guide on how to unindex pages in Webflow.
What Webflow adds automatically to your robots.txt
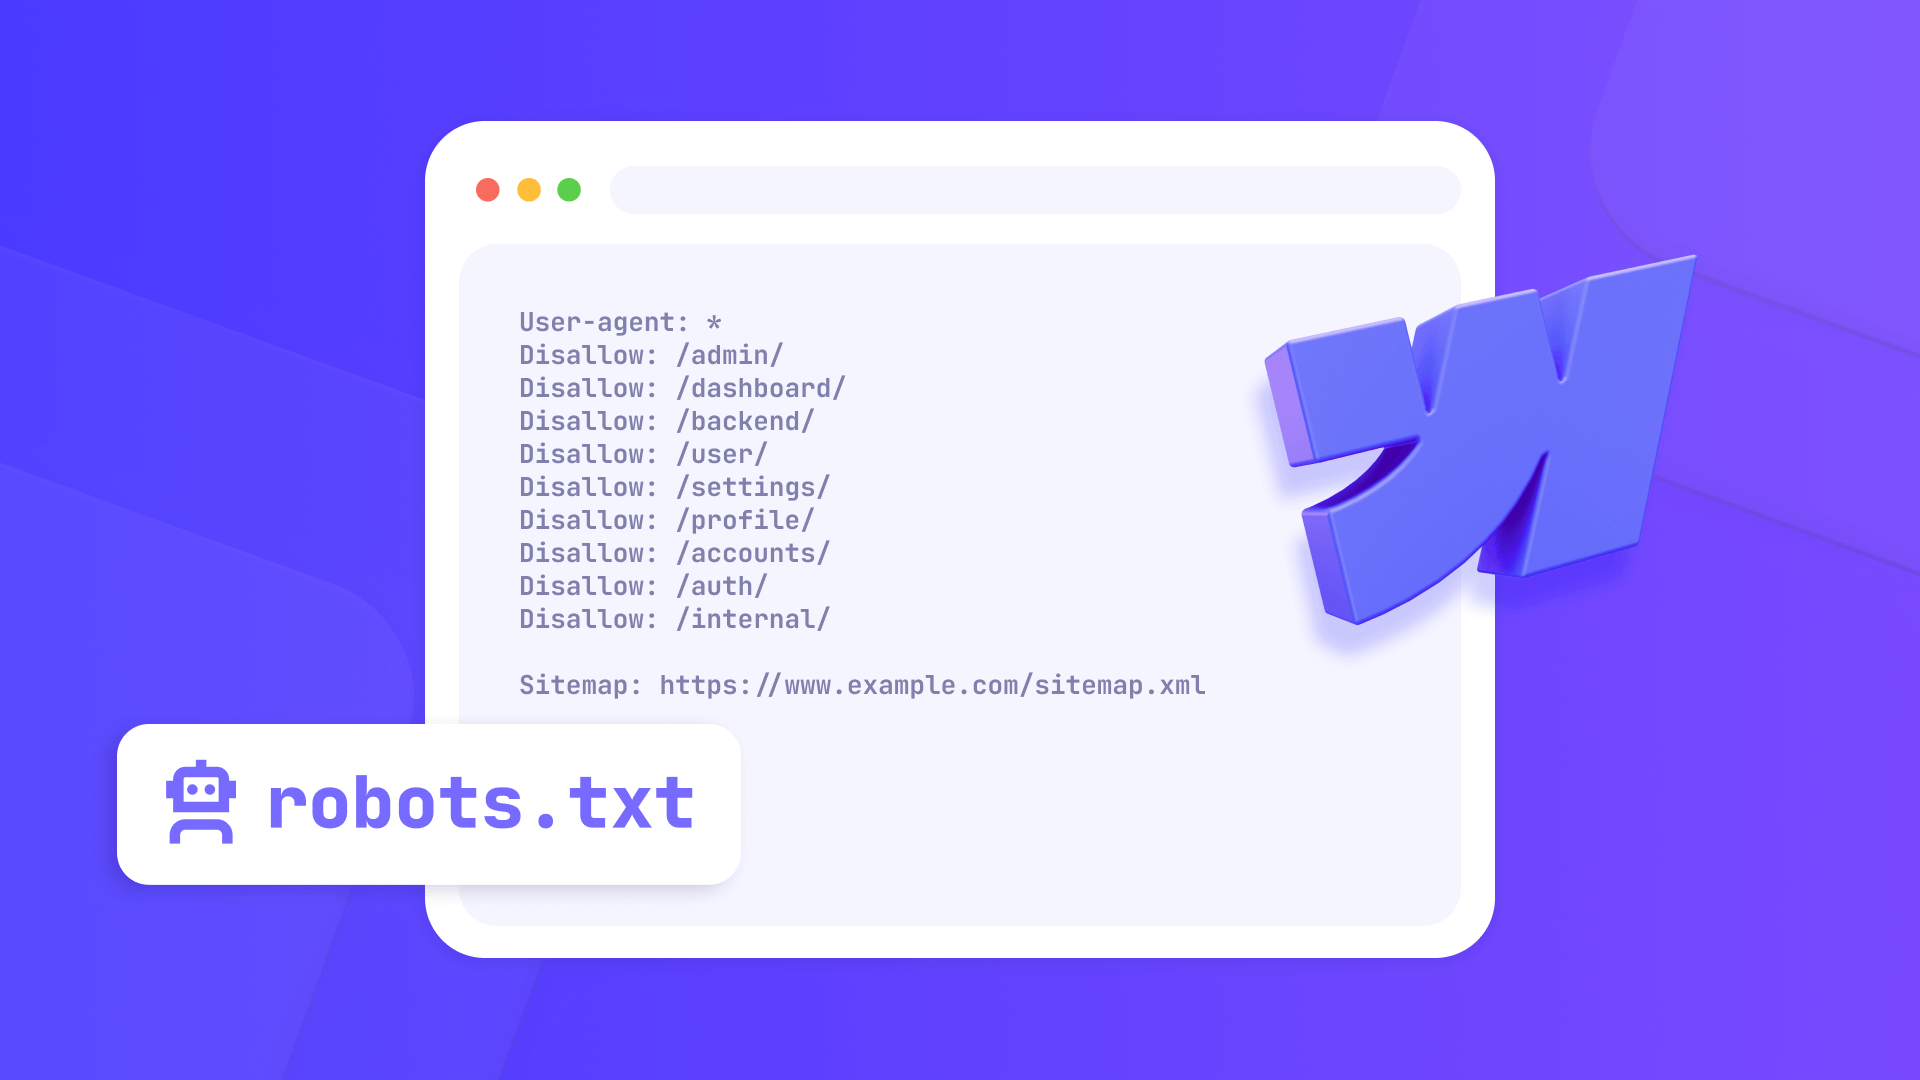
Before you edit anything, Webflow already generates a robots.txt file for your site. By default, it includes a reference to your sitemap:
Sitemap: https://yourdomain.com/sitemap.xml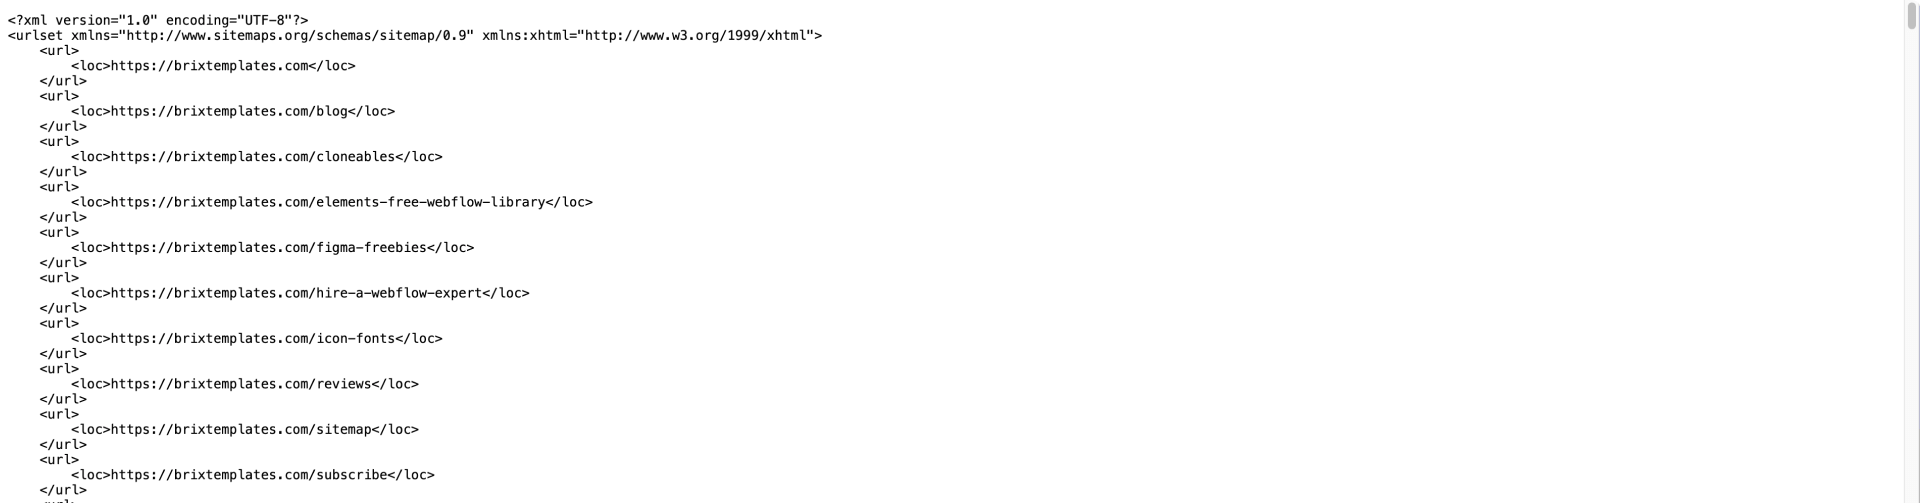
This tells crawlers where to find your sitemap so they can discover all your pages efficiently. Webflow also provides a toggle to remove this line if you prefer to handle sitemap discovery separately.
How to create and edit robots.txt in Webflow
Webflow's native robots.txt editor lives in your site settings. Here's how to find it and use it.
Open Site settings > SEO > Indexing in Webflow
Open your Webflow project and go to Site settings > SEO > Indexing. This is where you'll find the robots.txt editor along with other indexing controls like auto-generated sitemaps and canonical URL settings.
Add your robots.txt rules in Webflow
In the robots.txt section, you'll find a text area where you can add your rules. Type or paste your rules following standard robots.txt syntax — each rule block starts with a User-agent line followed by Disallow or Allow directives.
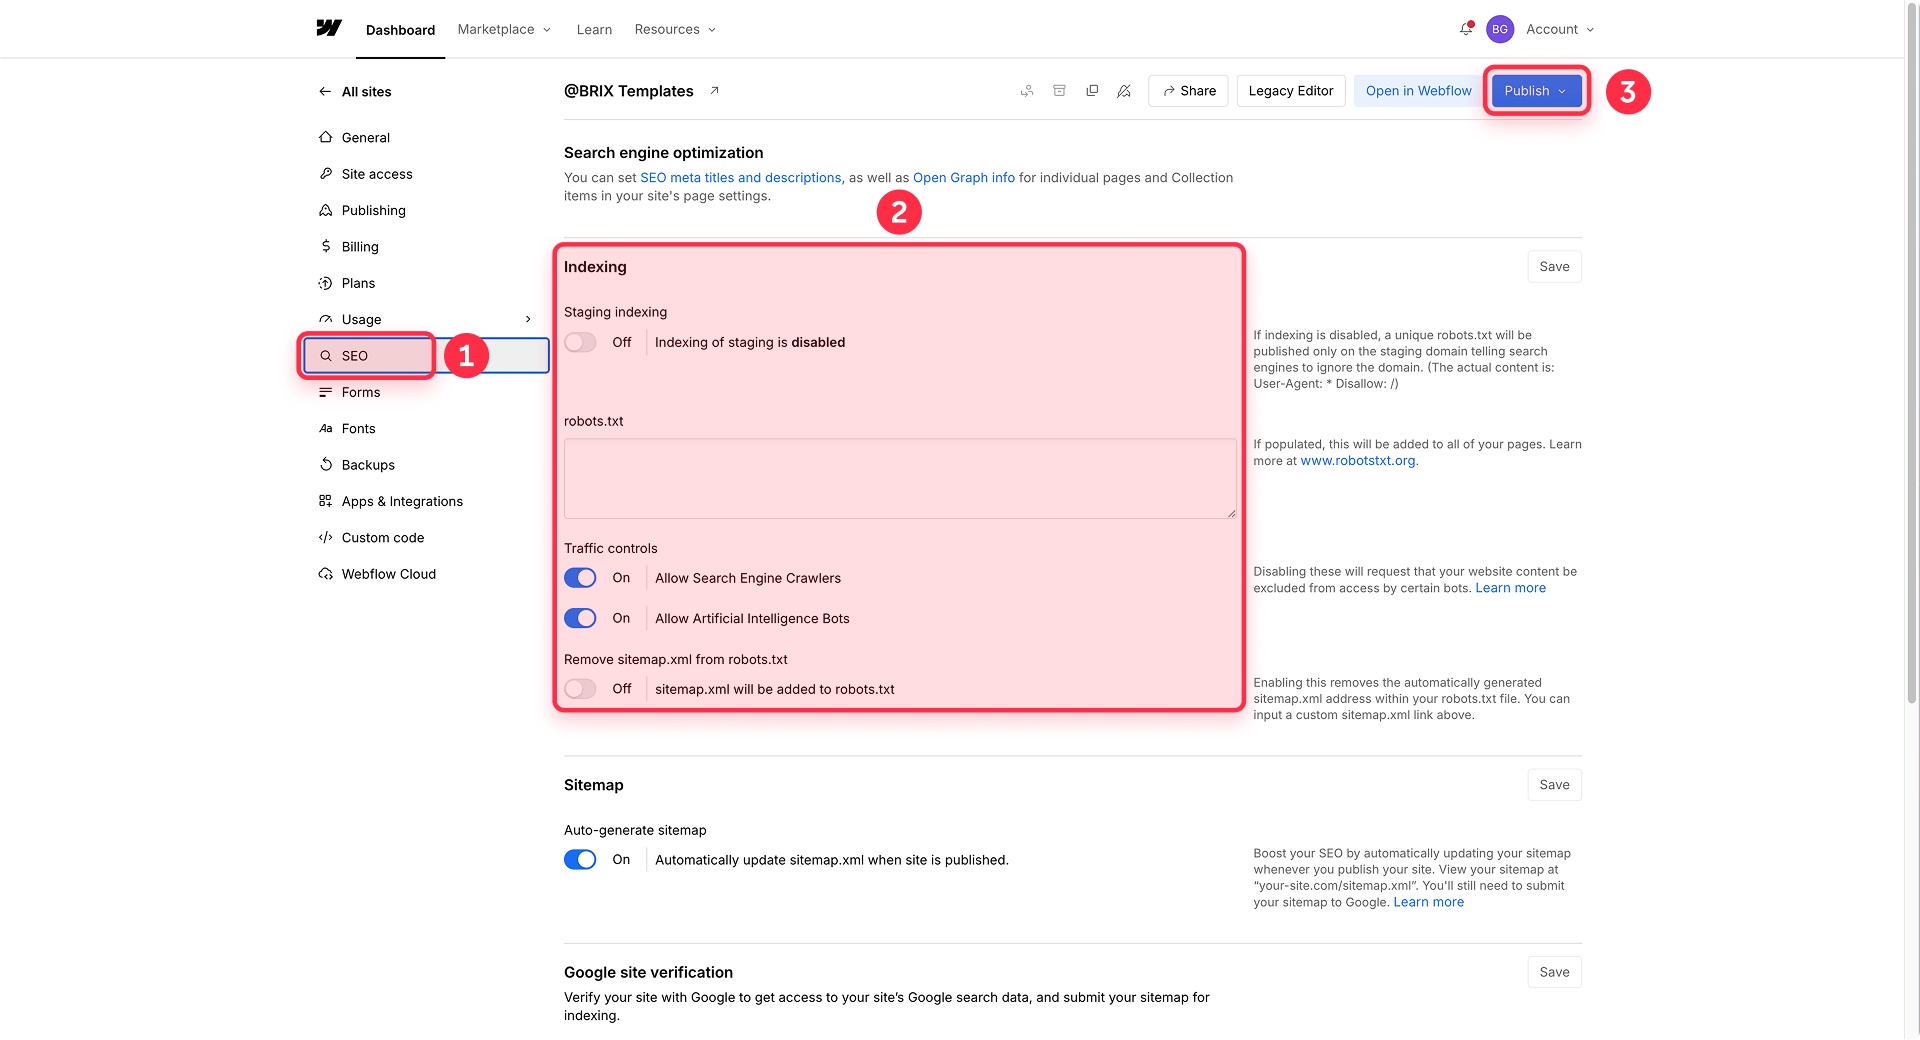
Decide whether to keep or remove the default sitemap line in Webflow
By default, Webflow includes a link to your sitemap in your robots.txt file. If you want to remove it, toggle Remove sitemap.xml from robots.txt to on. In many cases, keeping the sitemap reference is a reasonable default — it can help crawlers discover your pages more efficiently.
Save, publish, and verify your robots.txt in Webflow
Click Save and then publish your site. Your robots.txt changes won't take effect until you publish. After publishing, open your browser and navigate to yourdomain.com/robots.txt on your primary domain. You should see your rules live.
The most useful robots.txt rules for Webflow sites
Here are the rules you'll use most often, with ready-to-copy examples.
Allow all bots to crawl your Webflow site
This is the default behavior — there's generally no need to add anything if you want all bots to crawl everything. But if you previously blocked something and want to reset:
User-agent: *
Allow: /
Block a specific folder or Collection path in Webflow
Use this to prevent crawlers from accessing entire sections of your site, like old CMS Collections, internal pages, or filter-based URL variations:
User-agent: *
Disallow: /old-collection/
Disallow: /internal/
The trailing slash matters. Disallow: /folder/ blocks everything inside that folder. Disallow: /folder also blocks a page called "/folder" at the root level.
Block a specific page in Webflow
To block a single page without affecting others:
User-agent: *
Disallow: /thank-you
Disallow: /coming-soon
Allow specific bots and block all others in Webflow
If you only want certain crawlers to access your site:
User-agent: Googlebot
Allow: /

User-agent: Bingbot
Allow: /

User-agent: *
Disallow: /
Remember: specific bot rules override general rules. If you define rules for Googlebot, it follows those and ignores the catch-all.
Block AI bots in your Webflow robots.txt
To discourage AI companies from scraping your content for training data, you can add specific user-agent rules for commonly known AI crawlers. The following are widely referenced examples, but keep in mind that user-agent strings can change over time and new crawlers may emerge:
User-agent: GPTBot
Disallow: /

User-agent: ChatGPT-User
Disallow: /

User-agent: CCBot
Disallow: /

User-agent: Google-Extended
Disallow: /

User-agent: ClaudeBot
Disallow: /

User-agent: PerplexityBot
Disallow: /

User-agent: Bytespider
Disallow: /
Many AI crawlers may respect these directives, but behavior varies by provider and bot. New crawlers appear regularly, and some providers change their user-agent strings over time. Also note that Google-Extended controls whether Google can use your content for AI model training — it is not the same as blocking Google Search crawling (Googlebot handles that separately). Check each provider's documentation for their current user-agent strings and what each one controls. For a complementary approach to controlling how AI models interact with your site, see our guide on adding an llms.txt file to Webflow.
Temporarily block your entire Webflow site
If your site is under development or you need to temporarily hide it from all search engines:
User-agent: *
Disallow: /
Remove this rule and republish when you're ready for crawlers to return. Keep in mind that Google may take hours or even days to recrawl and reflect the change.
How to test and verify your robots.txt in Webflow
Adding rules is only half the work. The other half is confirming they're live and working on the right domain.
Check the live file on your primary domain in Webflow
Open your browser and go to yourdomain.com/robots.txt. Make sure you're checking the canonical or primary domain — not necessarily your webflow.io subdomain or a non-primary hostname. If Google is crawling your staging subdomain instead of your live domain, see our guide on how to stop Google from indexing your Webflow staging subdomain. The file you see should reflect the rules you configured.
Re-publish before testing with third-party tools in Webflow
robots.txt changes only go live after you publish your site. If you test before publishing, you'll see the old version. Always publish first, then verify.
Confirm the sitemap line resolves in your Webflow robots.txt
If you kept the default sitemap reference, check that the URL in your robots.txt points to your primary domain:
Sitemap: https://yourdomain.com/sitemap.xmlOpen that URL in your browser to confirm the sitemap loads correctly.
Use Search Console to spot blocked-by-robots issues in Webflow
Google Search Console's Page Indexing report shows pages affected by robots.txt rules. Look for the "Blocked by robots.txt" status to see which pages Google couldn't crawl. If you see pages you didn't intend to block, check your rules for overly broad patterns.
Know the difference between a bad rule and a domain mismatch in Webflow
Many "robots.txt not working" problems aren't caused by bad rules. They happen because you're checking the wrong hostname. robots.txt is evaluated per host/domain, so checking a non-canonical hostname (such as your webflow.io subdomain instead of your primary domain) can lead to misleading results. Always verify on the domain Google actually crawls — your canonical domain.
Common robots.txt mistakes in Webflow
Testing the wrong hostname or non-primary domain in Webflow
This is a common issue. robots.txt is evaluated per host/domain, so if your canonical domain is www.yourdomain.com but you're checking yourdomain.com or your webflow.io subdomain, you may see different content — or no file at all. Always test on the primary domain configured in Webflow.
Blocking the entire site by accident with Disallow: / in Webflow
A single misplaced slash in a Disallow rule can block your entire site from being crawled. Disallow: / means "block everything." Disallow: (with nothing after it) means "block nothing." That one character makes the difference between a functional site and one that crawlers can no longer access.
Adding a duplicate sitemap entry in Webflow
Webflow already adds a sitemap line to your robots.txt by default. If you also add one manually in your rules, you'll end up with two sitemap references. This generally won't cause problems, but it's unnecessary and can confuse some crawlers. Either let Webflow handle it or toggle off the default and add your own.
Thinking robots.txt is private in Webflow
robots.txt is a public file. Anyone can view it by typing yourdomain.com/robots.txt in their browser. Don't use it to "hide" sensitive pages, admin panels, or private content. Use authentication, password protection, or noindex tags instead.
Assuming every bot respects your Webflow robots.txt rules
Webflow's own documentation warns that not all bots follow robots.txt rules. Legitimate search engine crawlers like Googlebot and Bingbot will respect them. Malicious scrapers and poorly configured bots won't. robots.txt is a polite request, not a security mechanism.
Forgetting some setups need more than native Webflow settings
If you're running a reverse proxy, multiple domains pointing to the same Webflow site, or a localization setup with different crawl needs per region, native robots.txt settings may not cover your requirements. These advanced scenarios need custom solutions at the proxy or CDN layer.
When native Webflow robots.txt is not enough
Most Webflow sites are well served by the native robots.txt editor. But some setups need more.
For the specific case of AI crawlers and bandwidth-heavy bot traffic, see our guide on how to block bots and crawlers from your Webflow site. It covers the practical robots.txt, meta tag, and WAF options to use when native controls are not enough.
Multi-domain or localization setups with different crawl needs in Webflow
If you have multiple domains pointing to the same Webflow project (for example, separate domains for different countries), you may need different robots.txt rules for each domain. Webflow's native editor applies the same rules to all domains, so you'll need a reverse proxy to serve domain-specific robots.txt files.
Reverse proxy setups and your Webflow robots.txt
When your site runs behind a reverse proxy (NGINX, Cloudflare, etc.), the proxy server can intercept requests to /robots.txt and serve a custom file before the request reaches Webflow. Webflow's documentation notes that if your origin subdomain (like your-site.webflow.io) remains as the default domain, the auto-generated robots.txt and sitemap may point to that subdomain instead of your custom domain.
Hosting your own robots.txt and sitemap in front of Webflow
In reverse proxy setups, you can host your own robots.txt file on the proxy server. Here's a basic NGINX example that serves a custom robots.txt:
location = /robots.txt {
    alias /path/to/your/robots.txt;
    default_type text/plain;
}
This bypasses Webflow's native robots.txt entirely and serves your custom file from the proxy.
When Cloudflare Workers still make sense for Webflow robots.txt
Cloudflare Workers are useful when you need to serve different robots.txt files based on the hostname, handle complex URL rewriting alongside robots.txt, or manage robots.txt at the edge across multiple regions. This was the primary method before Webflow added native support. Today, it's only necessary for advanced setups that go beyond what the native editor handles.
If your team needs more control than Webflow’s native robots.txt settings allow, our Webflow agency can help implement a custom setup that matches your SEO, staging, and indexing requirements.
Common misconceptions about Webflow robots.txt
- "You still need Cloudflare to create robots.txt in Webflow." — False. Webflow has native robots.txt editing at Site settings > SEO > Indexing.
- "If robots.txt loads on one domain, SEO tools will read it correctly on every hostname." — False. robots.txt is evaluated per host/domain, so different hostnames may serve different files. Check your canonical domain specifically.
- "Webflow leaves sitemap handling entirely up to you." — False. Webflow auto-adds the sitemap reference and gives you a toggle to remove it.
- "Every bot will respect your robots.txt rules." — False. Only legitimate crawlers tend to follow robots.txt. Malicious or poorly configured bots generally ignore it.
- "Native robots.txt settings cover every advanced proxy or multi-domain setup." — False. Complex setups with reverse proxies or multiple domains may need custom solutions.
Frequently asked questions about robots.txt in Webflow
Can you create a robots.txt file directly in Webflow?
Yes. Go to Site settings > SEO > Indexing and add your rules in the robots.txt section. Click Save and publish your site for the changes to take effect. You typically don't need third-party tools or workarounds for standard use cases. Availability of custom robots.txt controls may vary by plan or current product configuration, so it's worth confirming against Webflow's latest plan documentation.
Where do you edit robots.txt in Webflow?
Open your Webflow project, navigate to Site settings > SEO > Indexing, and scroll to the robots.txt section. You'll find a text area where you can add, edit, or remove rules. Changes must be saved and published before they appear on your live site.
How do you add or remove sitemap.xml from robots.txt in Webflow?
Webflow adds the sitemap reference automatically. To remove it, toggle Remove sitemap.xml from robots.txt to on in Site settings > SEO > Indexing. To add a custom sitemap entry, include it in your robots.txt rules as a Sitemap: directive with the full URL. Avoid duplicates by only using one method.
Why does your robots.txt work on www but fail on the root domain in Webflow?
robots.txt is evaluated per host/domain, so different hostnames may serve different content. If your canonical domain is set to www.yourdomain.com but someone (or a tool) checks yourdomain.com, they may see a different file. Make sure your DNS and Webflow settings point both versions to the same site, and always verify your robots.txt on the domain Google actually crawls.
Why does Google Search Console say "Blocked by robots.txt" on your Webflow site?
Google is telling you that a page it tried to crawl matches a Disallow rule in your robots.txt. Check your rules for overly broad patterns — a Disallow: / blocks everything, and a Disallow: /folder can accidentally match pages you didn't intend. Use Google Search Console's URL Inspection tool to test specific pages against your live robots.txt.
Why does your robots.txt show as unavailable in SEO tools for your Webflow site?
This usually means the tool is checking a hostname where robots.txt doesn't resolve — often the webflow.io subdomain or a non-primary domain. Verify that your primary domain is properly configured in Webflow and that the file loads when you visit yourdomain.com/robots.txt directly in a browser.
Can you block AI bots in Webflow with robots.txt?
Yes. Add separate Disallow: / rules for each AI bot user-agent in your robots.txt editor. Commonly referenced AI crawlers include GPTBot, ChatGPT-User, CCBot, Google-Extended, ClaudeBot, PerplexityBot, and Bytespider, but this list is not exhaustive and user-agent strings can change. Many AI crawlers may respect these directives, but behavior varies by provider and bot — check each provider's documentation for their current user-agent strings.
Can you block a single page or folder in Webflow robots.txt?
Yes. Use Disallow: /your-page for a single page or Disallow: /your-folder/ for a folder. The trailing slash on folders is important — it tells crawlers to block everything inside that path. Without it, you might also block a page at the root level with the same name.
Can you edit robots.txt on a free Webflow plan?
Custom robots.txt controls may depend on your plan or site configuration and should be confirmed against current Webflow plan availability. Webflow does generate a basic robots.txt file automatically, but the ability to add custom rules in Site settings > SEO > Indexing has historically been a paid-plan feature. If you don't see the editor in your settings, check Webflow's current plan documentation to confirm what's available on your plan.
When do you still need Cloudflare Workers or a reverse proxy for robots.txt in Webflow?
You may need an advanced setup when you have multiple domains serving different robots.txt files, a reverse proxy that intercepts requests before they reach Webflow, or a localization setup where each domain needs different crawl rules. For most single-domain Webflow sites, the native editor is sufficient.
Conclusion
Webflow's native robots.txt editor handles the vast majority of crawling control needs — blocking pages, folders, and specific bots, managing your sitemap reference, and keeping your crawl budget focused on what matters. The key is getting the rules right, publishing before testing, and verifying on your canonical domain.
If your setup involves reverse proxies, multi-domain configurations, or complex localization, you may need to serve robots.txt from the proxy layer. But for many standard single-domain Webflow sites, the native settings at Site settings > SEO > Indexing are sufficient.
Need help with advanced Webflow SEO or a complex multi-domain setup? Our Webflow agency can help you get it right.


Join readers commenting on this post!