
So, you want to connect GetResponse forms to your Webflow site? Great choice! Whether you’re building your email list or automating lead capture, we’ve got you covered. Below, we’ll walk through two easy methods—direct embedding (super quick!) and Zapier (for automation fans). No coding knowledge required—just follow the steps!

Method 1: Directly embed a GetResponse form in Webflow
This is the best option for those who don't have a lot of technical knowledge and need a simple solution.
Why you’ll love this:
- Done in minutes.
- Uses GetResponse’s ready-made designs.
- Zero tech headaches.
Step 1: Create your form in GetResponse
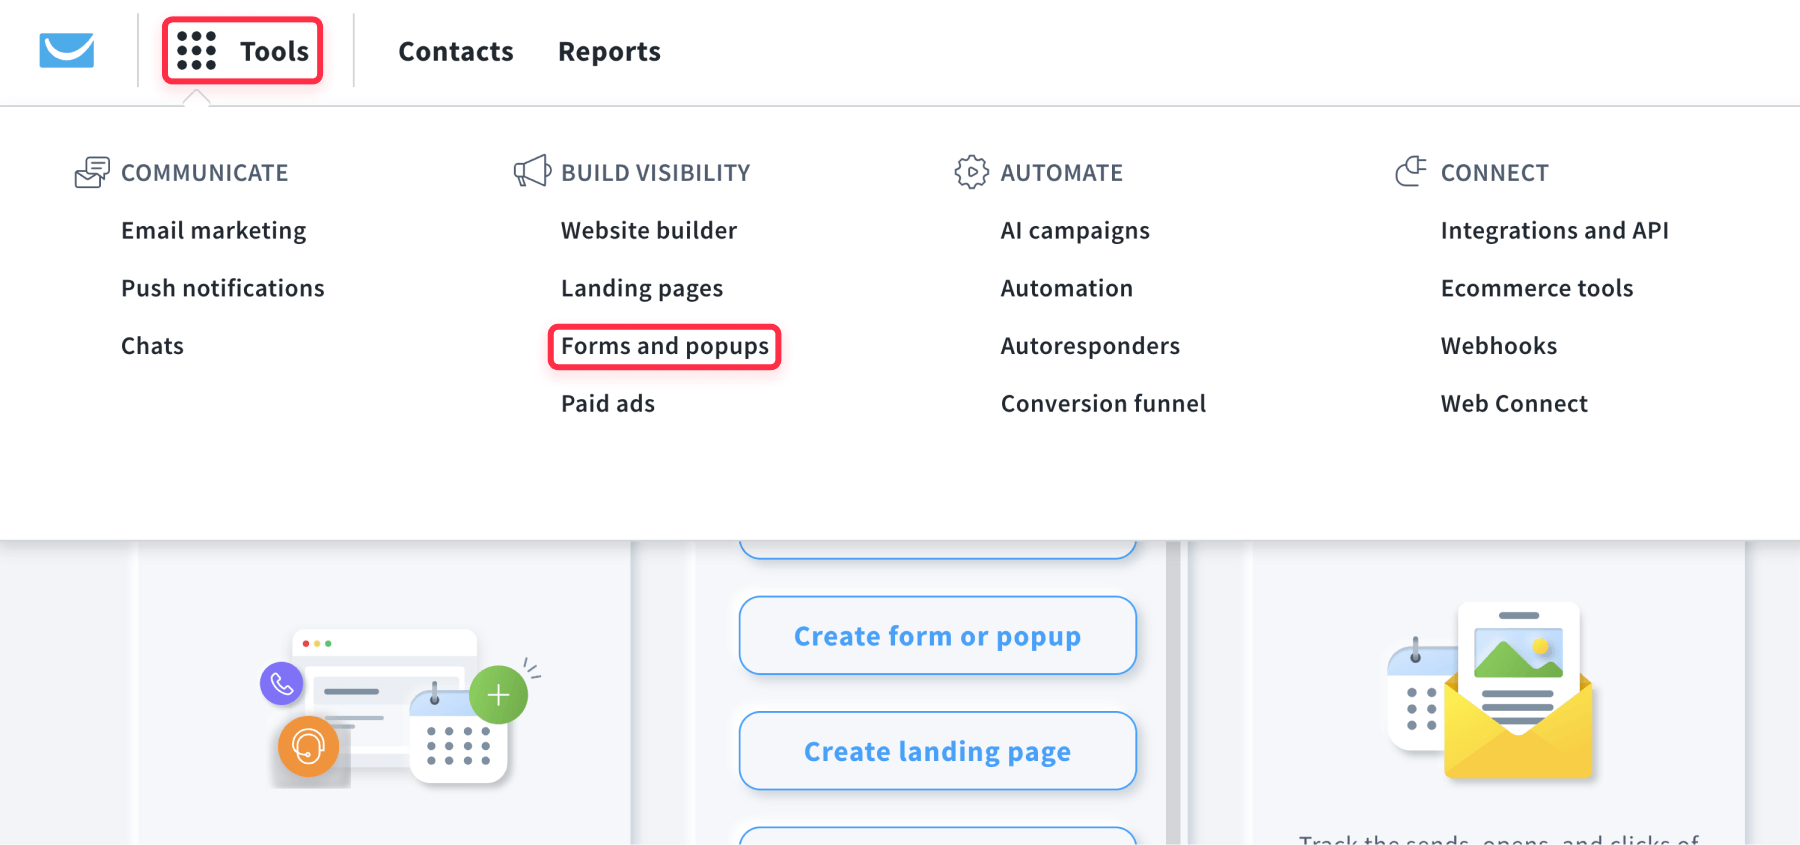
- Go to "Tools" > "Forms and Popups" in GetResponse.
- Click "Create" and pick “Embedded in a page”.
- Choose a template: Pick a predesigned option (quick!) or a blank one for full customization.
Step 2: Adjust basic styles and settings
- Design: Adjust colors, fonts, and layout to match your brand.
- Set up fields: Add email, name—whatever fields you may need.
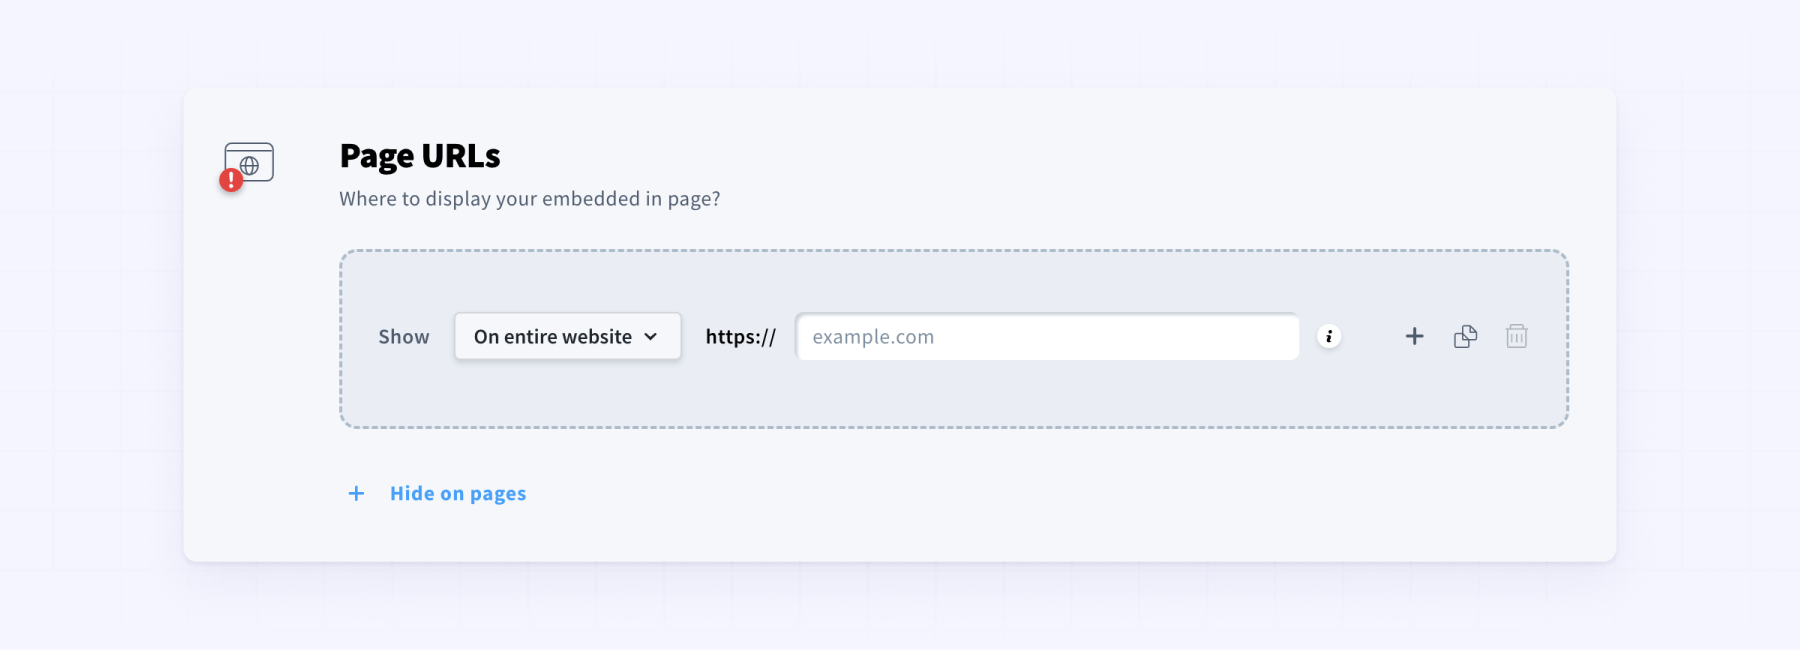
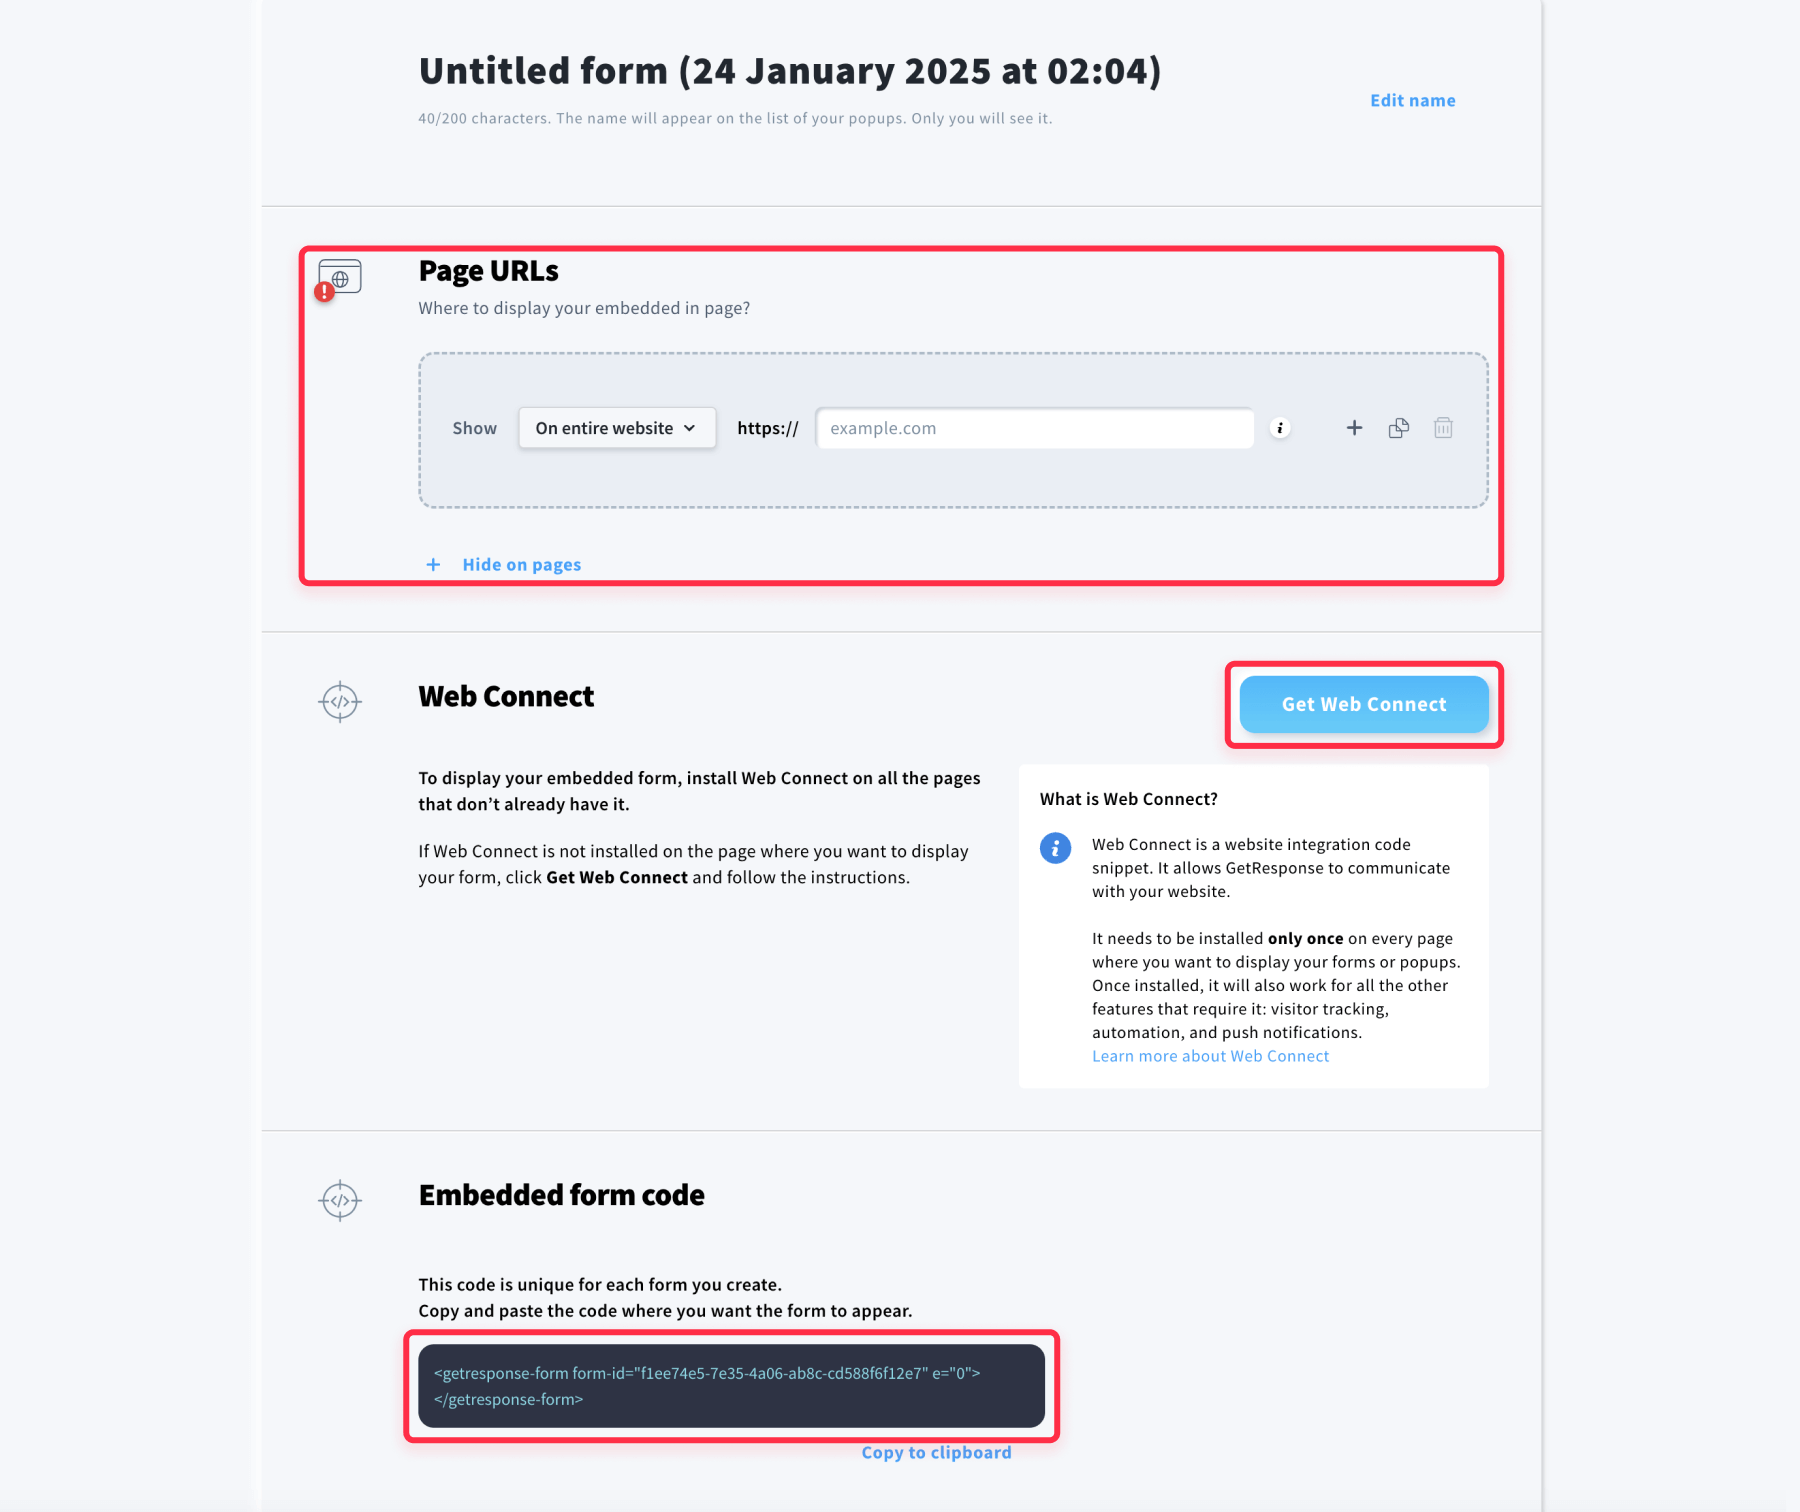
- Copy the code: Under Page URLs, add your site, then copy the Web Connect script and form code.
Step 3: Add the form to Webflow
Paste the script:
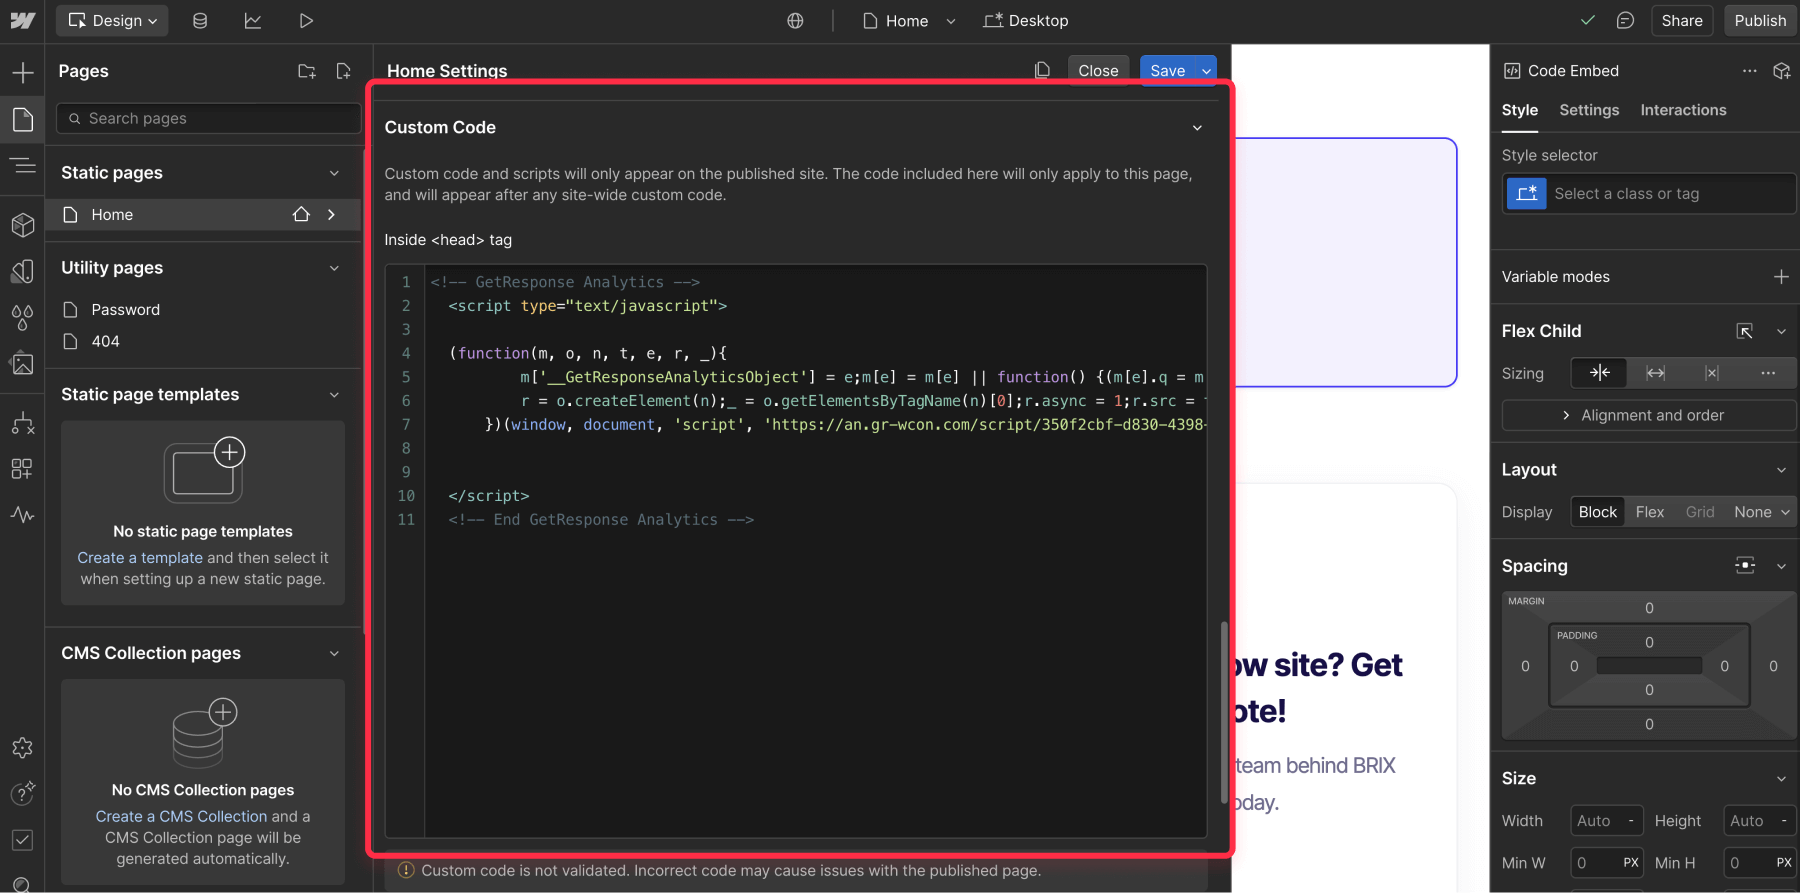
- In Webflow, open your page settings.
- Under Custom Code > inside <head> tag, paste the Web Connect script.
(This helps GetResponse talk to your site!)
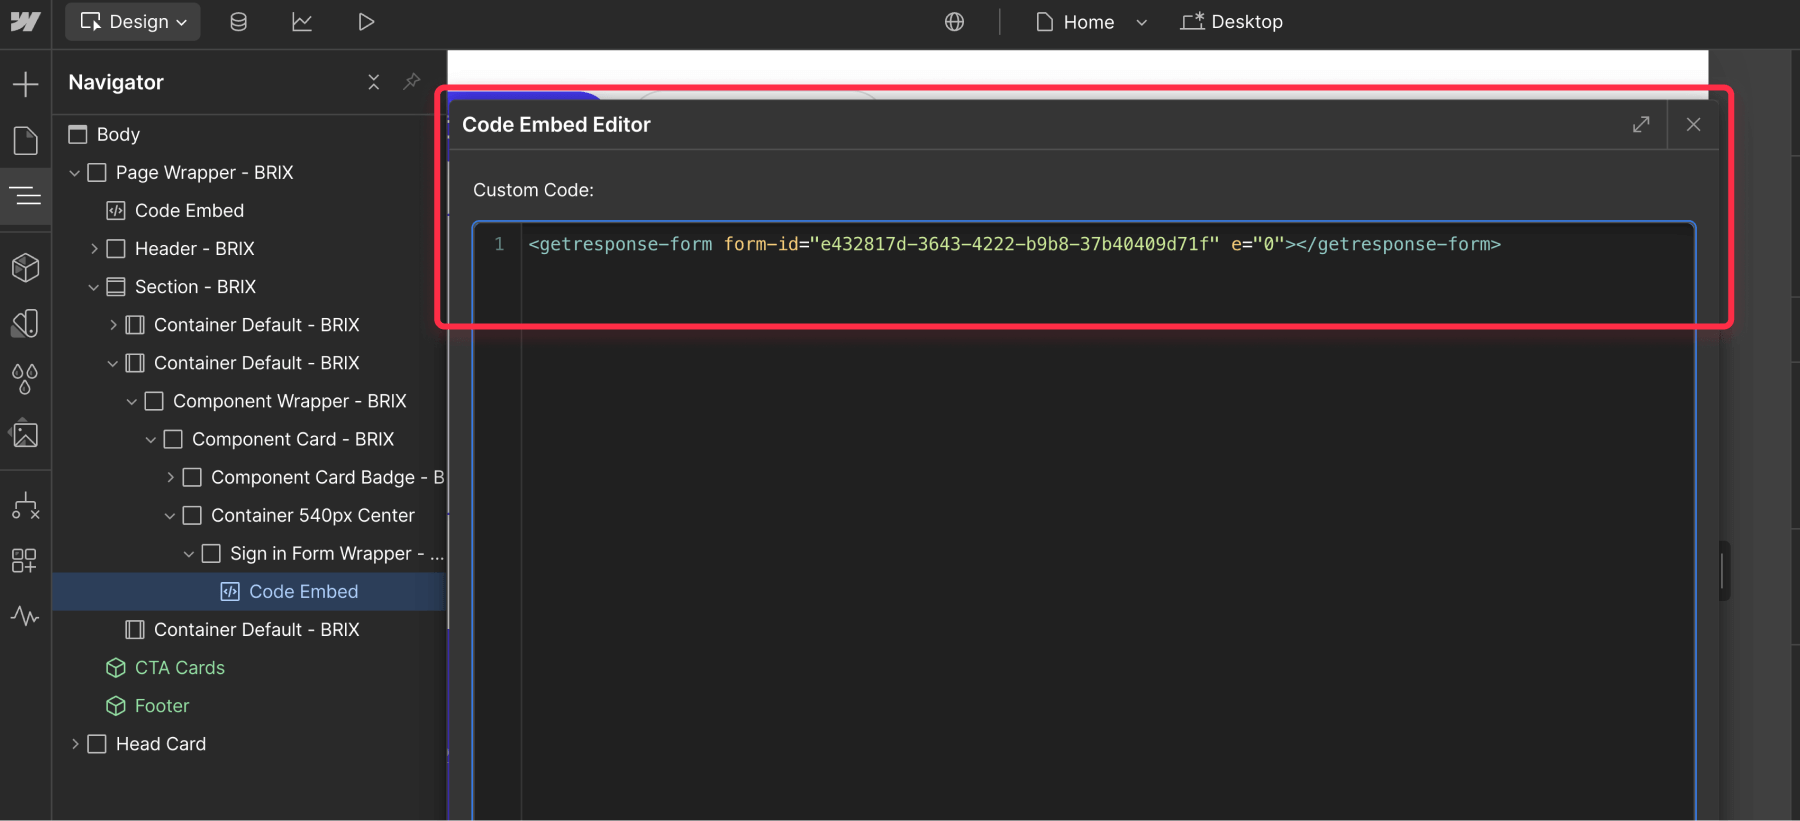
Embed the form:
- Drop an "Embed Code" element where you want the form.
- Paste your GetResponse form code.
- Publish and celebrate—you’re live!
Method 2: Connect GetResponse with Webflow forms with Zapier
For marketers who love automation (and want to keep their Webflow design forms).
Why this method rocks:
- Keep your custom Webflow form design.
- Auto-add contacts to GetResponse.
- Perfect for multi-step workflows.
Step 1: Prep your Webflow form
- Design your form in Webflow (make it pretty!).
- Name fields clearly: Use labels like “Email” or “First Name” so Zapier recognizes them later.
Step 2: Build your Zapier “Zap”
- Log in to your Zapier account or create one if you don’t have it yet.
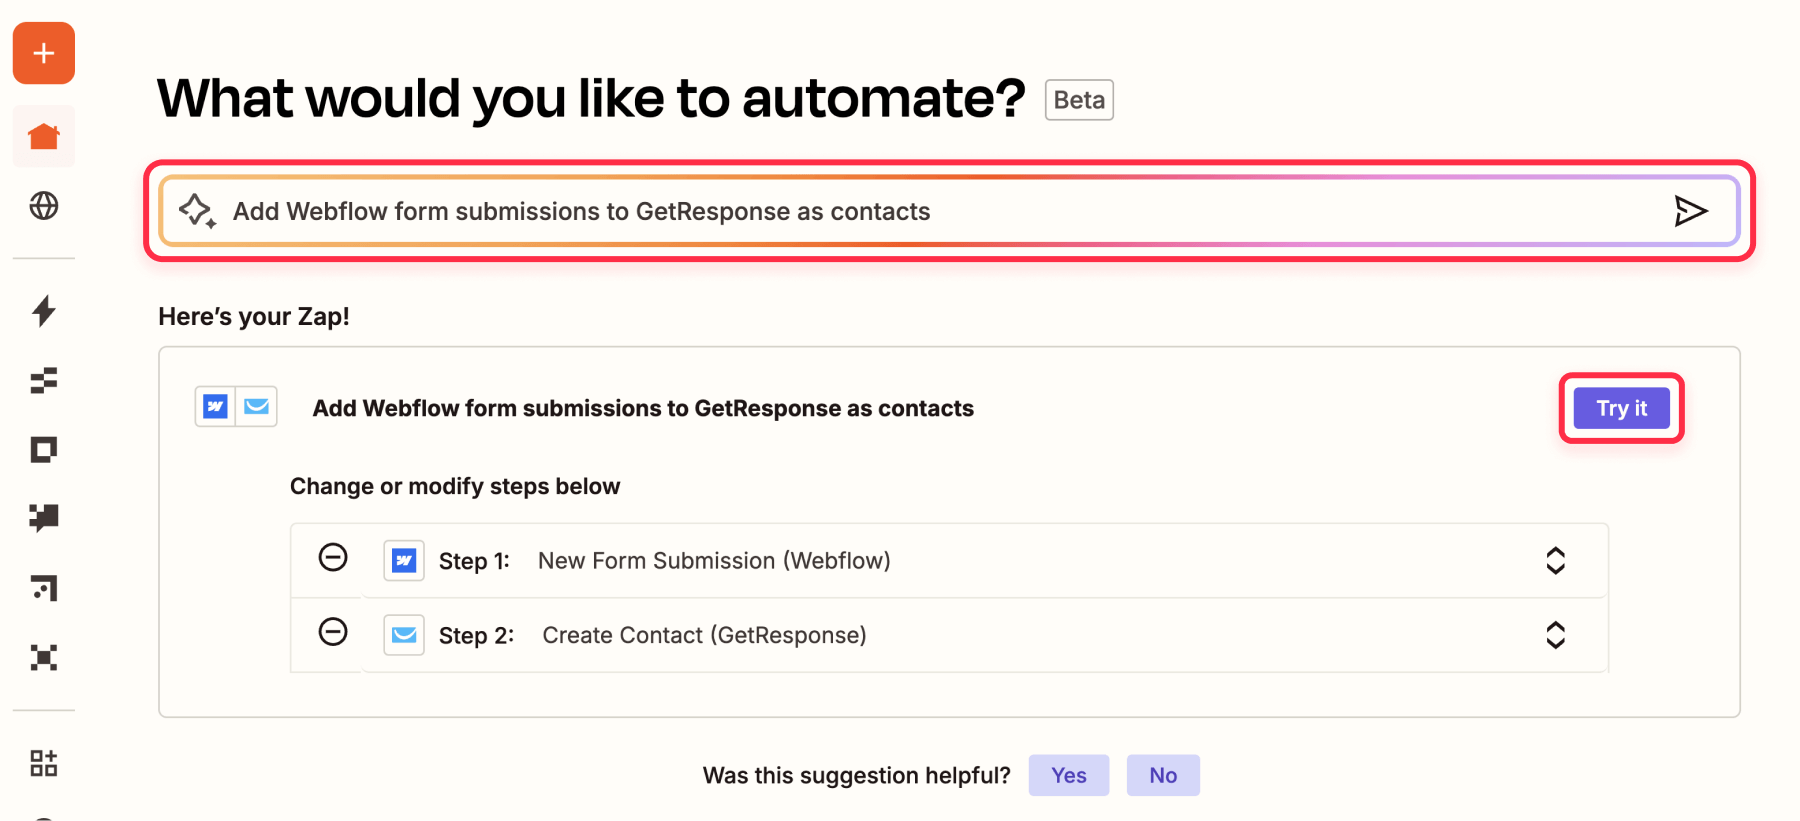
- Generate a new automation in the AI automation prompt box with: Add Webflow form submissions to GetResponse as contacts.
- Click the Try it button to start with the template.
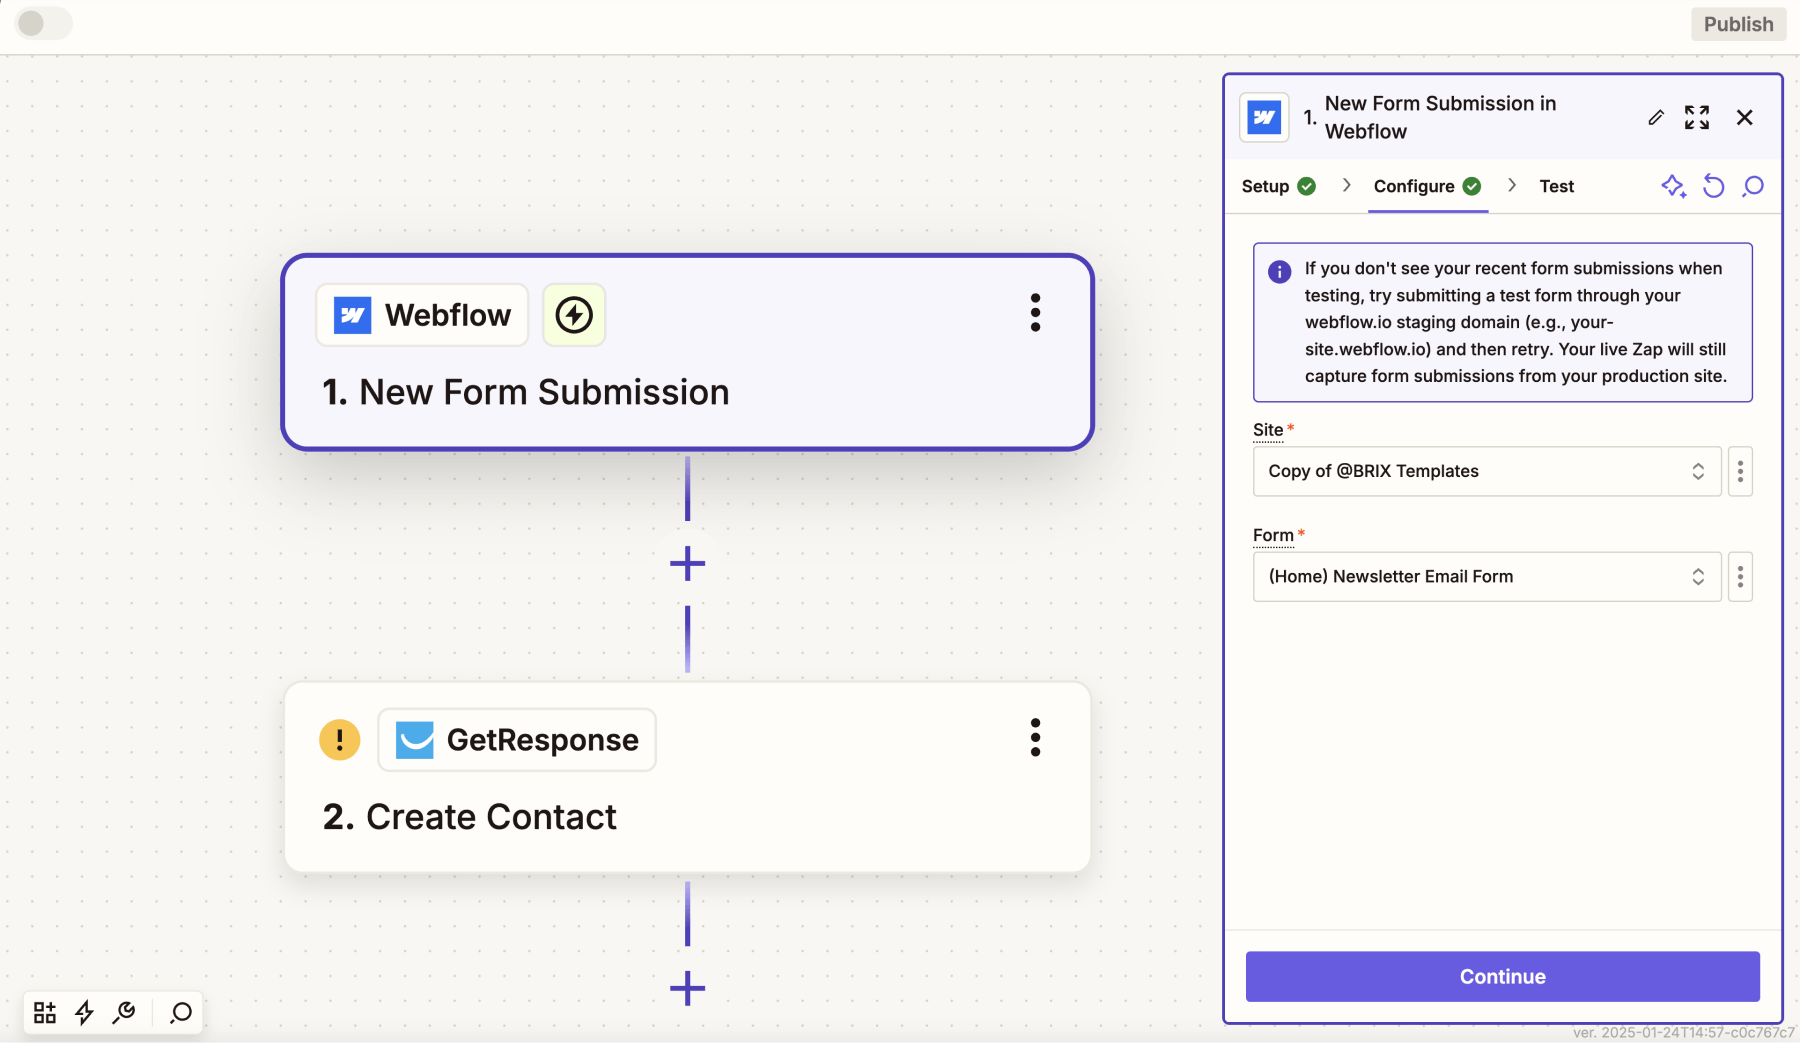
Step 3: Connect your Webflow account to Zapier
- Link your Webflow account to Zapier.
- Pick the site where your form is located.
- Choose the form you want to automate (e.g., “Newsletter”).
- Submit a test entry to ensure Zapier successfully detects your form data.
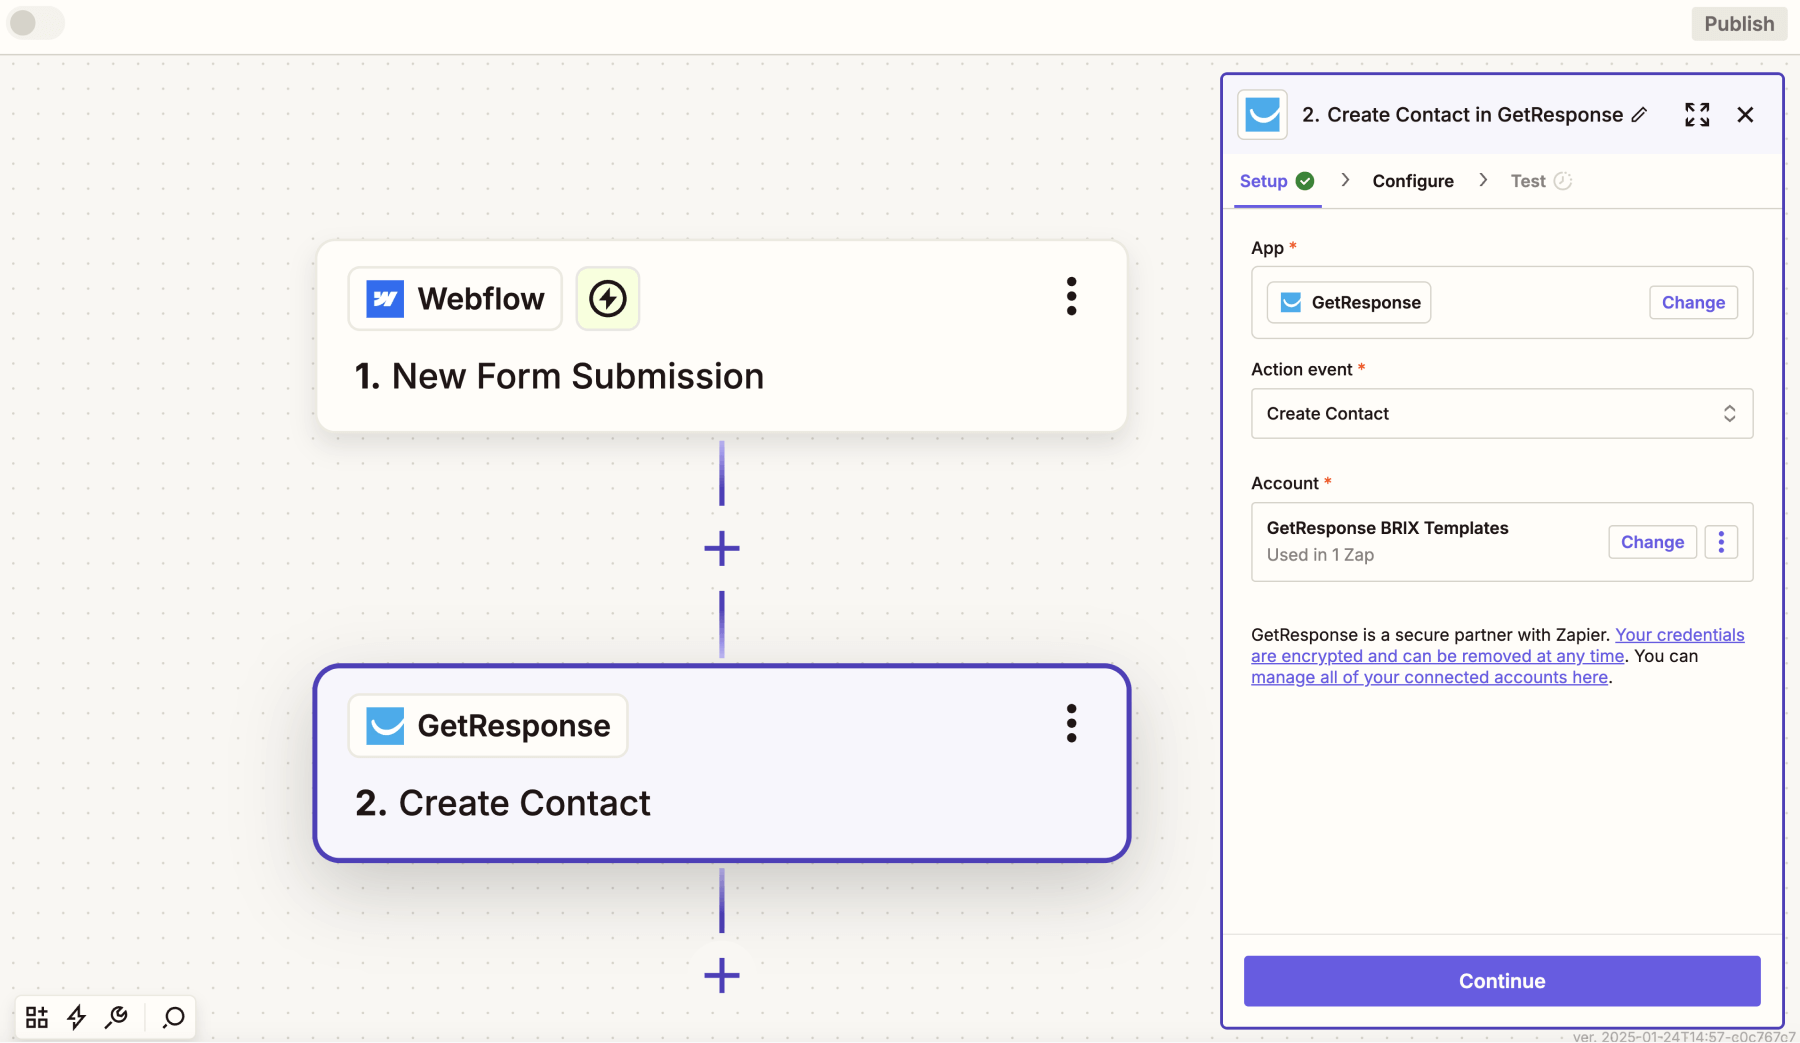
Step 4: Connect your GetResponse account with Webflow!
- In Zapier, click 'Sign in' to connect your GetResponse account and authorize the connection.
- Next, locate your GetResponse API key by clicking Tools > Integrations and API in GetResponse. Click "Generate API key" and copy it immediately as it will only be shown once.
- In Zapier, paste your API key and select "GetResponse" as the Account Type. If using GetResponse MAX, enter your MAX domain name (optional).
- Finally, click "Yes, Continue to GetResponse" and wait for the connection verification. Once successful, proceed to configure your automation settings.
Step 4: Finalize and launch
- Test again: Submit another form entry. Check if it lands in GetResponse.
- Turn on the Zap and let automation do the rest.
Troubleshooting common issues
If your form isn’t working as expected:
- Form not showing up?
- Double-check where you pasted the code in Webflow. The Web Connect script goes in the <head> section, and the form code goes in an Code Embed element.
- Zapier automation failing?
- Ensure field names in Webflow (e.g., “Email”) exactly match what’s in Zapier.
- Test the Zapier connection again. If it fails, re-copy your GetResponse API key (it’s hidden after the first use!).
Which method should you choose?
Go direct embed if:
- You want it done fast.
- You’re okay using GetResponse’s design.
- No need for fancy automations.
Choose Zapier if:
- You want full control over your form’s look.
- You love automating tasks (who doesn't?).
- You’re using other tools in your workflow.
Wrapping up
Both methods work great—it just depends on your style! Prefer simplicity? Direct embed’s your friend. Want automation magic? Zapier’s the way. Our team at BRIX Templates live for Webflow + GetResponse setups. We’ll handle the tech so you can focus on growing your list!


Join readers commenting on this post!