
Webflow designers often face a frustrating challenge: displaying external content that changes for each CMS item. Whether it's Google Maps showing different office locations or Calendly booking widgets for different sales representatives, the solution isn't immediately obvious.
The standard Embed element on Webflow doesn't automatically connect to your CMS fields, leading many to resort to creating static pages instead of leveraging the powerful benefits of the Webflow CMS, or implementing complex code workarounds that are difficult to maintain.
In this tutorial, we'll show you a surprisingly simple solution that connects your CMS fields directly to iframe embeds, saving you hours of work while creating a more dynamic, maintainable website.
Why dynamic CMS-based iframes matter for Webflow sites
Dynamic iframes bridge the gap between Webflow's design capabilities and external interactive content, allowing each CMS item to display unique, relevant embedded elements without duplicating work. Here are some powerful applications:
- Location-specific maps: Create property listings, store locators, or travel guides where each page shows a unique map location without duplicating design elements
- Personalized media players: Embed different videos, audio tracks, or slideshows on each product page, case study, or team member profile
- Interactive tools: Add calculators, booking widgets, or configurators that change parameters based on the CMS item being viewed
- External content integration: Seamlessly incorporate content from third-party services like Google Docs, Notion pages, or specialized platforms while maintaining design consistency
- Content-specific testimonials: Display relevant customer reviews from third-party platforms like Google Reviews or Trustpilot that match the exact product or service on each page
How to add dynamic iframes in your Webflow site
Let's break down the implementation process into clear, manageable steps.
1. Preparing your Webflow CMS collection for dynamic iframes
First, we need to set up the proper fields in your Webflow CMS collection:
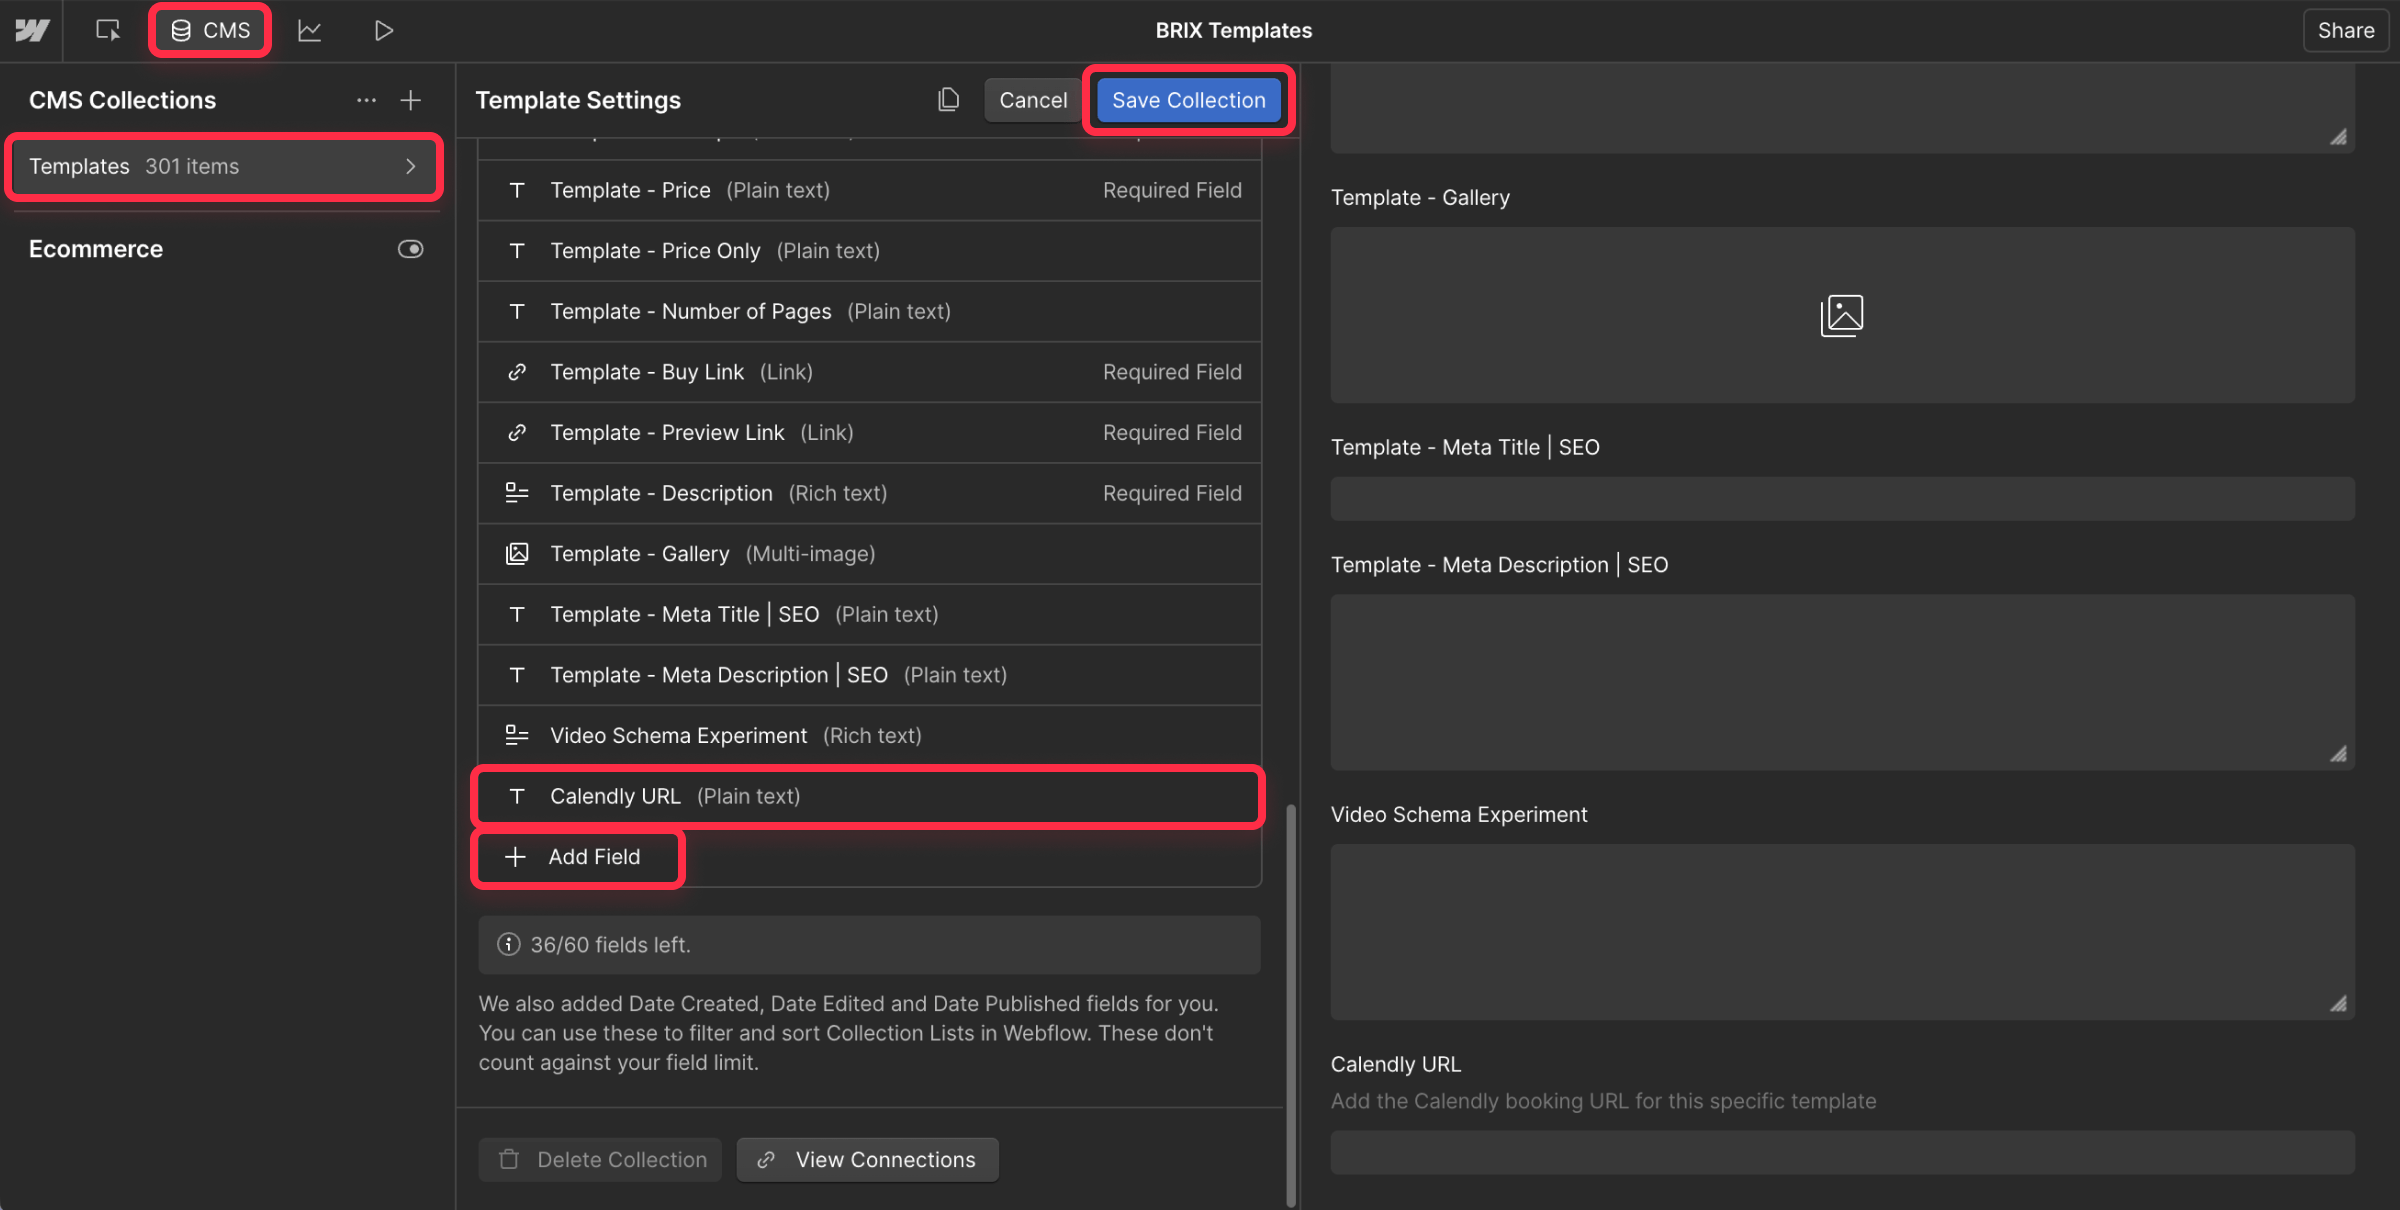
- Navigate to your Webflow project and open the CMS Collections panel
- Select the collection where you want to add dynamic iframes
- Click Add Field to create a new field
- For most iframe implementations, a Plain Text field works best
- Name it clearly based on what it will contain (e.g., "Map URL", "Calendly URL", etc)
- Add a helpful description to guide content editors on what to enter
- Save your changes
This field will store the unique part of your iframe for each CMS item—typically a URL, ID, or parameter that changes per item.
2. Creating your embed code in Webflow for iframe embedding
Now, let's add the iframe to your collection template:
- Open the Webflow Designer and navigate to your collection template page
- Position your cursor where you want the iframe to appear
- From the Add Elements panel, locate and add an Embed element
- Click the gear icon on the added element to open its settings
- In the embed code editor, paste your iframe HTML
For example, if embedding a Google Map, your code might look like this:
<iframe
  src="https://www.google.com/maps/embed?pb=YOUR_MAP_PARAMETERS"
  width="100%"
  height="450"
  style="border:0;"
  allowfullscreen=""
  loading="lazy"
  referrerpolicy="no-referrer-when-downgrade">
</iframe>
Don't worry about the specific map parameters yet—we'll connect them to your CMS field in the next step.
3. Connecting your Webflow CMS field to the iframe
This is where the magic happens—connecting your CMS data to the iframe:
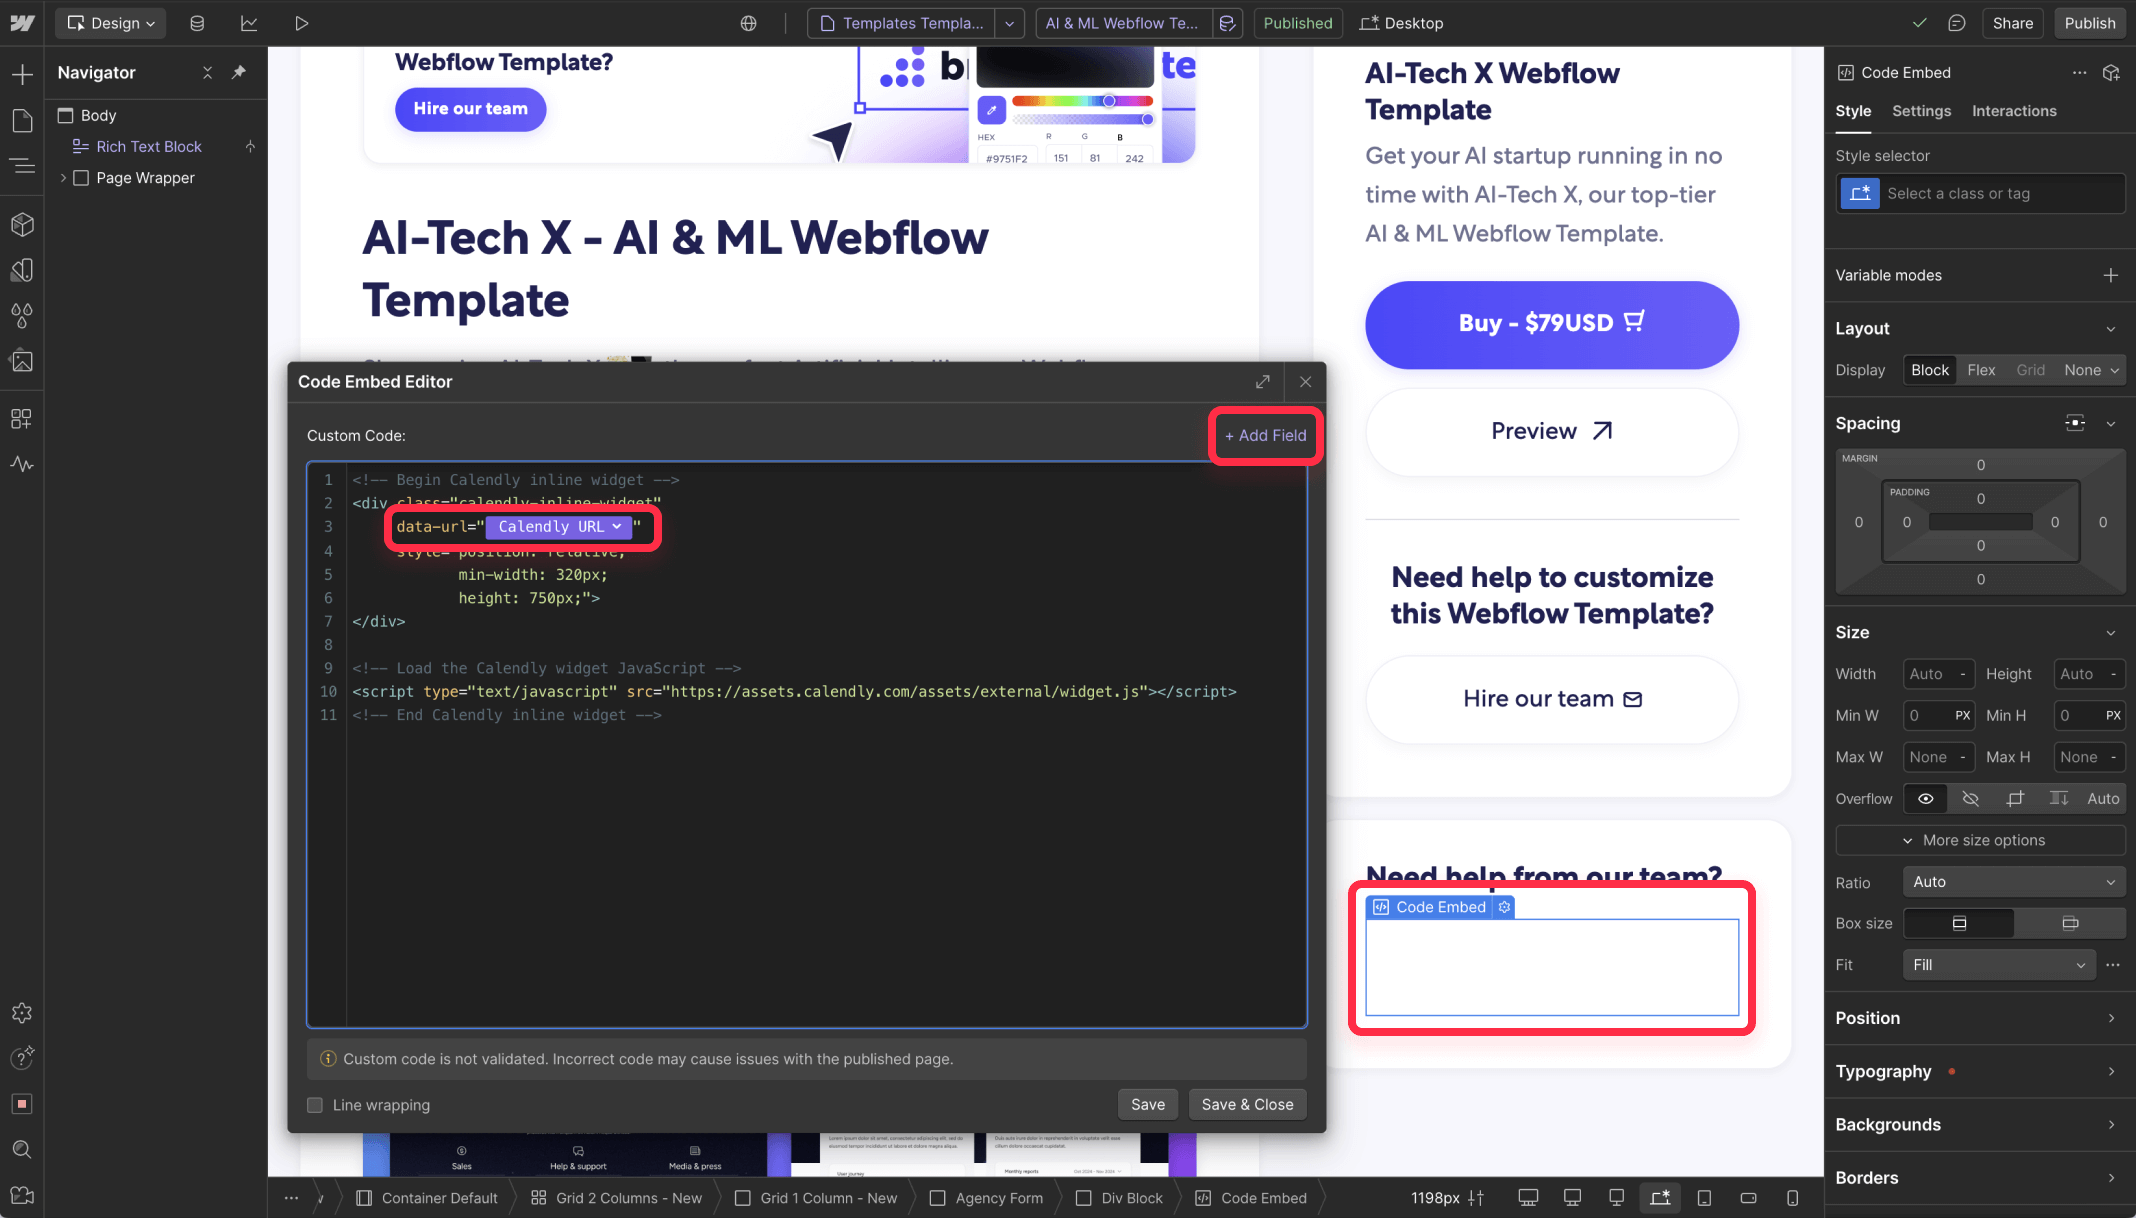
- In the embed code editor, locate the part that needs to be dynamic (usually the src attribute)
- Highlight just the portion that should change for each item (e.g., the map parameters or URL)
- With that text highlighted, look for the + Add Field button above the code editor
- Select your previously created field from the dropdown (e.g., "Map URL")
- Webflow will replace the highlighted text with a binding like "Map URL"
- Click Save to apply your changes
The embed will now dynamically update with each collection item's specific content.
4. Adding conditional visibility to your Webflow iframe (optional)
If some CMS items might not have embed content:
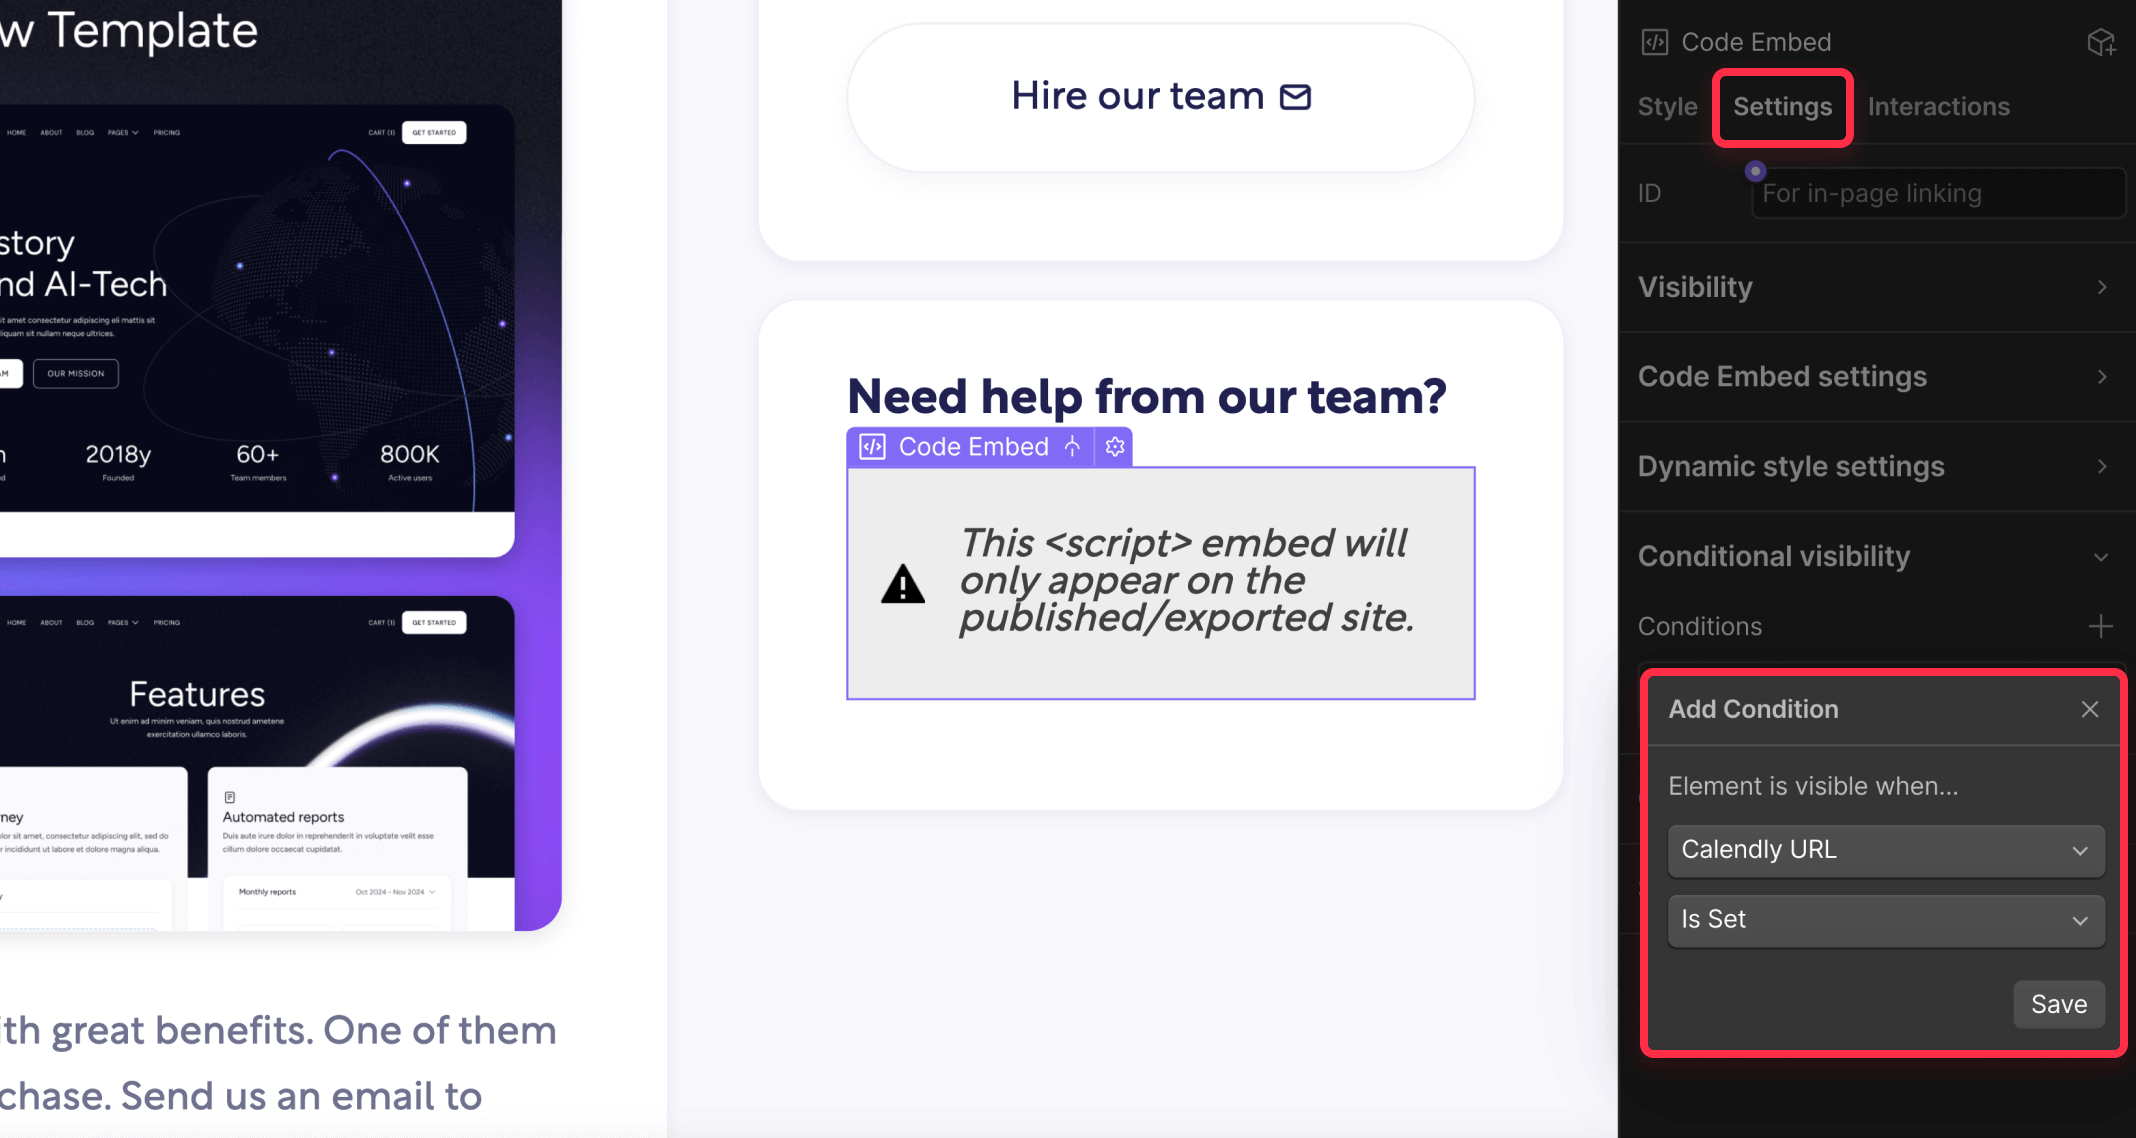
- Select your embed element in the Designer
- Open the Settings panel and find Conditional Visibility
- Set the condition to show only when your CMS field is not empty
- This prevents empty iframes from appearing when no content is available
5. Testing and publishing your Webflow dynamic iframes
Before going live:
- Preview your collection pages to ensure iframes display correctly
- Add several test CMS items with different iframe sources
- Check behavior on various device sizes
- Publish your site when everything works as expected
Troubleshooting common issues with dynamic Webflow iframes
Even with the correct setup, you might encounter these common problems:
- Iframe not displaying: Ensure your CMS field contains a valid URL or parameter. Check that the source allows embedding via iframes (some sites block this).
- Security warnings: Some browsers block mixed HTTP/HTTPs content. Make sure your iframe source uses HTTPS if your Webflow site does.
- Loading performance: For pages with multiple iframes, add the loading="lazy" attribute to your iframe code to improve page load times.
Conclusion
Implementing dynamic iframes in Webflow empowers you to create rich, personalized experiences without duplicating work or sacrificing design consistency. From embedding custom maps for each location to displaying client-specific widgets, this approach keeps your CMS efficient while delivering interactive content tailored to each page.
For more advanced implementations or complex integration challenges, our Webflow agency specializes in custom CMS solutions that enhance site functionality. Whether you're building a multi-location business directory or a content-rich educational platform, we can help optimize your iframe implementation while maintaining clean, professional designs.


Join readers commenting on this post!