
Manually adding alt text to every image in your Webflow CMS is tedious, time-consuming, and prone to errors. Forgetting this crucial step can damage your site's SEO and accessibility, but tracking hundreds of images across your blog or portfolio feels impossible. This often results in inconsistent or missing alt text, leaving valuable optimization opportunities on the table.
This tutorial solves that problem by teaching you how to link your image alt text directly to a CMS field in Webflow, like your blog post title. By setting this up once, you can ensure every new item you create automatically has descriptive, SEO-optimized alt text without any additional effort. You'll learn how to automate this process for CMS Template Pages, saving hours of manual work and significantly improving your site's performance.

Why dynamic alt text matters for your Webflow site
Implementing dynamic alt text goes beyond simple convenience - it's a strategic decision that strengthens your site's technical foundation. By automating this process, you establish an efficient, error-proof system that delivers measurable benefits in three key areas:
- Time savings and scalability: The most immediate advantage is efficiency. Instead of manually writing alt text for each image in every new article, product, or project, you set it up once at the template level. This means all future content will automatically inherit this optimization, saving you countless hours as your site grows.
- Consistency and error reduction: Manual work is prone to human errors like forgetfulness, inconsistencies, or typos. By linking alt text to a CMS field, you guarantee that every image follows the same formatting rule. This eliminates the risk of having images without alt text, ensuring uniform, professional optimization across your entire site.
- Guaranteed SEO and accessibility improvements: Every image without alt text is a missed SEO opportunity and an accessibility barrier. By automating this process, you ensure 100% of your CMS images are optimized. This provides search engines with valuable context for indexing your visual content and guarantees users with screen readers can navigate your site smoothly.
How to set up dynamic alt text in Webflow
This process lets you connect an image's alt text attribute directly to a field within your CMS collection in Webflow. We'll demonstrate using a common example: setting the featured image's alt text to be the blog post title.
Connecting alt text in Webflow CMS template pages
First, we'll configure the main featured image on your blog post template page. This ensures each individual blog post page has its alt text set correctly.
1 - Navigate to your Blog Post Template Page from the Pages panel in the Webflow Designer.
2 - Select the featured image element on the page. This image should already be connected to your CMS. If it's not, go to the Element settings panel and use the Get image from option to link it to your Featured Image field.
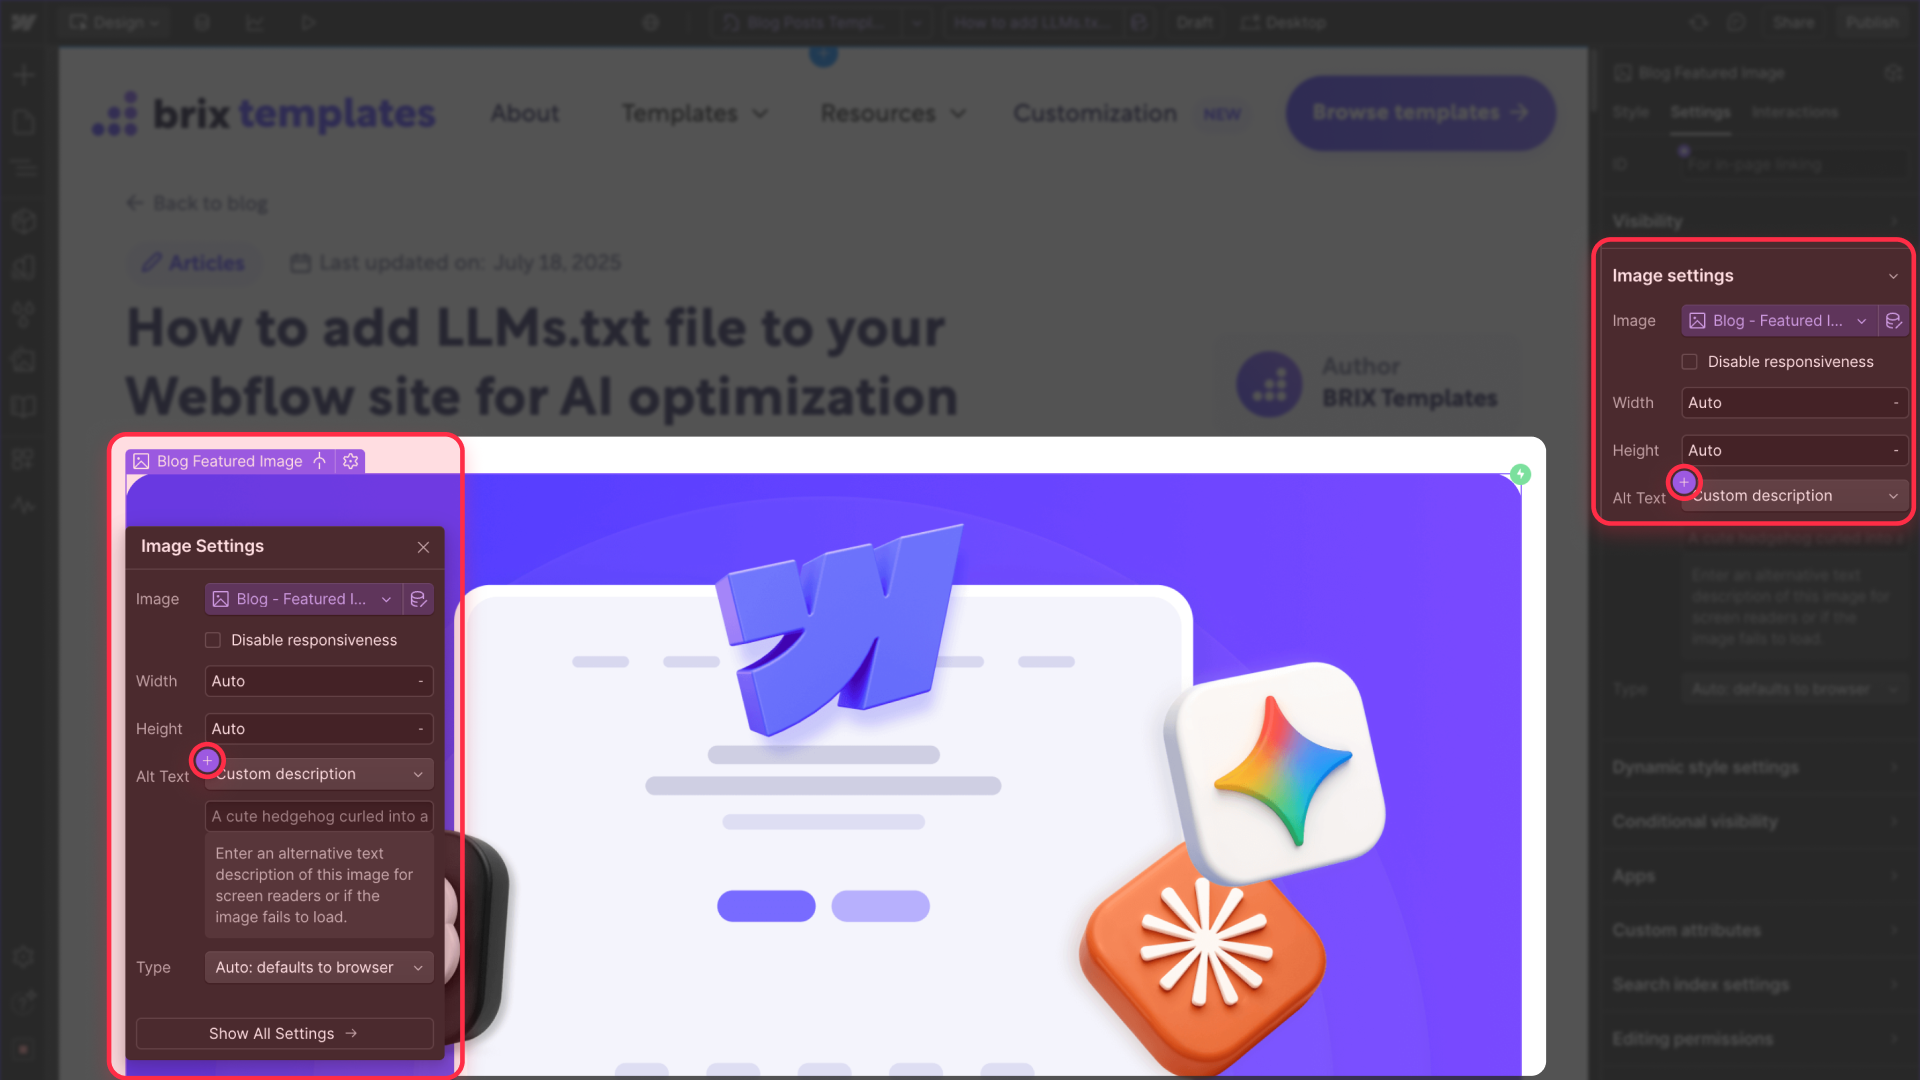
3 - In the Element settings panel, look for the Image settings section. You'll see that the Alt Text field is set to Custom description by default.
4 - To change this, click the small purple dot icon that appears to the right of the Alt Text field.
5 - When you click it, a list of all fields from your CMS collection will appear.
6 - Select the field you want to use as the alt text source. For this example, we'll choose Blog - Title (or Name, depending on how you've named it).
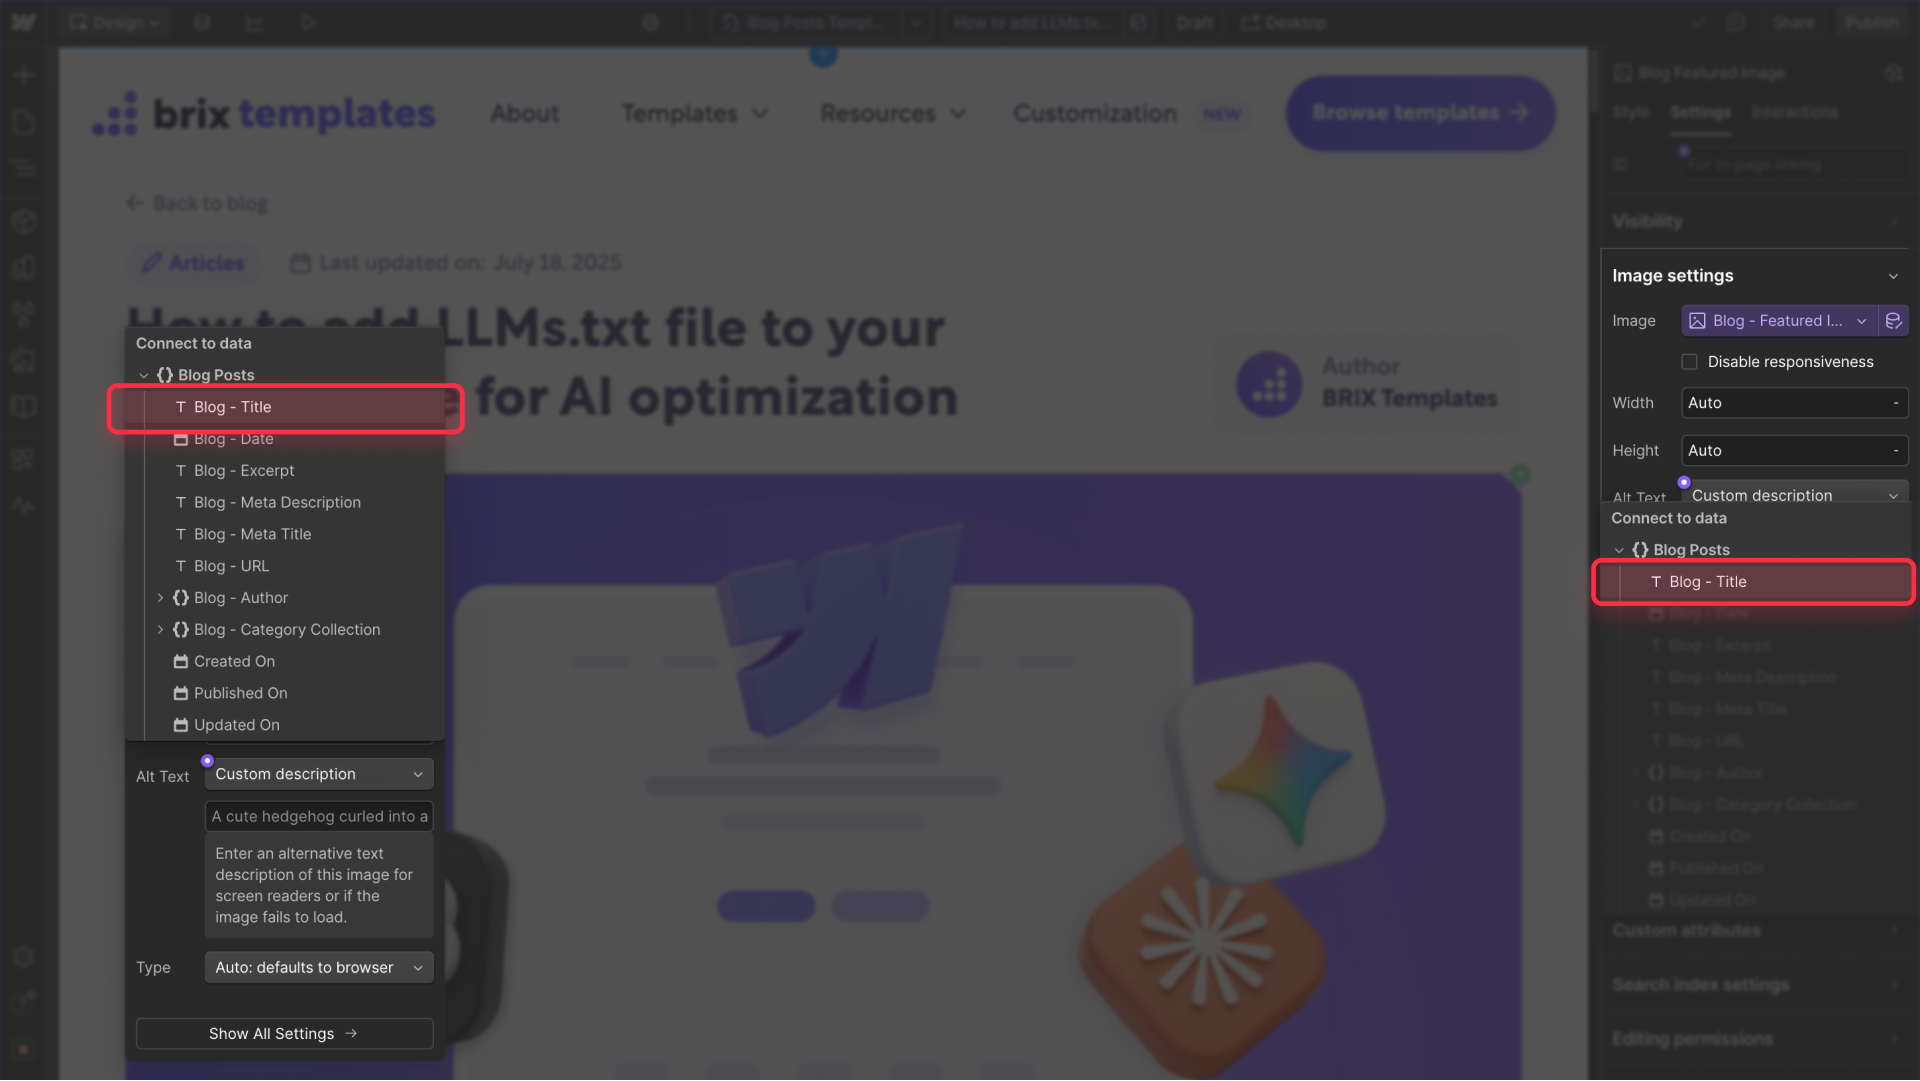

That's it! Now every blog post will automatically use its title as alt text for the featured image, creating a dynamic, effortless solution
Setting up dynamic alt text for other images in Webflow
You can apply this method to any image connected to a CMS collection, like an author's photo.
- On your Blog Post Template Page, select the author image element.
- In the Element settings panel, ensure the image is connected to the author's photo field (this may require adding a reference to your Authors collection).
- Check the Get alt text from box and select the Author Name field from the dropdown menu. This will automatically generate alt text like "Photo of John Smith".
Troubleshooting common issues with dynamic alt text in Webflow
- The desired field isn't in the dropdown menu: This usually means the field you want to use isn't a standard text field. The alt text source must be a Plain Text, Rich Text, or Name field type. You can't use fields like Number, Date, or Color. To fix this, create a new Plain Text field in your collection and copy the necessary data there.
- The alt text doesn't update: If you change a post's title but the alt text on the published site remains the same, you probably just need to republish your site. Webflow needs to regenerate the static HTML pages with the new CMS data. Publish the site again and check the image's alt text.
- The alt text is too long or not descriptive: A post's title isn't always the best alt text. If your titles are very long or don't accurately describe the image, it's better to create a dedicated Alt Text field (Plain Text type) in your CMS collection. This gives you full control while still managing content dynamically.
- The "Get alt text from" option doesn't appear: This option only appears for image elements that are connected to a CMS collection. If the checkbox isn't visible, first make sure you've connected the image itself using the Get image from setting at the top of the Element settings panel.
Frequently asked questions about dynamic alt text in Webflow
How do I connect alt text to a CMS field in Webflow?
To connect alt text, first select an image that's already linked to your CMS collection. In the Element Settings panel, look for the Image settings section. Click the small purple dot icon next to the Alt Text field and select the CMS field you want to use as the source, like Title or a custom text field. This creates a dynamic connection that automatically pulls the alt text from your chosen field for every CMS item.
How do I create a custom field for alt text in Webflow CMS?
If the title isn't descriptive enough, go to your CMS Collection settings. Click Add New Field, choose Plain Text, and name it something clear like "Alt Text for Image". Save the collection. Now when you edit a post, you'll have a specific field to write perfect alt text. Finally, connect this new field to your image in the Designer following the same purple dot method described above.
How do I automate alt text for e-commerce products in Webflow?
The process is ideal for online stores. In your Products collection, select the main product image. In the image settings, connect the Alt Text to the Name field of your product. By doing this, every product you add to your store will automatically use its name as alt text, improving your product listings' SEO without any additional manual work. This ensures consistent optimization across your entire catalog.
What's the difference between static and dynamic alt text in Webflow?
Static alt text is manually typed for each image and never changes unless you edit it directly. Dynamic alt text pulls from a Webflow CMS field automatically, updating whenever that field changes. Static works for one-off images, while dynamic is perfect for templates where you want consistent, automated alt text across hundreds of similar pages like blog posts or products.
Conclusion
Automating your images' alt text with Webflow's CMS is a simple yet powerful way to improve SEO and accessibility while saving significant time. By linking your alt text to CMS fields like post titles or dedicated text fields, you create a scalable system that ensures consistency and eliminates human error risk. This lets you focus on creating great content, knowing your page optimization is handled automatically.
Implementing these small but impactful changes can dramatically improve your site's performance. If you want to explore more advanced Webflow optimizations or need help building a scalable website, our agency can help you out with expert guidance and development services.


Join readers commenting on this post!