
Adding an event to a personal calendar should be easy. An “Add to Calendar” button lets visitors choose their calendar app and open an event with its title, date, time, location, and description already filled in. They can review the details before saving it.
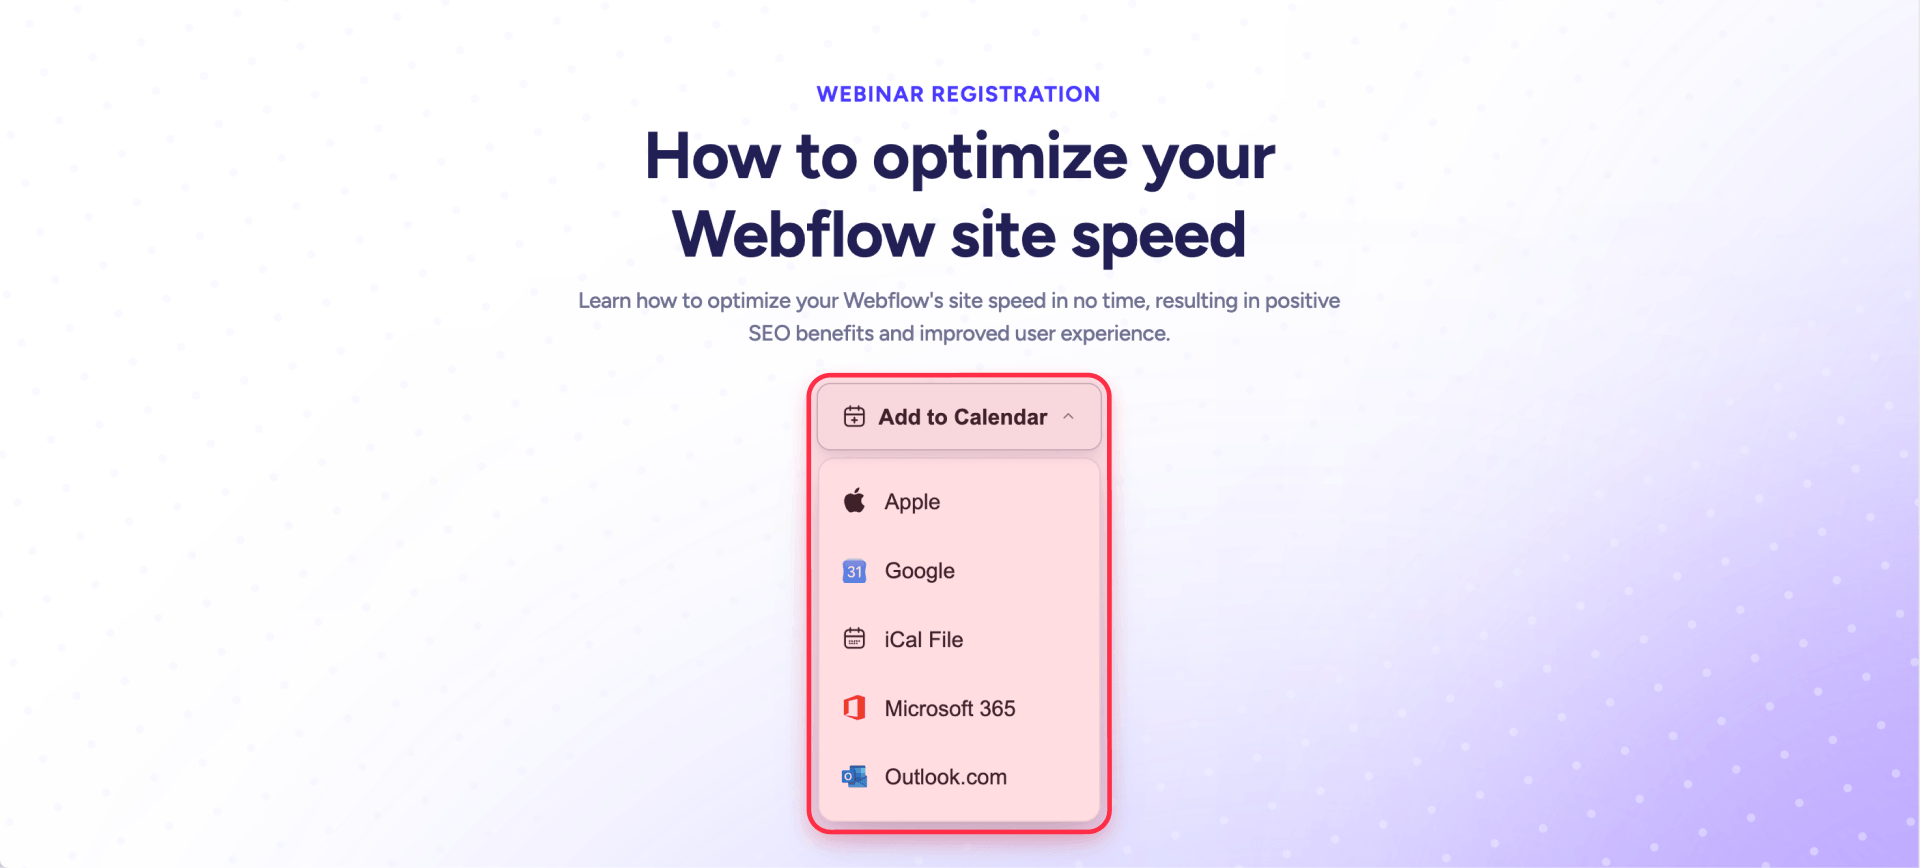
This guide shows you how to add a free calendar button to Webflow using the Add to Calendar Button web component. It offers Google Calendar, Apple Calendar, Microsoft 365, Outlook.com, and an iCal file option. The options displayed may vary by device and event settings.
Why add a calendar button to your Webflow site?
A calendar button saves visitors from copying event details by hand. It is useful when you want people to remember a date and have the event information available in the calendar they already use.
Common uses include:
- Webinars: Place the button on a webinar page or after registration so attendees can save the session time.
- Workshops and meetups: Let visitors save the event's date, location, and description.
- Conferences: Add a separate button for each session so visitors can choose which sessions to save.
Saving an event is separate from registering for it. Keep your registration form or ticket checkout if the event requires a booking. A calendar button opens or downloads event details; it does not automatically register visitors or guarantee that later changes to a saved copy will reach them.
How to add the button in Webflow
You need two pieces: one script that loads the component, and one HTML element containing your event details. Add the script once to a page. Add one HTML element for each button you want to show.
Webflow's custom code tools require an eligible Site or Workspace plan. The button itself does not require a paid Add to Calendar PRO account for the setup shown here.
1. Add the script
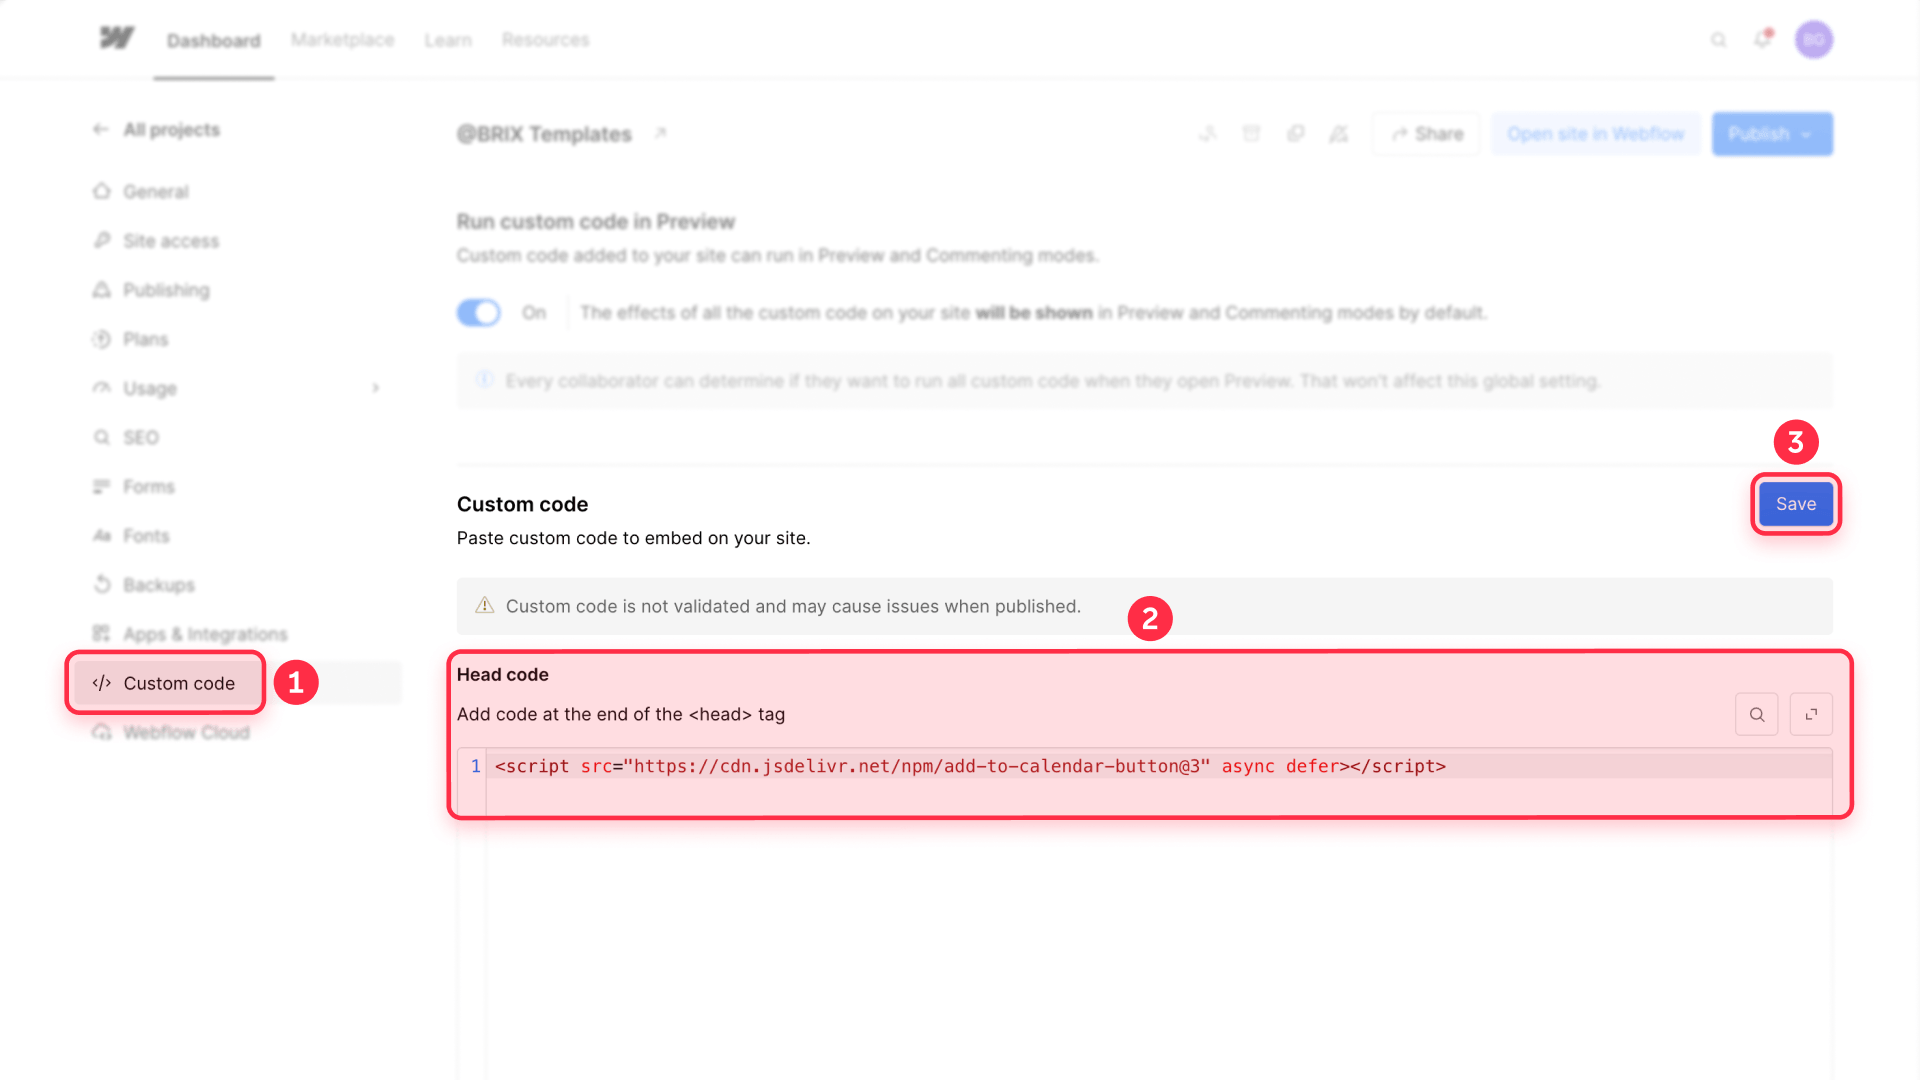
Go to Site settings → Custom code → Head code and paste:
<script src="https://cdn.jsdelivr.net/npm/add-to-calendar-button@3" async defer></script>Save your changes. If you need the button on only one page, you can put the same script in that page's Page settings → Custom code → Inside <head> tag field instead. Use one location or the other for that page; you do not need to load the script twice.
2. Add the event button
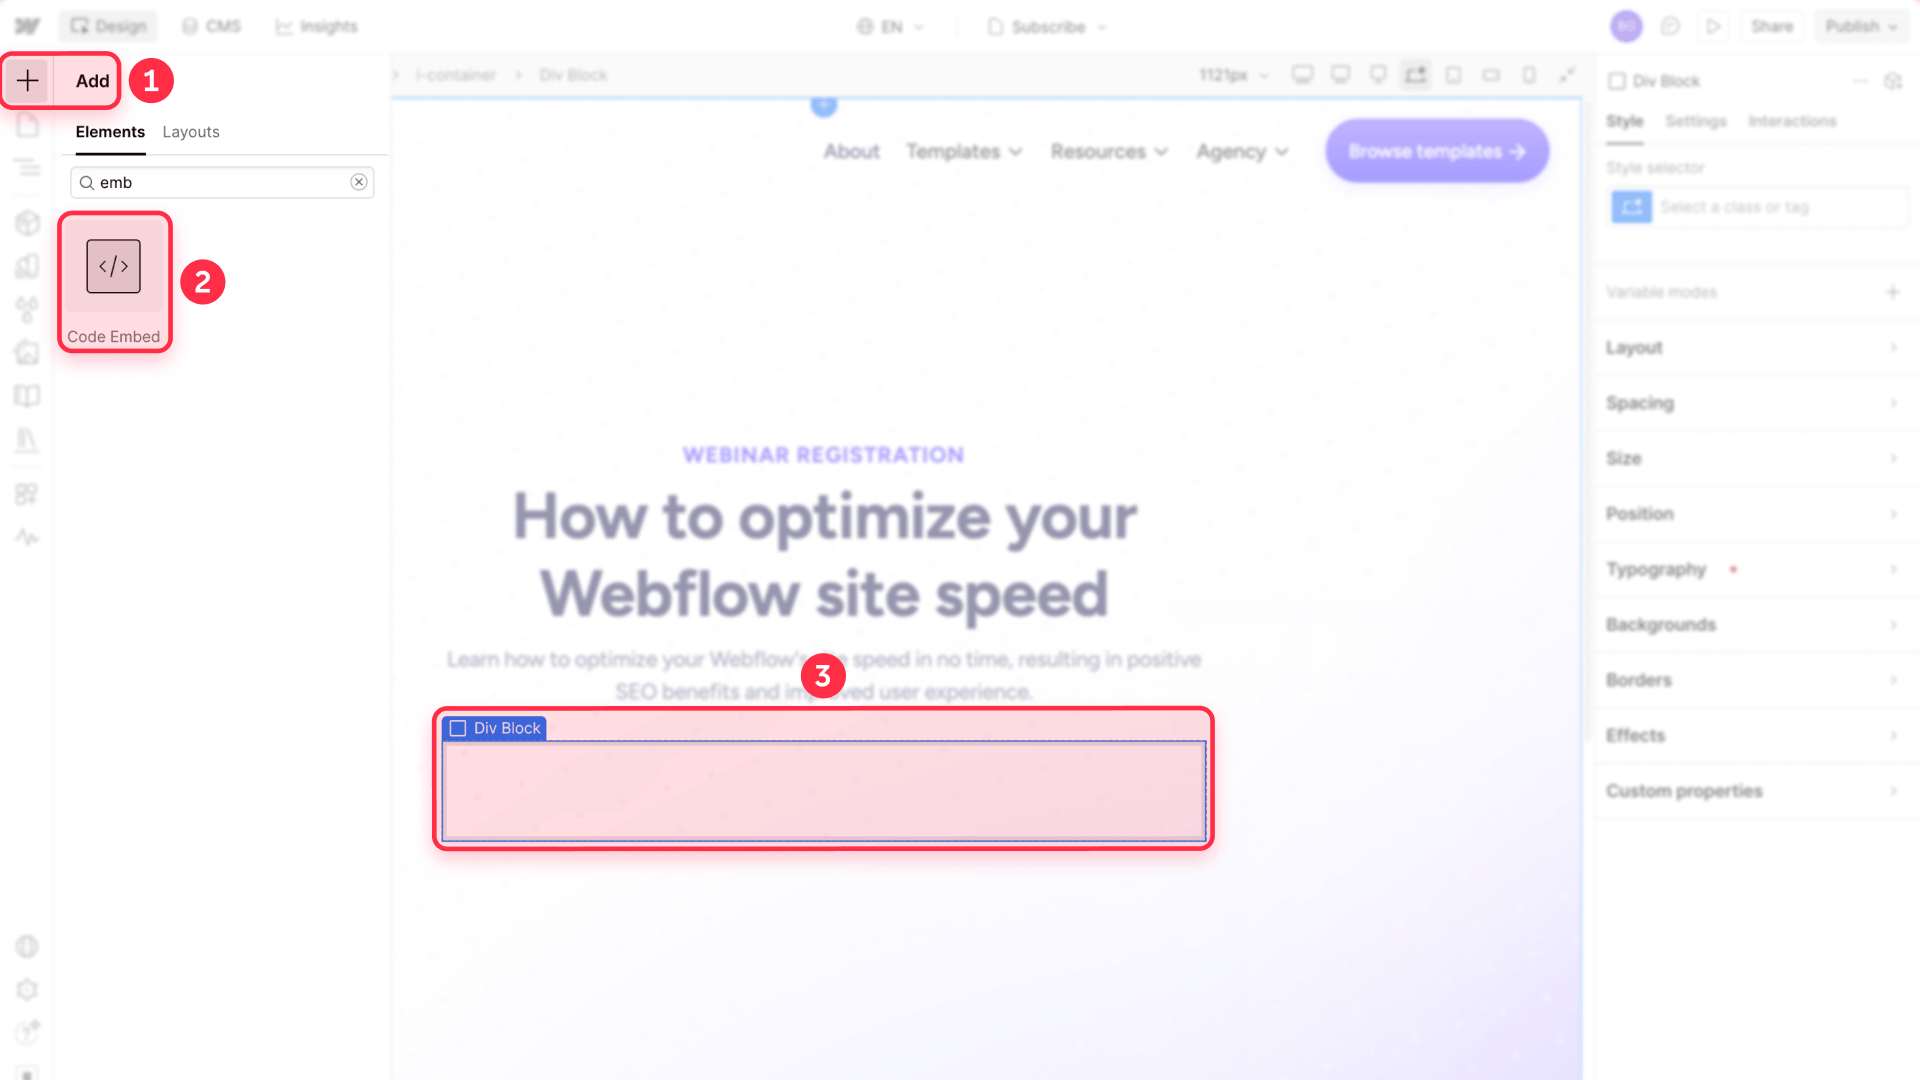
In the Webflow Designer, add a Code Embed where you want the button to appear.
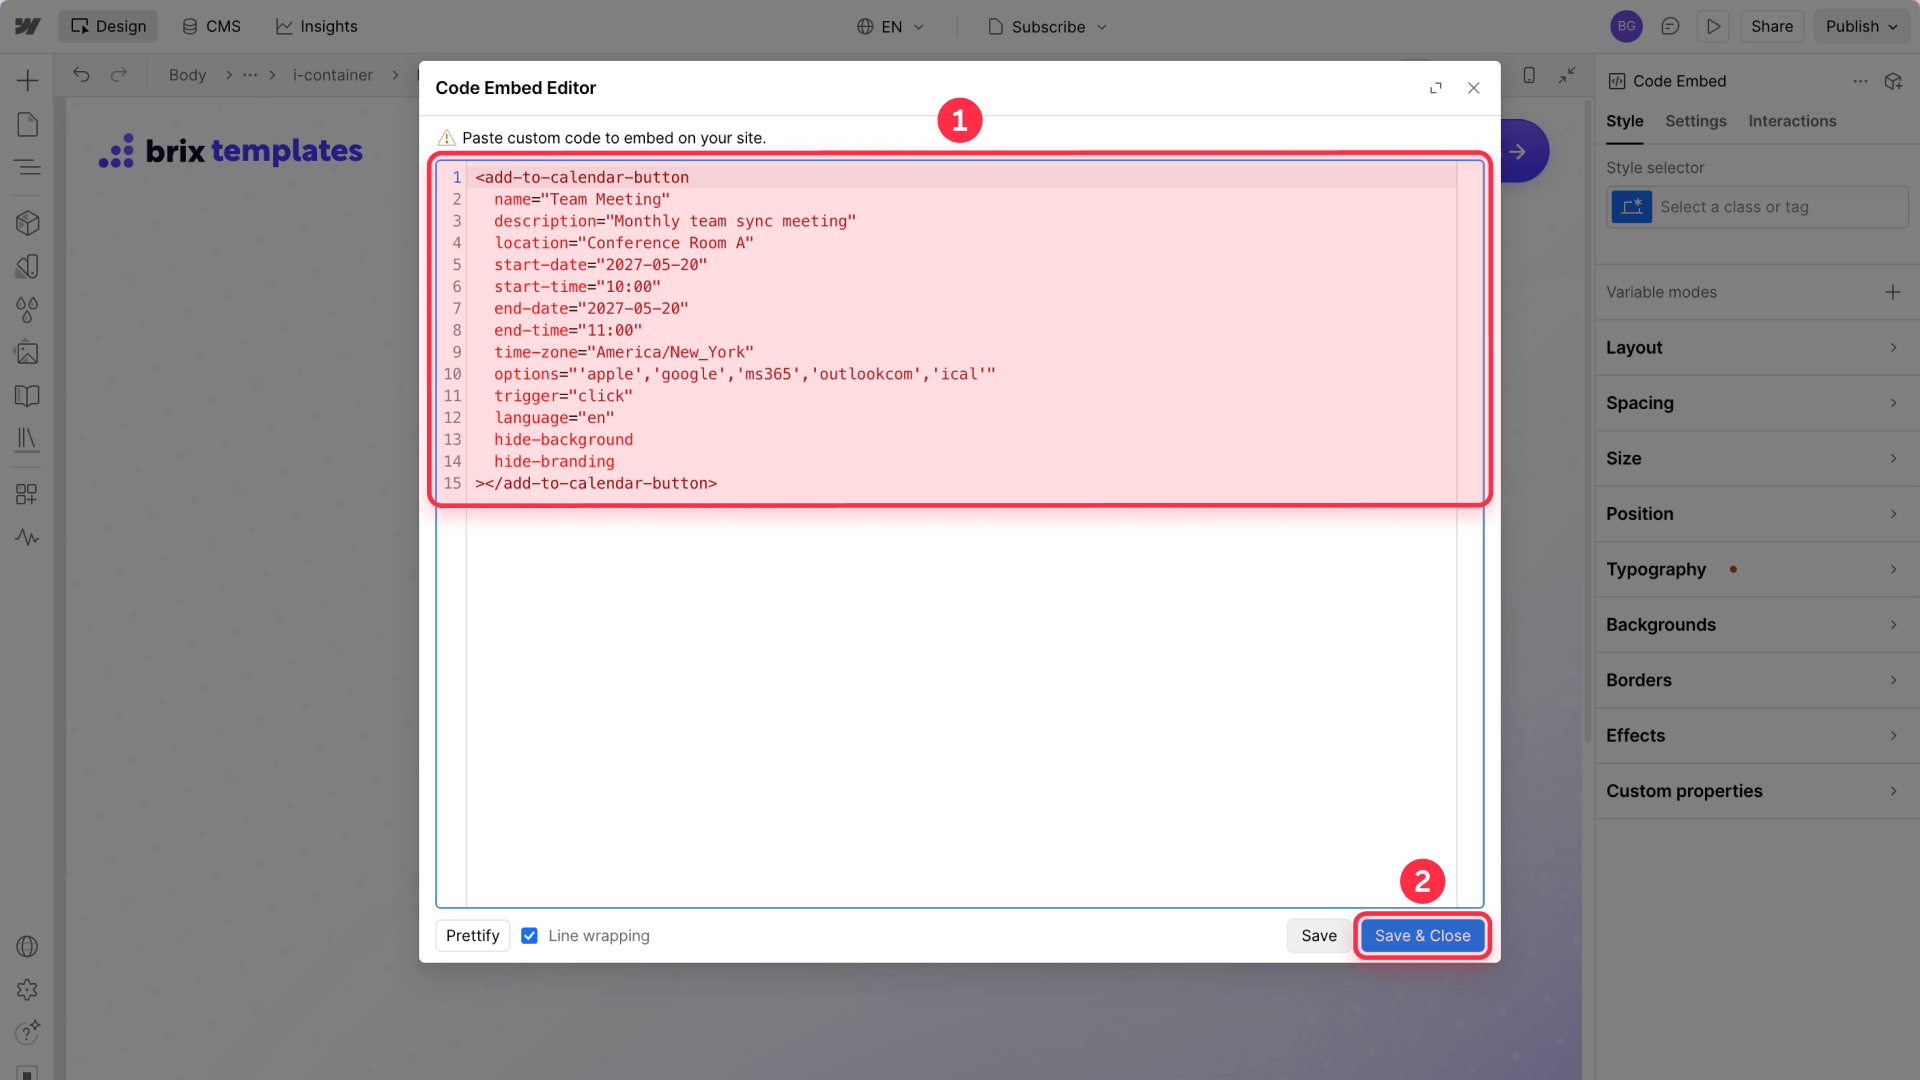
Paste this complete example:
<add-to-calendar-button
  name="Team Meeting"
  description="Monthly team sync meeting"
  location="Conference Room A"
  start-date="2027-05-20"
  start-time="10:00"
  end-date="2027-05-20"
  end-time="11:00"
  time-zone="America/New_York"
  options="'apple','google','ms365','outlookcom','ical'"
  trigger="click"
  language="en"
  hide-background
  hide-branding
></add-to-calendar-button>
Replace the sample event details with your real title, dates, times, location, and time zone before publishing. The example date is only a demonstration; update it for your event. For multiple events on the same page, add another Code Embed with that event's details. The script from step 1 is still added only once.
The hide-background attribute keeps the page visible when the menu opens. The hide-branding attribute removes the component's small promotional label. Both are supported by the component's configuration options.
What do the attributes mean?
- name: The event title.
- description: A short description or agenda.
- location: A physical address, room, or meeting link.
- start-date and end-date: Dates in YYYY-MM-DD format.
- start-time and end-time: Times in 24-hour HH:MM format.
- time-zone: The event's time zone, such as America/New_York.
- options: The calendar choices offered to visitors. ms365 is Microsoft 365; outlookcom is Outlook.com; ical provides an iCal file option.
- trigger: How the menu opens. click makes it open when the visitor clicks.
- language: The button interface language. Use es instead of en for Spanish.
- hide-background: Makes the area behind the open menu transparent.
- hide-branding: Removes the component's promotional label.
The event's title and description do not get translated by the language attribute. Enter them in the language your visitors should read. The full configuration reference lists additional settings.
Customize the button's appearance
The component includes a default design, so no extra CSS is needed to get started. Publish the page and check how the button looks within your site's layout.
To change the button text, add an attribute such as label="Save this event" inside the opening <add-to-calendar-button> tag. To try a built-in shape, add button-style="round". The component also supports style-light for color and font variables; see its styling options before changing them.
If you are replacing the BRIX button, remove its old <brix-calendar-button> element and any --brix-* CSS overrides. Those styles belong to the previous component and do not customize this one.

Test the button before publishing to your main domain
Publish the page to your Webflow staging domain (your-site.webflow.io) and test the published page. Webflow lets you publish to staging without publishing to your custom domain.
Check the following:
- Click the button and make sure the calendar menu opens without a gray background or promotional label.
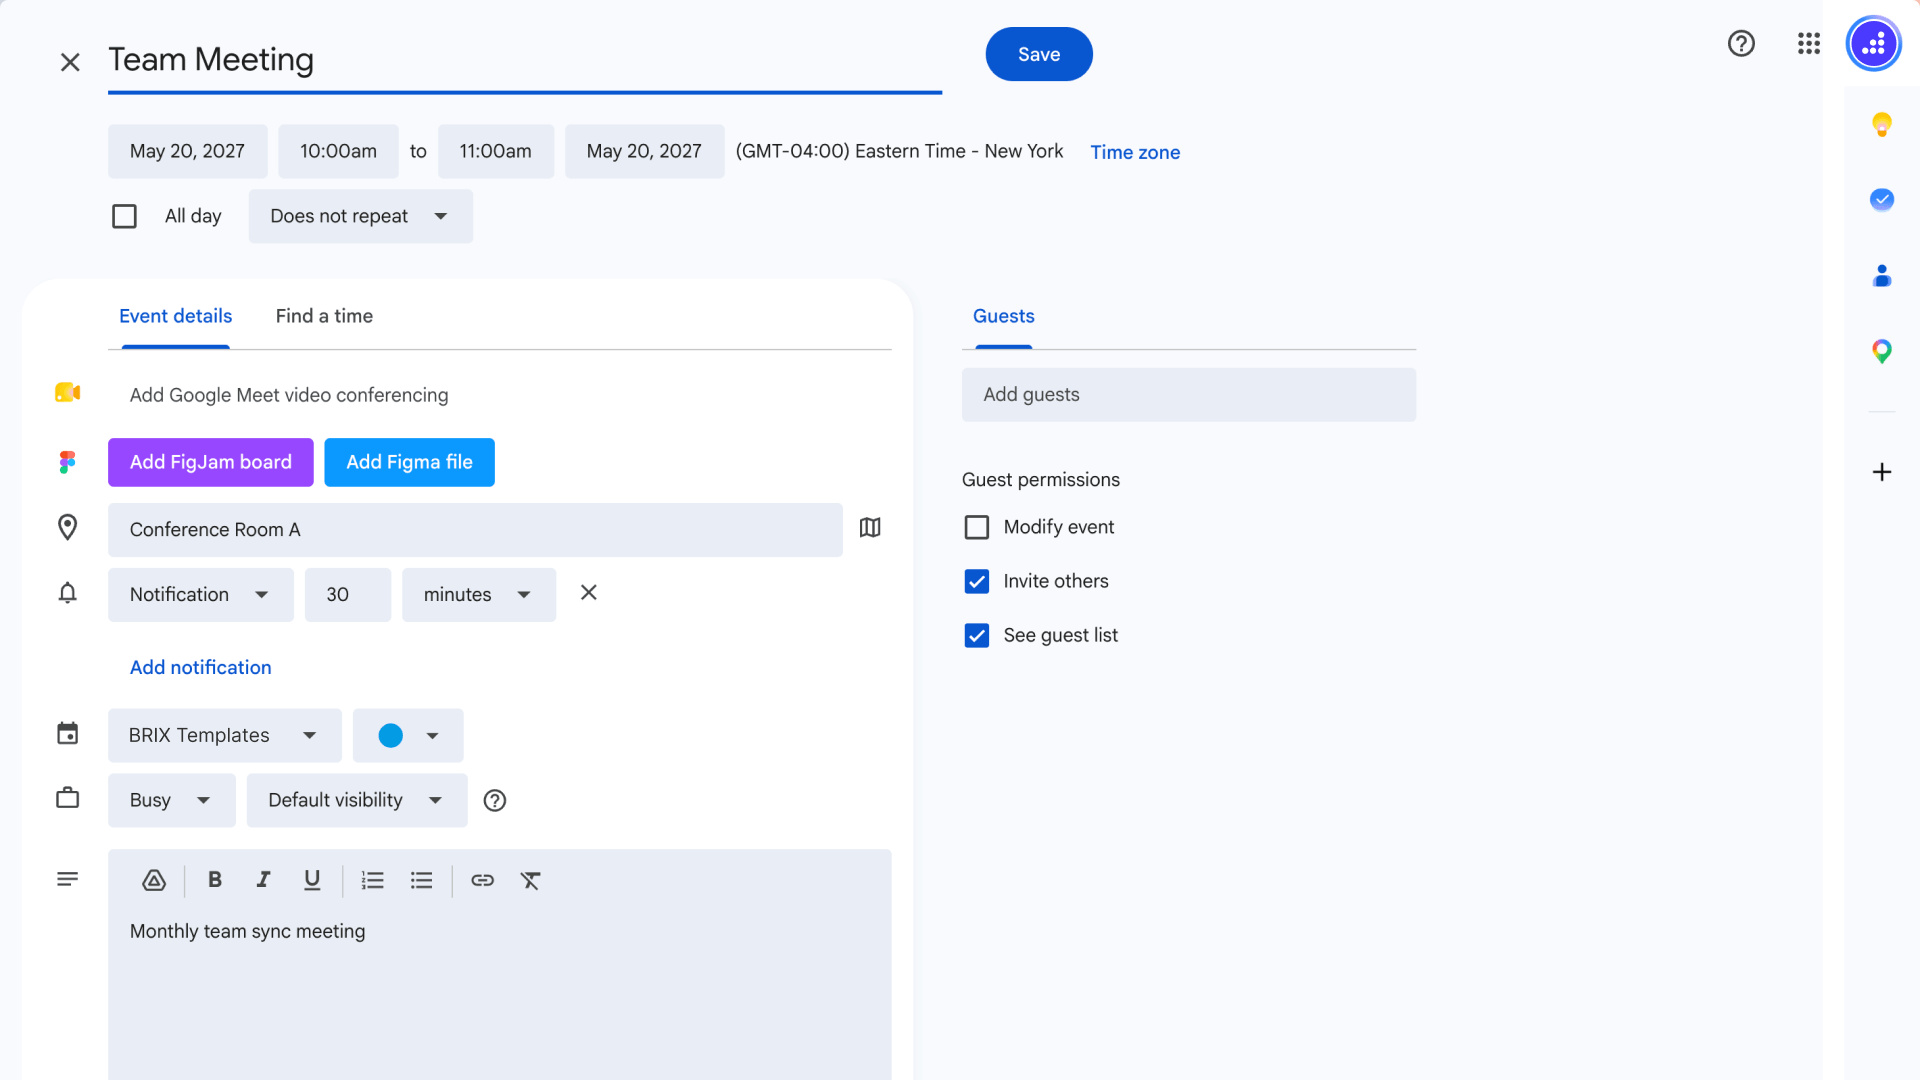
- Open the Google option and check the title, date, time, description, and location before saving.
- Test the Apple/iCal and Microsoft choices on the devices or browsers your visitors use.
- Check that the event appears at the intended time for visitors in another time zone.
- Check the menu at desktop and mobile widths.
The visitor may still need to confirm or import the event in their calendar app. The button does not directly write to a visitor's calendar.
Troubleshooting
If the button does not appear, check that the script is included on that page and that the opening and closing <add-to-calendar-button> tags are present. Then open the published page and check your browser's developer tools for a failed script request or a configuration error.
If event details are wrong, recheck the dates, 24-hour times, and time-zone value. If the menu is clipped by your layout, try the documented list-style="dropdown-static" setting and retest it on mobile. Always test the result on the published page.
Conclusion
With one script and one event element, visitors can open your event in their chosen calendar and decide whether to save it. Update the attributes for each event, publish to staging, and verify the event details in the calendars your visitors use.









Join readers commenting on this post!