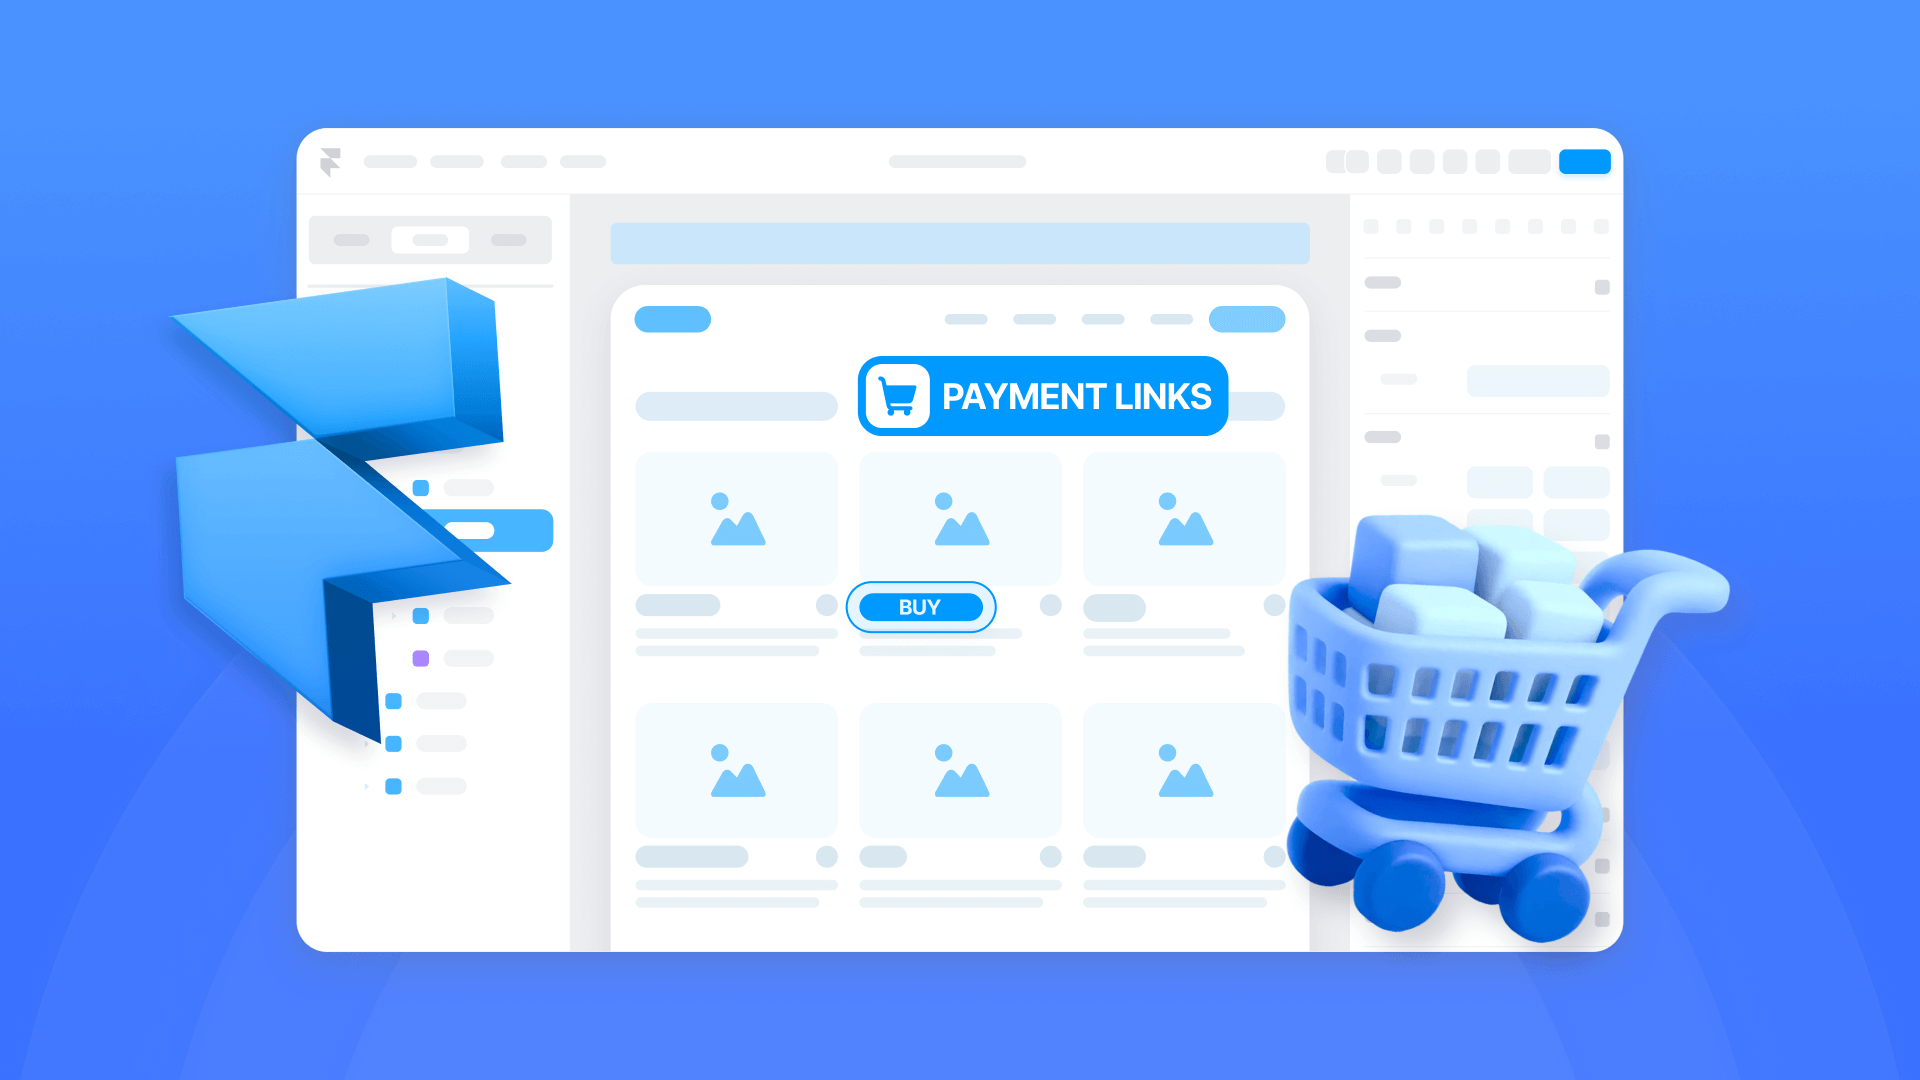
Framer gives you full design control over your site—but the moment you need to collect money, you'll notice there's no native checkout, no cart, and no payment settings. Unlike platforms with built-in ecommerce, Framer doesn't offer any payment infrastructure out of the box.
That's not necessarily a problem. It just means you need to pick the right external tool for the job. And "accepting payments" can look very different depending on whether you're selling a single service, running a subscription pricing page, managing a multi-product store, or gating content behind a membership.
This guide walks through the most reliable ways to accept payments on a Framer site, from the simplest hosted checkout to full cart and membership setups.
Why accepting payments matters for Framer sites
Most Framer sites aren't online stores—they're marketing sites, landing pages, or SaaS homepages that need a clean way to collect money. Here are the most common scenarios.
- Selling services or deposits: A consultant, agency, or freelancer needs a "Pay now" button on a Framer landing page that sends clients to a professional checkout
- Launching digital products quickly: Take payment and deliver a download, access code, or course link without building a product catalog or shipping system
- Running a SaaS pricing page: Subscription tiers need a billing flow that handles recurring charges, upgrades, and cancellations
- B2B invoicing with payment terms: High-ticket services or custom projects often need invoices with line items, partial payments, or payment plans—not a generic "Buy now" link
- Multi-product stores without switching platforms: Keep your Framer design and layer a cart on top when you genuinely need multi-item purchasing
- Membership or gated content: Sell access to premium pages, courses, or communities where billing and authentication need to work together
What to decide before choosing a Framer payment method
Since Framer has no built-in payment system, every option involves connecting an external tool. Before choosing one, answer these questions—they'll point you to the right section of this guide:
- Are you selling one thing at a time or do customers need a cart with multiple items?
- Is the payment one-time or recurring?
- Do you need to restrict access to content after payment (member-only pages, courses, SaaS features)?
- Do you need tax calculation, discounts, shipping, or inventory management?
- What happens after payment—deliver a file, send an email, create an account, trigger an onboarding flow?
Getting clear on these upfront saves you from adopting a tool that doesn't scale with your business.
Choosing the right Framer payment option
There's no single "best" tool—there's a best tool for each business model. Here's how to match your situation to the right approach:
- Selling a single product, service, deposit, or simple subscription: Use Stripe Payment Links—fastest setup, professional hosted checkout, works with any Framer button
- Want an embedded checkout widget on your Framer page: Use Stripe Buy Button—same hosted checkout, but the CTA lives inside your page as an embedded component
- Invoicing for high-ticket B2B services: Use Stripe Invoicing—supports line items, partial payments, and payment plans that a generic checkout link can't handle
- Running a membership site with gated access: Use Outseta or Thenty—both integrate with Stripe and handle authentication, page gating, and recurring billing on Framer
- Need a multi-product store built inside Framer: Use Frameshop—a Framer plugin that adds product management, cart, and Stripe checkout without leaving Framer
- Need a multi-item cart with full checkout and transactional emails: Use Foxy—a hosted cart and checkout layer that connects to Framer and handles receipts by default
- Need a full ecommerce engine behind your Framer design: Use Shopify checkout—via Buy Button embeds or the Framer Commerce plugin for a headless setup
The fastest path for most businesses is Stripe Payment Links. The most complete "store" path is Shopify checkout or Frameshop. And if you need subscriptions with access control, Outseta or Thenty are the go-to options in the Framer ecosystem.
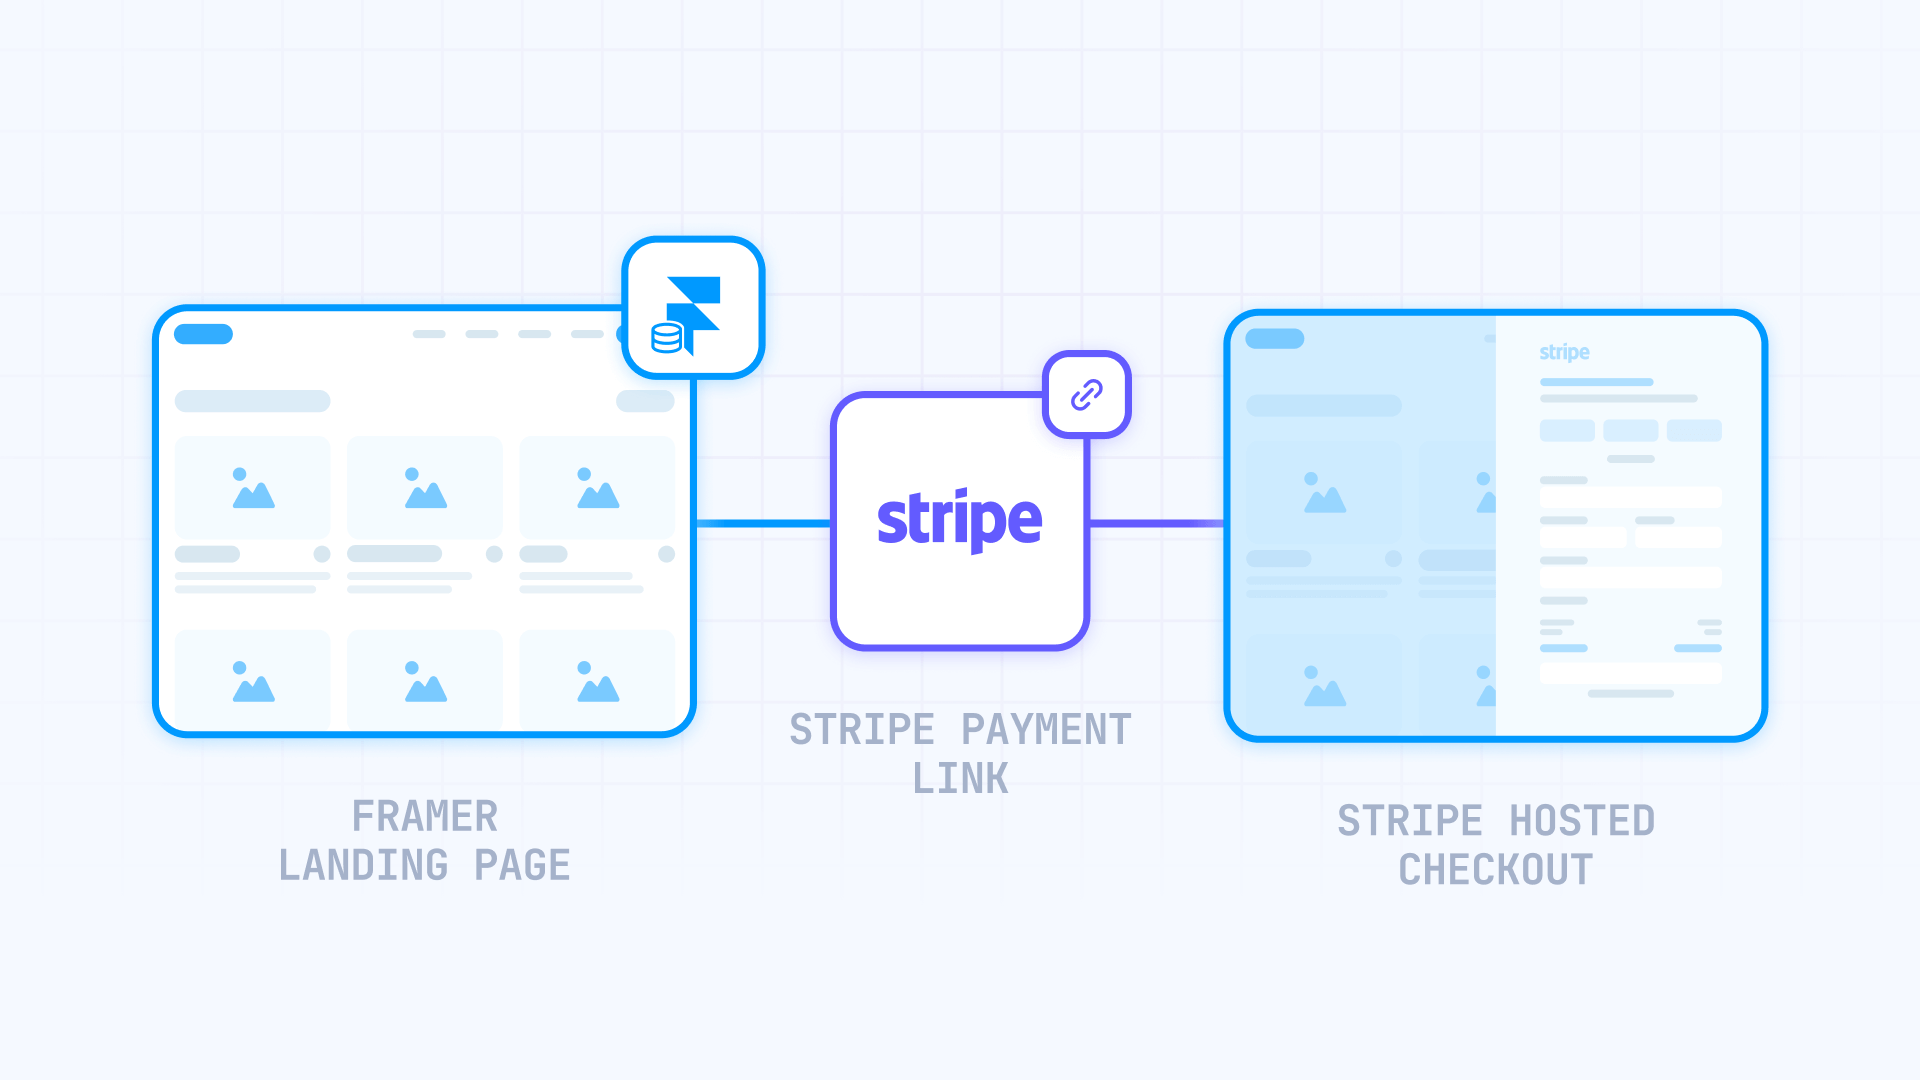
How to set up Stripe Payment Links on a Framer site
Stripe Payment Links are the quickest way to start accepting money: Stripe hosts the full checkout experience, and you simply link to it from your Framer site. They work for goods, services, subscriptions, tips, and donations.
Creating a Stripe Payment Link for your Framer site
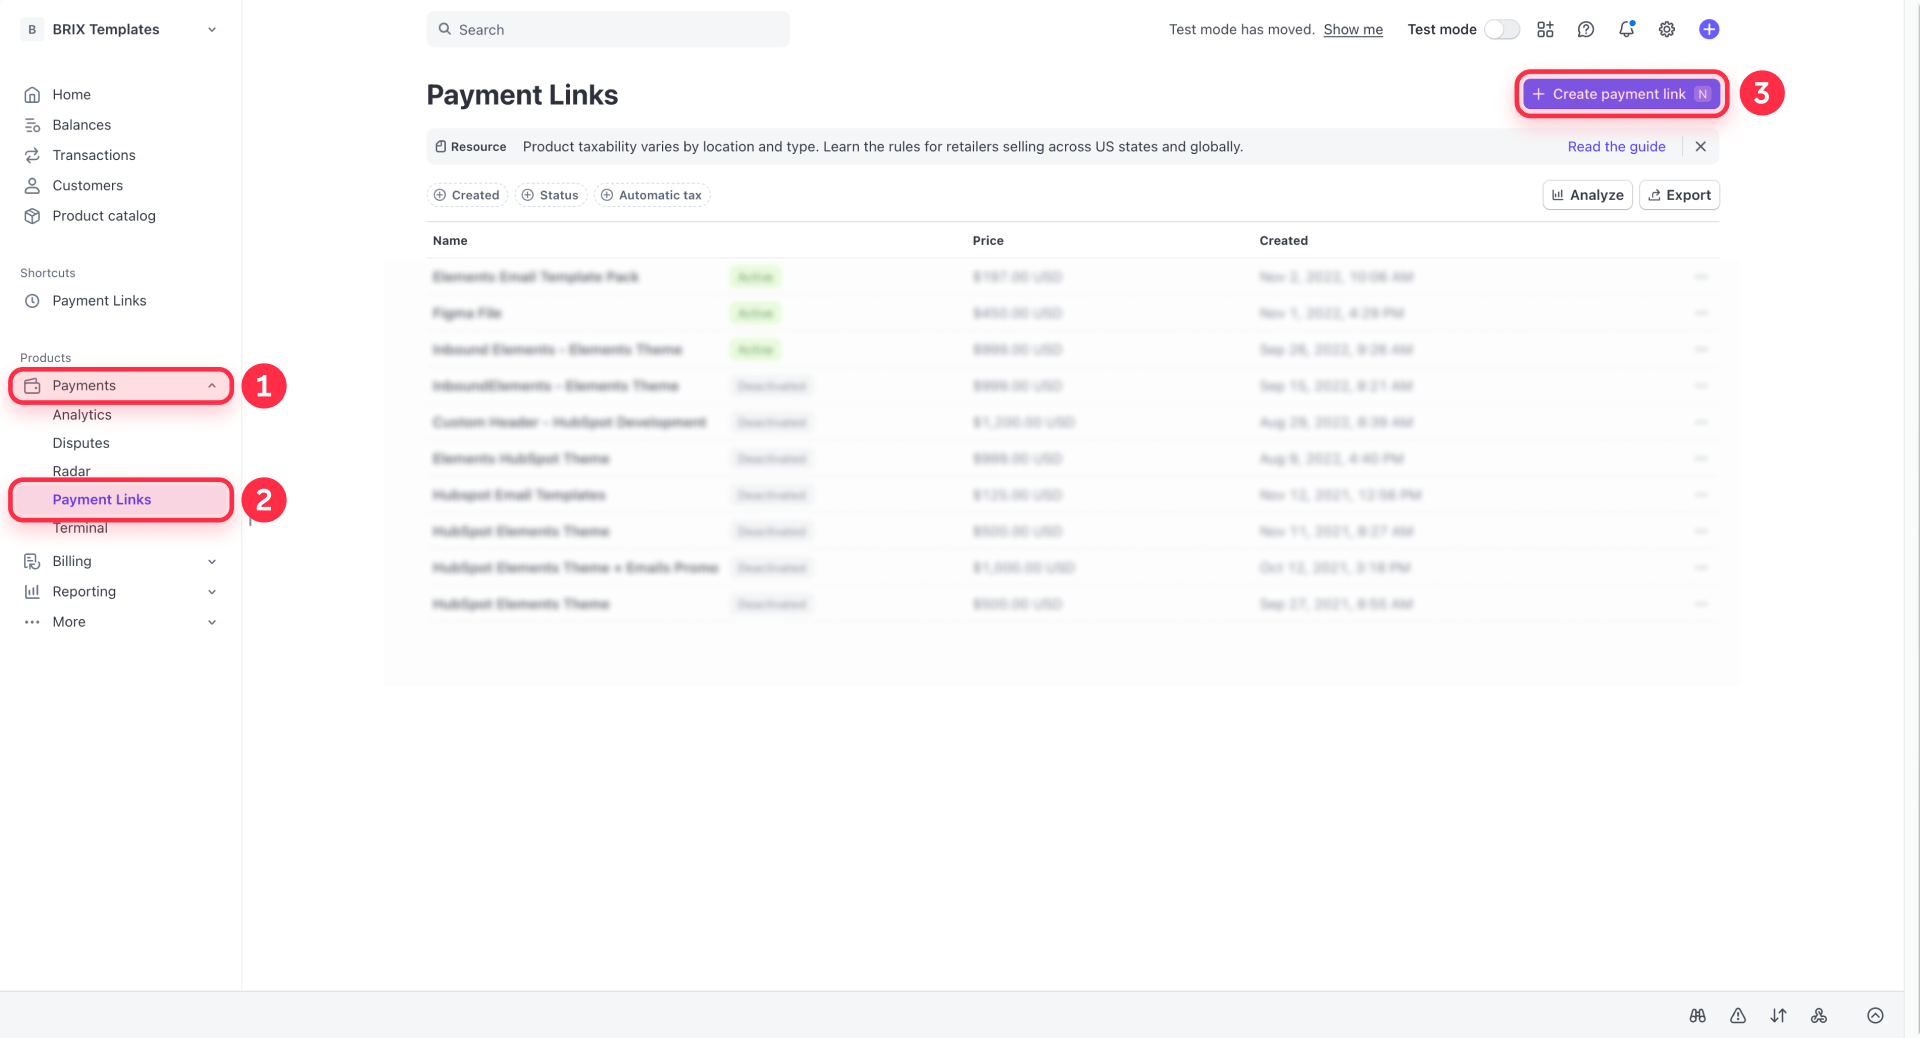
- In the Stripe Dashboard, go to Payment Links and click + New
- Choose between Products or subscriptions (fixed price) or Customers choose what to pay (useful for donations and tips, but doesn't support recurring)
- Set up your product name, price, and any checkout options you need
- Click Create link and copy the URL
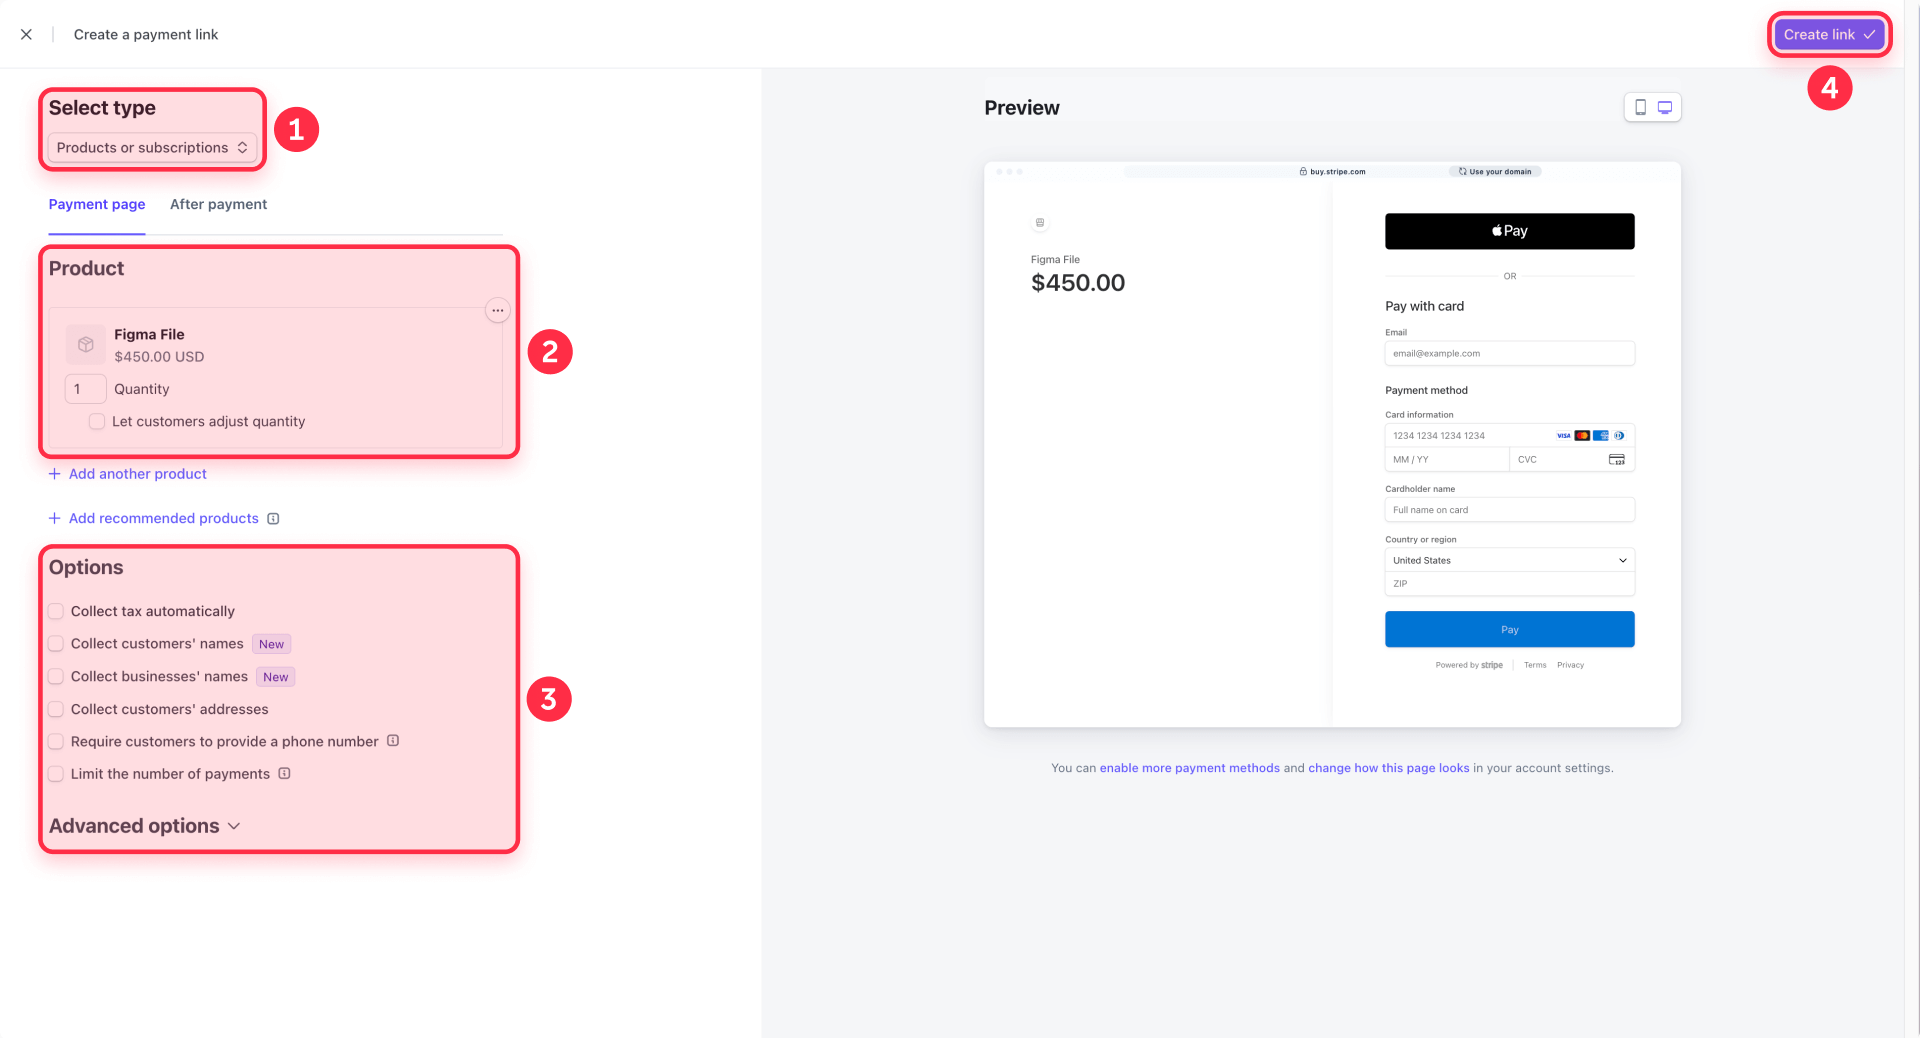
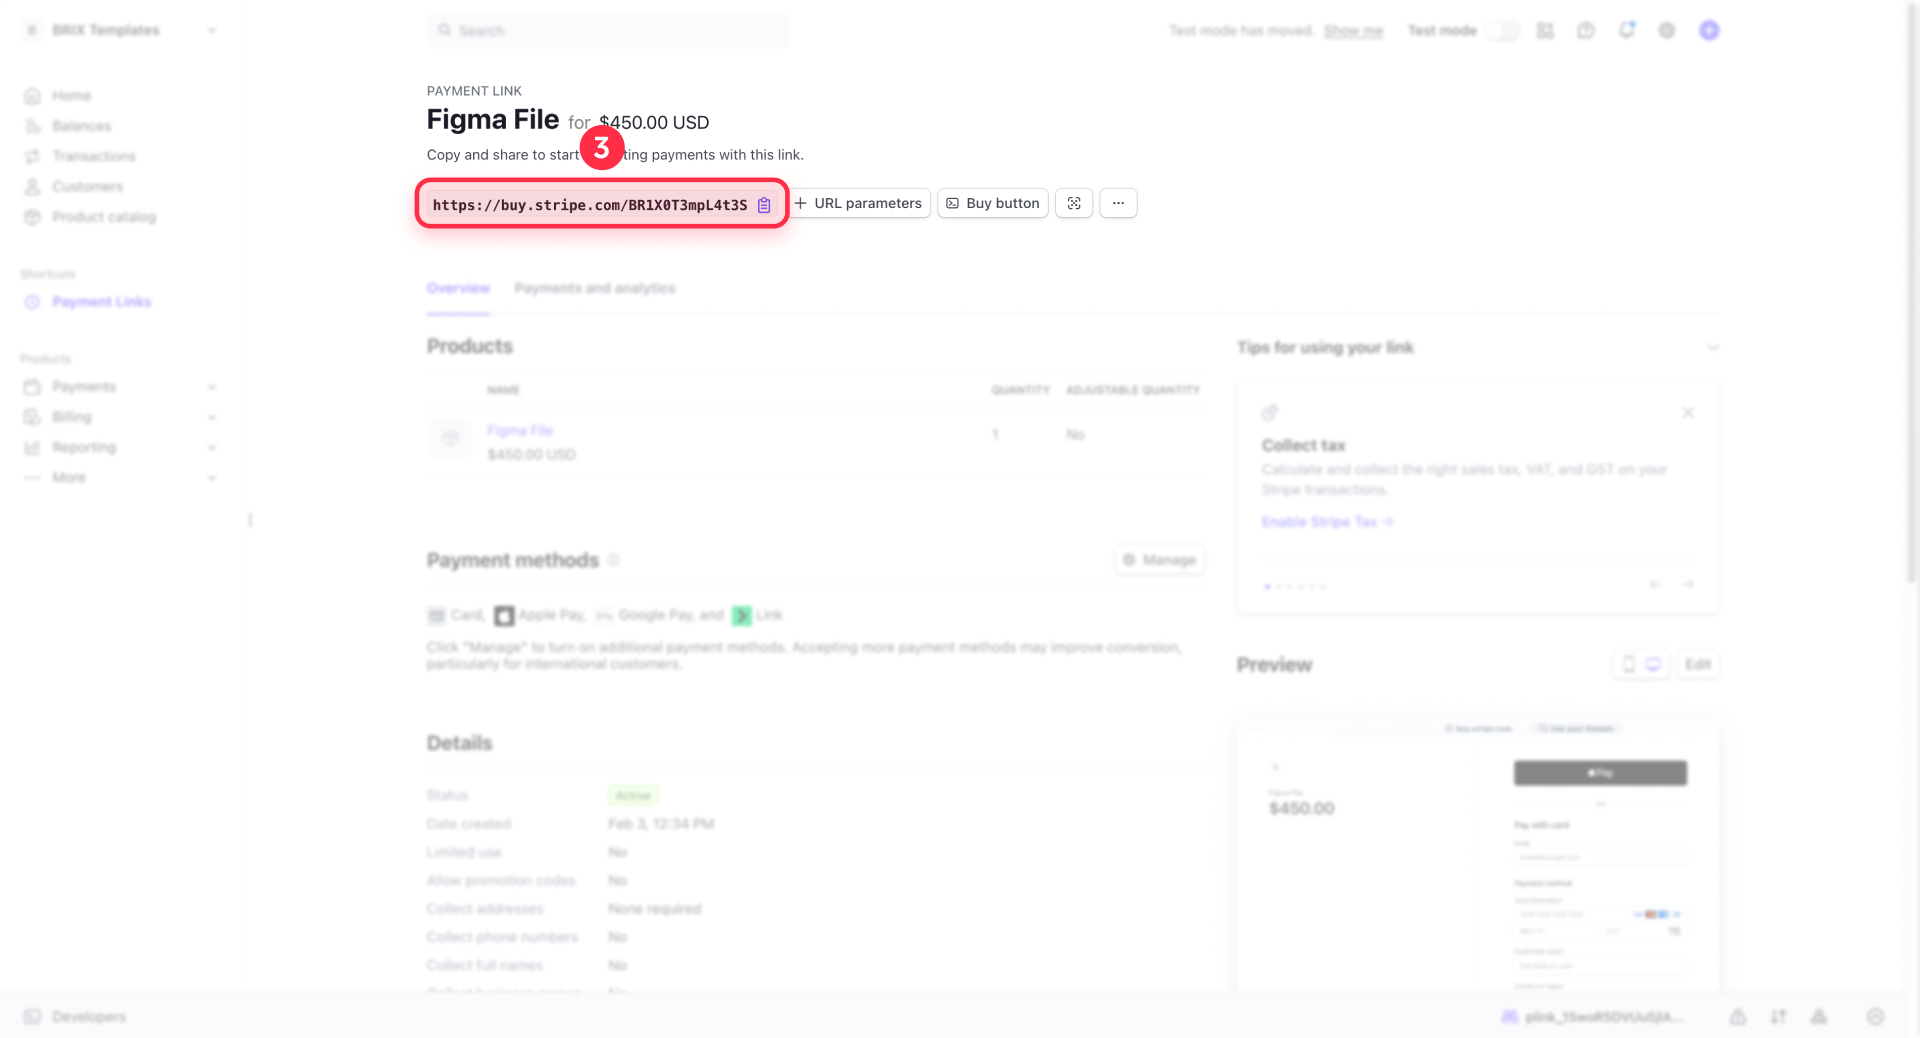
Stripe automatically displays the most relevant payment methods for each visitor—including Apple Pay and Google Pay—so you get a modern checkout experience with no extra setup.
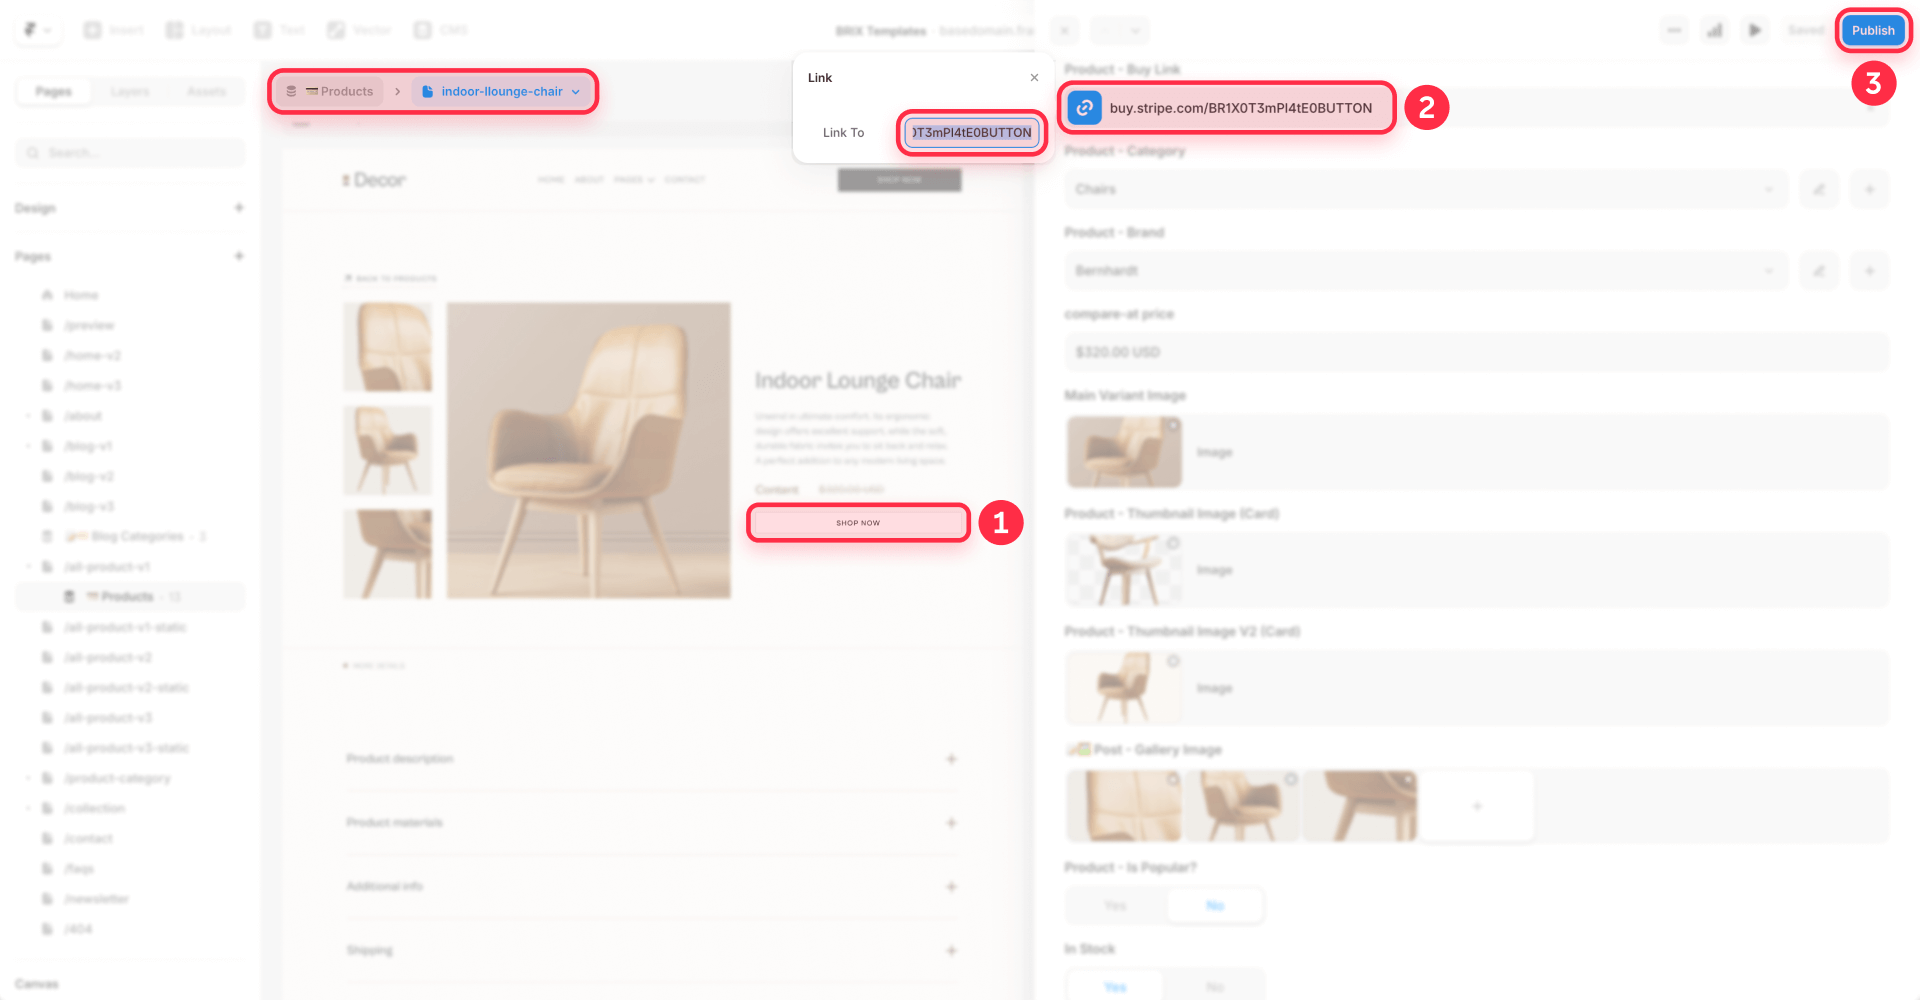
Connecting a Stripe Payment Link to a Framer button
- Select your CTA button in the Framer canvas (for example, "Buy now" or "Pay deposit")
- In the right panel, set the button's Link property to the Stripe Payment Link URL
- Publish your site and test the full flow

That's all it takes. You now have payments running on your Framer site.
Managing multiple Stripe Payment Links with Framer CMS
If you're selling several offers, don't hardcode links into individual pages. Use Framer CMS to keep everything organized.
- Create a CMS Collection (for example, "Offers" or "Services")
- Add a Link field for the Stripe Payment Link URL—use a proper Link field, not plain text, to avoid formatting mistakes or broken URLs in production
- Build a CMS page template with your product layout
- Bind your CTA button's Link property to the CMS Link field
Now each CMS item gets its own Stripe Payment Link, and your template stays reusable. Add a new offer in the CMS, paste in its Stripe link, and it's live without touching the canvas.
Redirecting back to Framer after a payment
Hosted checkout works best when you control what happens after the transaction.
- Create a Framer page at a stable URL like /thank-you
- Add a clear confirmation message and a next-step CTA (download link, onboarding form, booking calendar)
- In Stripe, open your Payment Link and go to the After payment settings
- Set it to Redirect customers to a URL and paste your Framer thank-you page URL
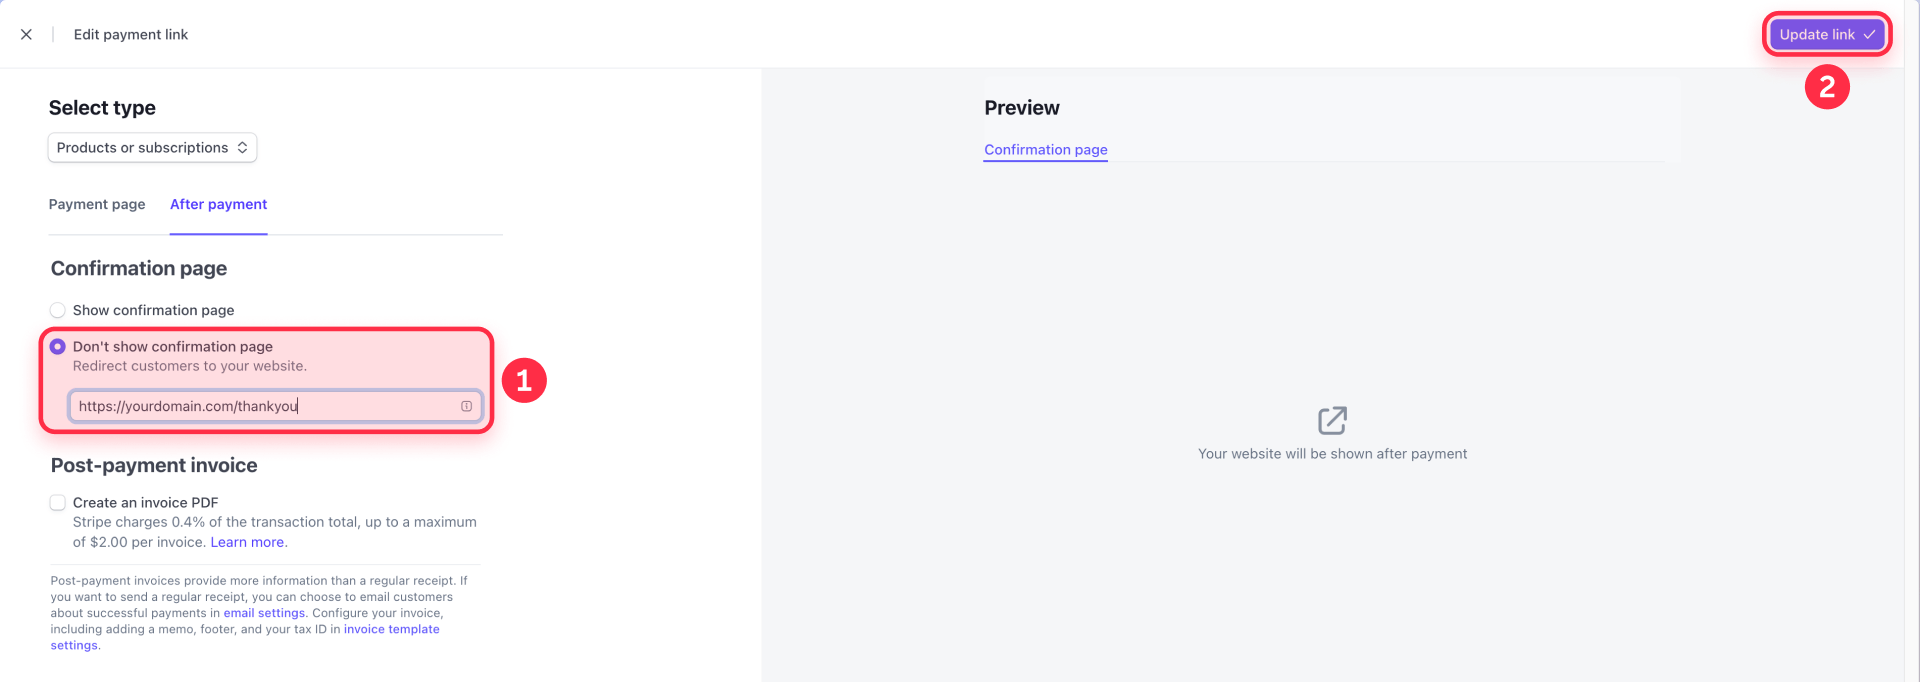
Keep your thank-you page URL stable—don't change slugs mid-campaign, or your redirects will break.
Handling emails and delivery after payments on Framer
Here's what most people forget: Framer has no order system, so nothing happens automatically after a customer pays. There's no order record, no fulfillment workflow, and no confirmation email from Framer's side.
Your options:
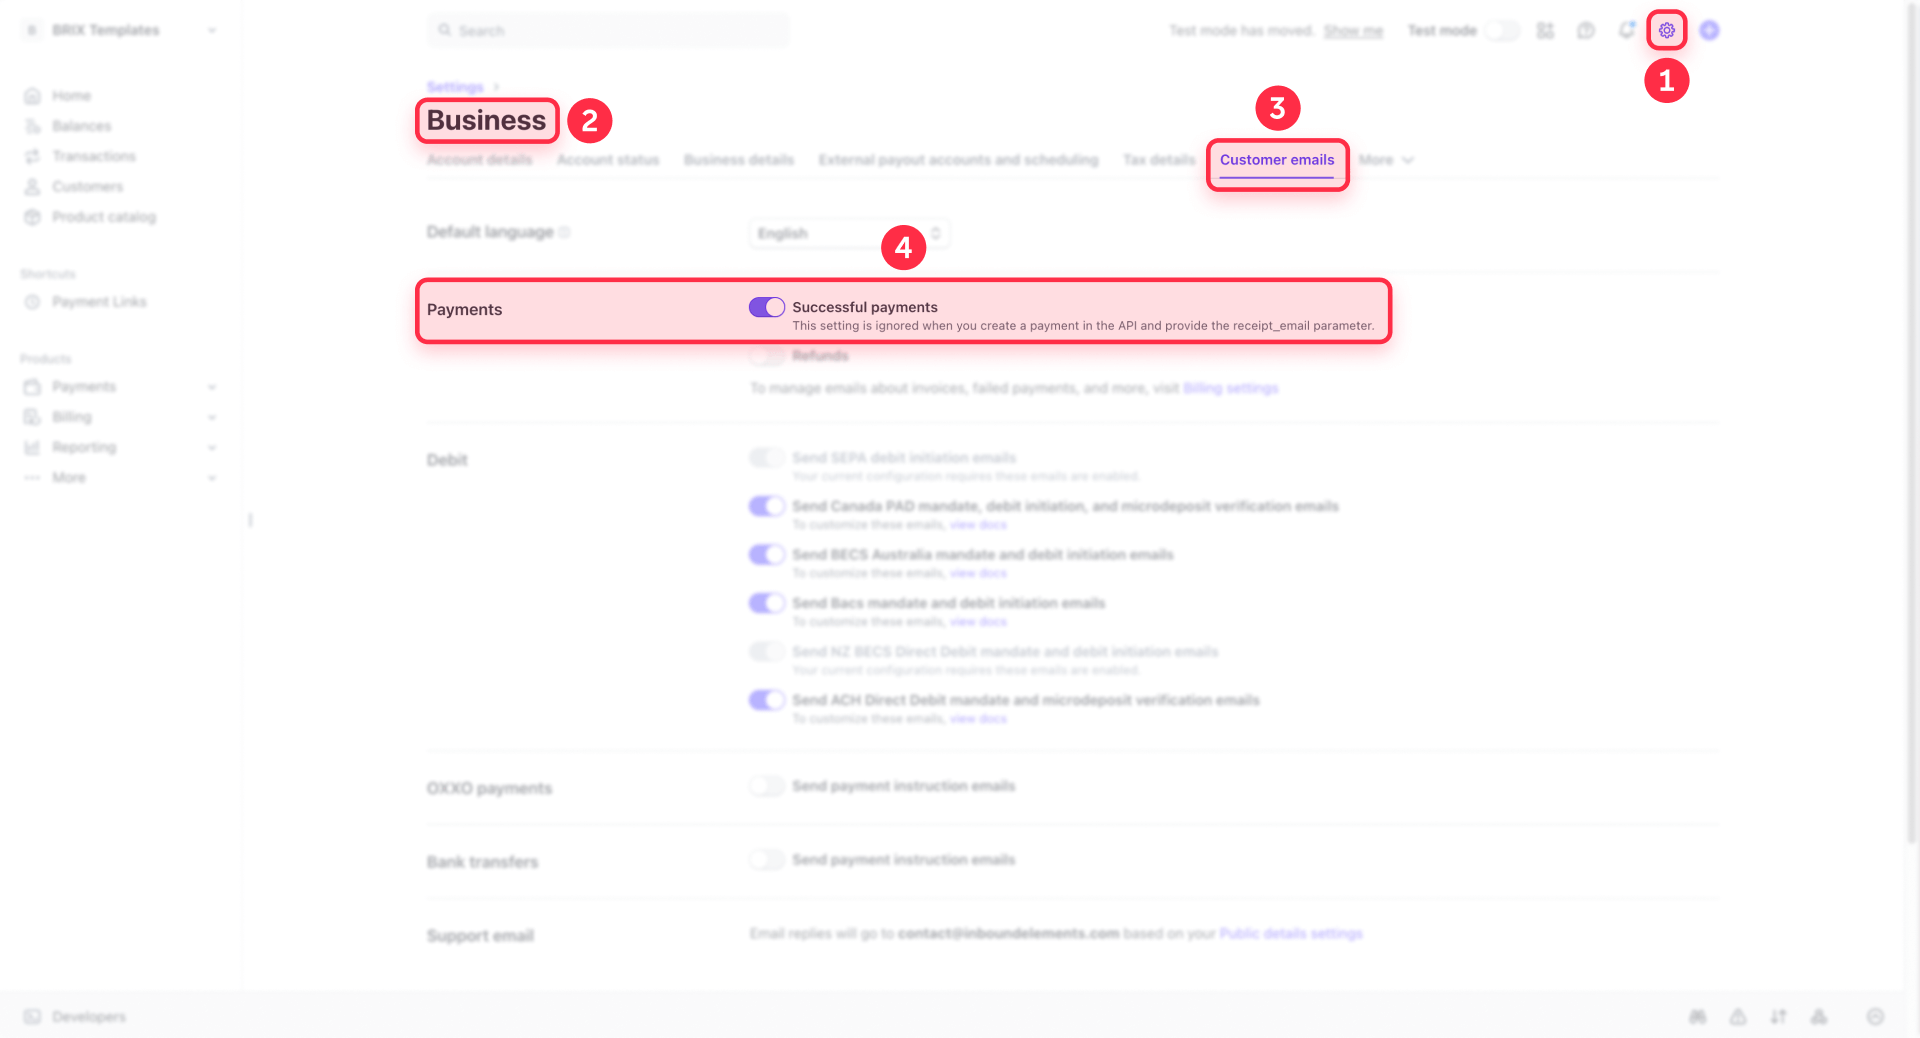
- Stripe receipts: Turn on email receipts in your Stripe settings—they're clean, immediate, and require zero extra configuration
- Stripe's redirect page: Send customers to your Framer thank-you page with download links, next steps, or onboarding instructions
- Third-party automation: If you need more (deliver a file, invite to a platform, notify your team), you can connect Stripe to tools like Zapier or Make, and from there trigger actions in Mailchimp, Google Sheets, Slack, or almost any other service
For digital products, don't rely on a public download URL that anyone could share. Use an automation that sends a unique link per purchase, or gate access behind a membership tool.
Embedding a Stripe Buy Button on a Framer site
If you want the checkout trigger embedded directly on your page instead of a standard link, Stripe lets you generate a Buy Button widget for any Payment Link. The checkout experience is identical—the difference is that the CTA lives inside your Framer page as an embedded component.
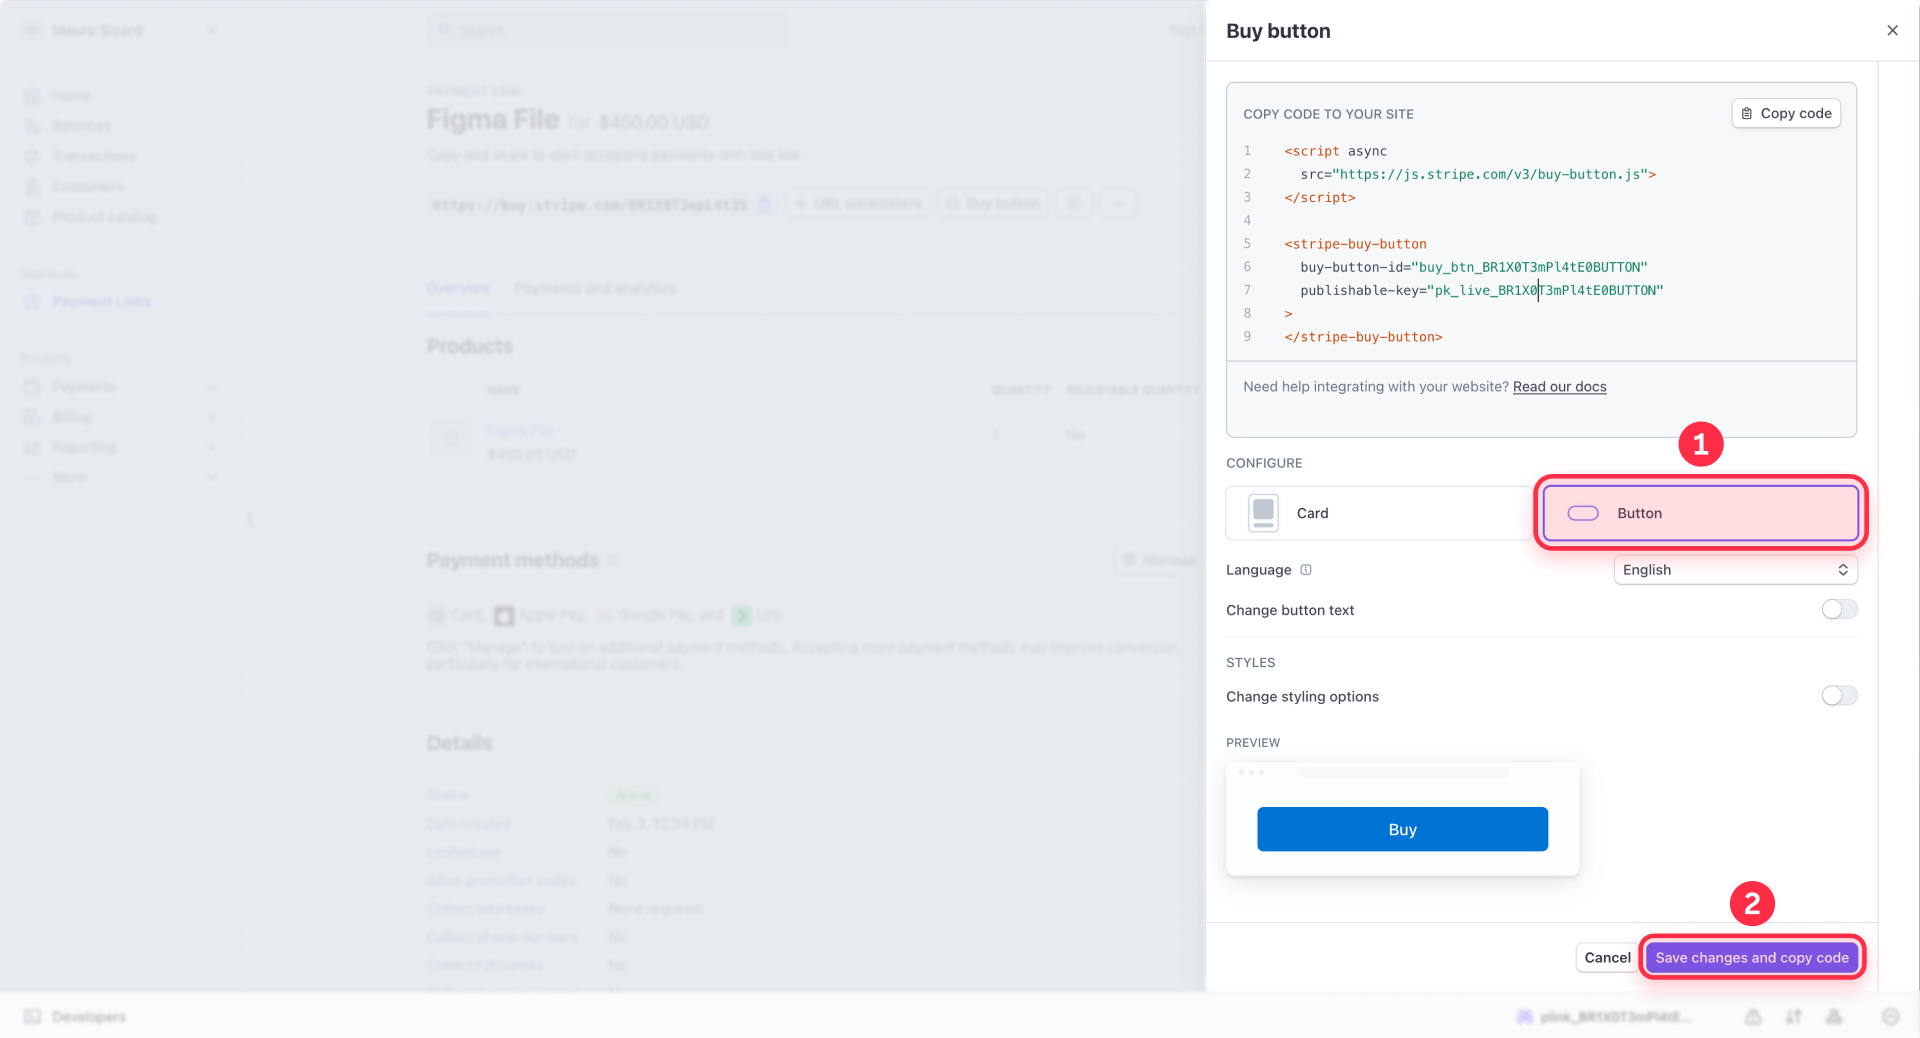
Generating the Stripe Buy Button code
- In the Stripe Dashboard, go to Payment Links
- Select a link and click Buy button
- Configure the style (button or card widget) and copy the generated code
Adding the Stripe Buy Button to Framer
If you only need one Buy Button on a page, paste the full snippet into a Framer Embed component in HTML mode.
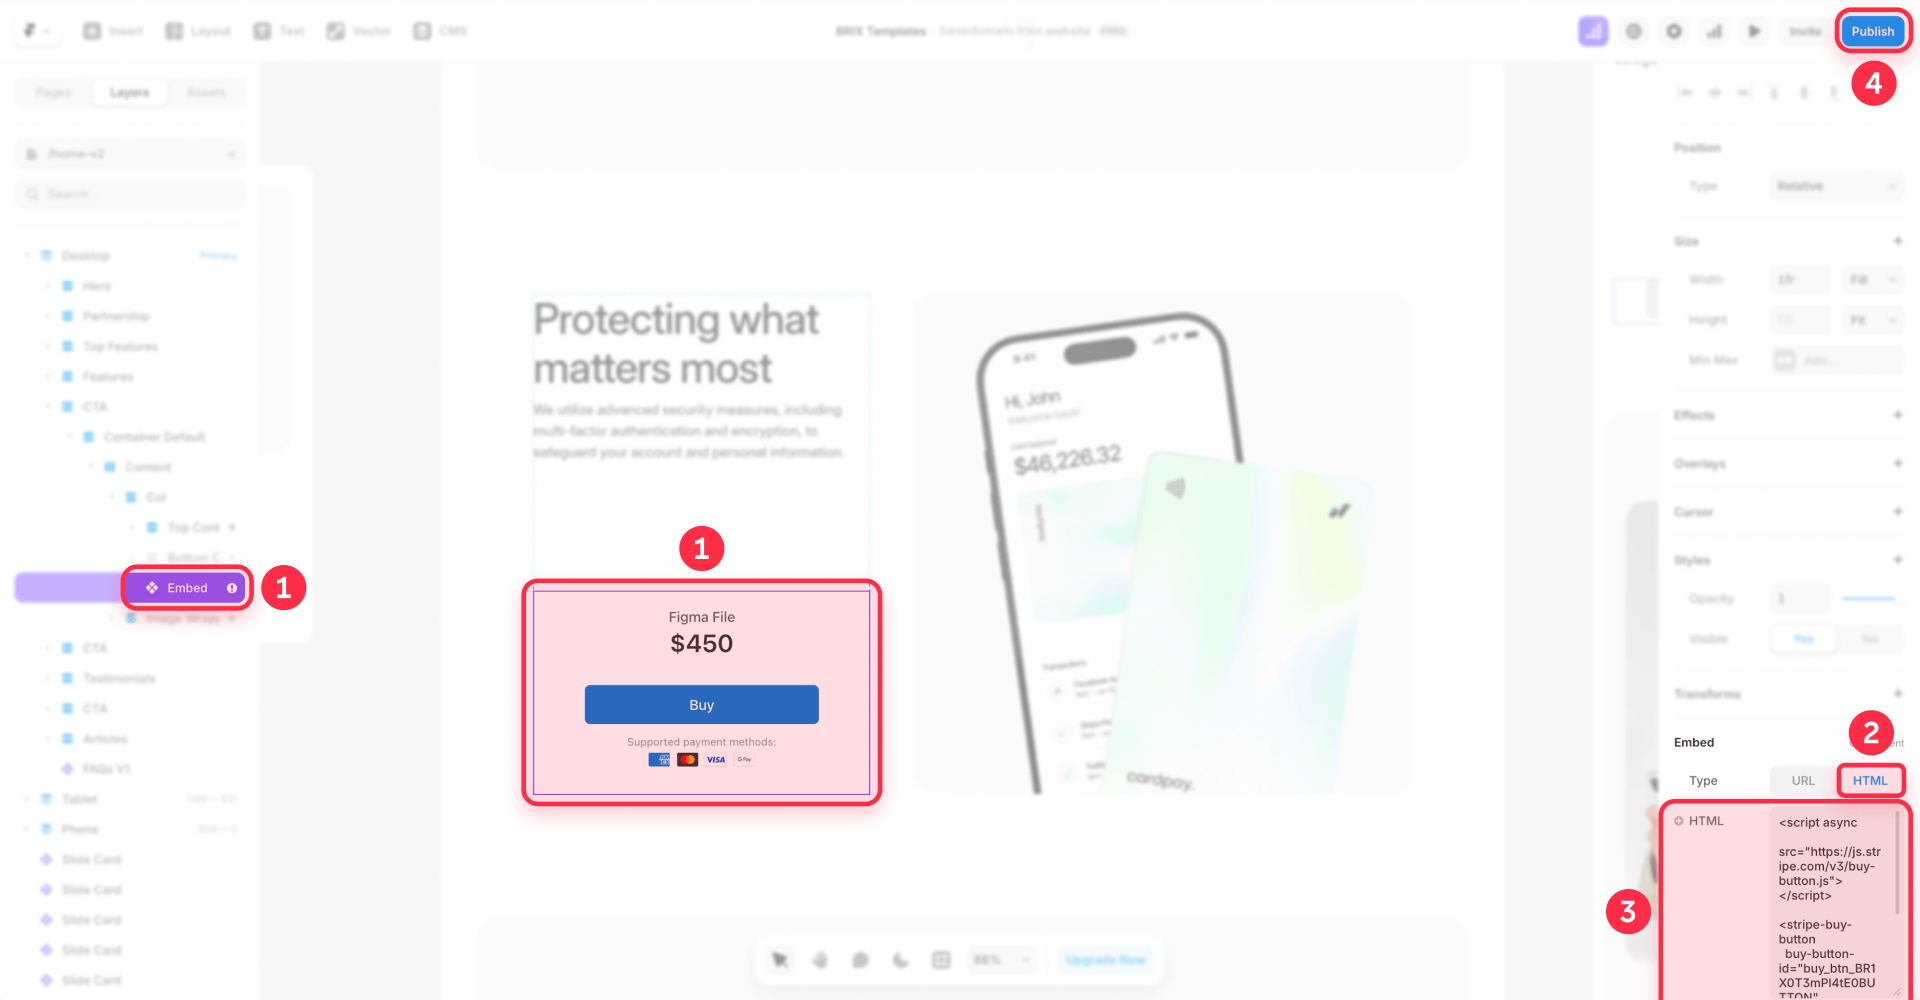
If you're placing Buy Buttons on multiple pages, load the Stripe script once using Project Settings → Custom Code (place it at the end of the body for better performance), then add only the button element in each page's Embed component. This avoids duplicate script tags, which is a common cause of "it works on one page but breaks on another."
Important: Many embeds won't render in the Framer canvas preview. Always publish and test on the live site. If a Stripe embed shows blank, check whether the embedded service is being blocked by security headers—if so, switch to a link-based approach.
Passing context into Stripe checkout from Framer
Stripe Buy Button supports attributes like client-reference-id (useful for reconciliation and webhooks) and customer-email (prefills the email field at checkout). These can be helpful if you're connecting Stripe events to downstream automation.
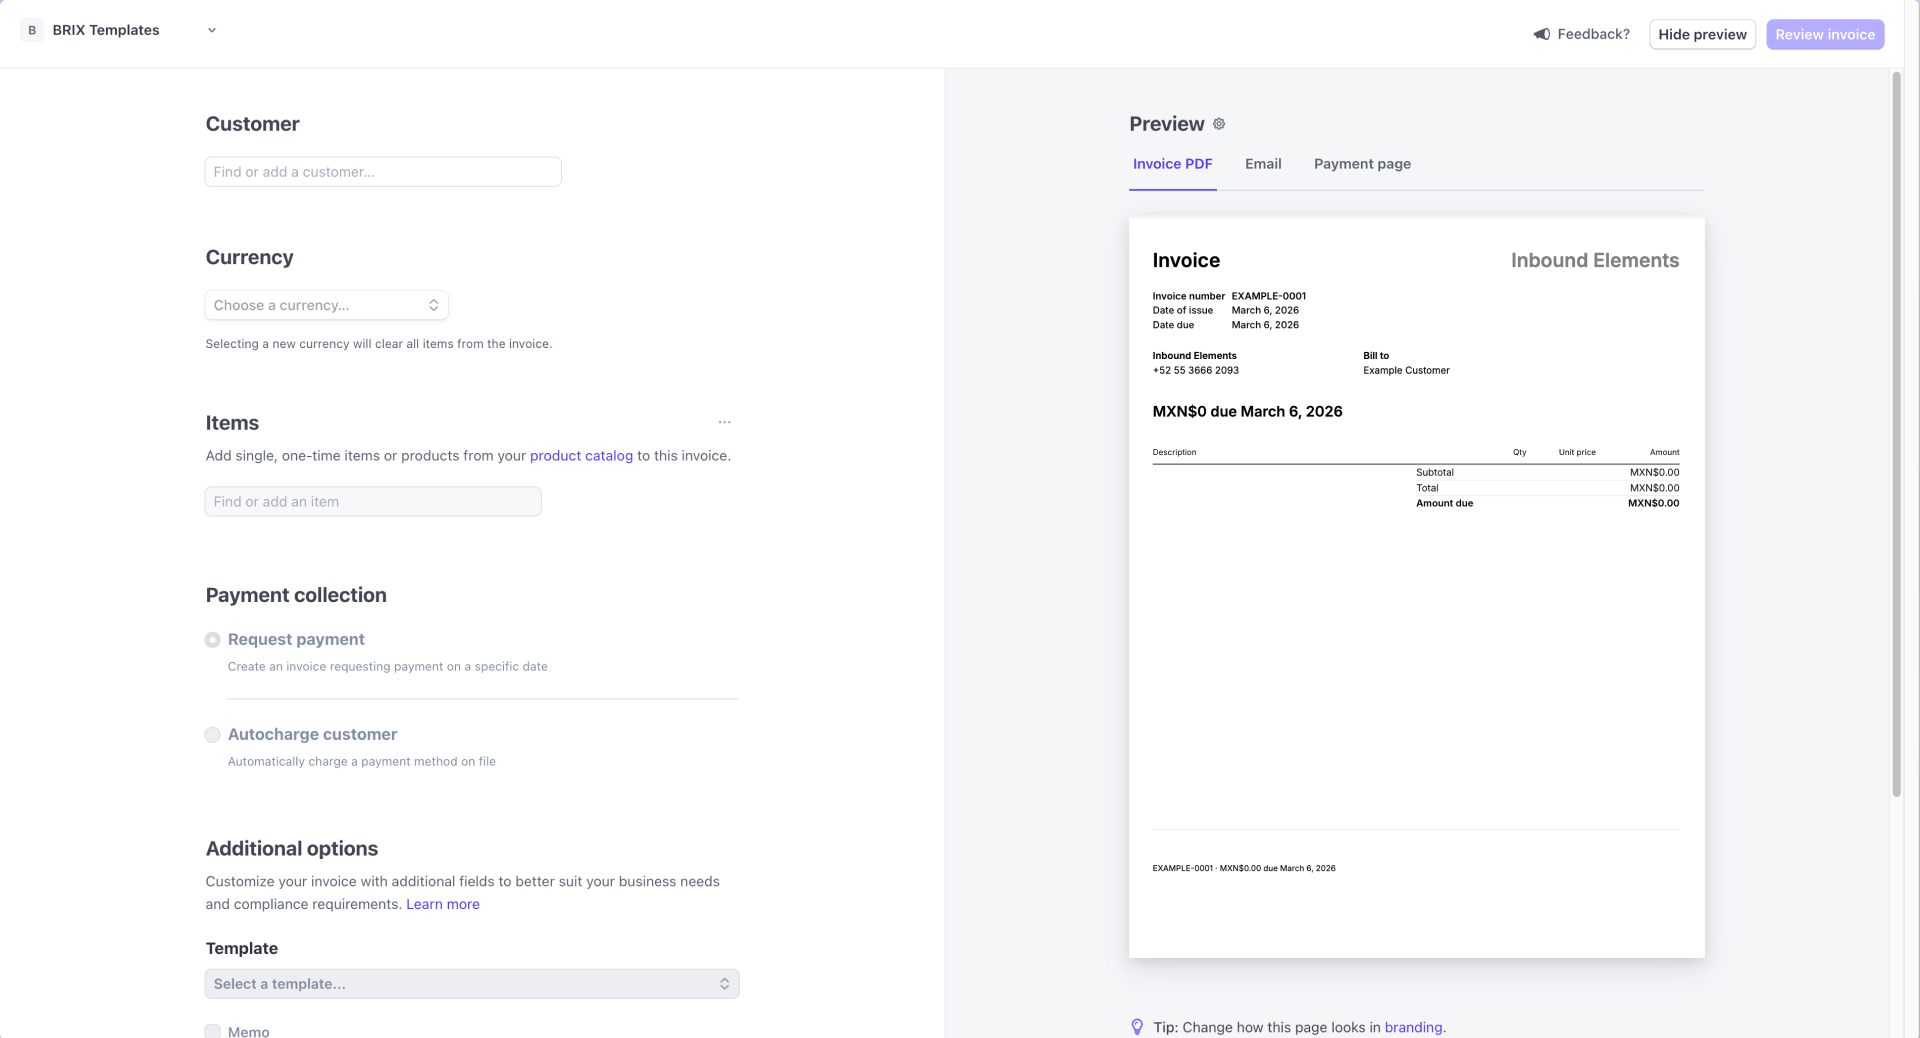
Collecting high-ticket payments on Framer with Stripe Invoicing
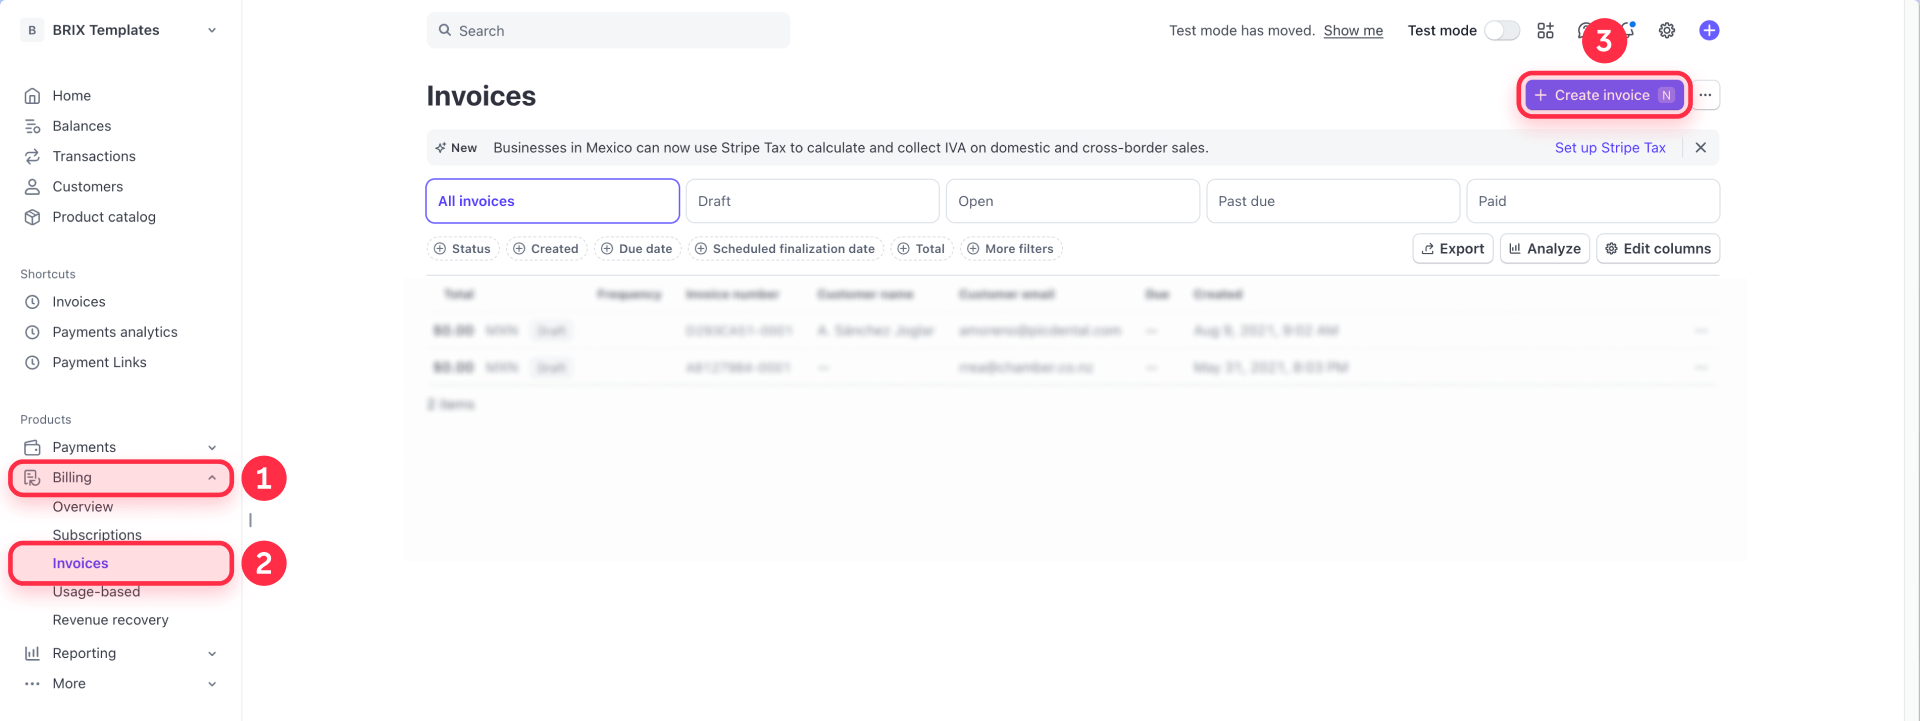
For B2B services, consulting, and custom projects, Stripe Invoicing is often a better fit than a generic Payment Link. Invoices support line items, partial payments, payment plans, and custom terms—things a "Buy now" button simply can't do.
When Stripe Invoicing makes more sense than Payment Links on Framer
Use Invoicing when:
- You're sending a payment request to a specific client, not "anyone with a link"
- You need partial payments or installment plans
- You want line items showing exactly what the client is paying for
- You need professional payment terms (net 30, net 60)
Automating invoice creation from a Framer form
The cleanest flow connects a Framer form directly to Stripe Invoicing through automation:
- Add a form to your Framer site labeled "Request a quote" or "Get an invoice"
- Set the form to send data as JSON to a webhook endpoint (Framer supports HTTP POST for form submissions)
- Connect that webhook to Zapier or Make, which receives the form data and creates a Stripe invoice with the client's name, email, line items, and payment terms
- Stripe sends the hosted invoice link to the client automatically
This way, a client fills out your Framer form, and within minutes they receive a professional Stripe invoice in their inbox—no manual work on your end.
Note: Framer webhooks don't follow 3xx redirects. Your endpoint must return a 2xx response or Framer will retry the request.
Building a multi-product store on Framer with Frameshop
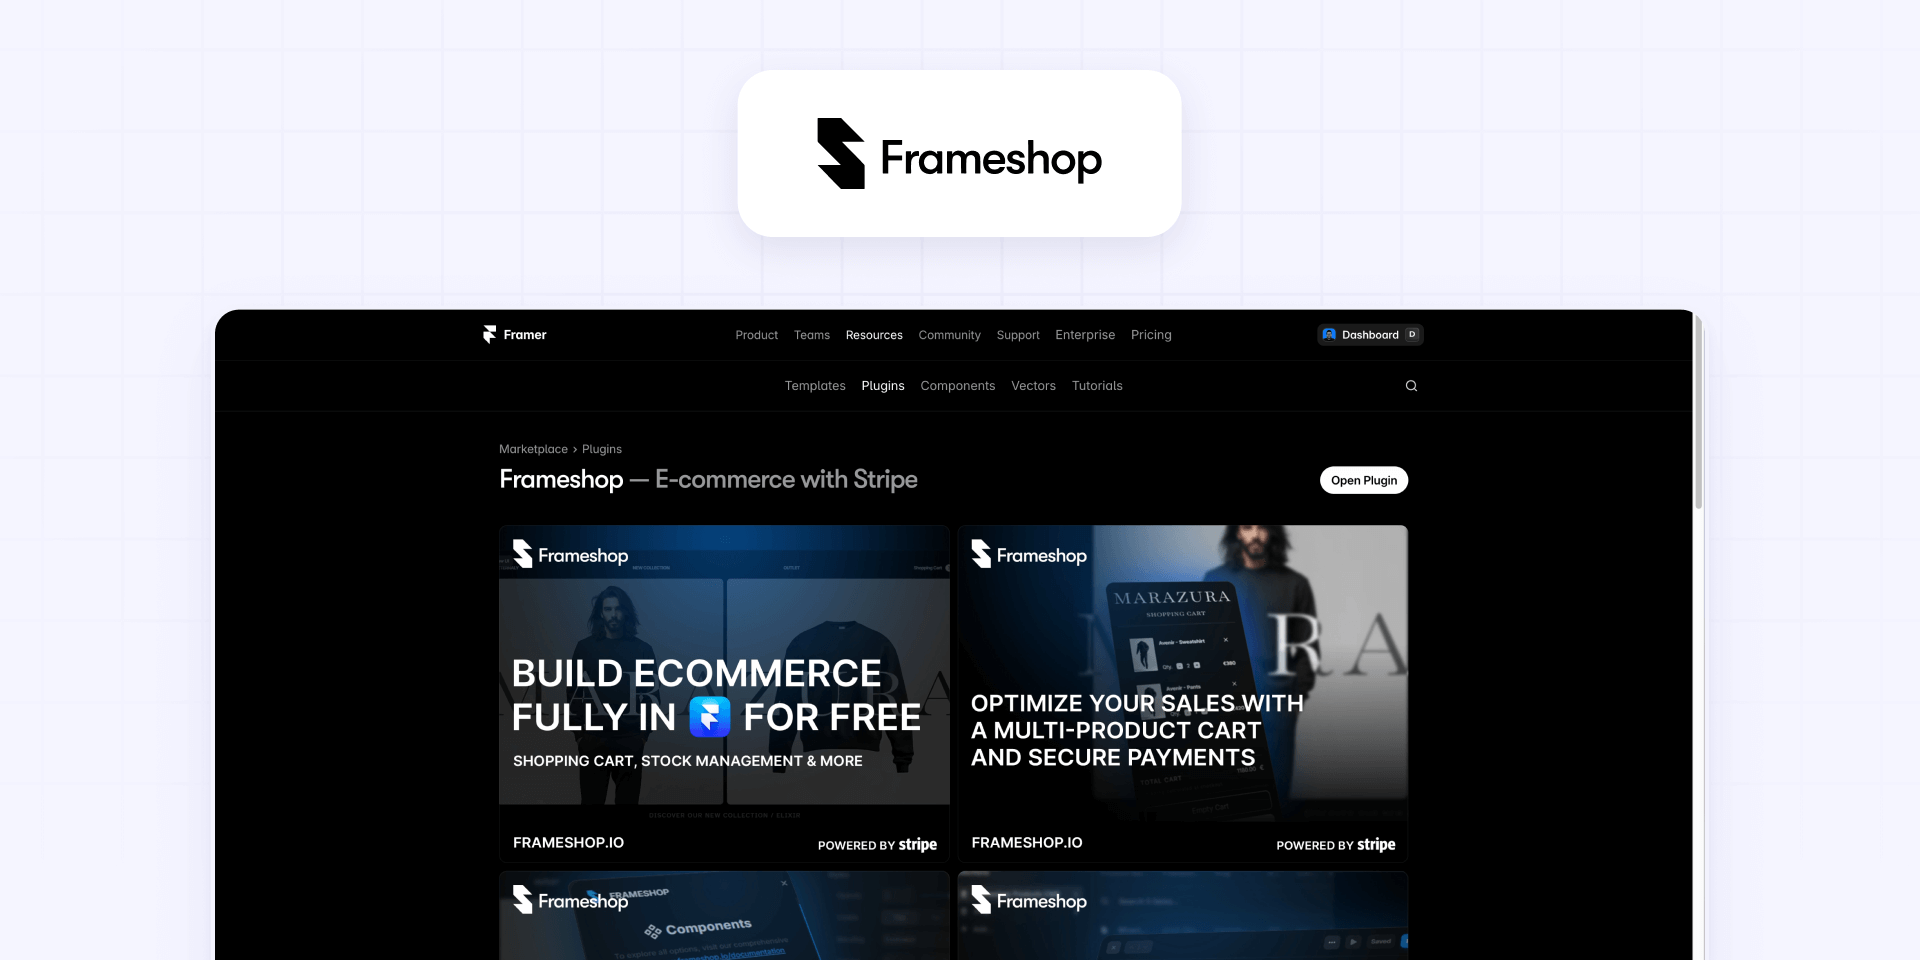
If Stripe Payment Links feel too limited because you need a cart, Frameshop is a Framer plugin designed to add ecommerce with cart and checkout functionality directly inside Framer.
What Frameshop does on a Framer site
Frameshop lets you manage products inside Framer CMS, sync them with Stripe, and build multi-product checkout flows using its provided components—product lists, product pages, and checkout UI. It's the closest you can get to a "Framer-native store" without leaving the platform.
Setting up Frameshop on Framer
- Install the Frameshop plugin from the Framer Marketplace
- Follow Frameshop's setup to create products in Framer CMS and connect them to your Stripe account
- Use the Frameshop components to build product grids, detail pages, and cart functionality
Understanding Frameshop limitations on Framer
Frameshop covers the basics well, but if your business needs advanced inventory rules, complex shipping logic, deep discounting systems, or mature order management, Shopify is still the more robust engine. Frameshop is best for sites that need cart functionality without the overhead of a full ecommerce platform.
Using Shopify checkout on a Framer site
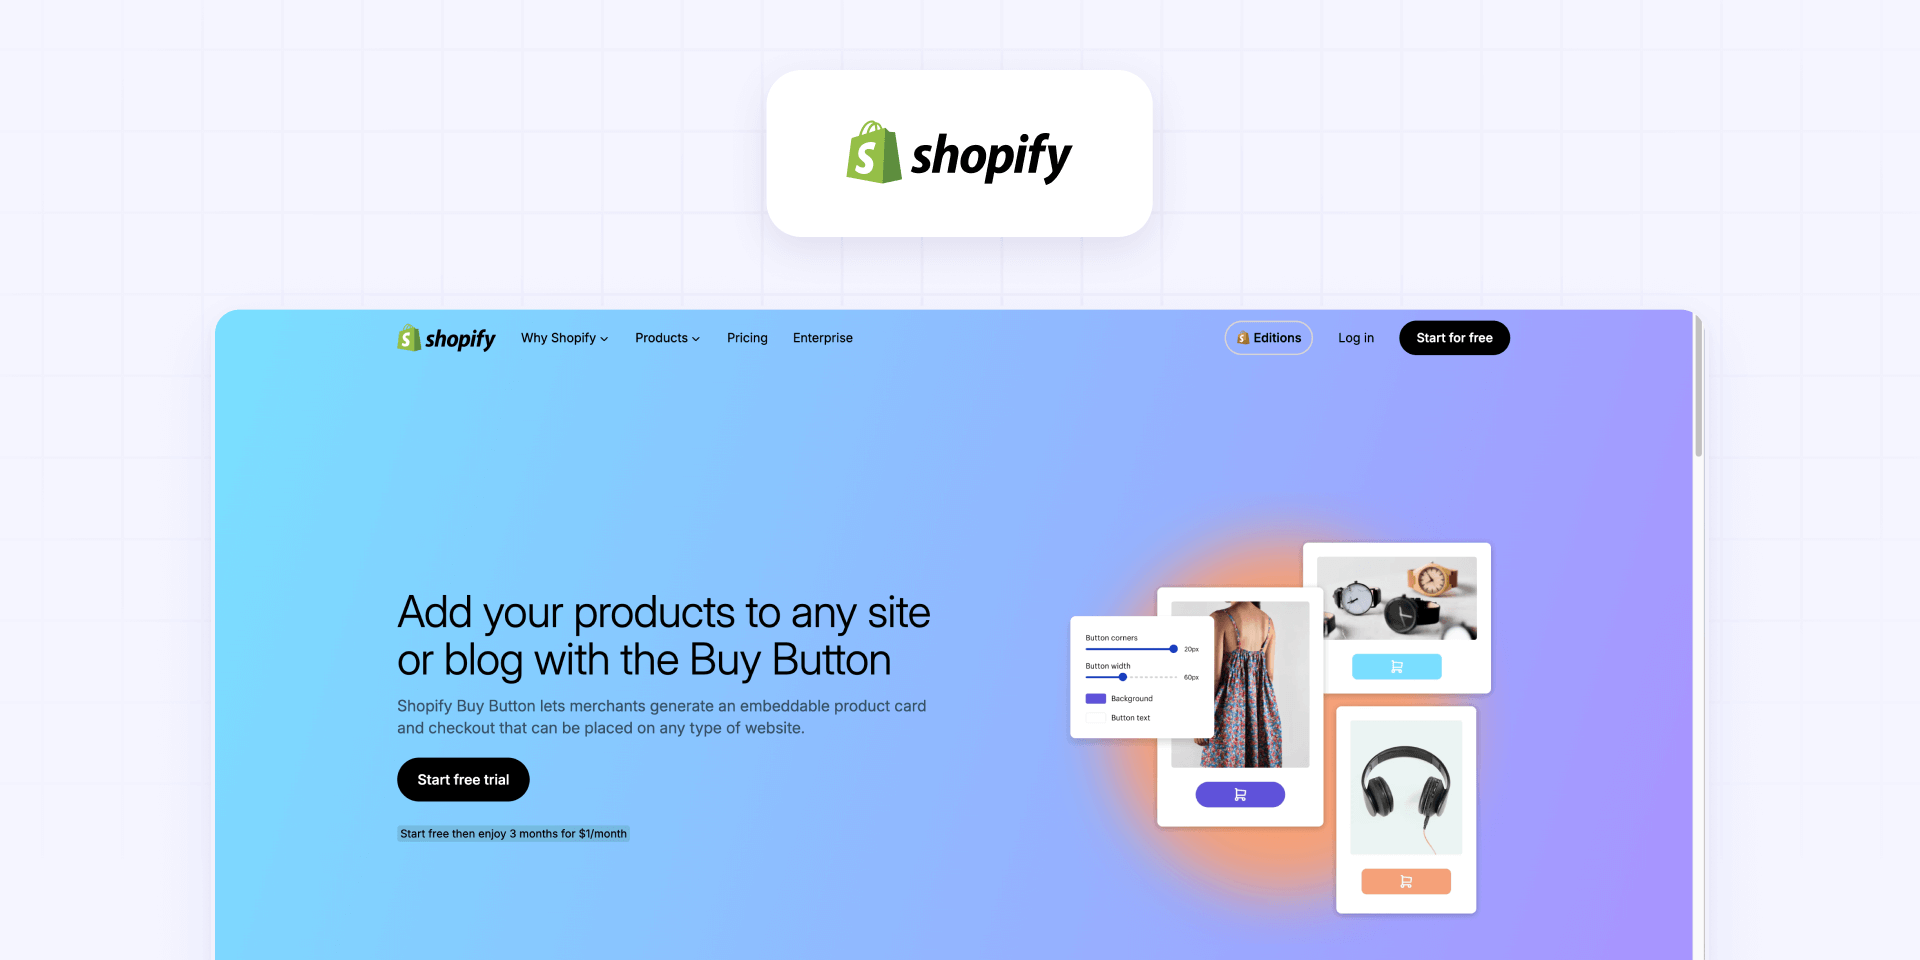
This is the "serious ecommerce engine, best-in-class checkout" approach. You design your entire storefront in Framer, but transactions, inventory, shipping, taxes, and discounts are handled by Shopify.
Adding a Shopify Buy Button to Framer
The fastest path is Shopify's Buy Button sales channel:
- Create a Buy Button in Shopify for your product
- Copy the embed code
- Paste it into a Framer Embed component in HTML mode
This gives you a single-product checkout powered by Shopify's infrastructure.
Using the Framer Commerce plugin for a headless setup
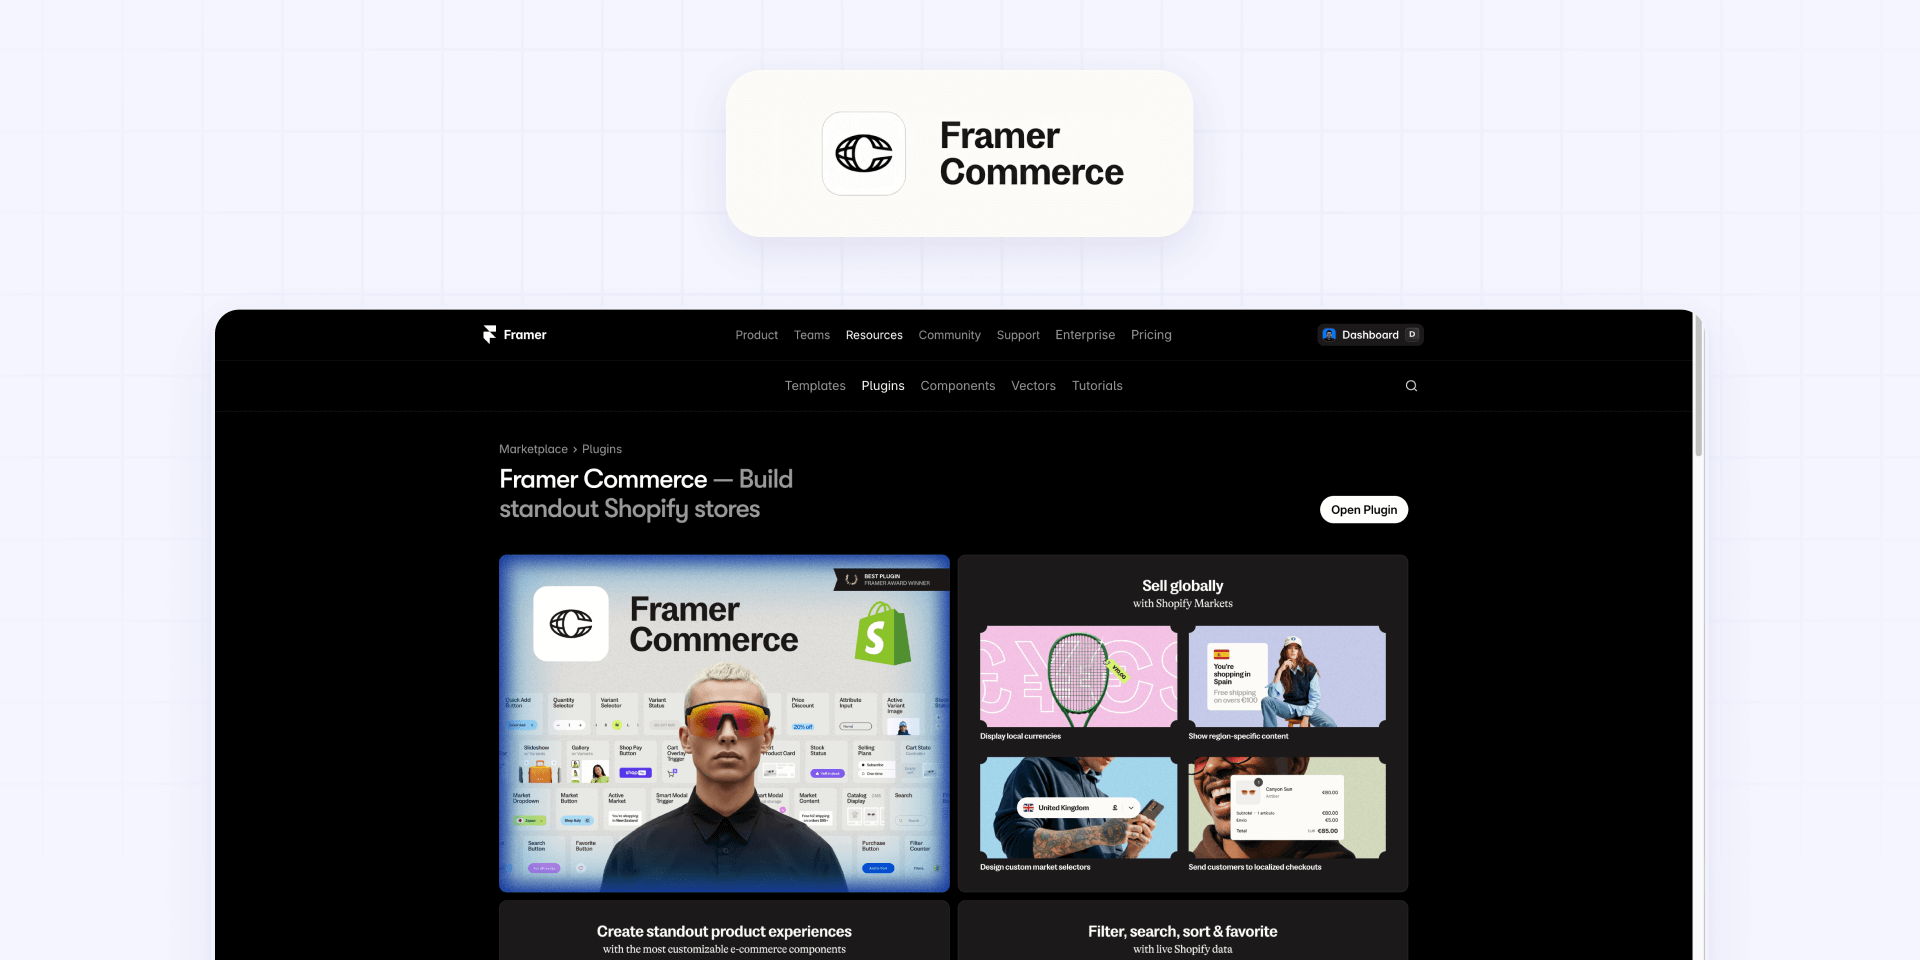
The Framer Commerce plugin syncs Shopify products and collections directly into Framer, letting you build custom product grids and detail pages while Shopify handles everything behind the checkout.
This is the right choice when you need:
- Custom product layouts designed entirely in Framer
- Shopify's inventory, discount codes, tax calculation, and shipping rules
- A checkout experience that customers trust
If your original goal was "just accept payments" but you're finding that you also need inventory, shipping, and discount management, Shopify checkout behind a Framer front-end is usually cheaper long-term than stacking multiple partial tools.
Selling memberships on Framer with Outseta or Thenty
When your product is access to something—a course, a community, premium content, SaaS features—you need billing and access control working together. Stripe handles money, but it can't gate pages or authenticate users. That's where membership tools come in.
Using Outseta for Framer memberships
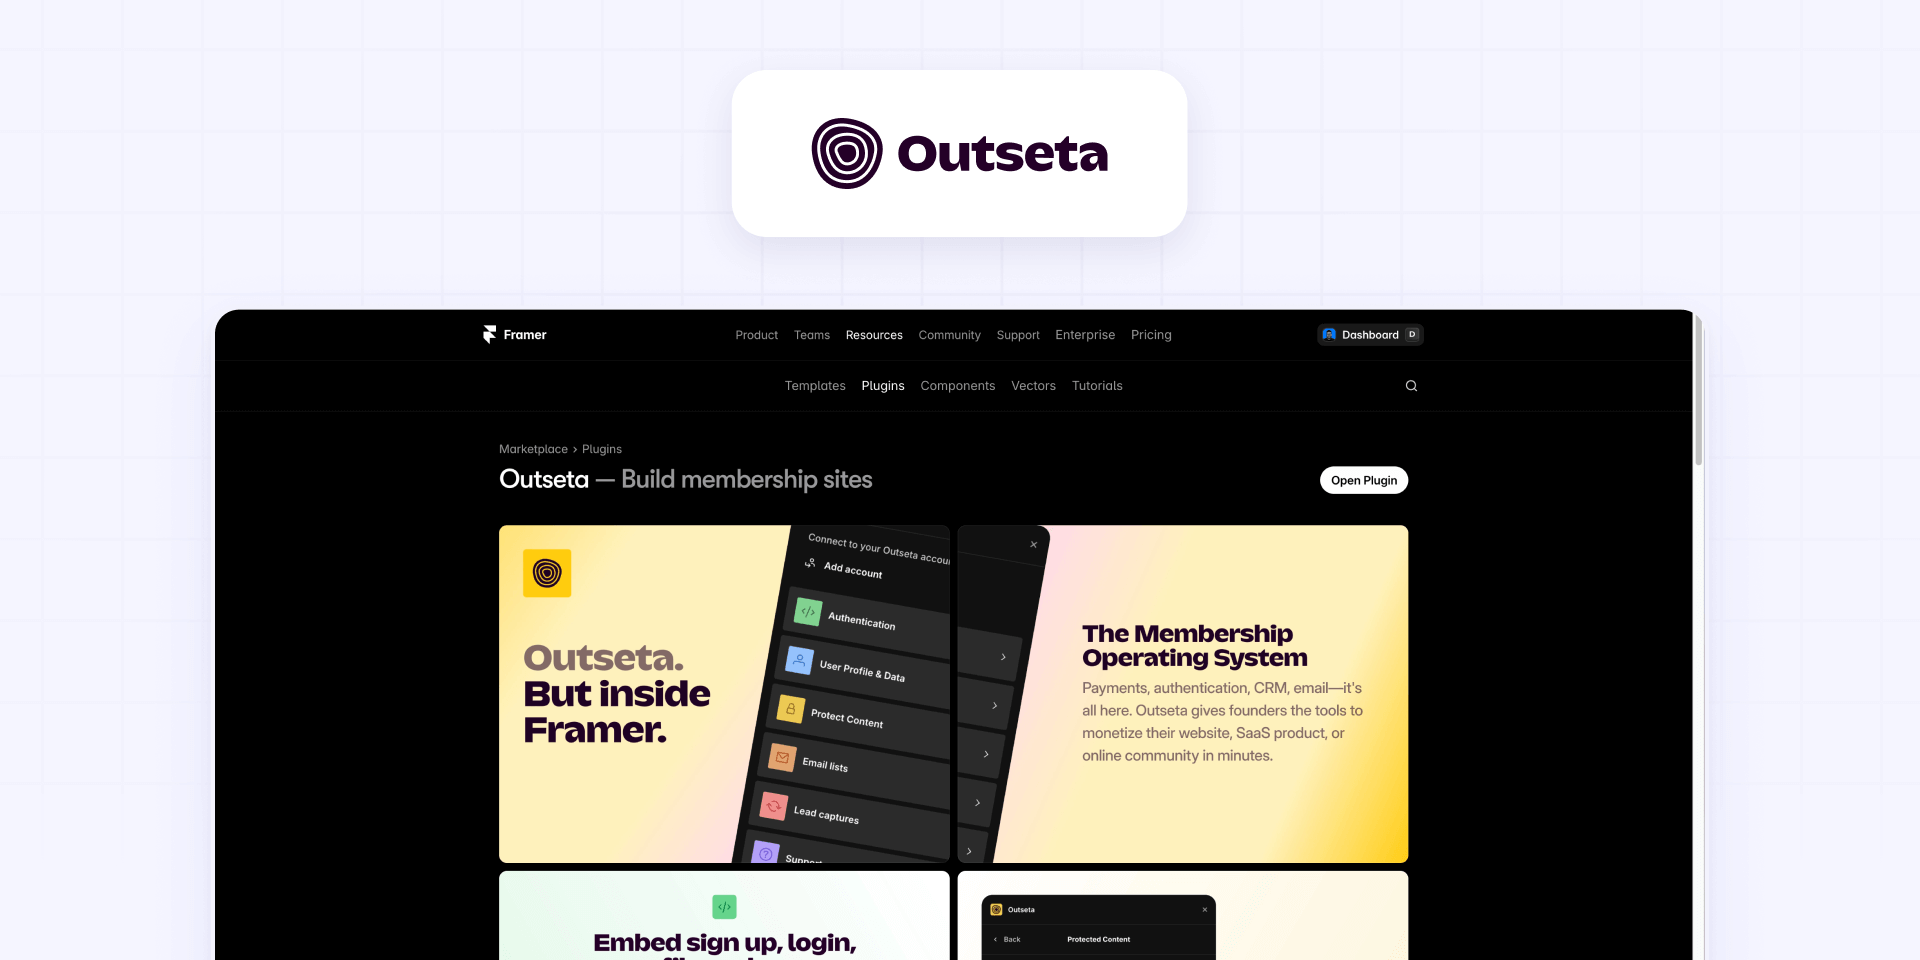
Outseta combines billing, CRM, and authentication in a single platform. Its Framer plugin lets you:
- Install Outseta from the Framer Marketplace
- Connect your Stripe account inside Outseta
- Define membership plans that map to Stripe prices
- Gate Framer pages or content based on membership status
Outseta is the stronger choice when you want billing plus customer relationship management—tracking lifecycle stages, sending targeted emails based on plan status, or managing support alongside subscriptions.
Using Thenty for Framer digital products and memberships

Thenty focuses specifically on selling digital products with checkout control and membership features. Its Framer plugin handles Stripe integration and access gating.
Choose Thenty when your model is more "product + gated content" than "full CRM"—it's lighter and more focused than Outseta.
Choosing between Outseta and Thenty for Framer
- Use Outseta when you need billing, authentication, CRM, and customer management in one tool
- Use Thenty when your primary need is selling digital products with gated access and you want a simpler setup
Both connect to Stripe and integrate natively with Framer. The decision comes down to how much customer management you need beyond the paywall.
Adding a cart to a Framer site using Foxy
When you need multi-item checkout with full cart functionality and you'd rather not use Frameshop or Shopify, Foxy offers a hosted cart and checkout layer that connects to Framer.
When Foxy makes sense for Framer sites
Foxy is a good fit when:
- Customers need to add multiple items before checking out
- You need a complete checkout flow with shipping, tax calculation, and order management
- You need subscription or recurring billing built into the checkout
- You want transactional emails handled automatically—Foxy sends receipts and confirmations by default
How Foxy connects to Framer
- Add Foxy's loader script via Project Settings → Custom Code (place it at the end of the body)—this powers the cart and checkout functionality site-wide
- Link Framer buttons to Foxy product URLs with the relevant product details (name, price, quantity)
Foxy also supports purchase forms where you set the form Action to Foxy's endpoint and use hidden fields for product data like name, price, and subscription frequency.
The trade-off is maintaining a separate commerce layer alongside Framer, with its own dashboard, settings, and fees. For sites that genuinely need cart behavior without a full ecommerce platform, that trade-off is worth it.
Frequently asked questions about accepting payments on Framer
Can I accept payments on a Framer site without a full ecommerce platform?
Yes—and most Framer sites do exactly that. The standard approach is hosted checkout, where Stripe handles the entire payment experience and you link to it from a Framer button. You don't need a store, a cart, or any payment infrastructure built into Framer.
The simplest starting point is a Stripe Payment Link connected to a Framer CTA button, with a redirect back to a Framer thank-you page. Build one test offer and run it end-to-end before scaling to more products.
How do I add a Stripe Payment Link to a Framer button?
Create the payment URL in the Stripe Dashboard, then paste it into your Framer button's Link property in the right panel. Publish and test the full flow—click, pay, redirect.
Configure the Stripe link to redirect customers back to a published Framer thank-you page so you control the post-payment experience. Keep that page URL stable throughout campaigns so redirects don't break.
How do I embed a Stripe Buy Button on a Framer site?
Generate the embed code from the Stripe Dashboard, then paste it into a Framer Embed component in HTML mode. If you're adding Buy Buttons to multiple pages, load the Stripe script once via Project Settings → Custom Code and place only the button element on each page.
Always test on the published site—many embeds won't render in the Framer canvas preview. If the embed shows blank, the service might be blocking iframes, in which case a standard link works better.
How do I sell subscriptions on a Framer site?
You have several options depending on your needs. Stripe Payment Links support recurring payments, so for simple subscriptions you can create a recurring Payment Link and add it to a Framer button. Foxy also handles subscription billing as part of its cart and checkout system.
If your subscription includes access control (gated pages, member-only content, login), you'll need Outseta or Thenty to handle authentication and page gating alongside billing.
What's the difference between Stripe Payment Links and Stripe Buy Button on Framer?
Both use the same Stripe-hosted checkout. The difference is how the CTA appears on your page. A Payment Link is a URL you attach to any Framer button—it's the simplest approach and easiest to style natively. A Buy Button is an embedded widget that renders Stripe's own button or card UI inside your Framer page.
Choose whichever minimizes complexity on your page. Fewer scripts and embeds usually mean better performance and fewer things to debug.
Does Framer send order emails when I use Stripe or other payment tools?
No. Framer has no order system, so nothing happens automatically after a customer pays—no confirmation email, no receipt, no fulfillment notification from Framer's side.
Your options are enabling Stripe's built-in email receipts (simplest), redirecting to a Framer thank-you page with next steps, or connecting Stripe to an automation tool like Zapier or Make for custom post-payment workflows.
When should I use Frameshop instead of Stripe Payment Links on Framer?
Use Frameshop when you need a product catalog with cart functionality inside Framer—multiple products, quantities, and a checkout flow. Stripe Payment Links handle one product per checkout, so they're not ideal when customers want to buy several items at once.
Frameshop manages products in Framer CMS and syncs with Stripe, giving you a "Framer-native store" without leaving the platform. If you need more advanced ecommerce operations (shipping rules, inventory, discounts), Shopify is the more mature option.
Can I use Shopify checkout on a Framer site?
Yes—and it's the go-to approach when you need a real ecommerce engine behind your Framer design. The fastest path is a Shopify Buy Button embed. For a deeper integration, the Framer Commerce plugin syncs products and collections into Framer while Shopify handles inventory, taxes, shipping, and checkout.
If you started looking for "payments on Framer" but realize you also need inventory, shipping, and discounts, Shopify checkout is usually more cost-effective than stacking several partial tools.
How do I gate Framer pages based on a Stripe subscription?
Stripe handles billing, but it can't control what visitors see on your Framer site. You need a membership tool like Outseta or Thenty that connects to Stripe and translates "this customer has an active subscription" into "show them this page."
Both tools have native Framer plugins. Outseta is broader (billing + CRM + auth), while Thenty is more focused on digital product delivery with gated access.
When should I use Stripe Invoicing instead of Payment Links on Framer?
Use Stripe Invoicing when you're dealing with specific clients, not anonymous buyers. Invoicing supports line items, partial payments, installment plans, and professional payment terms (net 30, net 60)—none of which Payment Links can handle.
It's the better fit for B2B services, consulting, and custom projects where each payment is unique. Connect a "Request a quote" form on your Framer site to Stripe Invoicing manually or through automation.
Conclusion
Accepting payments on a Framer site comes down to choosing the right external checkout for your business model. Stripe Payment Links and Buy Buttons handle most single-product scenarios. Stripe Invoicing covers high-ticket B2B. Frameshop and Foxy add cart functionality. Outseta and Thenty handle memberships with access control. And Shopify checkout steps in when you need a full ecommerce engine.
The key is matching the tool to what happens after payment—not just the checkout itself. Emails, delivery, access gating, and order management all need answers when Framer has no built-in commerce system.
If you'd rather have this implemented end-to-end with the right stack for your specific business model, our Framer team at BRIX can set it up correctly from the start.


Join readers commenting on this post!