
When building websites in Webflow, adding video content through lightboxes is a common requirement. However, Wistia videos in lightboxes typically require visitors to click twice – once to open the lightbox and again to start the video. This creates an unnecessary step that can impact user engagement and the overall viewing experience.
This guide will show you how to make your Wistia videos play automatically when a lightbox opens, creating a smoother experience for your website visitors. Whether you're featuring product demos, customer testimonials, or educational content, this simple enhancement can make a significant difference in how your videos are presented.
Understanding Wistia integration
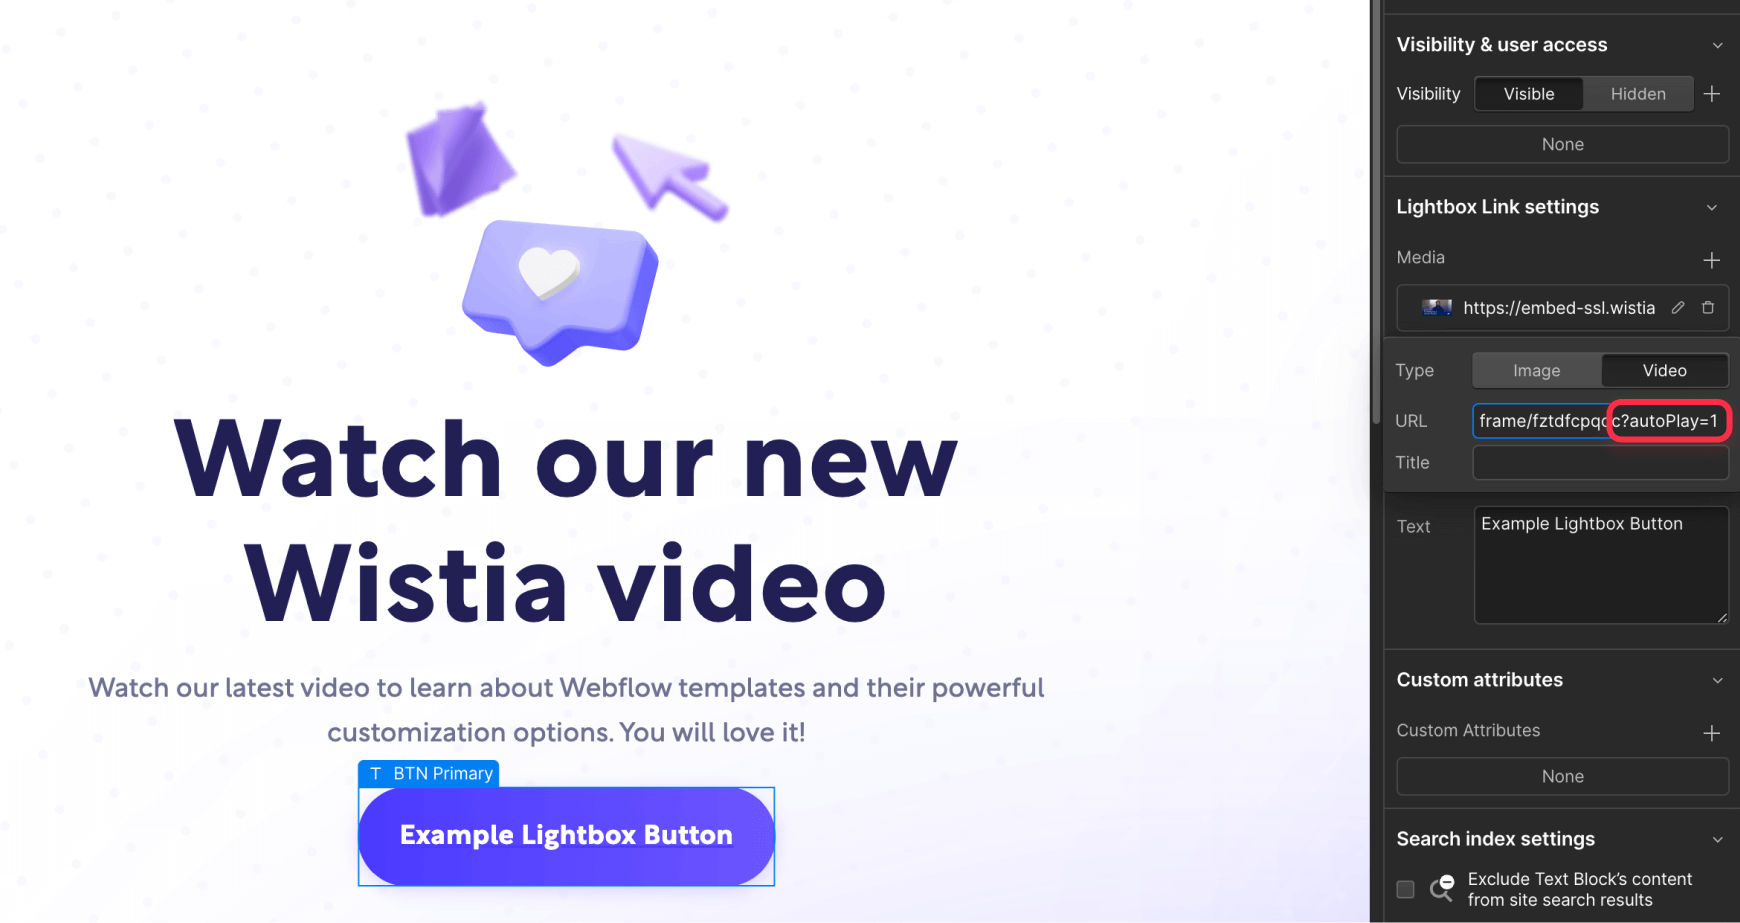
Getting Wistia videos to autoplay in Webflow lightboxes is a straightforward process that involves adding the specific ?autoPlay=true parameter to your video URL. This small modification tells the Wistia player to begin playback as soon as the lightbox opens, eliminating the need for that second click. The key is ensuring you're using the correct URL format and parameters that Wistia expects.
Step-by-step implementation
1. Setting up the video trigger
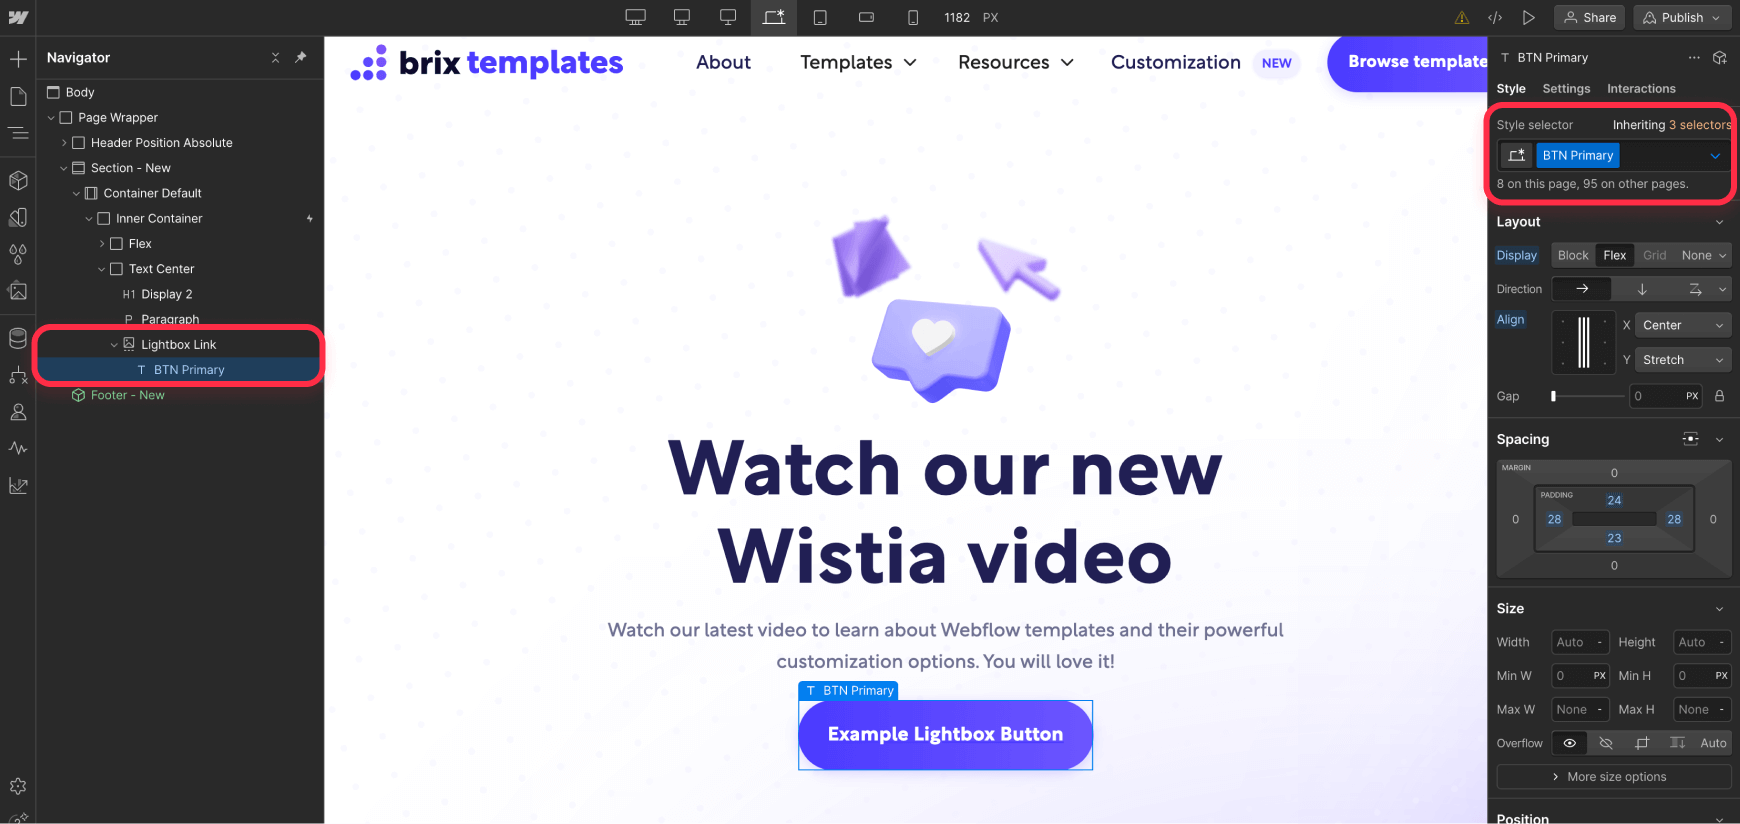
- Begin by adding a Lightbox element to your desired page location

After the Lightbox has been added, we can start customizing it's settings for Wistia:
- Select "Video" as your content type in the lightbox settings
- Insert a text block within the lightbox link
- Apply styling by adding a custom class to the text block (e.g., create a "wistia-video-button" class and style it according to your design system)
2. Preparing your Wistia video
- Access your video in your Wistia dashboard
- Locate the video's embed code or iframe URL
- Extract the URL that follows this format: https://fast.wistia.com/embed/iframe/VIDEOID
- Copy this URL for use in your Webflow lightbox settings
3. Configuring autoplay settings
- Add the autoplay parameter using Wistia's specific syntax: ?autoPlay=true
- Your complete URL should look like this: https://fast.wistia.com/embed/iframe/VIDEOID?autoPlay=true
Troubleshooting guide
When implementing Wistia autoplay, verify these essential elements if you encounter issues:
- Confirm your Wistia project permissions allow embedding
- Verify the video ID is correctly copied from your Wistia dashboard
- Check that the autoPlay parameter uses a capital 'P' as required by Wistia
- Ensure your lightbox settings are properly configured for video content, instead of images
Additional settings and considerations
When implementing Wistia videos in your lightbox, you can add extra parameters to enhance the viewing experience and ensure optimal performance across different platforms. Understanding these settings will help you create the best possible video experience for your visitors.
For the most reliable playback experience, you can add parameters to your Wistia URL to control behavior. For example, adding silentAutoPlay=true to your URL will start the video muted, which often provides better browser compatibility. The URL would look something like this: https://fast.wistia.com/embed/iframe/VIDEOID?autoPlay=true&silentAutoPlay=true
Setting up Wistia autoplay in Webflow lightboxes is a straightforward process that can significantly improve how your videos are presented. By following these implementation steps and understanding the available options, you can create a seamless video experience that starts playing as soon as your visitors interact with it.


Join readers commenting on this post!