While Webflow provides excellent visual design capabilities, running custom JavaScript functions on button clicks has traditionally required workarounds due to security restrictions on the onclick attribute.
This comprehensive guide introduces the brix-button-js attribute system that elegantly solves this limitation, allowing you to execute any JavaScript function by simply adding an attribute to your buttons.
Best of all, this solution can be implemented for free in under 5 minutes.
Introduction
Modern web applications often require custom JavaScript functionality triggered by user interactions. The brix-button-js attribute transforms Webflow's button elements into powerful triggers for any JavaScript function without complex event binding or ID management.
This implementation enables seamless function execution while maintaining Webflow's visual design workflow, creating an intelligent interaction system that bridges the gap between no-code design and custom functionality. You'll learn how to implement this versatile solution that works with any JavaScript function in your Webflow project.
Why custom button functions matter for Webflow sites
Understanding the strategic value of custom button functions helps you implement interactive features effectively:
- Calculator and interactive tools: Create instant calculations and conversions with buttons that trigger mathematical functions, update pricing displays dynamically, and provide real-time feedback without page refreshes
- Analytics and tracking integration: Fire custom analytics events to track user engagement precisely, send conversion data to multiple platforms simultaneously, and capture interaction patterns for optimization insights
- Dynamic content manipulation: Show/hide elements programmatically, update text and values dynamically, modify styles and classes based on user actions, and create interactive experiences beyond Webflow's native capabilities
- API and third-party integrations: Trigger external service calls, submit data to custom endpoints, integrate with payment processors or booking systems, and connect to any JavaScript-based SDK or library
Understanding Webflow's onclick limitation and the solution
Webflow blocks the direct onclick attribute for security reasons, preventing XSS attacks and maintaining platform stability. Our solution works differently — it uses a custom attribute system that Webflow allows, then safely connects these attributes to your functions using event delegation.
1 - Setting up your JavaScript functions on Webflow
Before implementing the button triggers, you need to define the JavaScript functions you want to execute.
Creating your custom functions
Follow these steps to set up your JavaScript functions:
- Plan your functions: Identify what actions you need (calculations, API calls, DOM manipulation) > List the function names you'll use > Keep names simple and descriptive
- Write your functions: Create functions in the global scope (accessible via window object) > Use clear, meaningful function names > Test each function independently first
- Add to your project: Place functions in Webflow's custom code section > Choose between page-specific or site-wide placement
Your functions are now ready to be connected to buttons using the brix-button-js system.
2 - Implementing the brix-button-js Webflow attribute system
The implementation involves adding the core JavaScript handler to your Webflow project and configuring buttons with the brix-button-js attribute.
Adding the brix-button-js script to your Webflow project
Here's how to add the button function execution capability:
1 - Copy the implementation script: This code handles all the magic:
[CODE WILL GO HERE]
2 - Add the script to Webflow:
- For one page: Open Page Settings (gear icon) > Go to Custom Code section > Paste into Before </body> tag > Hit Save
- For your whole site: Go to Project Settings > Custom Code > Add to Footer Code section > Click Save Changes

3 - Add your custom functions: Place your function definitions either before or after the brix-button-js script > Make sure functions are in the global scope
4 - Publish your site: Click Publish in the top-right > Select your staging domain and publish (don’t publish on production until everything works perfectly)
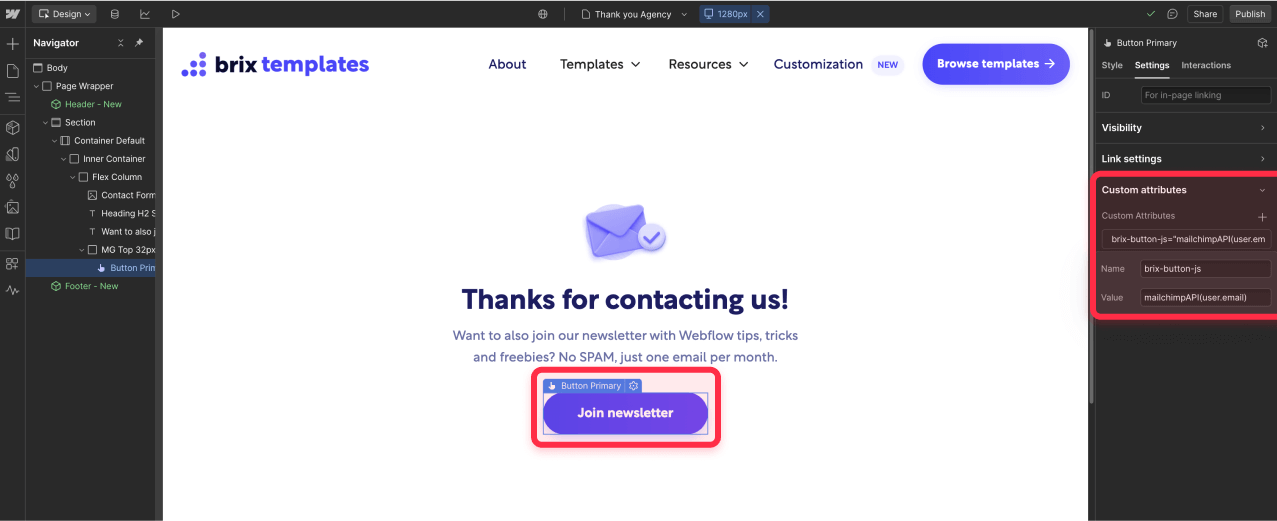
Configuring Webflow buttons with brix-button-js
Now let's set up your buttons to execute functions:
- Find your button: Open your page in Webflow Designer > Locate the button you want to enhance
- Select your button element: Click on your button > Can be a Button, Link Block, or any clickable element
- Add the magic attribute: Scroll to Custom Attributes in settings > Click + to add a new attribute:
- Name: brix-button-js
- Value: Your function name (e.g., calculate())
- Optional parameters: Include parameters in the function call > Example: calculate(5, 10) or showMessage('Hello')
- Multiple functions: Chain multiple functions with semicolons > Example: trackEvent(); calculate(); showMessage('Done')
Understanding brix-button-js attribute values
The brix-button-js attribute accepts different function formats depending on your needs:
- Simple function: Just the function name with parentheses like calculate()
- With parameters: Include arguments like multiply(5, 3) or showAlert('Warning!')
- Multiple functions: Chain with semicolons like validate(); submit(); trackEvent()
- Conditional execution: Use expressions like confirm('Are you sure?') && deleteItem()
- Arrow functions: Inline code like () => console.log('Clicked!')
Need async operations? The system fully supports async/await functions, promises, and complex asynchronous workflows. You can trigger API calls, animations, or any time-based operations seamlessly.
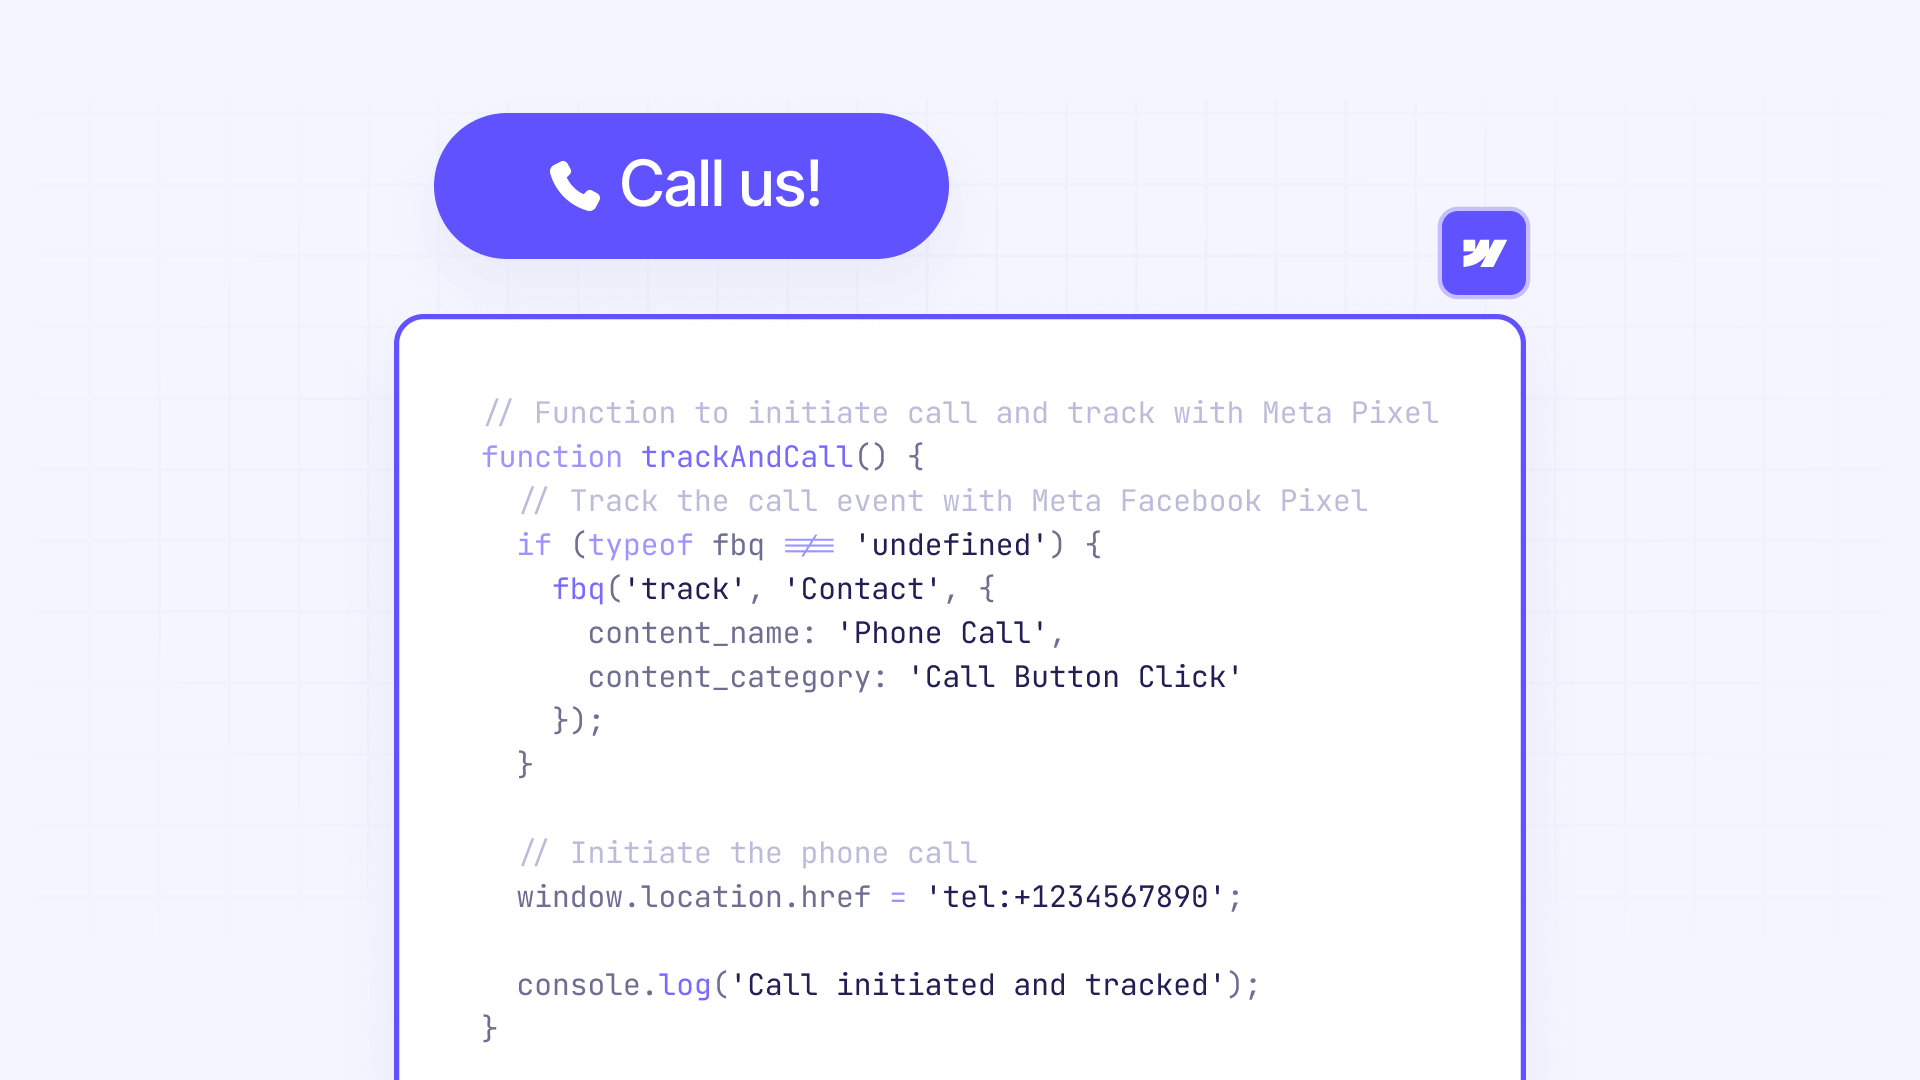
Real-world example: Call button with Meta Pixel tracking
Let's look at a practical example of a "Call us now!" button that both initiates a phone call and tracks the interaction with Meta Facebook Pixel:
1 - Create the tracking function: Add this to your site's custom code:
// Function to initiate call and track with Meta Pixel
function trackAndCall() {
  // Track the call event with Meta Facebook Pixel
  if (typeof fbq !== 'undefined') {
    fbq('track', 'Contact', {
      content_name: 'Phone Call',
      content_category: 'Call Button Click'
    });
  }

  // Initiate the phone call
  window.location.href = 'tel:+1234567890';

  console.log('Call initiated and tracked');
}
2 - Set up your button in Webflow:
- Add a button with text "Call us now!"
- Add custom attribute: brix-button-js="trackAndCall()"
- Style it with your brand colors
3 - Result: When clicked, the button will simultaneously fire the Meta Pixel event for conversion tracking and initiate the phone call on mobile devices, giving you valuable analytics while providing seamless user experience.
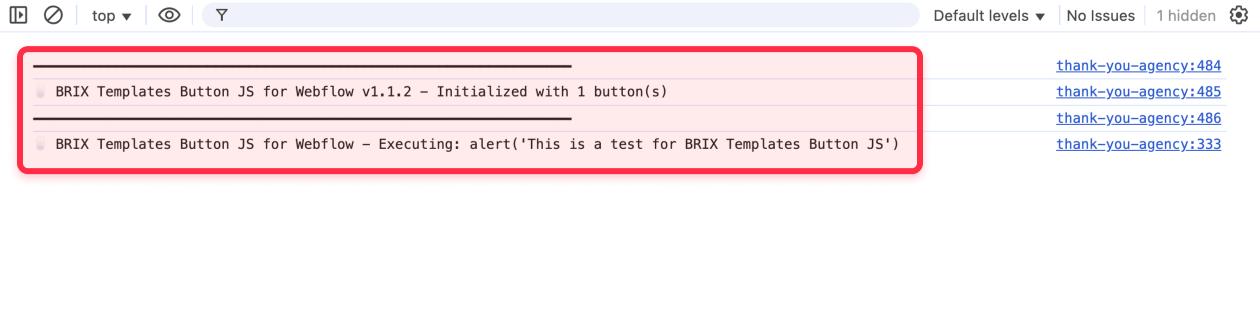
Testing your Webflow button function implementation
Time to ensure everything works perfectly:
- Do a basic test: Publish your site > Visit your page in a new browser tab > Click your configured button > Check that the function executes
- Check the console output: Press F12 to open developer tools > Go to the Console tab > Look for the success message: "🤖 BRIX Button JS for Webflow - Executing: [function name]"
- Test different scenarios: Try buttons with parameters > Test multiple function chains > Check error handling with invalid function names
- Verify function results: Confirm DOM updates happen correctly > Check that API calls fire properly > Validate analytics events are sent
Troubleshooting common button function issues
Here's how to fix the most common problems:
Function not executing:
- Verify function is defined in global scope (window.functionName)
- Check function name spelling matches exactly
- Ensure script loads before button clicks
- Look for JavaScript syntax errors in console
Parameters not working:
- Use proper quote escaping for strings in attributes
- Avoid complex objects - pass simple values or IDs instead
- Check parameter order matches function definition
Console errors appearing:
- Function might be undefined - check scope
- Syntax errors in function definition
- Missing DOM elements that function expects
Frequently asked questions
How to calculate and display pricing in Webflow with a button click?
Write a calculatePrice() function that reads input values from form fields using document.getElementById(), performs your calculation logic, and displays the result by updating a text element's .textContent. Apply brix-button-js="calculatePrice()" to your calculate button to instantly show pricing without page refresh.
How to toggle dark mode in Webflow using a button with JavaScript?
Create a toggleDarkMode() function that adds/removes a class from the body element using document.body.classList.toggle('dark-mode'), then define your dark mode styles in Webflow using that class. Set brix-button-js="toggleDarkMode()" on your toggle button and optionally save the preference to localStorage for persistence.
How to submit data to a custom API endpoint from a Webflow button?
Build an async function submitToAPI() that collects form data, uses fetch() to POST to your endpoint with proper headers and JSON body, then handles the response. Add brix-button-js="submitToAPI()" to your submit button, ensuring your function includes error handling and user feedback.
Conclusion
Implementing custom function execution with the brix-button-js attribute transforms your Webflow buttons into powerful interaction triggers that can execute any JavaScript logic. This solution bridges the gap between no-code design and custom functionality, enables sophisticated interactions without complex event management, and provides the flexibility needed for modern web applications.
The combination of Webflow's intuitive design interface and custom JavaScript functions creates unlimited possibilities for interactive experiences. Start with simple functions to test the implementation, then expand to more complex interactions as your needs grow.
For advanced implementations requiring complex state management, real-time data synchronization, or enterprise-level interaction patterns, our Webflow development team can create sophisticated solutions that perfectly align with your specific business requirements.


Join readers commenting on this post!