
Time-based elements can transform static Webflow pages into dynamic experiences. While Webflow excels at design flexibility, it doesn't include native countdown functionality.
Enter the BRIX Templates Countdown attribute—a streamlined solution that lets you add sophisticated countdown timers to any Webflow project through one simple attribute. This guide shows you how to implement, customize, and manage countdown displays that capture attention and drive action.
Why use countdown timers in your Webflow projects
Countdown timers serve multiple practical purposes in modern web design:
- Time-sensitive offers: Create urgency for limited-time deals and special promotions by showing exactly how long remains. This naturally encourages faster decision-making and helps drive conversions at crucial moments.
- Event anticipation: Build excitement for product launches, webinars, or special announcements with real-time countdowns that keep your audience engaged and informed about upcoming milestones.
- Engagement boosting: Transform static deadlines into dynamic experiences that capture attention and create a sense of momentum, helping visitors stay connected to your timeline-based content.
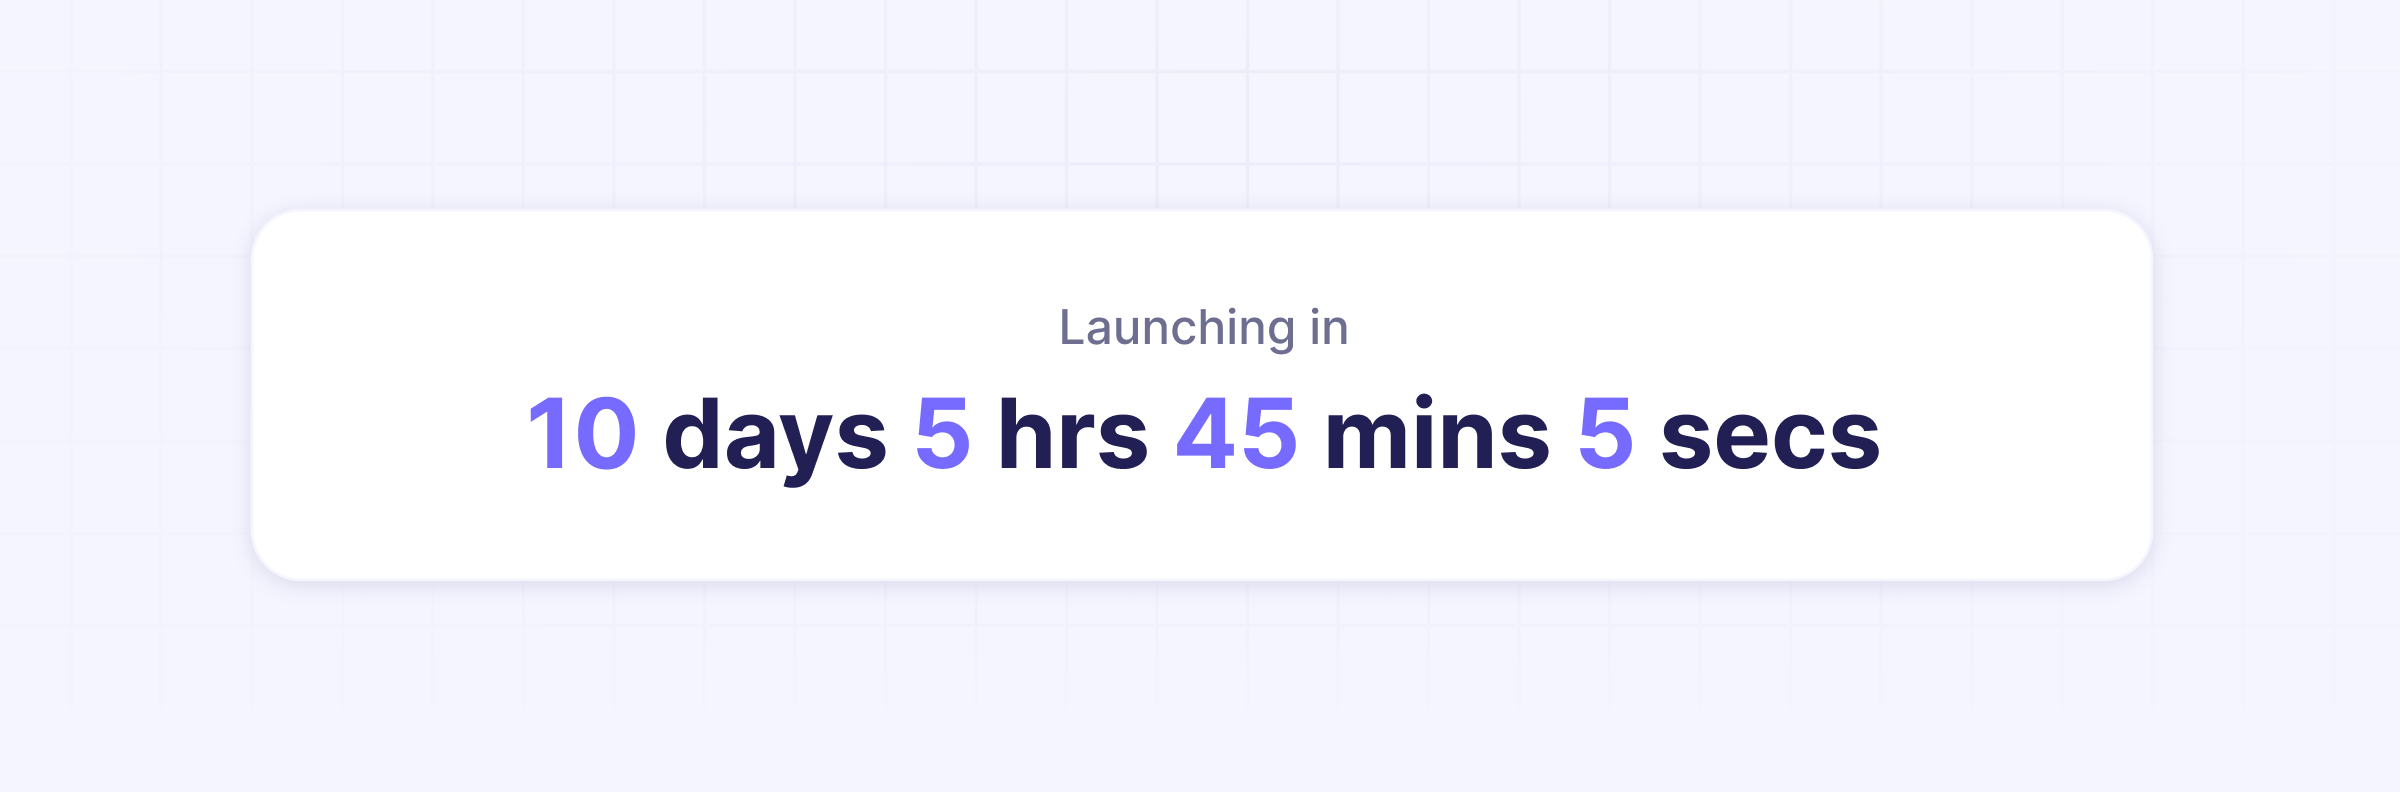
By using dynamic countdowns instead of static text, you create an interactive experience that naturally draws attention and helps visitors plan their engagement with your content.
How to add the countdown script to your Webflow site
How to add the core script to your project
- Access your Webflow project settings
- Navigate to Custom Code
- Find the "Before </body>" section
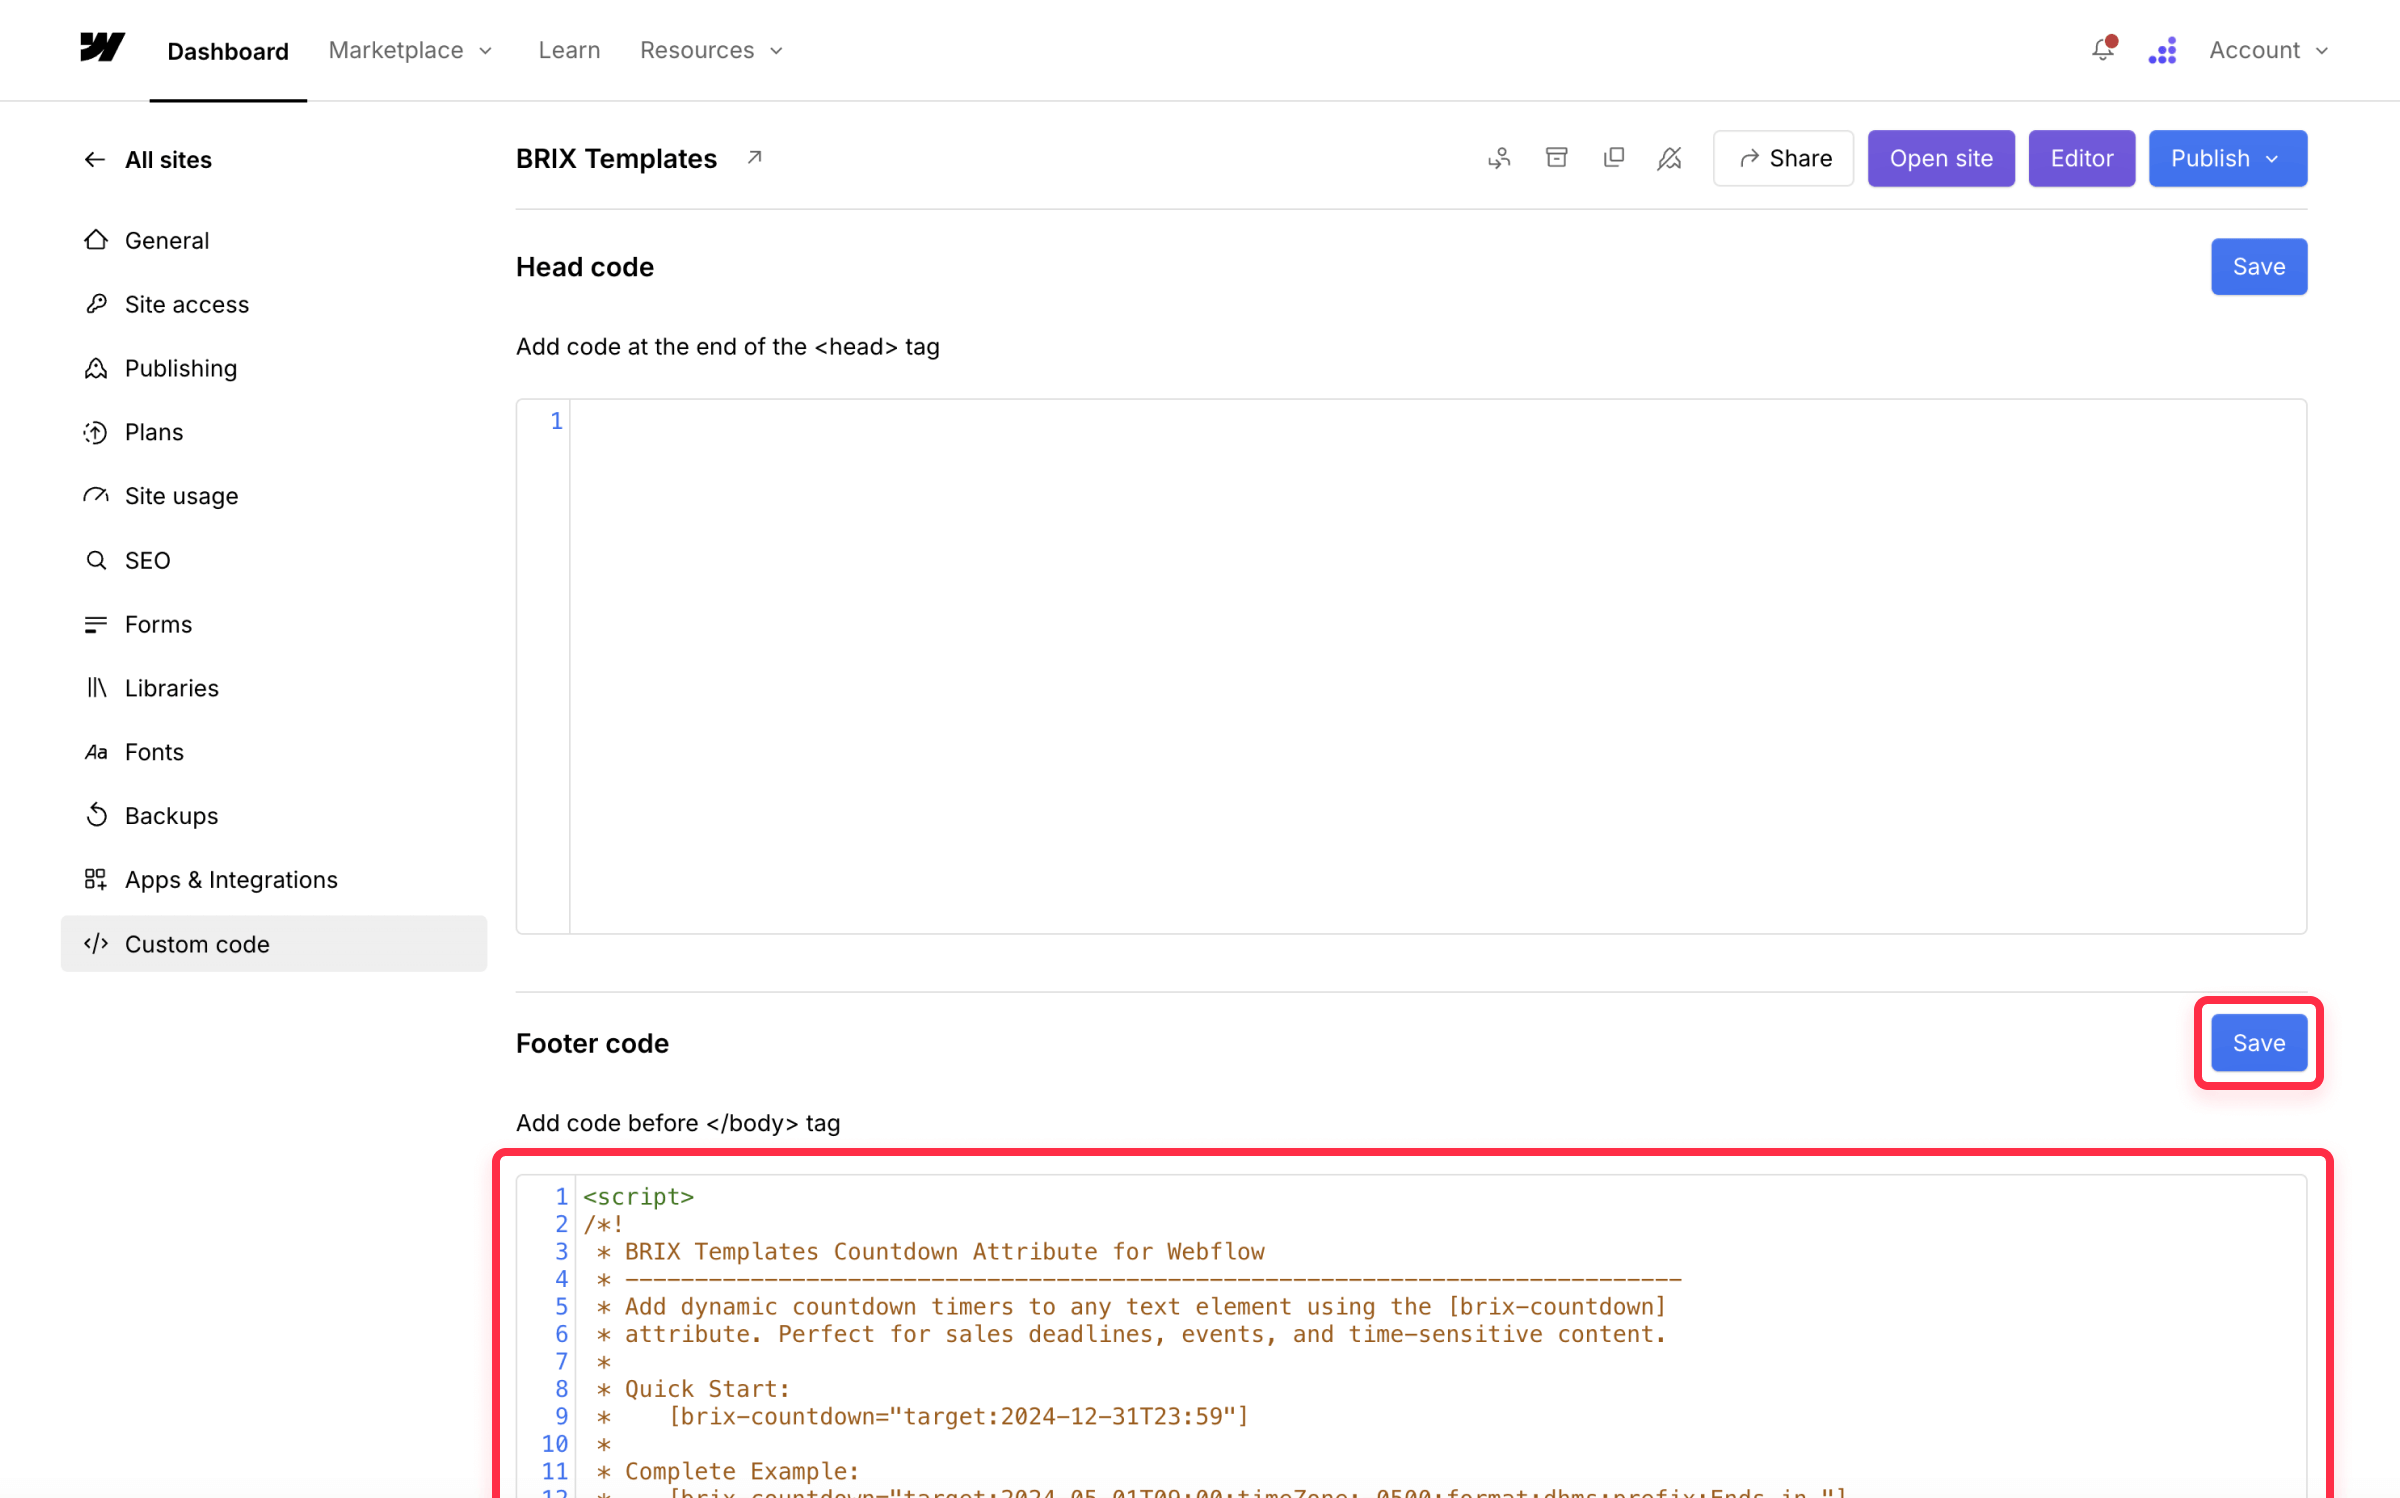
Insert the BRIX Templates Countdown attribute script:
<script>
/*!
 * BRIX Templates Countdown Attribute for Webflow
 * ----------------------------------------------------------------------------
 * Add dynamic countdown timers to any text element using the [brix-countdown]
 * attribute. Perfect for sales deadlines, events, and time-sensitive content.
 *
 * Quick Start:
 *    [brix-countdown="target:2024-12-31T23:59"]
 *
 * Complete Example:
 *    [brix-countdown="target:2024-05-01T09:00;timeZone:-0500;format:dhms;prefix:Ends in "]
 *
 * All Available Settings:
 * Required:
 *    - target: Countdown end date/time
 *
 * Optional:
 *    - timeZone: Time offset (e.g., "-0500") or "UTC"
 *    - format: Display units (dhms/dhm/dh/d)
 *    - leadingZeros: Show zeros before single digits (true/false)
 *    - prefix: Text before countdown
 *    - suffix: Text after countdown
 *    - expired: Text when countdown ends (empty = hide element)
 *    - daysLabel: Text after days number (default: "d")
 *    - hoursLabel: Text after hours number (default: "h")
 *    - minutesLabel: Text after minutes number (default: "m")
 *    - secondsLabel: Text after seconds number (default: "s")
 *
 * Need help configuring? Visit brixtemplates.com/blog for our countdown generator
 * tool that creates your attribute code automatically with an easy-to-use interface.
 *
 * Version: 1.0.3
 * Author: BRIX Templates
 */

(function() {
  'use strict';

  // On DOM Ready
  if (document.readyState === 'loading') {
    document.addEventListener('DOMContentLoaded', initBrixCountdown);
  } else {
    initBrixCountdown();
  }

  function initBrixCountdown() {
    const els = document.querySelectorAll('[brix-countdown]');
    els.forEach(el => setupCountdown(el));
  }

  function setupCountdown(el) {
    const rawAttr = el.getAttribute('brix-countdown') || '';
    const cfg = parseParams(rawAttr);

    let {
      target, timeZone, format, leadingZeros,
      prefix, suffix, expired,
      daysLabel, hoursLabel, minutesLabel, secondsLabel
    } = cfg;

    // Defaults if not provided
    target       = target       || '2025-12-31T23:59';
    timeZone     = timeZone     || 'UTC';
    format       = format       || 'dhms';   // 'd','dh','dhm','dhms'
    leadingZeros = (leadingZeros==='false') ? false : true;
    prefix       = prefix       || '';
    suffix       = suffix       || '';
    expired      = expired      || '';   // empty => hide
    daysLabel    = (daysLabel===undefined)    ? 'd' : daysLabel;
    hoursLabel   = (hoursLabel===undefined)   ? 'h' : hoursLabel;
    minutesLabel = (minutesLabel===undefined) ? 'm' : minutesLabel;
    secondsLabel = (secondsLabel===undefined) ? 's' : secondsLabel;

    // Convert the target date/time to an absolute moment in ms
    const targetMs = parseUtcPlusOffset(target, timeZone);

    // Update every second
    const intId = setInterval(() => {
      updateCountdown(
        el,
        targetMs,
        format,
        leadingZeros,
        prefix,
        suffix,
        expired,
        { daysLabel, hoursLabel, minutesLabel, secondsLabel },
        intId
      );
    }, 1000);

    // Initial immediate check
    updateCountdown(
      el,
      targetMs,
      format,
      leadingZeros,
      prefix,
      suffix,
      expired,
      { daysLabel, hoursLabel, minutesLabel, secondsLabel },
      intId
    );
  }

  // ----------------------------------------------------------------------------
  // Modified parseParams to preserve additional colons in the value
  // ----------------------------------------------------------------------------
  function parseParams(str) {
    const parts = str.split(';');
    const conf = {};
    parts.forEach(part => {
      // Don't trim the whole part so we can keep trailing spaces in values like "prefix:In "
      // Instead, find the first colon as a key-value delimiter.
      const firstColonIndex = part.indexOf(':');
      if (firstColonIndex === -1) return; // no valid "key:value" here

      // key is everything before the first colon
      const k = part.slice(0, firstColonIndex).trim();

      // value is everything after the first colon (no trimming to preserve possible trailing spaces)
      const v = part.slice(firstColonIndex + 1);

      if (!k) return;
      conf[k] = v; // store as-is
    });
    return conf;
  }

  // Interpret dtStr as naive UTC => dtStr+'Z'
  // Then shift by offset from timeZone
  function parseUtcPlusOffset(dtStr, tz) {
    let baseUtc = new Date(dtStr + 'Z');
    if (isNaN(baseUtc.getTime())) {
      baseUtc = new Date('2025-12-31T23:59:59Z');
    }
    const baseMs = baseUtc.getTime();

    // If timeZone=UTC => no shift
    if (tz.toUpperCase() === 'UTC') return baseMs;

    // e.g. +0530 => shift from base
    const re = /^([+-])(\d{2})(\d{2})$/;
    const match = tz.match(re);
    if (match) {
      const sign = match[1];
      const hh = parseInt(match[2], 10);
      const mm = parseInt(match[3], 10);
      let offsetMin = hh * 60 + mm;
      if (sign === '+') {
        return baseMs - offsetMin * 60000;
      } else {
        return baseMs + offsetMin * 60000;
      }
    }
    // fallback => treat as UTC
    return baseMs;
  }

  function updateCountdown(
    el,
    targetMs,
    fmt,
    leading,
    prefix,
    suffix,
    expired,
    labels,
    intervalId
  ) {
    const now = Date.now();
    const diff = targetMs - now;
    if (diff <= 0) {
      clearInterval(intervalId);
      handleExpired(el, expired);
      return;
    }
    const diffSec = Math.floor(diff / 1000);
    const days = Math.floor(diffSec / 86400);
    let remain = diffSec % 86400;
    const hours = Math.floor(remain / 3600);
    remain %= 3600;
    const minutes = Math.floor(remain / 60);
    const seconds = remain % 60;

    const out = buildCountdown(fmt, { days, hours, minutes, seconds }, leading, labels);
    el.textContent = prefix + out + suffix;
  }

  function handleExpired(el, rawExp) {
    // If empty => hide
    if (!rawExp.trim()) {
      el.style.display = 'none';
      return;
    }
    // Otherwise => show typed text
    el.textContent = rawExp;
  }

  function buildCountdown(fmt, { days, hours, minutes, seconds }, leading, lbl) {
    const pad = v => (leading ? String(v).padStart(2, '0') : String(v));
    switch (fmt.toLowerCase()) {
      case 'd':
        return pad(days) + (lbl.daysLabel || 'd');
      case 'dh':
        return (
          pad(days) +
          (lbl.daysLabel || 'd') +
          ' ' +
          pad(hours) +
          (lbl.hoursLabel || 'h')
        );
      case 'dhm':
        return (
          pad(days) +
          (lbl.daysLabel || 'd') +
          ' ' +
          pad(hours) +
          (lbl.hoursLabel || 'h') +
          ' ' +
          pad(minutes) +
          (lbl.minutesLabel || 'm')
        );
      default:
        // dhms
        return (
          pad(days) +
          (lbl.daysLabel || 'd') +
          ' ' +
          pad(hours) +
          (lbl.hoursLabel || 'h') +
          ' ' +
          pad(minutes) +
          (lbl.minutesLabel || 'm') +
          ' ' +
          pad(seconds) +
          (lbl.secondsLabel || 's')
        );
    }
  }
})();
</script>
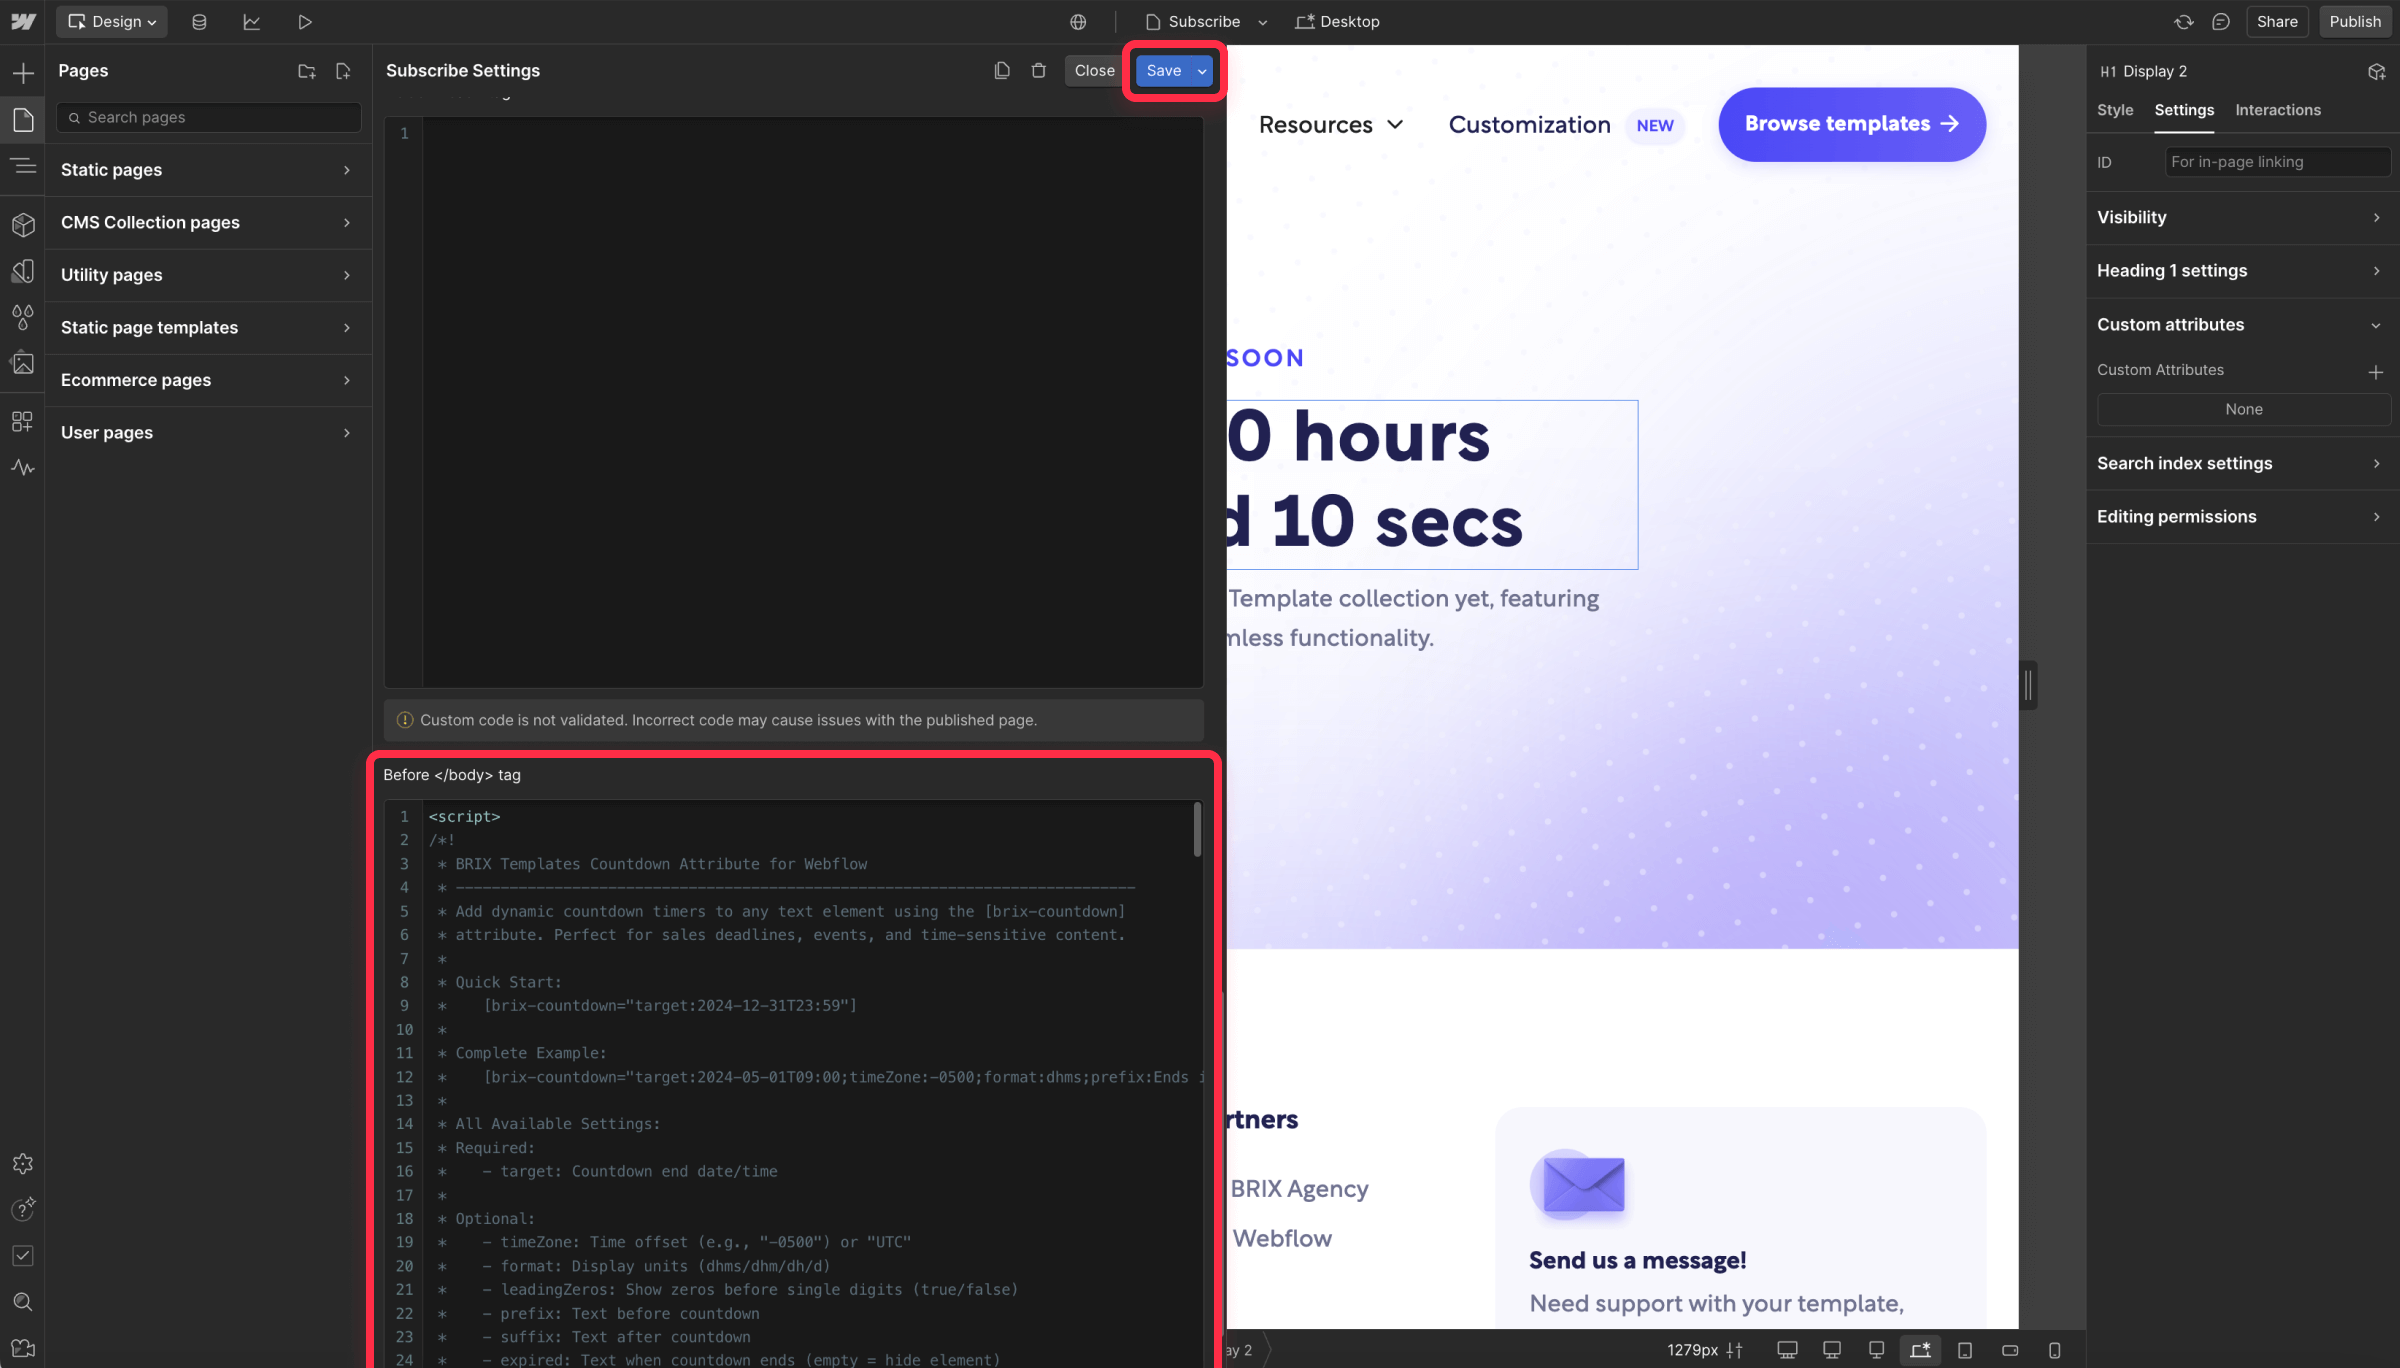
Alternatively, if you only need countdown functionality only on a specific page (or specific pages), you can add it through:
- Open the Webflow Designer
- Navigate to Pages
- Select Page Settings
- Find the "Before </body>" section
- Insert the same script
How to set up countdown timers in your Webflow design
After adding the script, you can set up individual countdown elements:
- Find and select the text element in your Webflow Designer where you want the countdown to appear. This could be within a promotion banner, event section, or any text block that will display your timer
- Open the element's Settings panel (gear icon)
- Locate the Custom Attributes section
- Add a new attribute:
- Name: brix-countdown
- Value: Your configuration string (explained below 👇🏻)
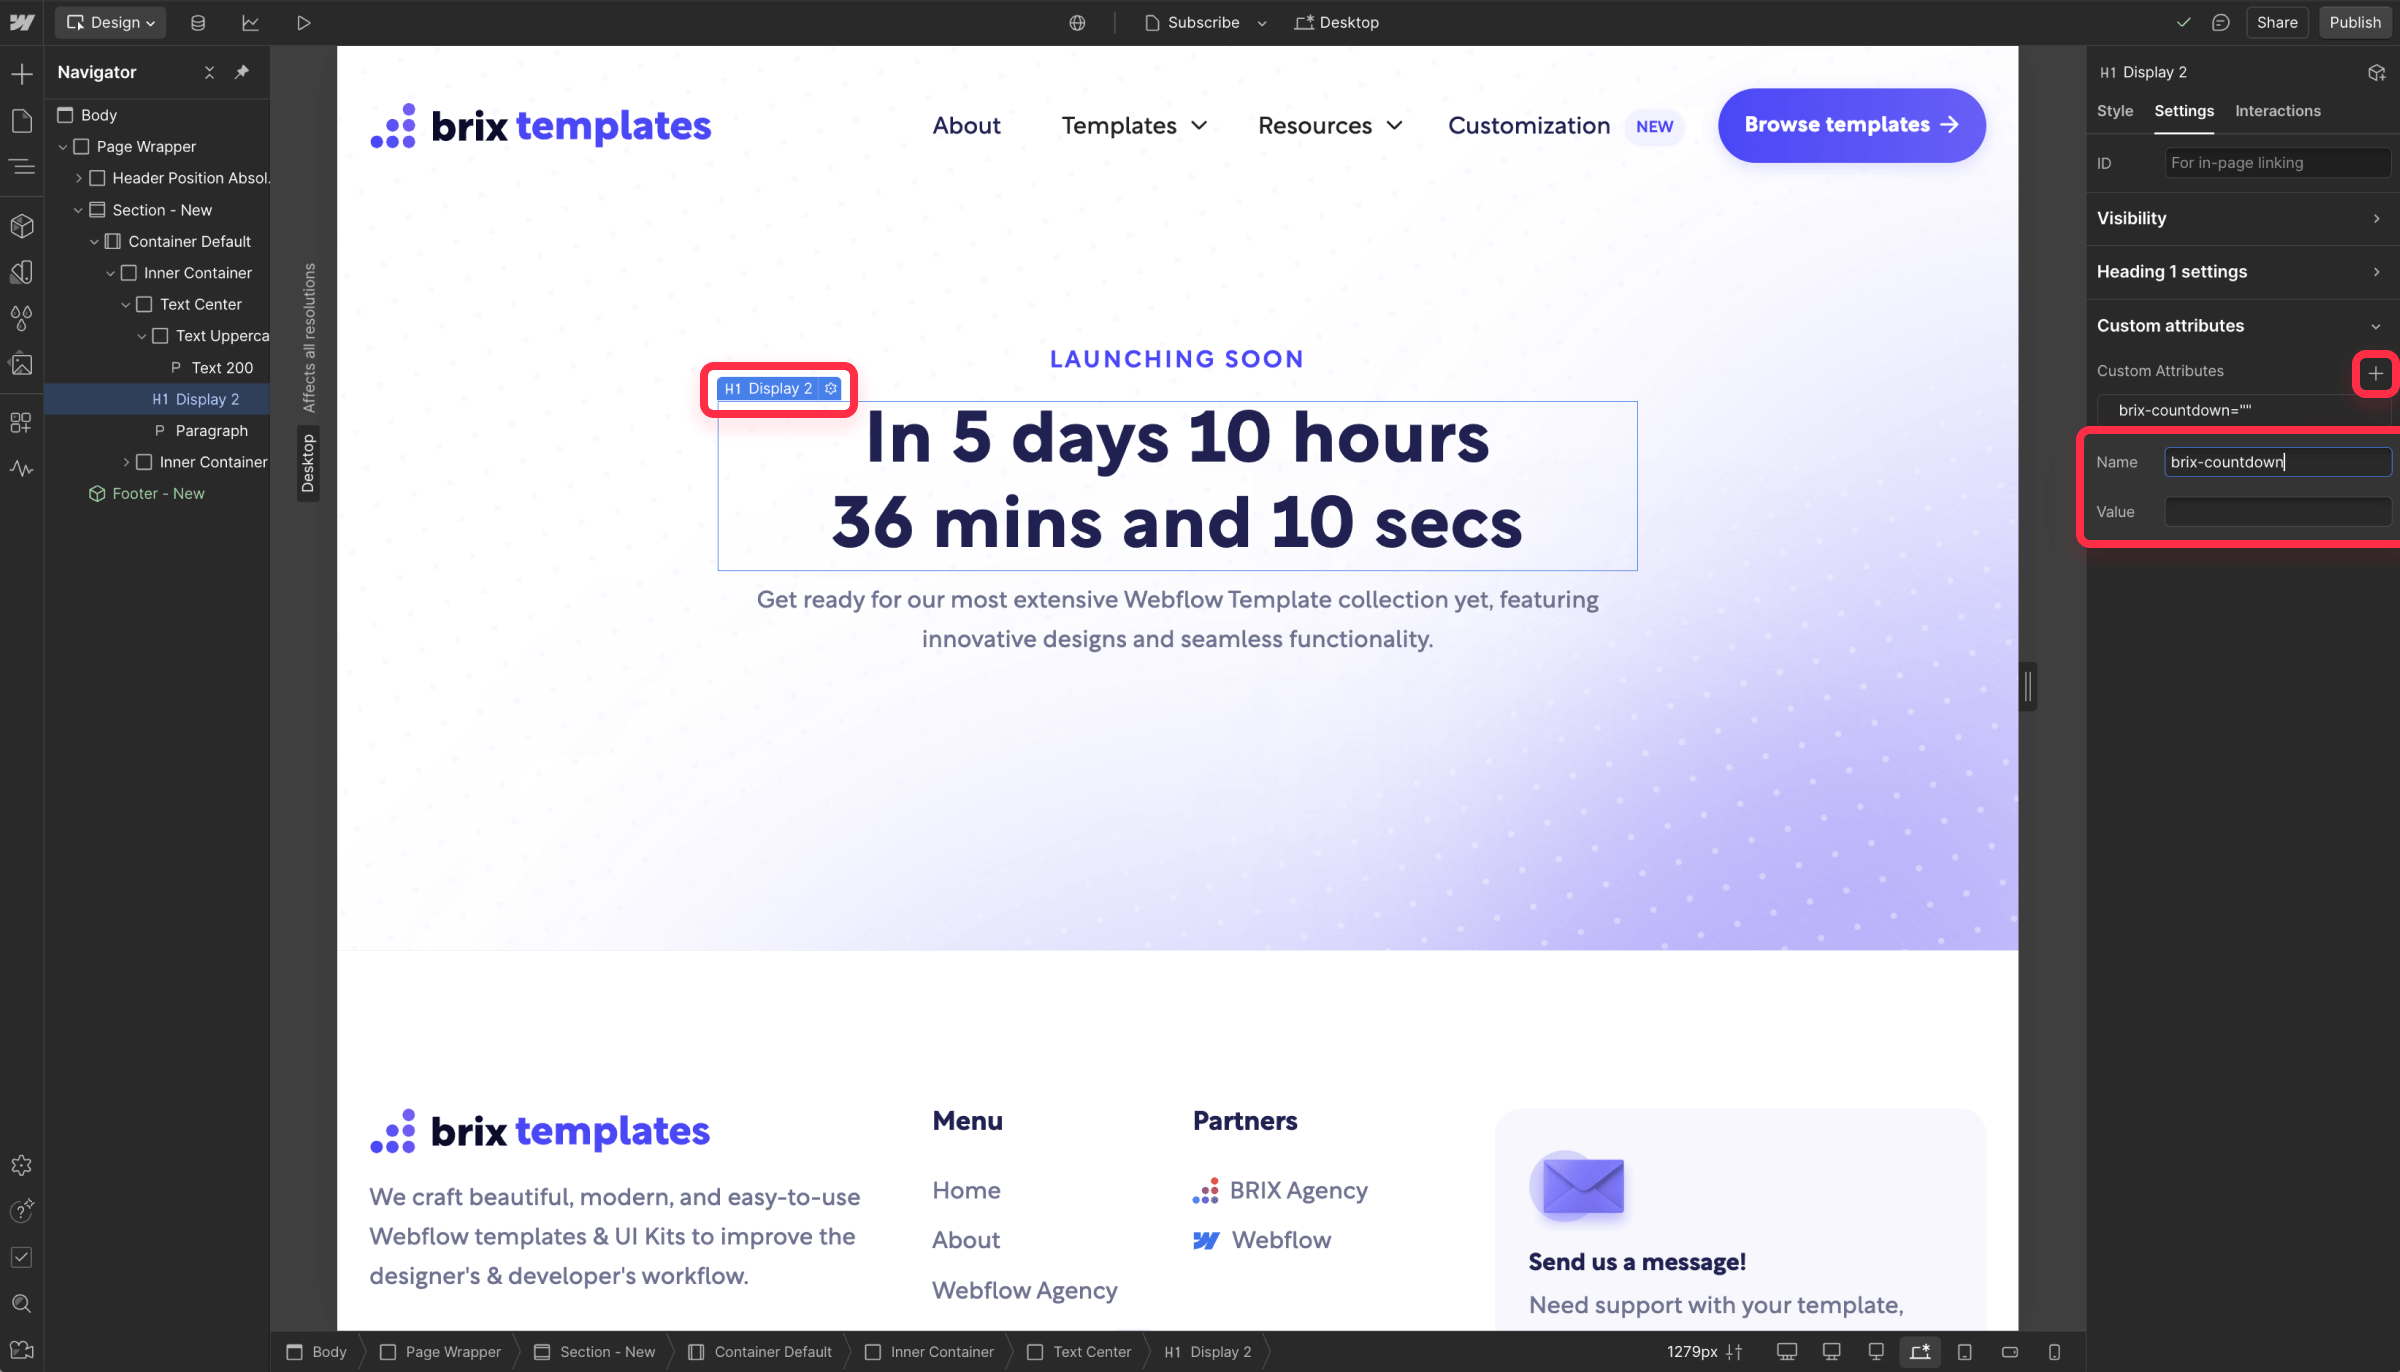
How to customize Webflow countdown widget with BRIX Templates countdown attribute
The brix-countdown attribute accepts various parameters in a single string, separated by semicolons. Here are the key configuration options:
Essential parameters
- target: The date and time to count down to (e.g., "2024-12-31T23:59")
- timeZone: Either "UTC" or an offset like "-0500" for EST
- format: Choose display format ("dhms", "dhm", "dh", or "d")
- leadingZeros: Show numbers with leading zeros (true/false)
Display customization
- prefix: Text before the countdown (e.g., "Sale ends in")
- suffix: Text after the countdown (e.g., "remaining!")
- expired: Text to show when the countdown ends (empty to hide)
- daysLabel: Custom label for days (e.g., " days ")
- hoursLabel: Custom label for hours (e.g., " hrs ")
- minutesLabel: Custom label for minutes (e.g., " min ")
- secondsLabel: Custom label for seconds (e.g., " sec ")
Some example configuration:
target:2024-05-01T09:00;timeZone:-0500;format:dhms;leadingZeros:true;
prefix:Offer ends in ;suffix:!;expired:This offer has ended;
daysLabel: days ;hoursLabel: hrs ;minutesLabel: min ;secondsLabel: sec
How to use the Webflow countdown generator tool
To simplify the countdown configuration process, you can use our Countdown Generator tool:
- Configure your desired countdown settings:
- Set your target date and time
- Choose your time zone
- Select format options and labels
- Customize display preferences
- Click "Preview" to see your countdown in action
- Click "Generate" to get the complete attribute code
Take the generated countdown configuration and add it as the 'value' in your Webflow element's brix-countdown attribute settings to activate your timer.
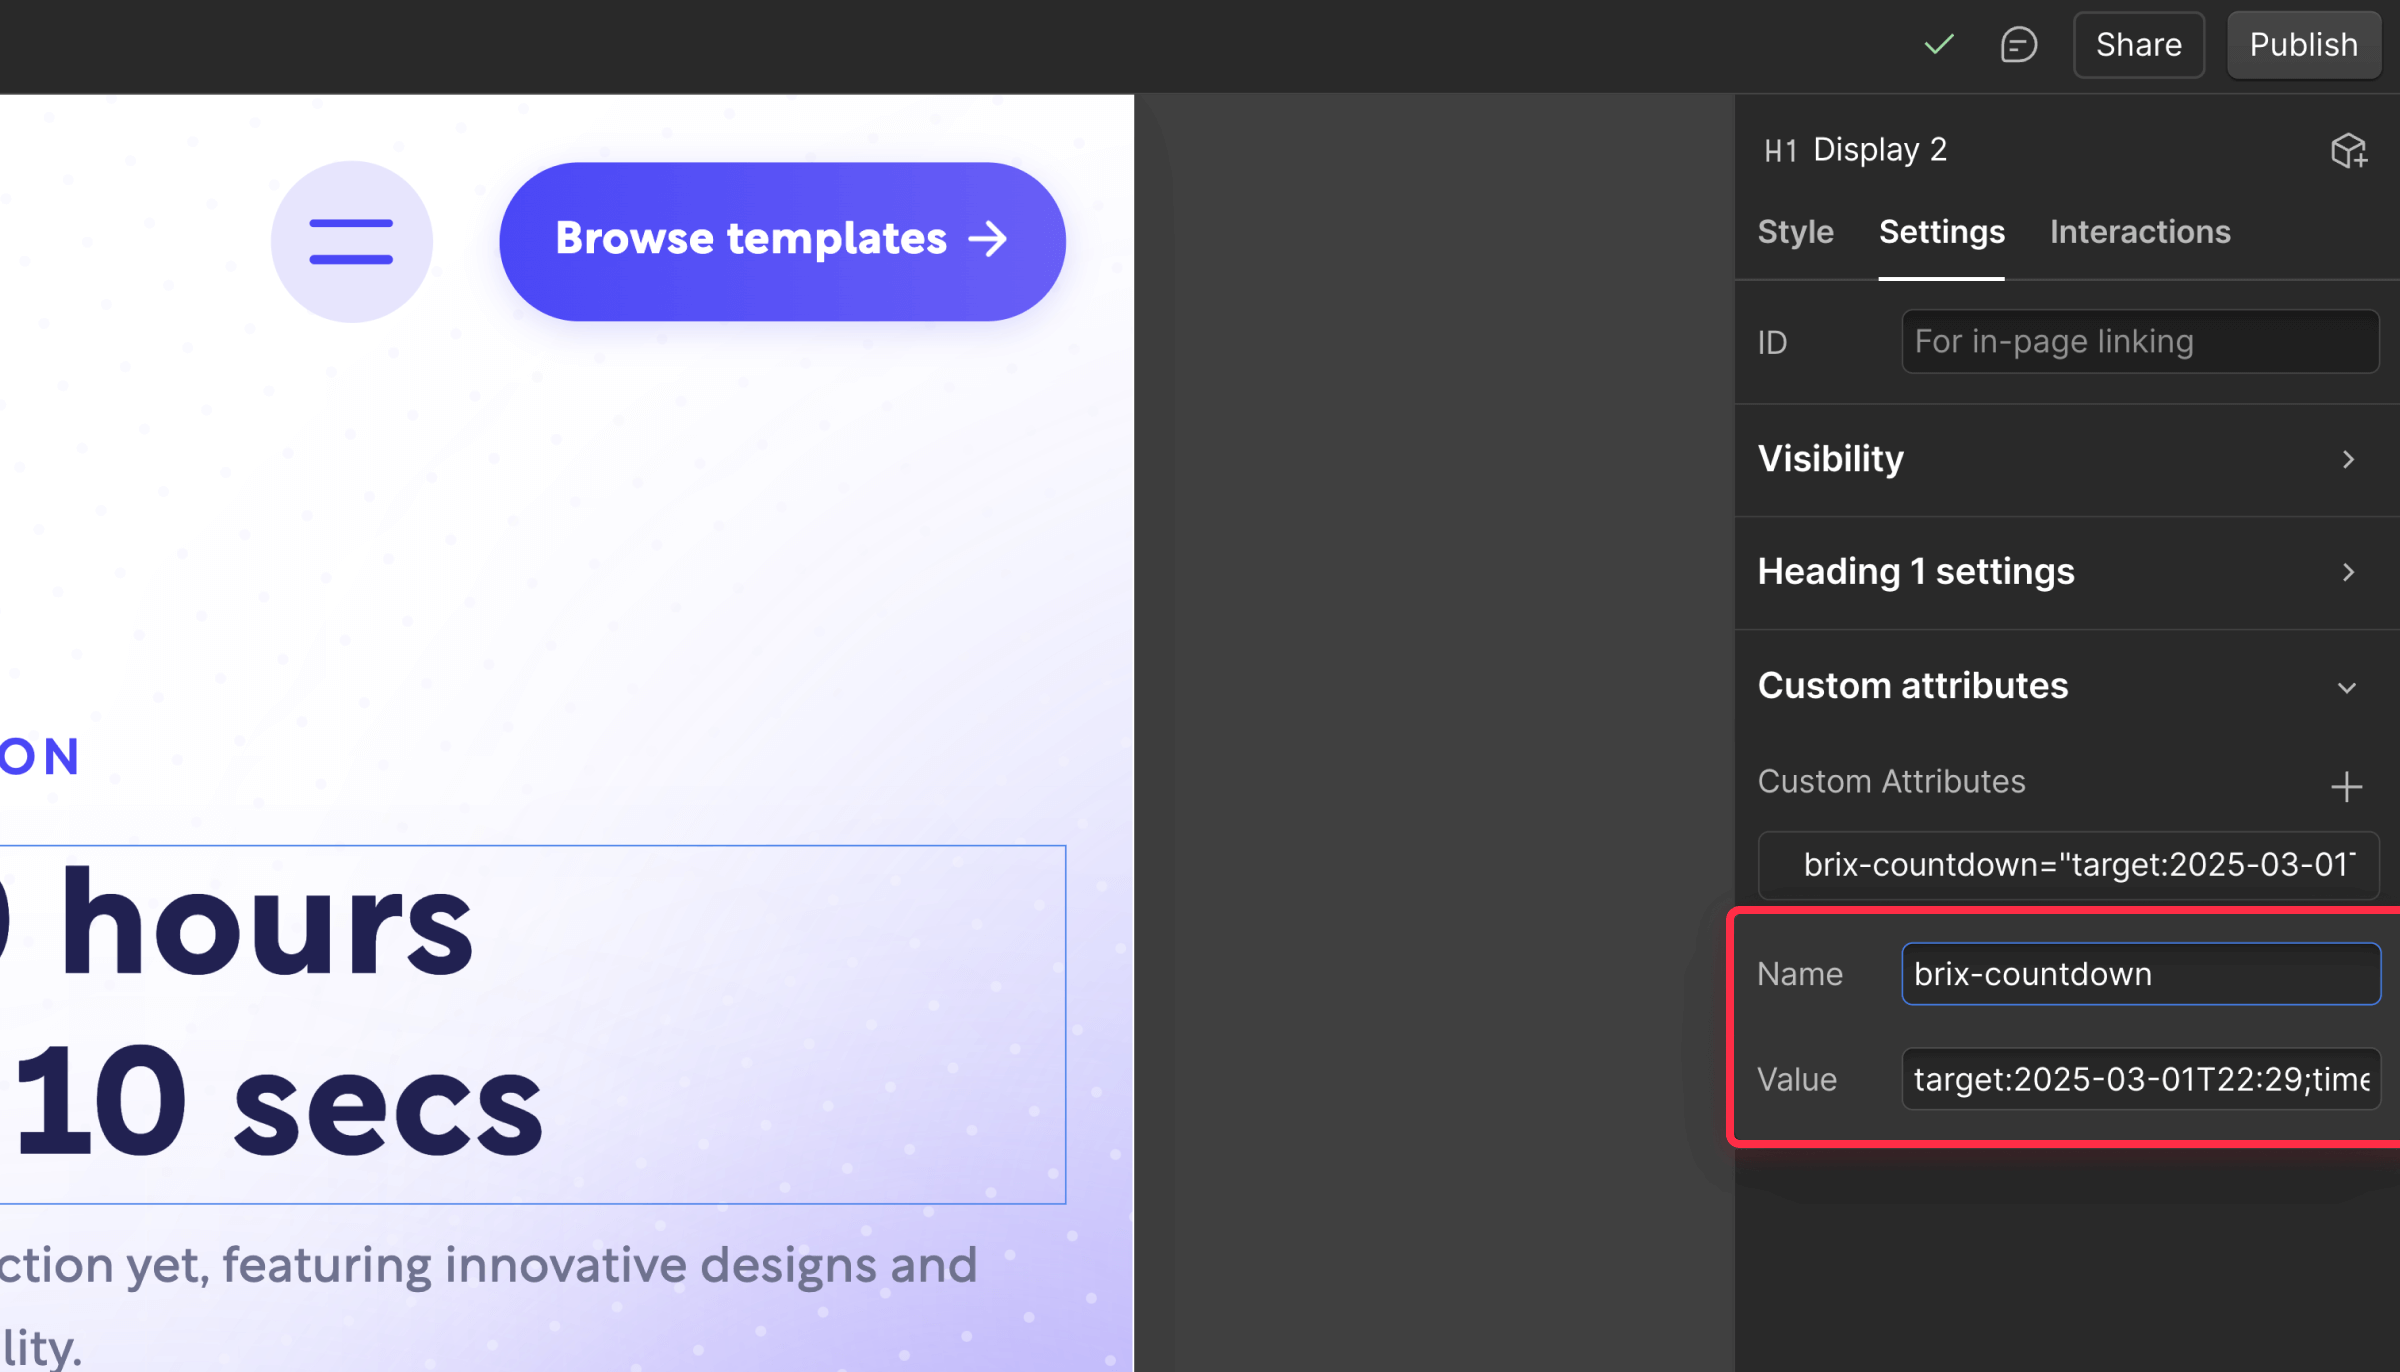
This process can be repeated for any number of countdowns you'd like to add to your site. Whether you need several countdowns or just one, you can use the generator tool to configure each timer with its own unique settings.
How to troubleshoot Webflow countdown timer issues
If your countdown isn't functioning as expected, check these common solutions:
- Timer not showing
- Verify the script is properly placed in the custom code section
- Check that your brix-countdown attribute is spelled correctly
- Confirm your target date is properly formatted (YYYY-MM-DDThh:mm)
- Incorrect time display
- Ensure your timeZone setting matches your intended offset
- Verify the target time is entered as UTC
- Expiration behavior issues
- For hiding elements, confirm your expired parameter is empty
- For custom messages, verify there are no colons or semicolons in your expired text
- Test the countdown near expiration (use our generator preview above 👆🏻) to ensure proper behavior
- Format problems
- Confirm your chosen format ("dhms", "dhm", "dh", "d") is correct
- Check that your custom labels don't contain semicolons
- Verify leadingZeros is properly set (true/false)
Conclusion
Time-based elements add a crucial dynamic layer to modern web experiences. With the BRIX Templates Countdown attribute, you can now integrate professional countdown functionality into your Webflow projects without complexity, and completely for free. This attribute-based approach gives you the flexibility to create compelling time-sensitive displays while maintaining clean, efficient code.
Want to take your timing features further or need assistance with implementation? Our team specializes in crafting custom Webflow solutions that align with your specific goals. Get in touch to discuss how we can help enhance your site with advanced countdown capabilities and other dynamic features.










Join readers commenting on this post!