
HubSpot is a trusted tool that helps businesses of all sizes manage their customer relationships. But for Webflow users, connecting forms to HubSpot can feel tricky sometimes. If your business gets a lot of form submissions every day, copying data from Webflow emails to HubSpot manually isn’t just slow—it’s a waste of time.
In this guide, we’ll show you four easy ways to connect Webflow forms to HubSpot. By the end, you’ll know which option works best for you—no advanced code skills needed!

Different methods to connect Webflow forms with HubSpot
When it comes to connecting Webflow forms with HubSpot, there are plenty of options. However, not all methods are equally suited for every situation. We’ve narrowed it down to four practical approaches, each with its own strengths. Let’s explore these options so you can choose the one that fits your needs best.
1. HubSpot's official Webflow app
HubSpot has an official app in the Webflow Marketplace designed to connect your forms to HubSpot. However, it has many bugs and issues that can make it unreliable, especially for production environments. So we straight-up don't recommend going with it.
2. Zapier integration with Webflow and HubSpot
Zapier is a popular tool for integrating apps, and it works really well for connecting Webflow forms to HubSpot. You can set it up without changing how your Webflow forms look, keeping everything simple. It’s a great option for teams already using Zapier, but may not be so great if you have many form submissions and you don't want to pay for a Zapier subscription.
3. Direct HubSpot form embedding on Webflow
You can embed HubSpot’s forms directly into your Webflow site. These forms include built-in tracking and pre-fill features, which make them super easy to use. However, the design options are limited, so this method works best for quick setups where matching your site’s exact design and branding isn’t a priority.
4. Raw HTML HubSpot form embedding on Webflow (Recommended)
With HubSpot, you can create a fully customizable HTML form that integrates seamlessly into your Webflow site. This method gives you complete control over the design using custom CSS, while still taking full advantage of HubSpot’s powerful features. If you’re looking for the perfect balance of flexibility and design control, this Raw HTML option is our top recommendation.

Each approach offers unique benefits depending on your goals and requirements (except for Option 1, which we don't recommend). Now that you’re familiar with the four options, let’s break them down step by step to help you find the best fit for your needs!
Method 1: HubSpot's official Webflow app
Current status as of January 2025: Not working
We gave the official HubSpot app a thorough test while writing this article, and unfortunately, it didn’t work. Sadly, this isn’t the first time we’ve run into problems with the app—it’s been hit-or-miss in the past, with bugs and errors that make it hard to rely on.
During our latest tests, we faced a lot of challenges. Setting up the HubSpot account was tricky, syncing forms didn’t work properly, and the mapping kept failing. To make things worse, we kept getting error messages saying the form couldn’t connect, which made the app completely unusable.
And it’s not just us—clients who’ve tried using the app have shared similar frustrations. They’ve told us about bugs, connection problems, and a lack of reliability, which just confirms how inconsistent it is.
It’s a real shame because this app has the potential to be such an easy and effective way to connect Webflow forms with HubSpot. For now, though, it falls short for businesses that need dependable workflows. Hopefully, HubSpot will fix these issues soon. In the meantime, let’s dive into three other reliable ways to connect Webflow forms with HubSpot.
Method 2: Zapier integration with Webflow and HubSpot
Zapier is a great option if you want to keep your Webflow forms as they are without using custom code. It’s simple to set up and allows you to add more automations when needed, thanks to thousands of pre-made "Zaps".
You can also get creative with Zapier by connecting multiple apps to build more advanced workflows with HubSpot (and yes, we can help you with that!). Just remember, Zapier charges for each task it runs, and costs can rise quickly if you have a lot of automations. If you’re already using Zapier or are fine with the pricing, it’s a strong choice for your integration needs.

Here’s a step-by-step guide to integrating Webflow forms with HubSpot using Zapier:
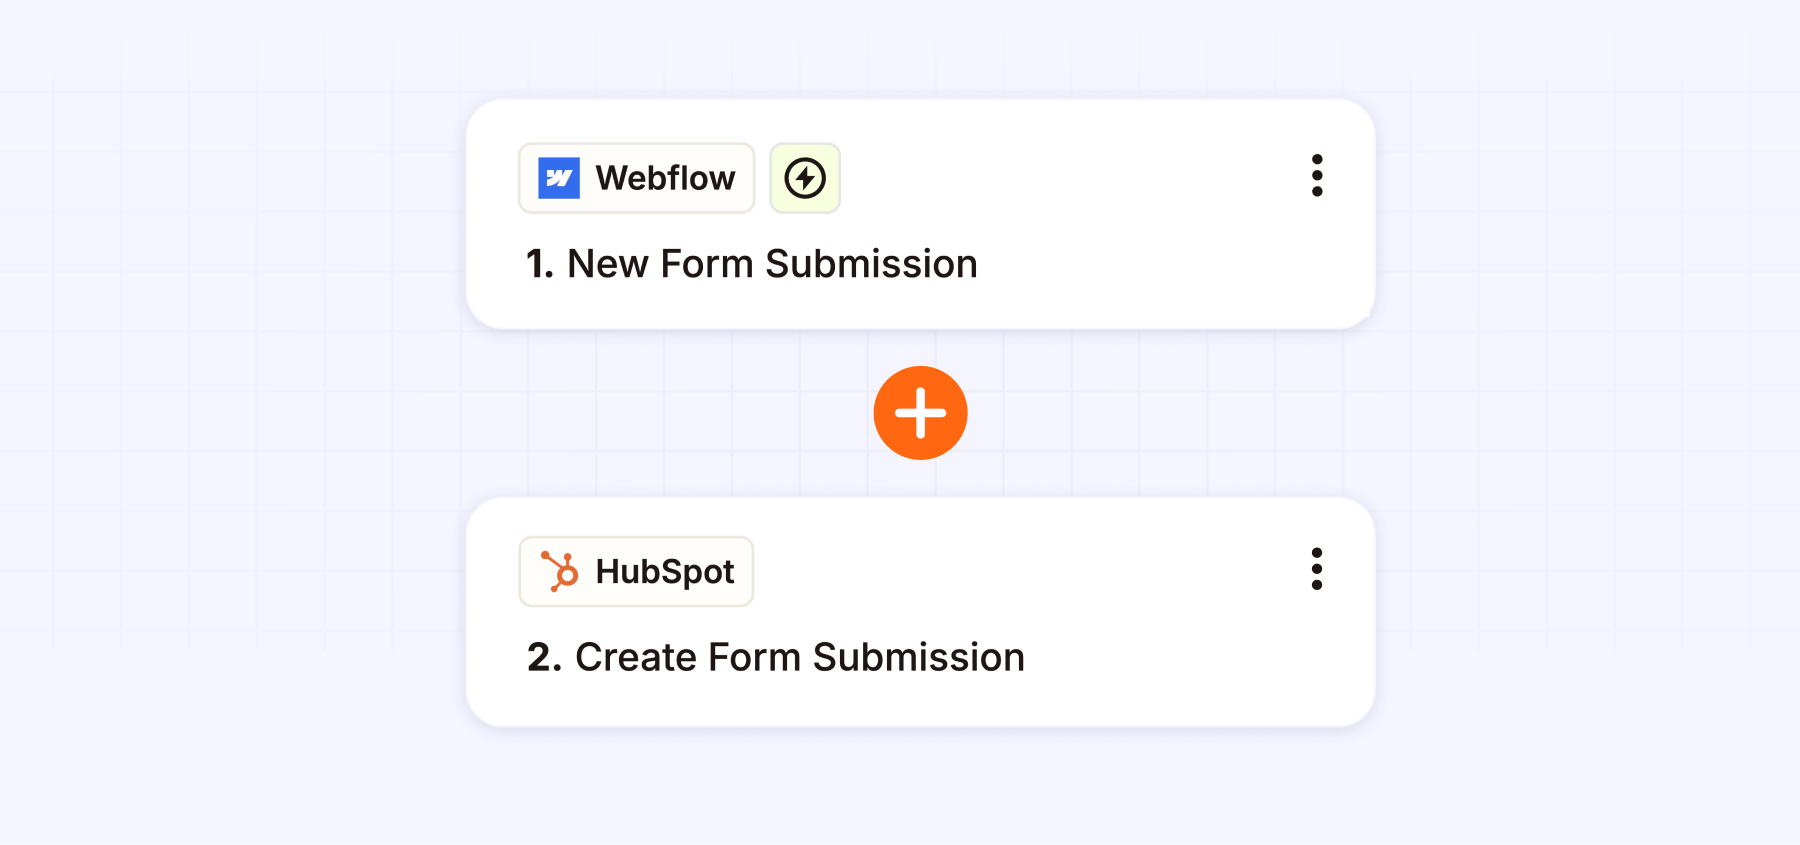
Step 1: Create your Zap
- Create or log in to your Zapier account.
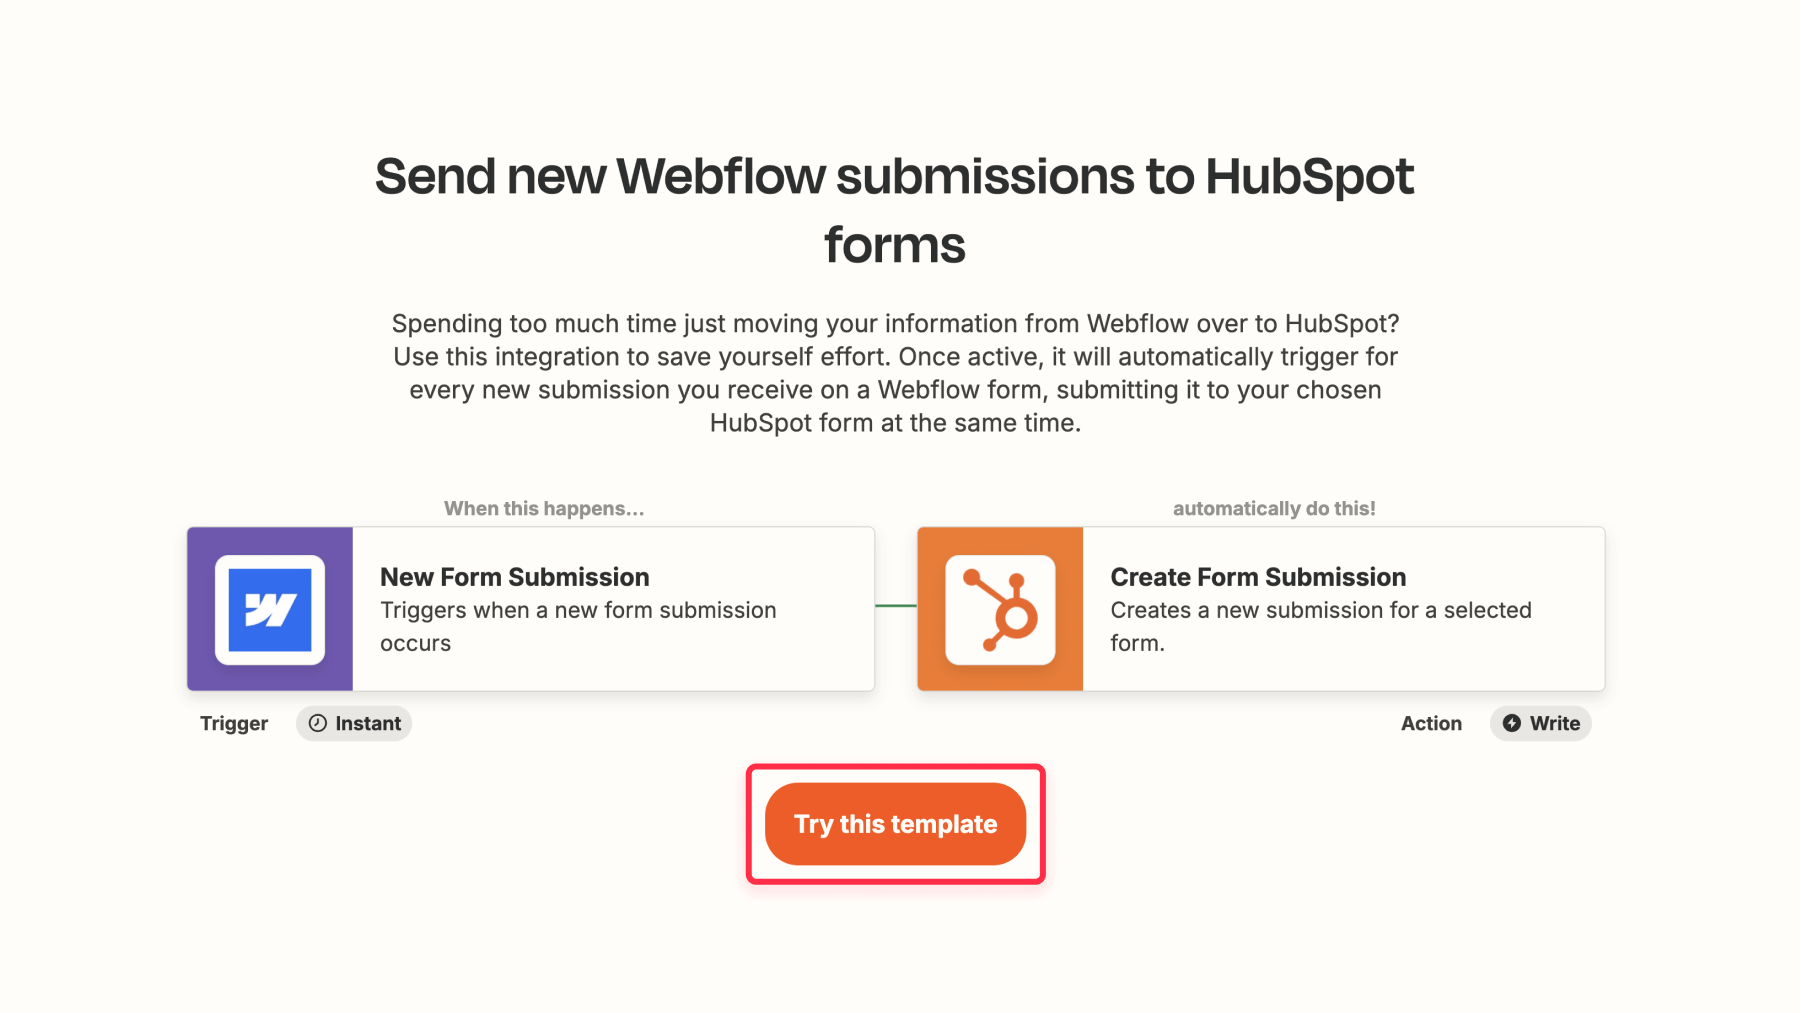
- Go to the page "Send new Webflow submission to HubSpot forms" on Zapier and click "Try this template".
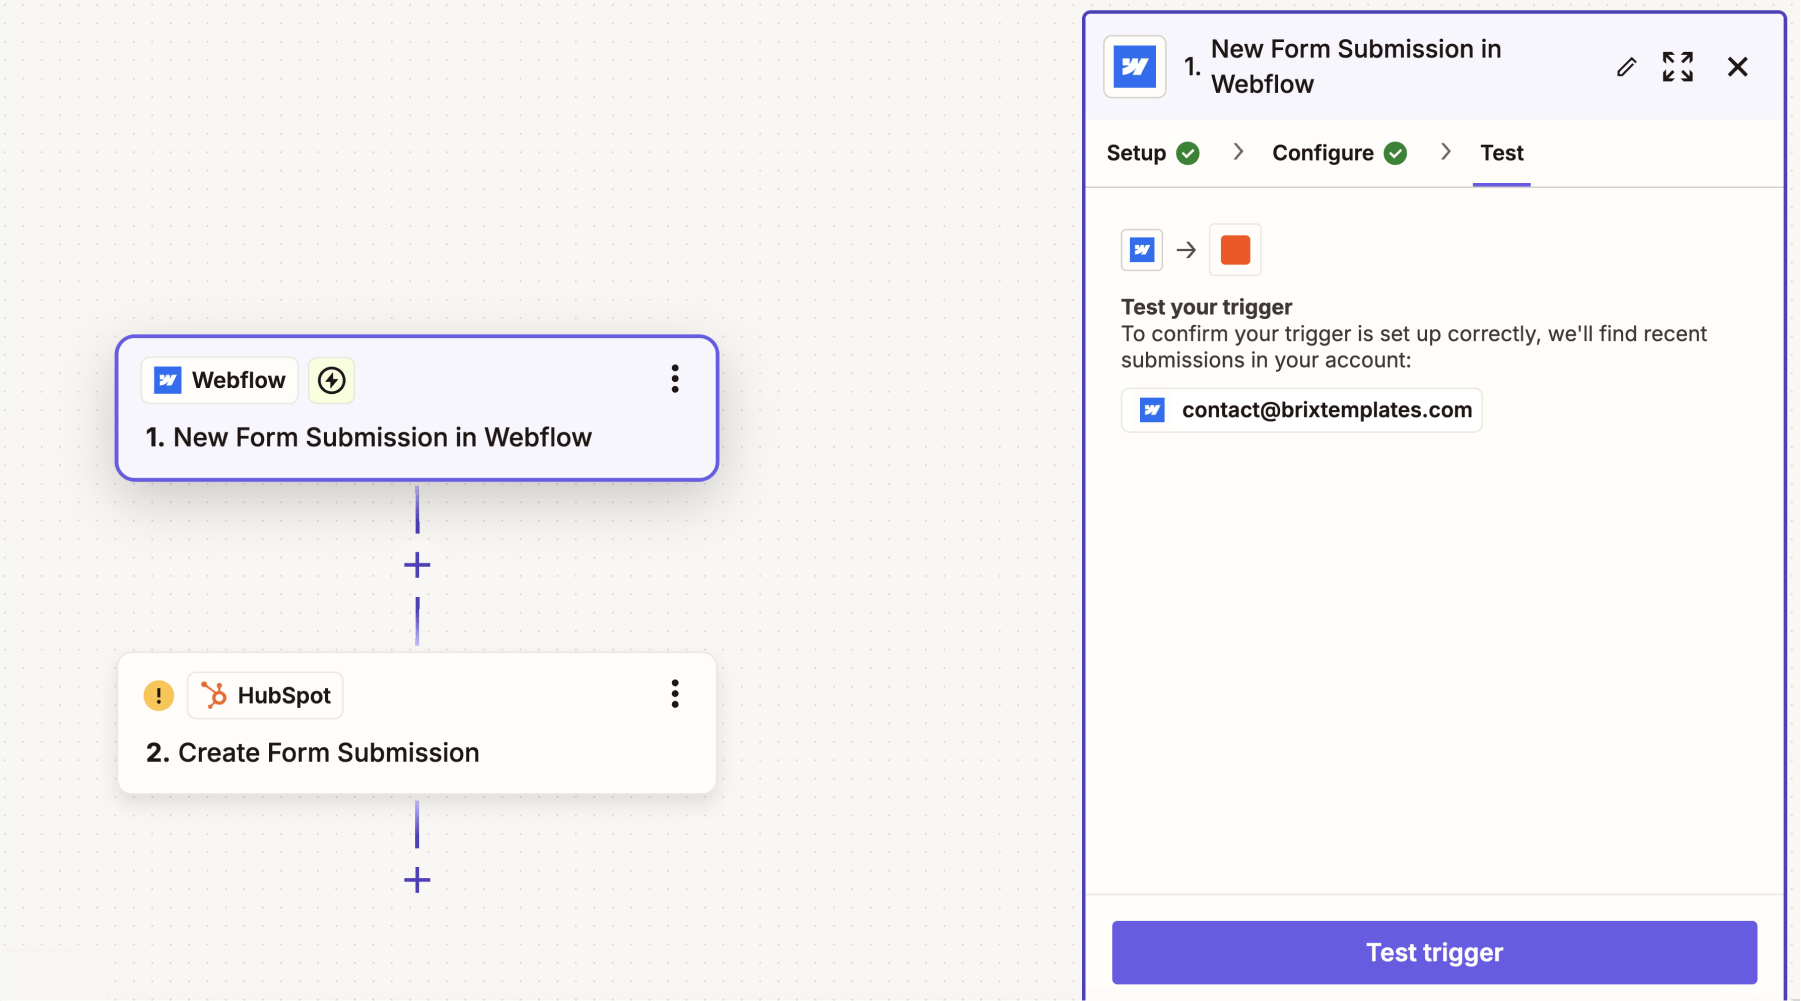
Step 2: Configure Webflow trigger
- Connect your Webflow account and choose the "Workspace" you want to connect.
- Select your site and form on the Zapier options.
- Click "Continue" and then test the trigger.
- ⚠️ Important: Make sure your site is published so Zapier can detect your forms.
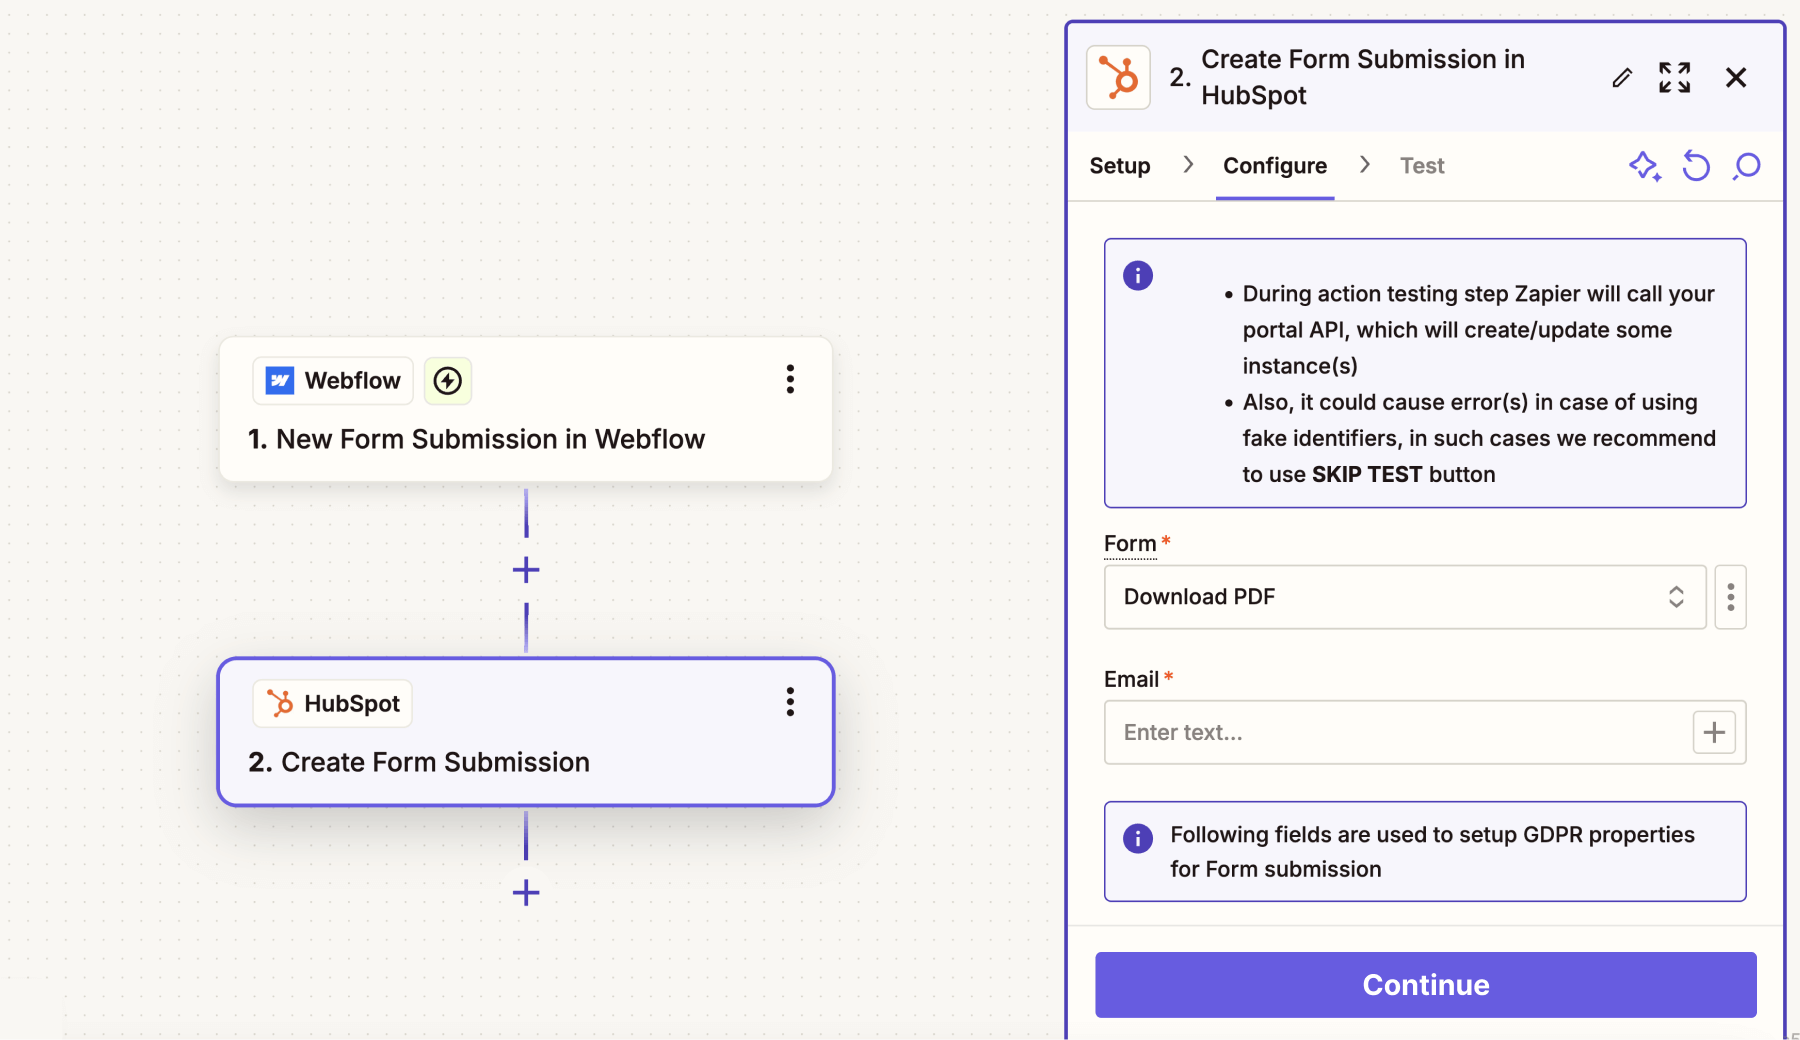
Step 3: Set up HubSpot action
- Connect your HubSpot account.
- Choose your target HubSpot form.
- Map your form fields.
- ⚠️ Important: Be sure to test the Webflow trigger before mapping the HubSpot form fields; otherwise, it won’t work.
- Click "Continue" and then test the trigger.
Pros and cons of using Zapier to connect Webflow forms with HubSpot
Pros:
- Keeps your existing Webflow form design and structure the same.
- Lets you add extra automation, like sending follow-up emails, updating HubSpot records, or triggering tasks in tools like Slack or other project management apps.
- Offers flexible options for mapping your form fields.
Cons:
- Needs a Zapier subscription for high submission volumes, and the costs can add up quickly as your usage grows.
- Adds a third-party dependency to your workflow.
Zapier is easy to use and gives you lots of flexibility for automating the connection between Webflow and HubSpot. If you’re okay with the pricing and its features fit your needs, it’s definitely worth considering!
Method 3: Direct HubSpot form embedding on Webflow
Embedding a HubSpot form directly into Webflow is probably the simplest option of the four. It’s quick and easy to set up, but it’s not our favorite. Why? Because you can’t fully customize the form’s design—only make small style tweaks. And let’s be honest, one of the reasons you’re using Webflow is to have a site with an unique design, not settle for HubSpot’s default design.
That said, if design isn’t a big concern for you, embedding a HubSpot form does have its perks. For example, you won’t need to manage two tools, and you’ll still get all of HubSpot’s native features.
If you’ve decided to try this method, here’s how to embed a HubSpot form directly into your Webflow site. Just follow these simple steps to get everything set up:
Step 1: Create your HubSpot form
- Navigate to Marketing > Forms in HubSpot.
- Select "Create Form" and choose the new form editor.
- Configure your form fields and settings.
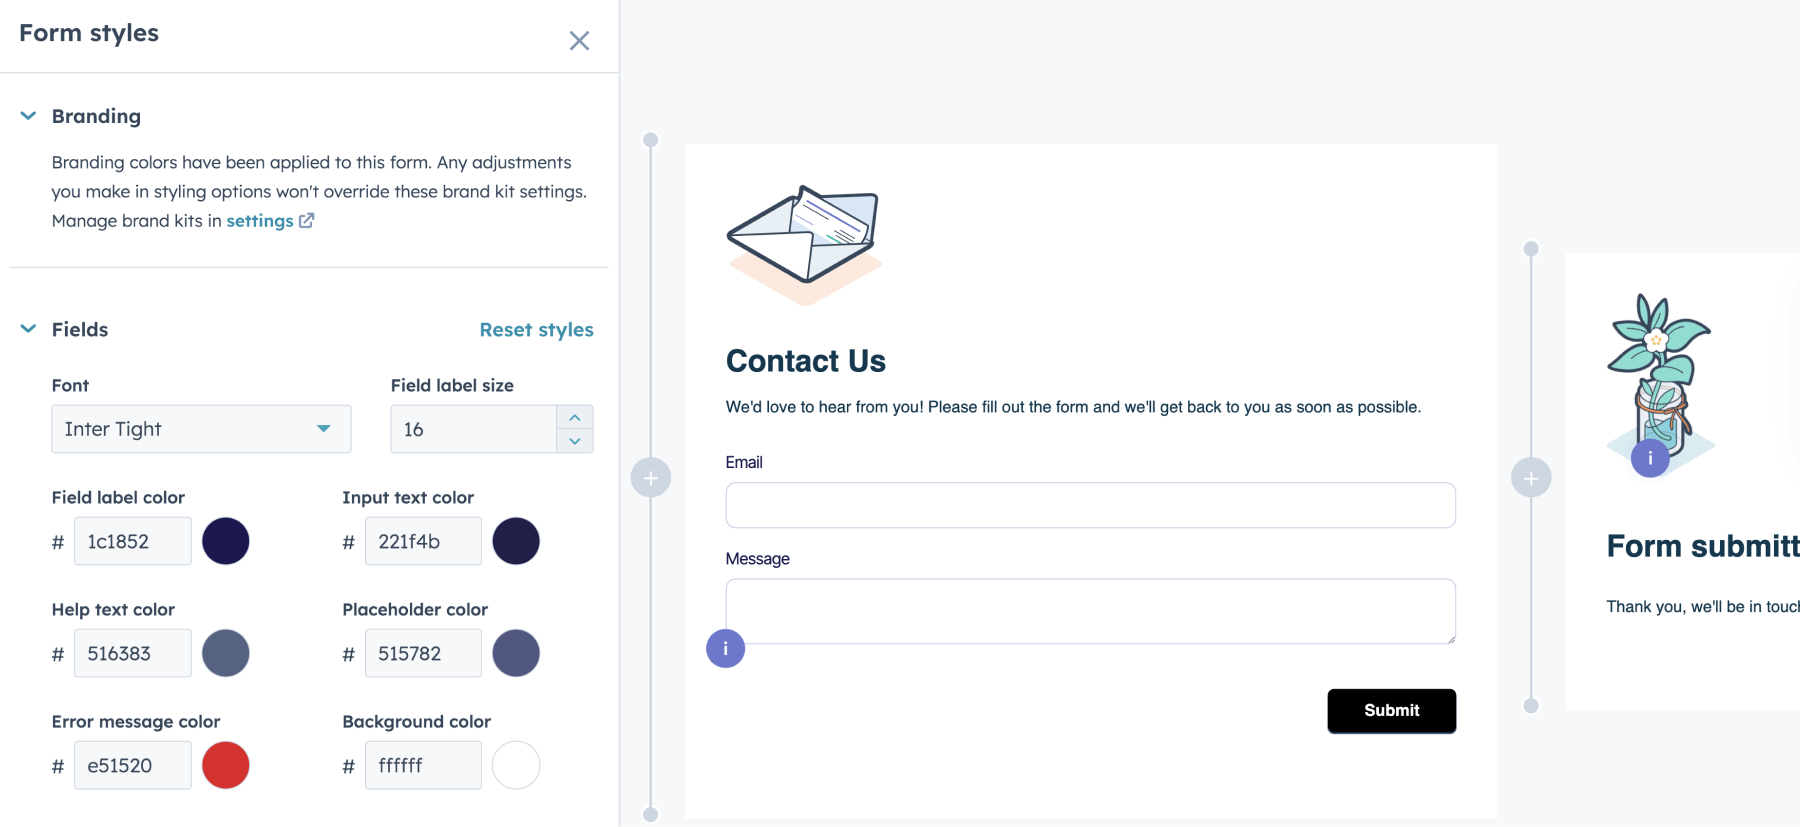
Step 2: Customize form styling
- Use HubSpot's styling options to align with your brand.
- Adjust fonts, colors, and spacing.
- Configure success messages and redirects.
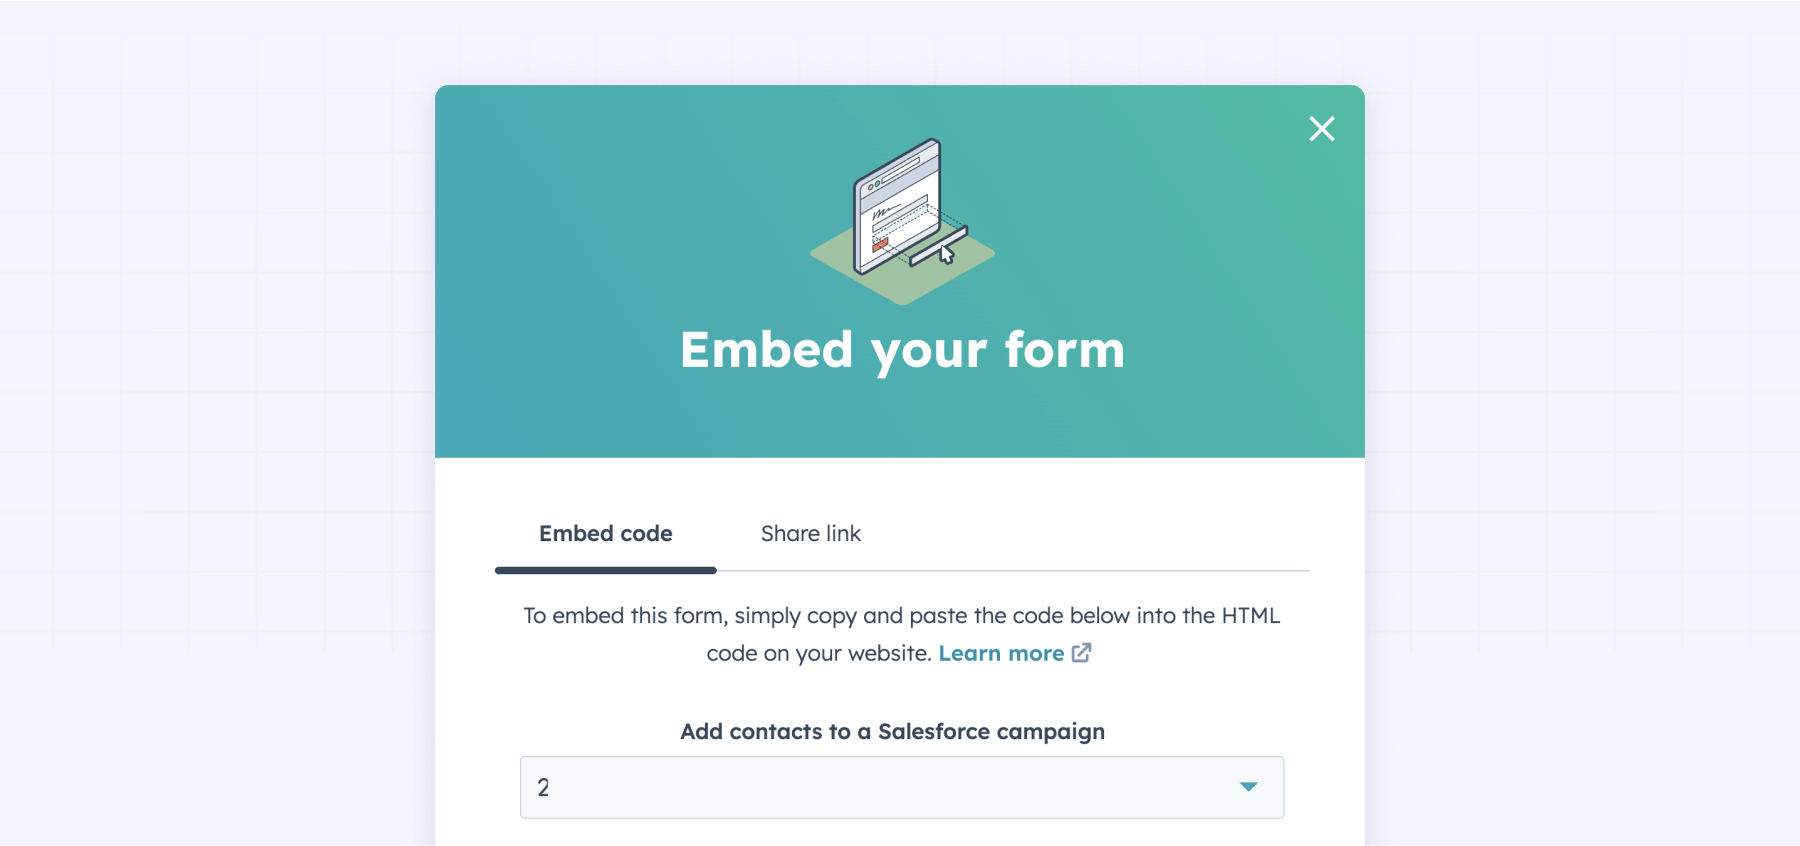
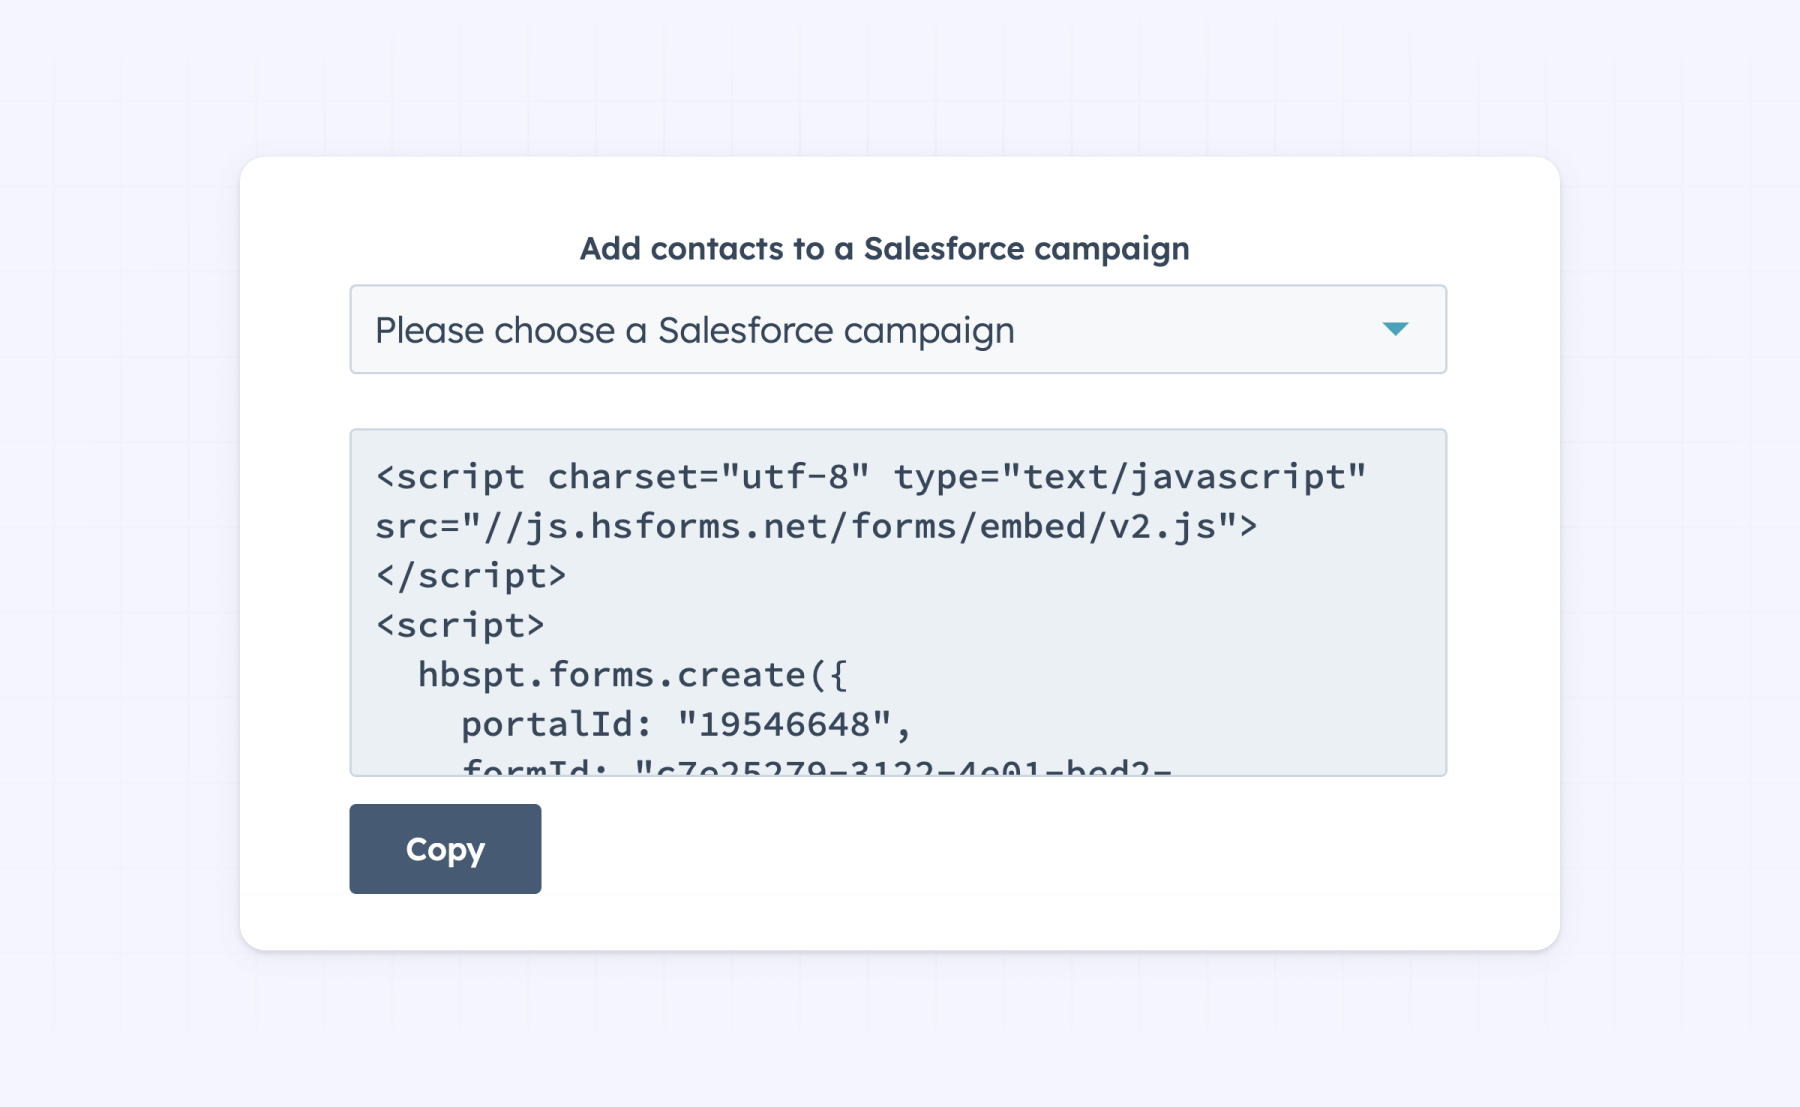
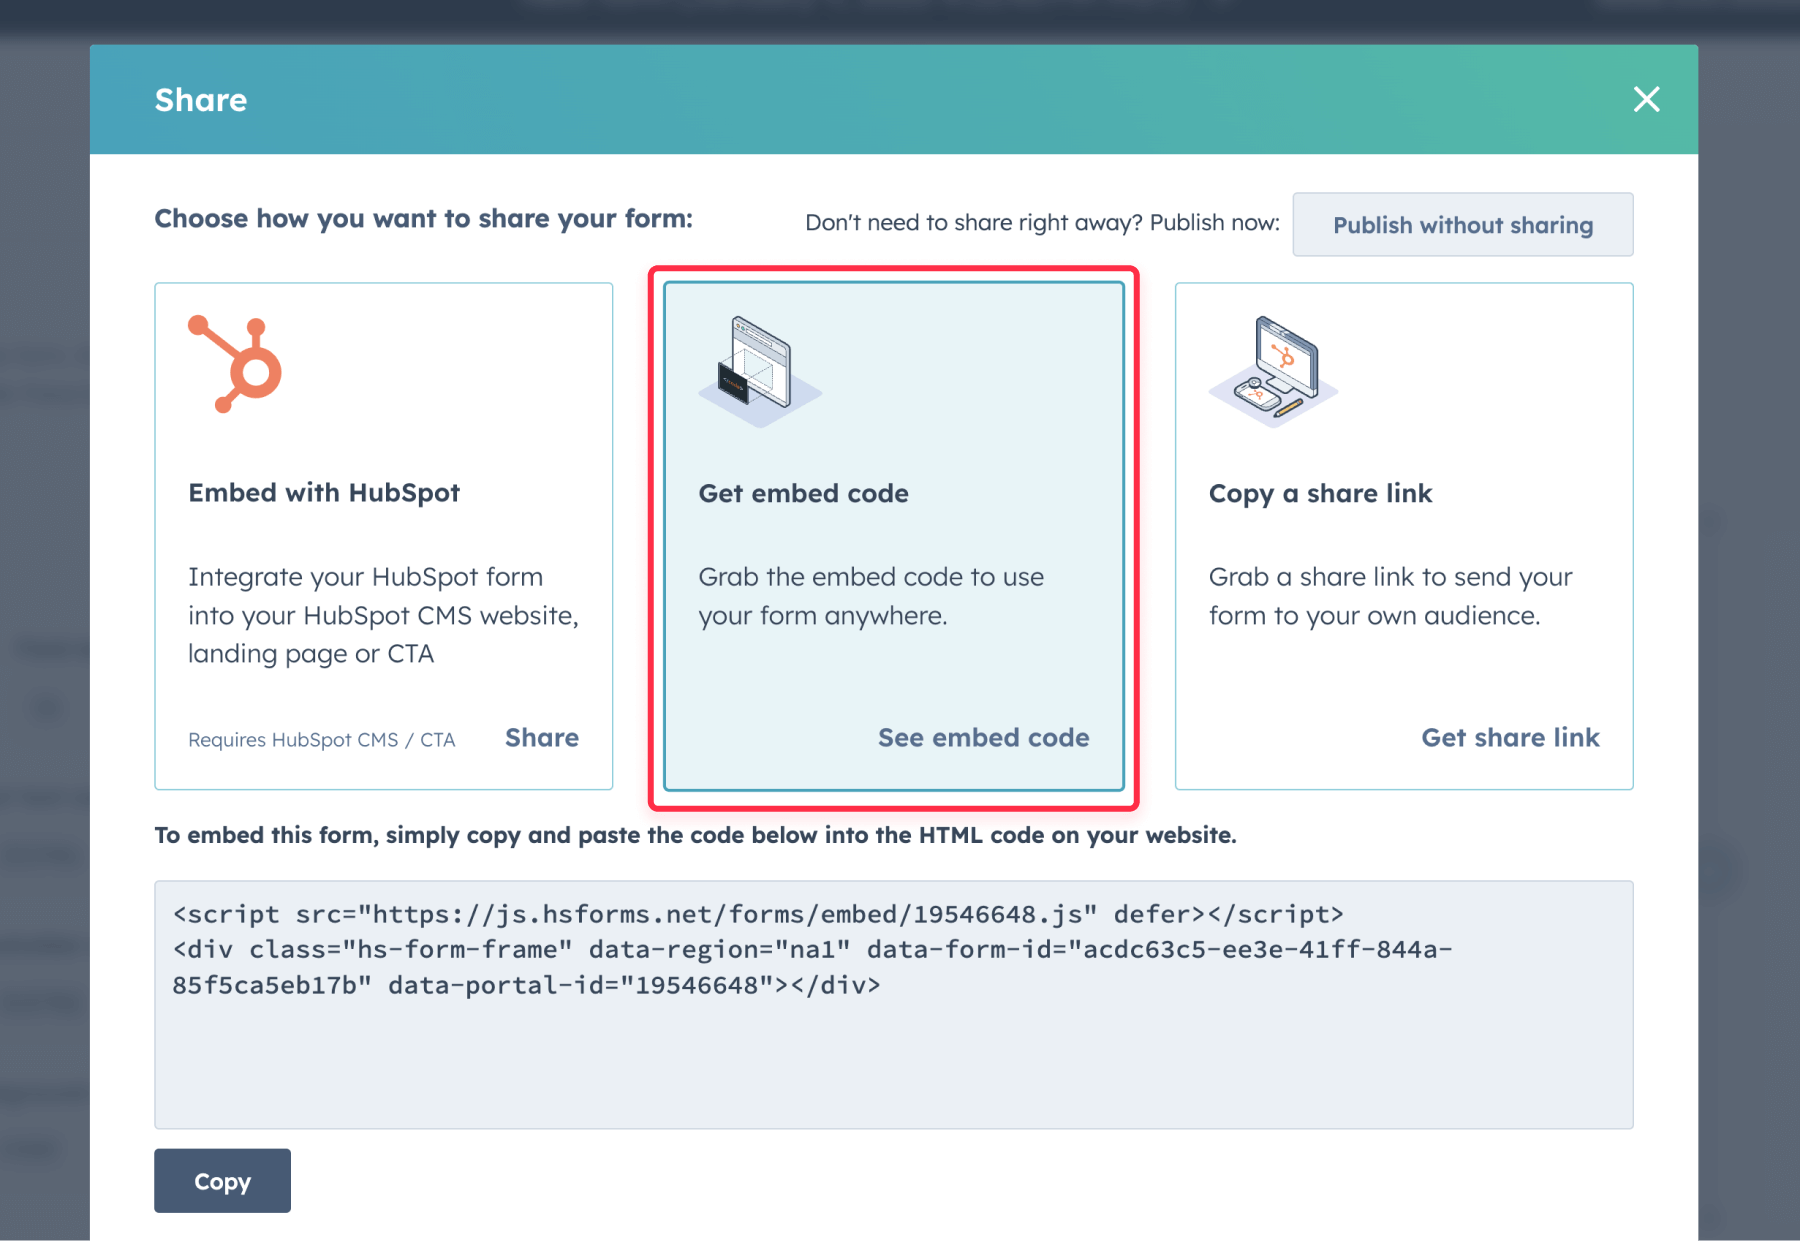
Step 3: Embed the Form
- Click "Review and Update".
- Select "Embed code".
- In Webflow, add an Embed element.
- Paste the HubSpot embed code.
Pros and cons of direct HubSpot form embedding on Webflow
Pros:
- Built-in HubSpot tracking for better analytics.
- Automatically updates form fields when they’re changed in HubSpot.
- Built-in form logic and validation, reducing errors.
- Pre-fills information for known contacts, making things easier for users.
Cons:
- Limited design customization, so it might not match your Webflow site perfectly.
This method is a great option for those looking for a quick and simple solution. However, for more control over design and customization, one of the other methods may be a better fit.
Method 4: Raw HTML form embedding on Webflow (Recommended)
This method is our top pick for using HubSpot forms in Webflow. Why? Because it gives you full control over the form’s design and structure without needing extra tools like Zapier. If personalizing your form to match your site is important, this is the way to go.
Keep in mind, you’ll need a HubSpot Marketing or CMS Hub plan (Professional or Enterprise) to access the Raw HTML form feature, which starts at $340/month.
That said, this method does require some basic knowledge of HTML and CSS. Don’t worry, though—we’ve put together an easy, step-by-step guide to help you through the process, including a basic CSS code you can use to customize your forms, and if you’d rather have someone handle it for you, our team is ready to help! Let’s dive into the steps for embedding a Raw HTML form in Webflow.
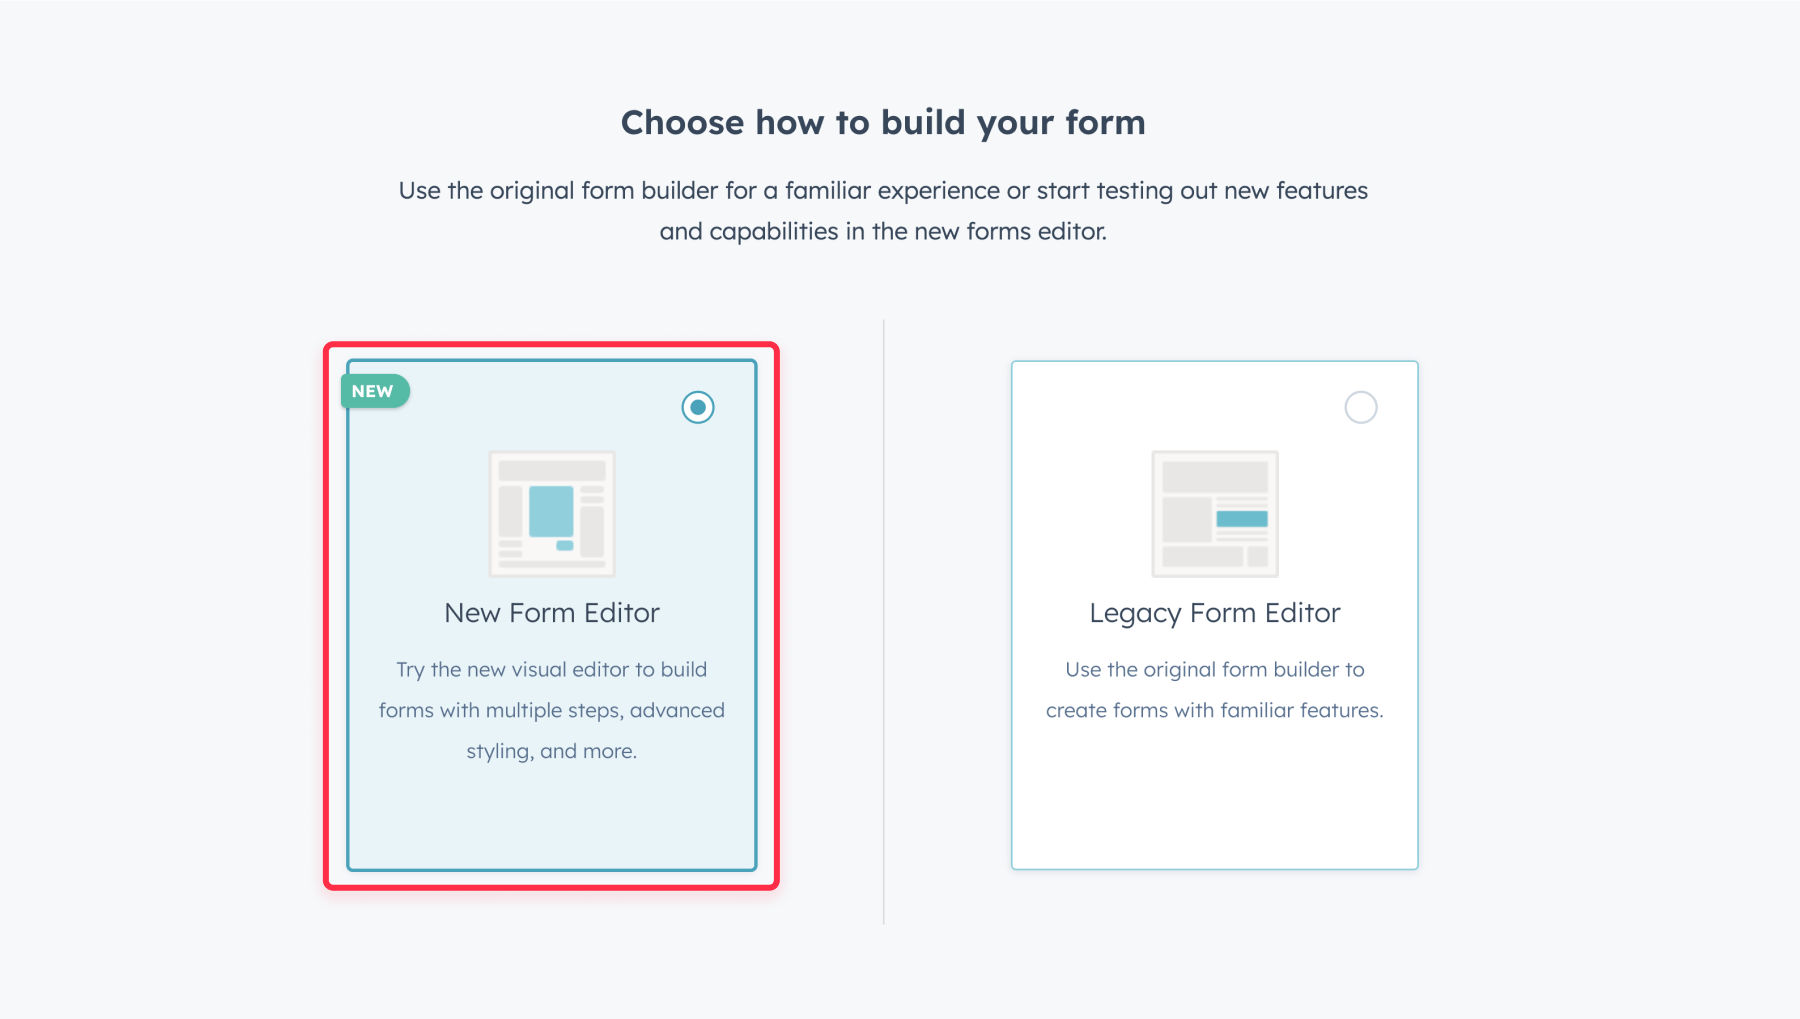
Step 1: Create your HubSpot form
- Access Marketing > Forms in HubSpot
- Select "Create Form" and choose the "Legacy Form Editor".
- Configure your form fields and logic.

Step 2: Generate Raw HTML form
- Navigate to Style & Preview.
- Select "Raw HTML Form".
- Copy the generated embed code.

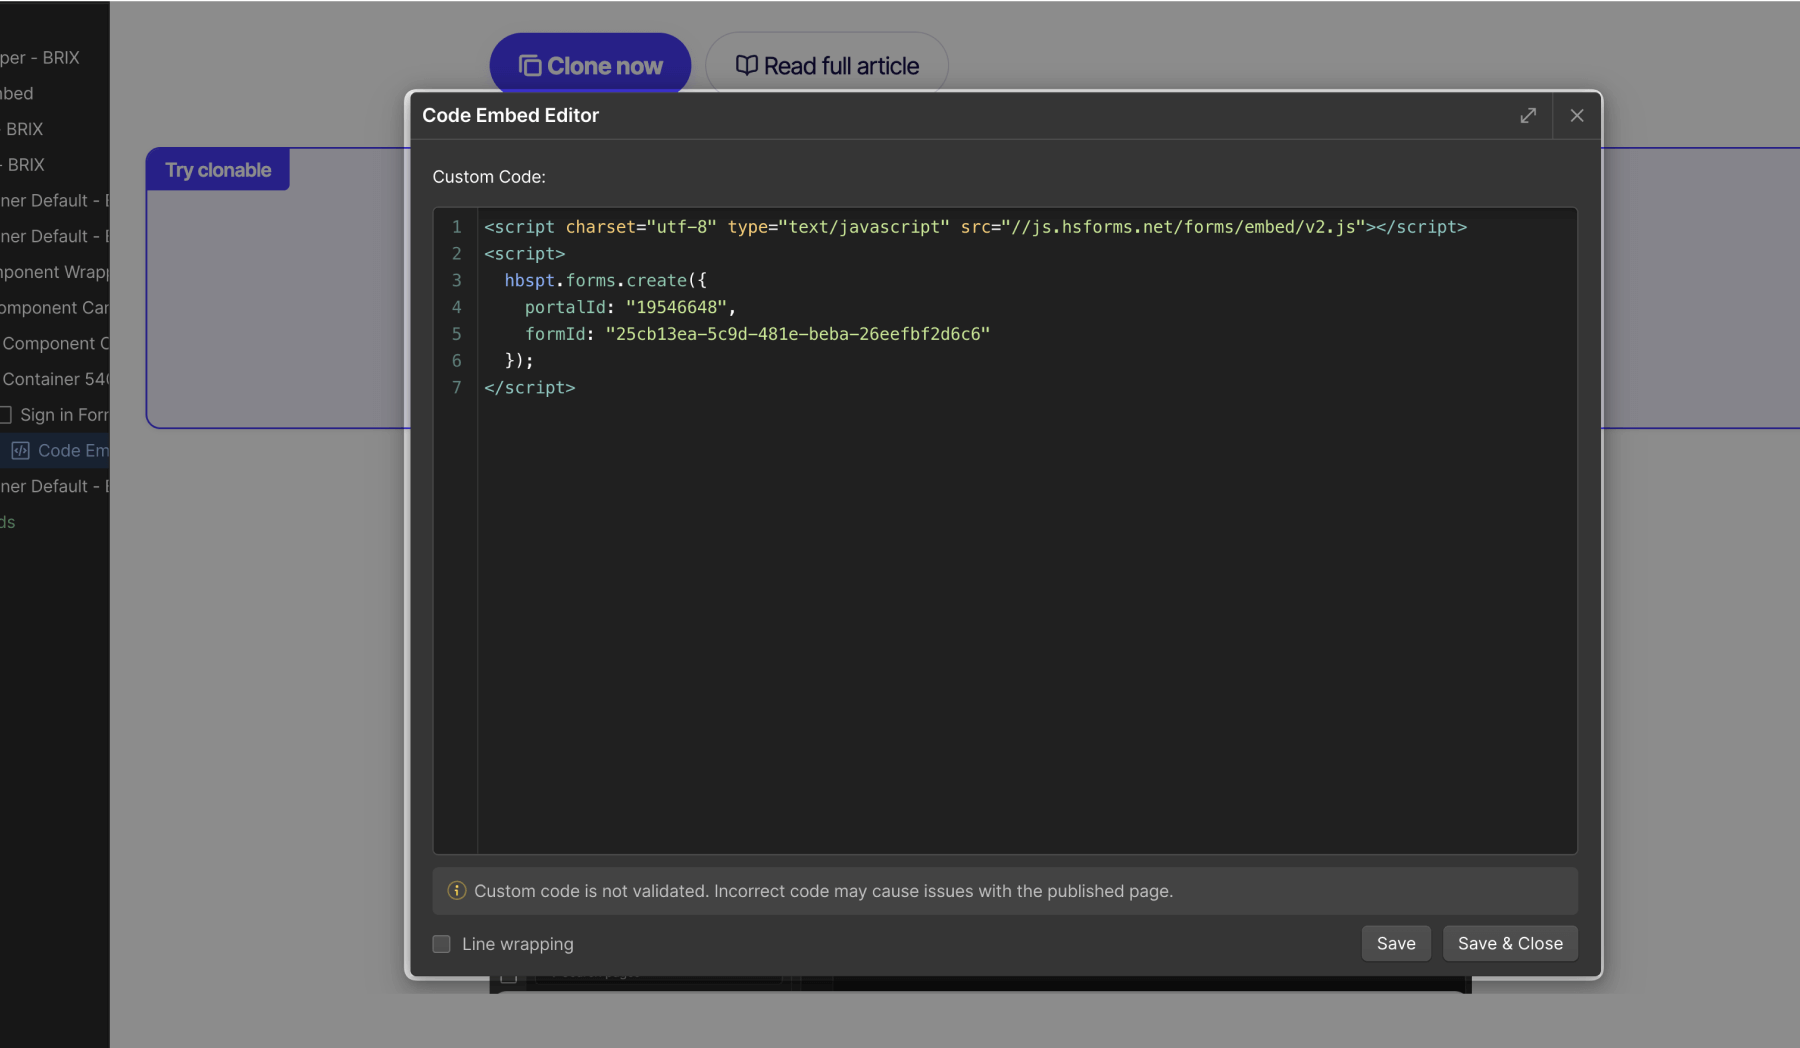
Step 3: Implementation in Webflow
- Add an HTML Embed element.
- Paste the HubSpot embed code.
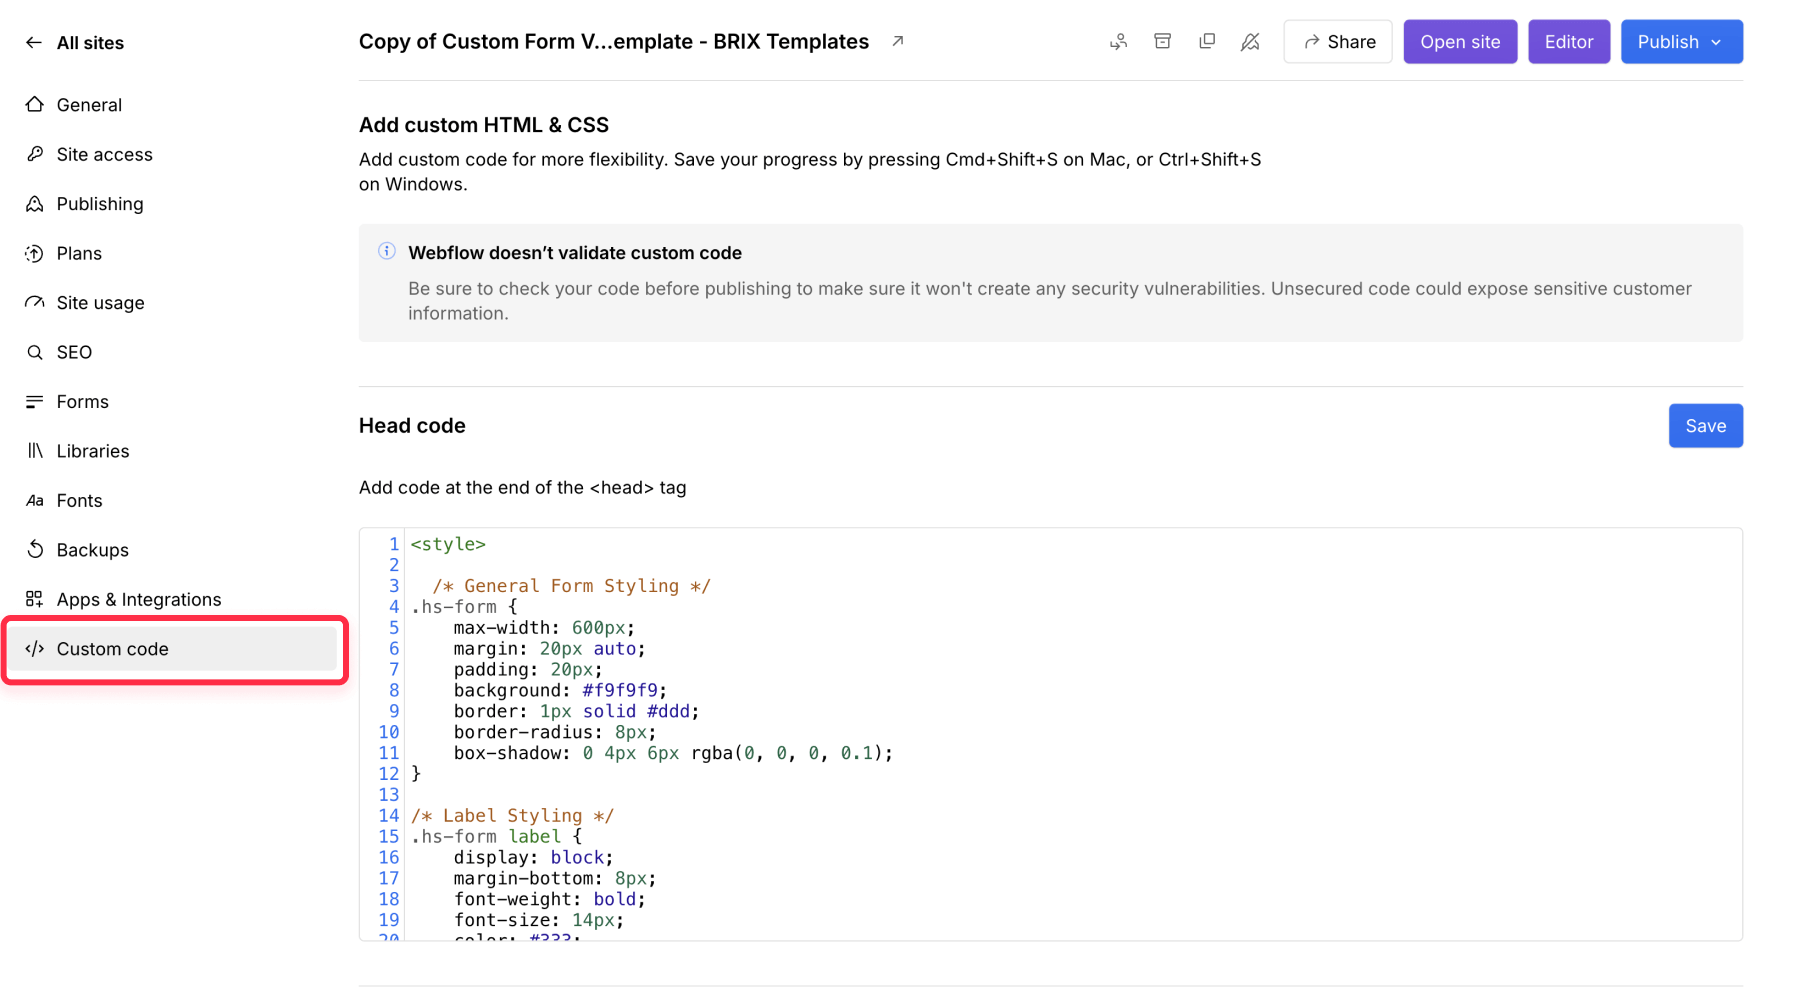
- Add custom CSS styling in the page settings or in the global CSS settings.
CSS implementation options
You can add your custom CSS in two ways:
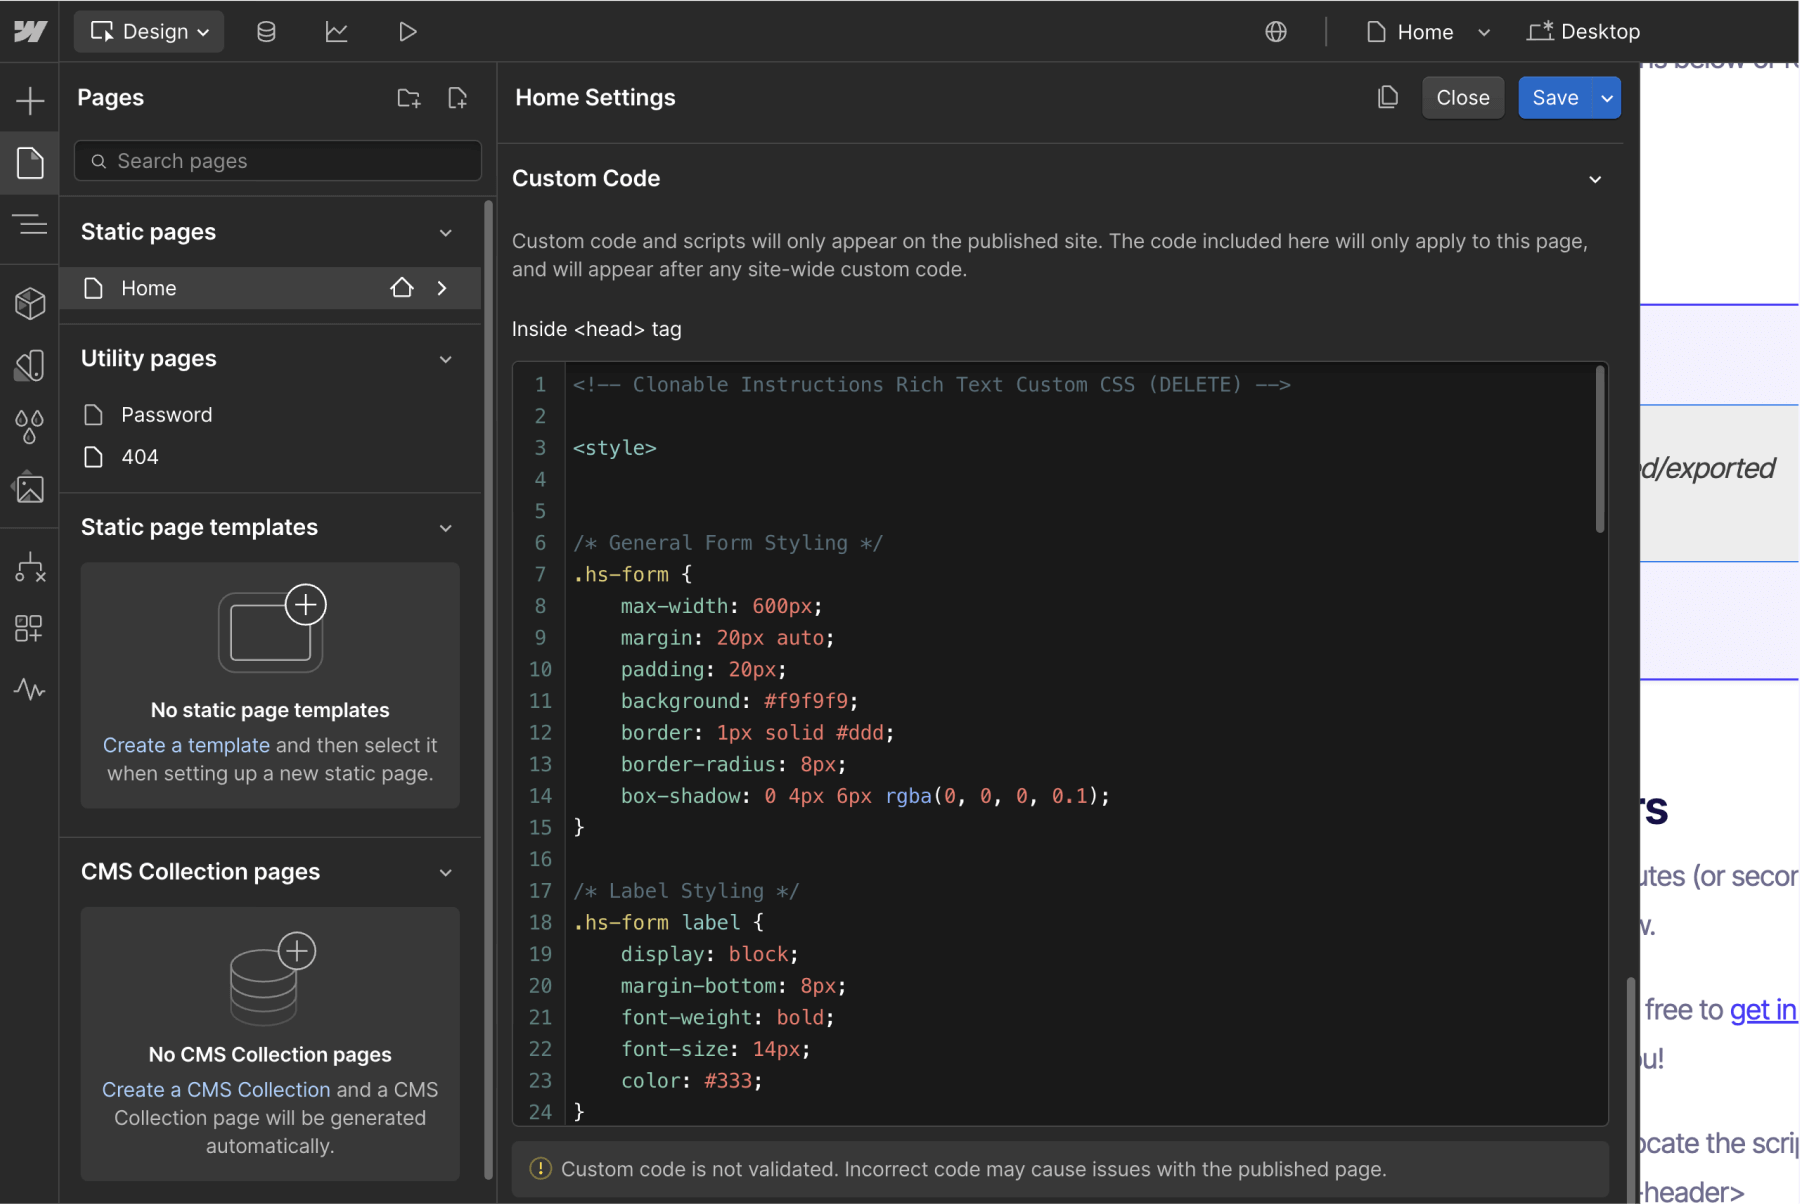
- Page-specific styling
- Access page settings in Webflow.
- Add CSS within style tags in the custom code section.
- Ideal for forms used on specific pages.
- Global styling
- Navigate to "Project Settings".
- Add CSS to the custom code section.
- Perfect for forms used across multiple pages.
Basic form CSS code
Below are a few lines of CSS with basic styles that you can copy and paste into your Webflow project. You can adjust them as needed to match your branding:
/* General Form Styling */
.hs-form {
    max-width: 600px;
    margin: 20px auto;
    padding: 20px;
    background: #ffffff;
    border: 1px solid #e3e2ea;
    border-radius: 8px;
    box-shadow: 0 4px 8px rgba(0, 0, 0, 0.1);
}

/* Label Styling */
.hs-form label {
    display: block;
    margin-bottom: 8px;
    font-weight: bold;
    font-size: 14px;
    color: #4b4c6a;
}

/* Input Fields Styling */
.hs-form .hs-input {
    width: 100% !important;
    padding: 10px;
    margin-bottom: 15px;
    border: 1px solid #dad8e5;
    border-radius: 8px;
    font-size: 14px;
    background: #fff;
    box-sizing: border-box;
    transition: all ease 0.3s;
}

/* Input Fields Hover Styling */

.hs-form .hs-input:hover {
    border: 1px solid #5c4eff;

}


/* Submit Button Styling */
.hs-form .hs-button {
    display: inline-block;
    background: #5c4eff;
    color: #fff;
    padding: 10px 20px;
    font-size: 16px;
    border: none;
    border-radius: 8px;
    cursor: pointer;
    transition: background 0.3s ease;
}

.hs-form .hs-button:hover {
    background: #362cb0;
}

/* Optional: Add focus styles for accessibility */
.hs-form .hs-input:focus {
    outline: none;
    border-color: #5c4eff;
    box-shadow: 0 0 5px rgb(2 0 255 / 16%);
}

/* Adjust Column Layout */
.hs-form fieldset {
    display: flex;
    flex-wrap: wrap;
    gap: 15px;
    border: none;
    padding: 0;
    max-width: 100% !important;
}

.hs-form .hs-form-field {
    flex: 1 1 calc(50% - 15px); /* Two columns with gap */
    min-width: 250px; /* Ensures fields don't get too small */
}

/* Error Message Styling */
.hs-error-msg.hs-main-font-element {
    display: block;
    margin: 10px 0;
    padding: 10px;
    background-color: #ffe6e6; /* Light red background */
    border: 1px solid #ffcccc; /* Border matching the background */
    border-radius: 8px;
    color: #cc0000; /* Dark red text for emphasis */
    font-size: 14px; /* Adjust font size for better readability */
    font-weight: bold; /* Bold text for visibility */
    line-height: 1.4;
}

.hs-error-msgs {
    list-style: none;
    padding: 0;
    margin: 0;
}

/* Full-width for fields on small screens */
@media (max-width: 600px) {
    .hs-form .hs-form-field {
        flex: 1 1 100%; /* Switch to one column on small screens */
    }
}
⚠️ Important note: These are just basic styles. Depending on your form’s structure and input elements, you might need to make further adjustments. If you need extra help, feel free to reach out to us!
Pros and cons of embedding a Raw HTML HubSpot form on Webflow
Pros:
- Complete design control.
- All HubSpot form features (tracking, logic, validation).
- Automatic field updates and form logic.
- No third-party dependencies or extra subscriptions.
Cons:
- You need a HubSpot Marketing or CMS Hub plan.
- Requires CSS knowledge for styling.
- Initial setup takes more time.
This method is perfect if you want full control over your form’s design and styling. However, it does require a bit more time and some CSS knowledge, so if you’re looking for a quicker setup, one of the other methods might be a better fit.
Quick comparison of all methods
Method 1: HubSpot’s Official Webflow App
- Setup difficulty: Very easy (but likely to have bugs and issues).
- Design flexibility: High (you can use Webflow to customize the forms).
- Costs: Free to use
- Ideal for: Teams that want to test basic integration features without investing too much time or effort initially. However, we don’t recommend this method for long-term or critical use due to its reliability issues.
Method 2: Zapier integration
- Setup difficulty: Medium (requires creating and connecting “Zaps”).
- Design flexibility: High (you keep your Webflow form design but rely on Zapier for data transfer).
- Costs: Zapier pricing depends on usage; costs can rise with high submission volumes or multiple automations.
- Ideal for: Marketers who want to set up advanced automations without custom coding, including connecting multiple tools and building more complex workflows, and are comfortable with Zapier’s subscription fees.
Method 3: Direct HubSpot form embedding
- Setup difficulty: Easy (simple to embed).
- Design flexibility: Low (limited styling options within HubSpot).
- Costs: Included with a free HubSpot account; no extra services needed.
- Ideal for: Non-technical users looking for quick setups where HubSpot’s default design is acceptable or only minor tweaks are needed.
Method 4: Raw HTML form embedding (Recommended)
- Setup difficulty: Medium to high (requires some HTML/CSS knowledge).
- Design flexibility: High (complete control using your own CSS).
- Costs: Requires a HubSpot Marketing or CMS Hub plan (Professional or Enterprise), starting at $340/month, plus some time or developer help.
- Ideal for: Teams that want a fully customized design and robust HubSpot features without third-party tools.
Conclusion
Each integration method has its own benefits, but we recommend the Raw HTML Form Embedding (Method 4) for most use cases. It offers the best balance between functionality and design control, so your forms look great and work seamlessly.
Your choice ultimately depends on your specific needs. Consider your technical skills, design preferences, and automation goals to decide which method is the best fit for you.
Need help? Our team at BRIX Templates has tons of experience with these integrations and can assist you in setting up the perfect solution for your site.


Join readers commenting on this post!